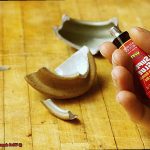
It’s a burning question that DIY enthusiasts and pros can’t help but ponder. Whether you’re tackling a home improvement gig or getting crafty, knowing how long it takes for different shades of liquid nails to dry is key to nailing your project (pun intended).
In this blog post, we’ll dive deep into the drying times of various liquid nail hues and unravel the science behind their metamorphosis.
From crystal clear to bold reds and blues, we’ll uncover the factors that influence drying time and dish out handy tips for achieving primo results.
Get ready to crack open the secrets of liquid nail drying and amp up your project game.
What Are Liquid Nails?
Contents
- 1 What Are Liquid Nails?
- 2 What Color Does Liquid Nail Dry?
- 3 Factors That Influence the Color of Liquid Nail When It Dries
- 4 How to Ensure Proper Bonding and Optimal Results
- 5 Additional Tips for Applying Liquid Nails
- 6 Different Types of Liquid Nails Available on the Market
- 7 Safety Precautions to Consider While Using Liquid Nails
- 8 Common Mistakes to Avoid When Working with Liquid Nails
- 9 Conclusion
When it comes to the world of DIY projects and construction endeavors, having a reliable adhesive is paramount. Enter Liquid Nails, the versatile brand of construction adhesive that has garnered immense popularity among professionals and DIY enthusiasts alike.
This article delves into the intricacies of Liquid Nails, exploring their composition, uses, and why they are the go-to choice for a wide range of applications.
What Are Liquid Nails?
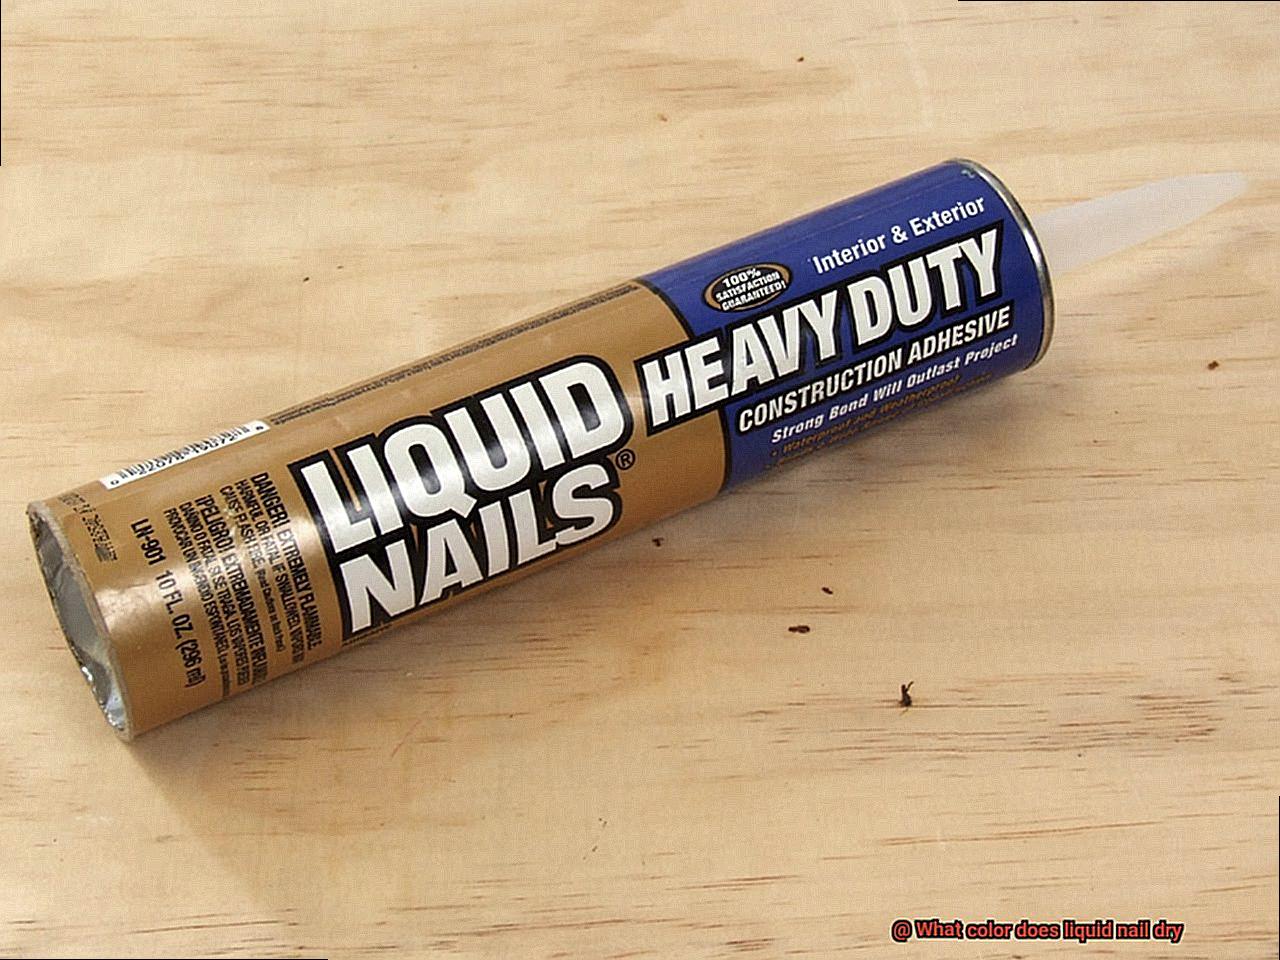
Liquid Nails stands as a formidable brand of construction adhesive renowned for its strength and durability. These adhesives are specifically formulated to bond a myriad of materials such as wood, metal, concrete, and ceramics together.
In stark contrast to traditional nails or screws, Liquid Nails offers an unyielding bond that can withstand moisture, heat, and vibrations.
Types and Formulations:
The beauty of Liquid Nails lies in its diverse range of formulations tailored to suit specific applications. The original formula holds its ground as a dependable choice, while heavy-duty construction adhesive tackles even the toughest projects.
For subfloor and deck applications, there is a formulation designed to withstand the harshest conditions. And when it comes to mounting mirrors with precision, there is a specialized mirror adhesive designed for just that.
Each formulation possesses unique properties crafted to excel in different project scenarios.
The Science Behind Liquid Nails:
At the heart of Liquid Nails’ adhesive prowess lies a synthetic rubber called polyvinyl acetate (PVA). This remarkable substance undergoes a chemical reaction known as polymerization upon application, resulting in hardening and the formation of an unbreakable bond. With this process at play, you can trust that your materials will remain securely bonded for years to come.
Versatile Uses:
Liquid Nails is a true workhorse in the realm of construction and home improvement projects.
Its versatility knows no bounds—it is perfect for bonding baseboards, crown molding, paneling, ceramic tiles, flooring, and even repairing cracks in walls or ceilings.
The incredible range of applications makes Liquid Nails an indispensable tool for professionals and DIY enthusiasts alike.
Drying Time and Appearance:
Liquid Nails typically dries clear or transparent once fully cured, seamlessly blending in with the surrounding materials. It is important to consult the product label or instructions beforehand, as certain formulations may dry with a slight yellowish tint. Additionally, factors such as surface type and adhesive layer thickness can influence the final appearance.
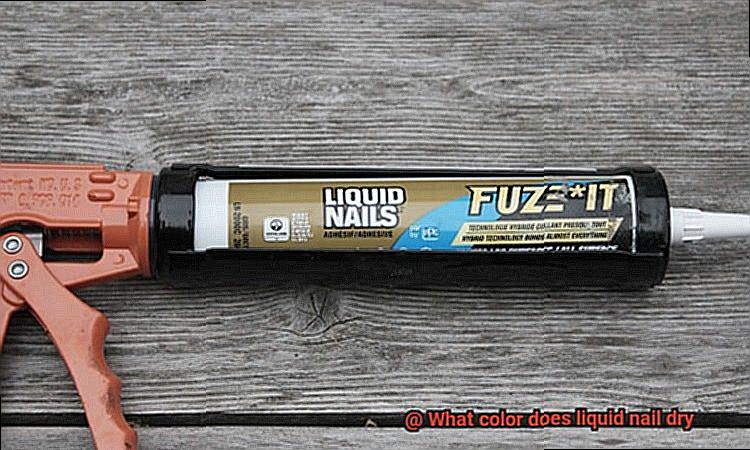
What Color Does Liquid Nail Dry?
Today, we embark on a journey into the captivating world of liquid nails – the mighty adhesive also known as construction adhesive or construction glue. One question that often arises when using this powerful bonding agent is, “What color does liquid nail dry?”
Join us as we explore the fascinating nuances of adhesive aesthetics.
The Initial Hue:
When liquid nail is first applied, its color presents itself in a spectrum ranging from a gentle whisper of light gray to a striking depth of dark gray. This initial shade reflects the adhesive in its wet state, poised for its remarkable metamorphosis during the drying process.
The Drying Process:
As liquid nail undergoes the alchemy of drying, a chemical reaction occurs, causing a captivating transformation in its color. However, it’s important to note that the specific hue to which liquid nail dries can vary depending on the brand and type of adhesive employed.
The Common Color:
In most instances, liquid nail dries to embrace a light tan or beige complexion. This versatile and neutral shade effortlessly melds with an extensive array of building materials, making it the preferred choice for countless construction projects.
Colorful Options:
Yet, if you find yourself yearning for alternatives to the customary tan or beige, fear not. The market offers an array of colored options to satiate your aesthetic desires.
White or clear liquid nails often grace certain applications where beauty meets purpose; think installing pristine white trim or working with transparent materials.
Influencing Factors:
We must recognize that external elements such as temperature and humidity have their say in shaping the final color of liquid nail during its drying process.
In certain conditions, the adhesive may don a slightly darker or lighter visage, adding an unpredictable touch to its artistic journey.
Performance Over Appearance:
Rest assured, dear constructors, that irrespective of its hue, once liquid nail has fully dried, it forms an unyielding bond between surfaces, delivering exceptional performance and unwavering durability. The color is but a fleeting aspect in the grand tapestry of construction excellence.
Painting Over Liquid Nail:
Should aesthetics reign supreme, especially in visible areas, rejoice. You have the power to paint over dried liquid nail, seamlessly blending it with the surrounding surface.
However, caution must be exercised to ensure that the adhesive has fully cured before embarking on this transformative endeavor.
Factors That Influence the Color of Liquid Nail When It Dries
Today, we will explore the intriguing factors that influence the color of this beauty staple when it dries.
Have you ever noticed that different liquid nails can result in slightly different shades?
Let’s uncover the secrets behind this phenomenon.
First and foremost, let’s delve into the chemical composition of liquid nail polish. Each manufacturer uses a unique formula, resulting in variations in color when the adhesive dries. Some may dry clear or transparent, while others may have a subtle hint of yellow or off-white.
So, don’t be surprised if your favorite brand gives you a slightly different shade every time.
Now, let’s talk about the enchanting process of solvent evaporation. Liquid nails contain solvents like acetone or toluene, which expedite the drying process. As these solvents evaporate, they leave behind a solid film of adhesive. The rate at which they evaporate can affect the color of the dried glue.
Too quick, and you might end up with a hazy finish. Too slow, and you risk prolonged drying times and potential discoloration.
Moving on, let’s discuss the impact of moisture content on liquid nail color. Excessive humidity or moisture in the environment where you apply your liquid nail can disrupt its drying process and alter its color.
It’s essential to ensure that the application area is dry before applying the adhesive for optimal results. After all, nobody wants a cloudy or discolored finish, right?
Ah, yes. Ambient temperature also plays a significant role in determining the color of your liquid nail when it dries. Higher temperatures can speed up drying time, while lower temperatures can slow it down.

Extreme temperatures may even cause color changes in the adhesive itself. So be sure to follow the manufacturer’s recommendations for temperature settings to achieve that perfect shade.
Let us not forget about surface porosity. Porous surfaces like wood or concrete can absorb some of the liquid nail, potentially altering its color.
To combat this, it’s crucial to prepare the surface properly by cleaning and priming it if necessary. This step ensures a consistent and desired color after drying.
The age of the adhesive can also impact its color when it dries. Over time, some adhesives may undergo slight changes due to chemical reactions or exposure to light.
So, it’s always a good idea to use fresh adhesive for optimal results and to avoid any potential color variations caused by aging.
Lastly, we must be vigilant about contamination. Clean tools and proper storage are essential to prevent exposure to dirt, dust, or other foreign substances that could cause discoloration or a mottled appearance in your lovely liquid nail polish.
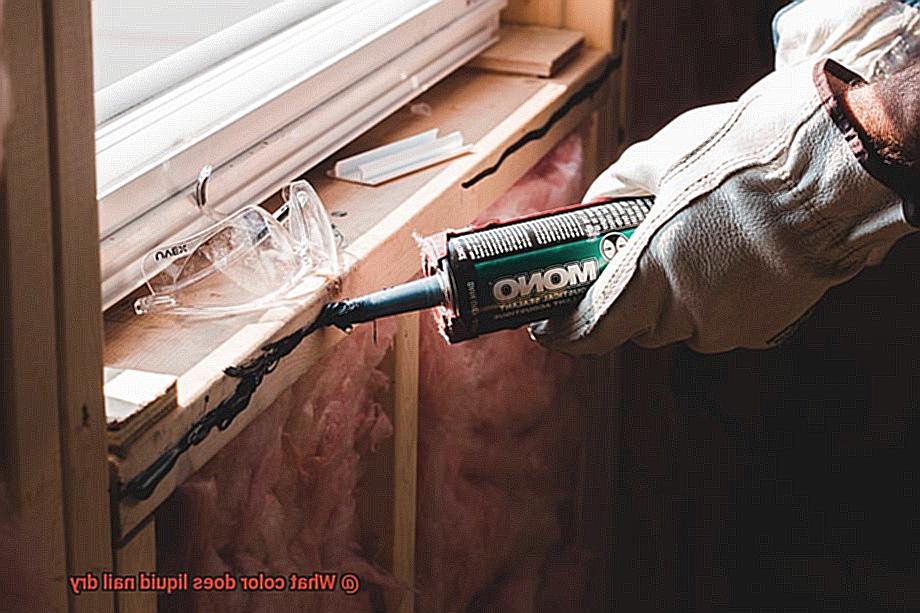
How to Ensure Proper Bonding and Optimal Results
Look no further than liquid nails. This versatile construction adhesive can bond various materials together, creating durable connections that stand the test of time. To ensure proper bonding and optimal results, follow this comprehensive guide.
Prepare the Surfaces:
Before applying liquid nails, it’s crucial to prepare the surfaces properly. Start by cleaning them thoroughly using a mild detergent and warm water. Remove any dirt, dust, or debris that could hinder the adhesive’s effectiveness. You want the surfaces to be clean and dry before moving on to the next step.
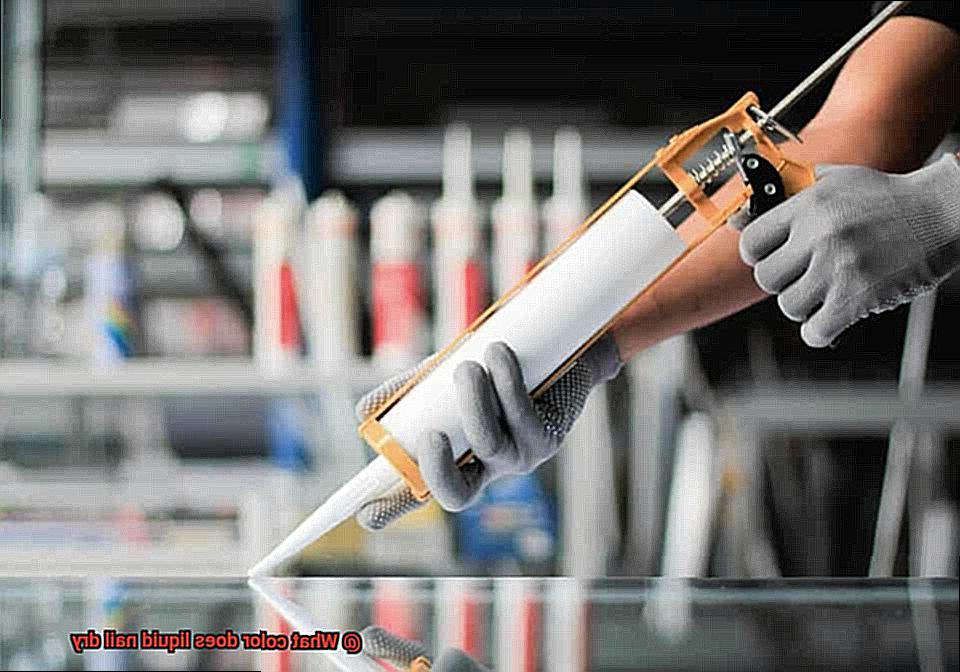
Apply the Liquid Nail Correctly:
To achieve a strong bond, it’s important to apply the liquid nail properly. Start by applying a thin bead of adhesive along one of the surfaces that will be bonded together. Avoid excessive application as it may lead to squeeze-out and affect bond strength. Multiple thin layers can be applied if needed.
Choose the Right Type of Liquid Nail:
Selecting the correct type of liquid nail for your specific application is crucial. Different formulations cater to various materials such as wood, metal, concrete, or plastic. Read the product label carefully to choose the appropriate type for your project. Using the right liquid nail ensures optimal bonding and prevents potential damage to your materials.
Align and Press Firmly:
After applying the adhesive, align the surfaces correctly and press them together firmly. Apply even pressure across the bonded area for a few minutes to allow the adhesive to set and create a strong bond. For larger or more complex projects, consider using clamps or other tools to ensure a tight bond while the adhesive cures. Follow the manufacturer’s recommended curing time.
Allow Sufficient Curing Time:
During the curing process, it’s essential to avoid unnecessary movement or stress on the bonded surfaces. Allow sufficient time for the liquid nail to fully cure before subjecting the bond to any load-bearing activities. Patience is key to achieving a strong and long-lasting bond.
Additional Tips for Applying Liquid Nails
In this article, we’ll explore some additional tips for applying Liquid Nails to ensure your projects stand the test of time.
Cleanliness is Key:
One of the most crucial steps in applying Liquid Nails is preparing the surface properly. Before applying the adhesive, take the time to clean the surface thoroughly. Dust, grease, and other contaminants can interfere with proper adhesion. By ensuring that the surface is clean and dry, you provide the ideal foundation for the adhesive to bond effectively. This step is especially important when working with surfaces that are prone to oil or dirt buildup, such as metal or plastic.
The Right Amount Matters:
Using the correct amount of adhesive is essential for a successful application. Applying too little adhesive may result in a weak bond that won’t hold up over time. On the other hand, using too much adhesive can lead to messy squeeze-out and an uneven bond line. To achieve the right amount, use a caulk gun or an adhesive applicator to apply an even and consistent layer. Remember, balance is key.
Spread It Evenly:
To ensure optimal coverage and adhesion, it’s important to spread Liquid Nails evenly across the surface. This can be achieved by applying the adhesive in a zigzag pattern or small dots along the surface. Using the correct trowel or notched spreader will help you distribute the adhesive evenly, ensuring a consistent layer throughout. By spreading the adhesive evenly, you create a strong and uniform bond between the materials.
Firmly Press Together:
After applying Liquid Nails, it’s crucial to press the materials firmly together. This step helps activate the bonding process and creates a strong connection between the surfaces. Apply pressure evenly across the entire bonded area, ensuring that the adhesive makes full contact with both surfaces. Giving it a little extra push for good measure will help ensure a secure bond that will stand up to the test of time.
Allow Sufficient Drying Time:
Patience is key when working with Liquid Nails. The drying time can vary depending on factors such as temperature and humidity. It’s important to allow sufficient drying time before putting any pressure or load on the bonded surfaces. Rushing this step can compromise the bond and result in a weaker adhesive connection. Be sure to check the manufacturer’s instructions for specific drying times and follow them accordingly.
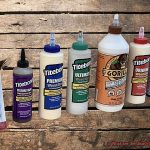
Different Types of Liquid Nails Available on the Market
Each color has its own unique characteristics and applications. In this guide, we’ll explore the colorful world of Liquid Nails and help you choose the right adhesive for your next project.
Clear Liquid Nails: The Invisible Bond
For projects where aesthetics are important, clear Liquid Nails is the way to go. This adhesive dries transparently, making it perfect for glass bonding or creating invisible seams. With clear Liquid Nails, you won’t have to worry about visible adhesive lines ruining the appearance of your project.
White Liquid Nails: Blending in with Style
When you need an adhesive that seamlessly blends with white or light-colored surfaces, white Liquid Nails is your best friend. It’s ideal for attaching molding, trim, or other decorative elements. The white color ensures a clean and professional finish without any noticeable adhesive marks.
Tan/Brown Liquid Nails: Strong and Reliable
For heavy-duty bonding applications, tan/brown Liquid Nails is the way to go. Specifically formulated for materials like wood, metal, and concrete, this variant provides a strong and reliable bond. The tan/brown color not only helps identify the adhesive after application but also adds a touch of ruggedness to your project.
Specialty Liquid Nails: Tailored to Your Needs
Liquid Nails also offers specialty variants designed for specific applications. Mirror and marble Liquid Nails provide clear finishes, ensuring flawless bonds without interfering with the appearance of mirrors or marble surfaces. These specialty options provide the extra strength and properties required for their intended uses.
Considerations for Choosing the Right Liquid Nails
When selecting a Liquid Nails product, consider factors such as the materials you’re bonding, visibility of the adhesive, and desired strength. Read product labels and descriptions carefully to ensure you choose the right adhesive for your project.
Safety Precautions to Consider While Using Liquid Nails
Liquid Nails is a powerful adhesive that provides a strong bond for various projects.
However, it is important to prioritize safety when working with this product. By following these safety precautions, you can ensure a safe and successful application of Liquid Nails.
Work in a well-ventilated area:
Liquid Nails can emit fumes that may be harmful if inhaled in large quantities.
Always work in a well-ventilated area or use a respirator to protect yourself from the fumes. Open windows and doors or use fans to improve air circulation.
Wear protective gear:
To protect your skin and eyes from potential contact with Liquid Nails, wear appropriate protective gear. This includes chemical-resistant gloves, safety glasses, and long-sleeved clothing. Gloves should be resistant to the adhesive to provide maximum protection.
Avoid direct skin contact:
Liquid Nails can cause skin irritation or allergic reactions in some individuals. Avoid direct contact with the adhesive by wearing gloves and promptly washing any exposed skin with soap and water. If any signs of irritation or an allergic reaction occur, seek medical attention immediately.
Keep away from flames and sparks:
Liquid Nails is flammable, so it is crucial to keep it away from open flames, sparks, or any potential sources of ignition. Store the adhesive in a cool and dry place, away from heat sources.
Follow manufacturer’s instructions:
Always read and follow the instructions provided by the manufacturer on the packaging of Liquid Nails. Different types of Liquid Nails may have specific safety precautions or application guidelines, so it is essential to familiarize yourself with the product before use.
Clean up spills promptly:
Accidental spills can happen during the application of Liquid Nails. It is important to clean up any spills or drips immediately using a suitable solvent recommended by the manufacturer. Dispose of any waste materials properly according to local regulations.
Keep out of reach of children and pets:
Liquid Nails should be stored in a secure location out of reach of children and pets. The adhesive can be toxic if ingested or cause harm if it comes into contact with eyes or skin.
Common Mistakes to Avoid When Working with Liquid Nails
Liquid Nails is a versatile and powerful adhesive that can be used for a wide range of projects. However, to achieve the best results, it is important to avoid common mistakes that can compromise the effectiveness of this adhesive. In this blog post, we will explore the top mistakes to avoid when working with Liquid Nails and why they are crucial to ensuring a successful bonding experience.
Applying too much adhesive:
One common mistake is using excessive amounts of Liquid Nails. While it may seem logical to apply more glue for a stronger bond, it can actually have the opposite effect. Excessive adhesive takes longer to dry and may not bond as effectively, resulting in a weaker hold. Additionally, it can create a messy work environment and make the project more difficult to handle.
Improper surface preparation:
Properly preparing the surface before applying Liquid Nails is vital for achieving a strong bond. This includes cleaning the surface thoroughly and removing any dust, dirt, or grease. Failure to do so can hinder adhesion and weaken the bond. To further enhance bonding, roughening up smooth surfaces with sandpaper can be beneficial.
Working in extreme temperatures:
Both hot and cold temperatures can affect the performance of Liquid Nails. Extreme heat can cause the adhesive to become too thin, making it difficult to work with and potentially leading to a weaker bond.
On the other hand, extremely cold temperatures can slow down the drying process and impact the overall strength of the bond. It is essential to work within the recommended temperature range specified by the manufacturer.
Insufficient drying time:
Patience is key when working with Liquid Nails. Rushing the drying process can result in a weaker bond or even complete failure.
It is crucial to follow the manufacturer’s instructions regarding drying time before applying any pressure or load on the bonded surfaces. This will ensure a strong and long-lasting bond.
Inadequate pressure during application:
Applying firm and even pressure during application is crucial to achieve proper contact between the adhesive and the surface. This creates a stronger bond. Using clamps or other tools to hold the materials together while the adhesive dries can also help achieve better results.
WSoaX4kgMeg” >
Conclusion
Liquid nail dries to a clear and transparent finish, allowing it to seamlessly blend with any surface.
As it sets, liquid nail becomes virtually invisible, leaving behind nothing but a strong and sturdy bond.