Ever been caught in a sticky situation where super glue accidentally lands on your rubber surface? It’s frustrating, right? That stubborn adhesive seems impossible to remove without causing damage. But don’t sweat it. In today’s blog post, we dive into the world of ‘What can remove super glue from rubber’ and uncover some tried-and-true methods to save the day.
Hook:
Picture this: you’re knee-deep in a DIY project, carefully gluing pieces together, when out of nowhere, a tiny drop of super glue splatters onto your rubber table mat or your favorite pair of rubber-soled shoes. Your heart sinks as you witness that sticky, yellowish blob clinging for dear life. How do you banish it without leaving behind any evidence?
Main points:
- Unleashing the power of bonding: Super glue, also known as cyanoacrylate adhesive, is designed to create strong bonds in an instant. However, this strength can work against us when accidents happen or mistakes occur.
- Patience is key: Before jumping into action, remember that removing super glue from rubber requires delicate handling. Abrasive methods may harm the material, so it’s crucial to approach the problem with care.
- Acetone – the superhero solvent: Acetone, commonly found in household nail polish removers, often comes to the rescue. It dissolves super glue effectively, making removal easier. But beware. Before applying acetone to rubber, perform a patch test since it can cause color fading or surface damage on certain types of rubber.
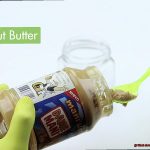
- Mother Nature’s remedies at your fingertips: If you prefer an organic approach, fret not. Natural options like olive oil, coconut oil, or even peanut butter can come to your aid. These substances break down the adhesive bond and make removing super glue from rubber a breeze.
- Seek professional wisdom: When all else fails, it’s wise to consult a professional before attempting harsher methods that may irreversibly damage the rubber surface.
Whether it’s a crafty mishap or a DIY disaster, knowing what can remove super glue from rubber is a game-changer. By understanding the strength of the bond, exercising patience, and utilizing solvents like acetone or natural alternatives, you can rescue your cherished rubber items from the clutches of super glue.
Common Household Items That Can Remove Super Glue from Rubber
Contents
- 1 Common Household Items That Can Remove Super Glue from Rubber
- 2 Mechanical Methods for Removing Super Glue from Rubber
- 3 Soaking in Warm Soapy Water to Remove Super Glue from Porous Rubber
- 4 Specialized Adhesive Removers for Tough Stains
- 5 Prevention Tips to Avoid Spills or Bonding of Super Glue on Rubber Surfaces
- 6 Patch Test Before Applying Solvents to the Entire Surface
- 7 Always Follow Instructions Provided by the Manufacturer When Using Adhesive Removers
- 8 Be Careful Not to Damage or Scratch the Rubber Surface During Removal Process
- 9 Conclusion
Accidents happen, and when super glue finds its way onto rubber surfaces, panic sets in. But fear not. Armed with everyday household items and a dash of wisdom, you can effortlessly bid adieu to unwanted super glue without leaving a trace. In this captivating guide, we will delve into a plethora of expert-approved methods and products that guarantee successful super glue removal from rubber surfaces.
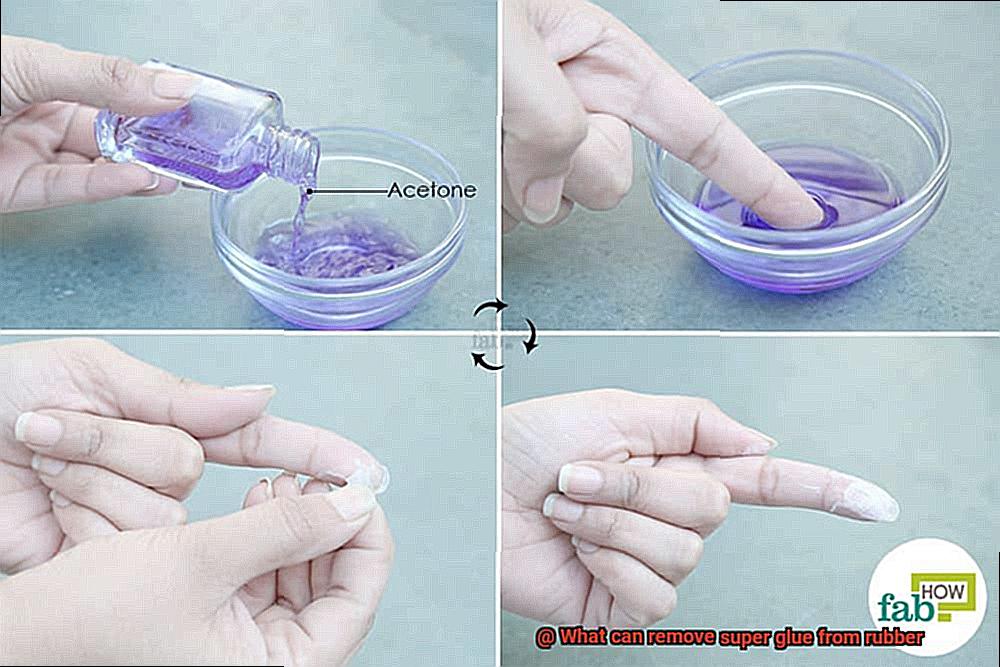
Method 1: Acetone – The Mighty Solvent
Acetone, a potent solvent found in nail polish removers, reigns supreme when it comes to dissolving super glue from rubber surfaces. Here’s how to harness its power:
- Begin by conducting a compatibility test on an inconspicuous area of the rubber surface.
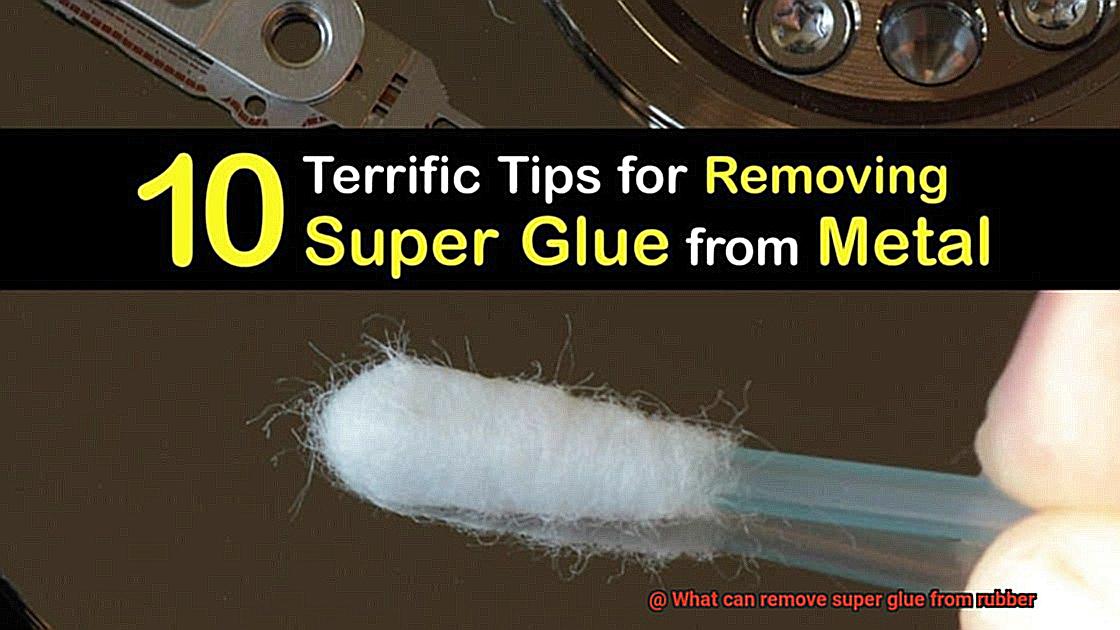
- Soak a clean cloth or cotton ball in acetone and gently apply it to the affected area using light pressure.
- Watch in awe as the super glue succumbs to the mighty acetone and dissolves before your eyes.
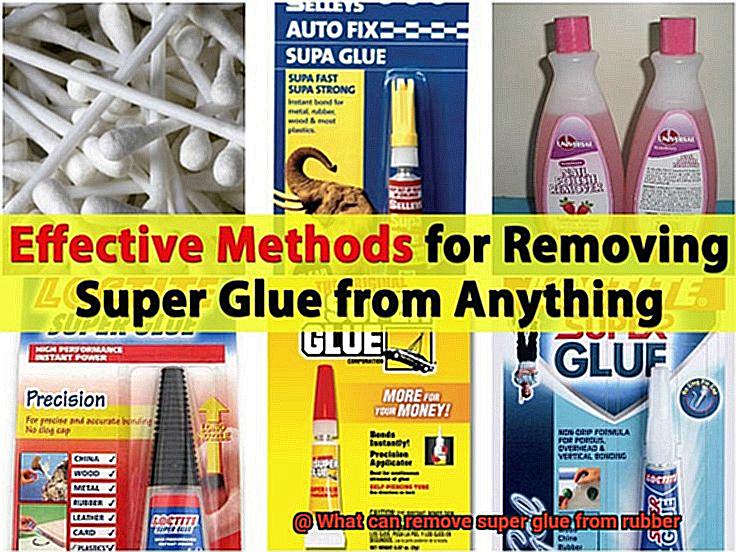
- Wipe away the dissolved residue with a clean cloth or rinse the area with water for a spotless finish.
Method 2: Rubbing Alcohol – The Gentle Elixir
When it comes to removing super glue from rubber surfaces, rubbing alcohol, or isopropyl alcohol, is your trusted companion. Follow these steps to achieve success:
- Perform a patch test on an inconspicuous area of the rubber to ensure the alcohol won’t cause any harm.
- Dampen a clean cloth or cotton ball with rubbing alcohol.
- Employ gentle circular motions and slight pressure while rubbing the affected area.
- Revel in the awe-inspiring sight of the super glue succumbing to the gentle elixir of rubbing alcohol as it dissolves.
- Wipe away the dissolved adhesive with a clean cloth or rinse the area with water for a pristine finish.
Method 3: Vegetable Oil – Nature’s Antidote
For those inclined towards natural solutions, vegetable oil emerges as a champion in the battle against super glue. Here’s how to utilize its natural power:
- Generously apply vegetable oil to the affected area, allowing it to soak for a few minutes.
- Harness the power of a blunt object, such as a spoon or plastic scraper, to gently peel off the softened glue.
- Cleanse the area with soap and water to eliminate any lingering residue, leaving behind a revitalized surface.
Mechanical Methods for Removing Super Glue from Rubber
Super glue’s relentless grip on rubber surfaces can be an exasperating battle. But fret not. In this comprehensive guide, we will explore the captivating realm of mechanical techniques that will liberate your rubber from its adhesive clutches.
With an arsenal of tools and a dash of finesse, you’ll be able to bid farewell to super glue forever. So grab your gear and let’s dive into the world of rubber restoration.
Scraping – Simplicity at Its Finest:
In the grand tapestry of super glue removal, sometimes simplicity reigns supreme. Armed with a plastic scraper or the trusty swipe of a credit card, begin delicately scraping the edges of the glue. Gradually work your way towards the center, applying just enough pressure to avoid harming the rubber surface. This elegant dance will loosen the adhesive’s grip, revealing a renewed rubber canvas.
Sanding – Precision Redefined:
When super glue dries and forms an unwelcome mound on your rubber, sanding emerges as an art form. Embrace the gentle caress of fine-grit sandpaper or an emery board, employing circular motions to skillfully sand away the glue. Remember, patience is key here; excessive sanding may compromise the integrity of your rubber. But fear not, for with measured strokes, you’ll uncover a flawlessly smooth surface.
Peeling – A Subtle Ballet:
For smaller areas plagued by super glue, peeling gracefully takes center stage. Begin by immersing a cloth or cotton ball in warm soapy water, allowing it to rest atop the glued area for a few minutes. This soothing soak softens the glue, making it pliable for removal. Armed with nimble fingers or precise tweezers, tenderly peel off the softened glue from the rubber surface. Behold the captivating performance of liberation.
Heat – An Enveloping Warmth:
In the realm of super glue battles, sometimes a touch of heat can loosen its unyielding grasp. Unleash the power of a hairdryer set on low heat or a heat gun positioned at a safe distance, enveloping the glued area in warmth. As the glue succumbs to the soothing temperature, unleash your scraping or peeling prowess using one of the aforementioned methods. Witness the adhesive’s surrender as it bids adieu.
Soaking in Warm Soapy Water to Remove Super Glue from Porous Rubber
Prepare to embark on a fascinating journey into the realm of rubber liberation, where the unyielding grip of super glue meets its match. In this captivating exploration, we delve into the magical world of soaking in warm soapy water to free your beloved porous rubber surfaces from the clutches of adhesive tyranny. With a blend of heat, soap, and a touch of finesse, you will bid farewell to super glue forever. So, gear up and let’s dive into the enchanting process of restoring your rubber treasures.
The Science Behind the Magic:
Soaking in warm soapy water is a tried-and-true method for removing super glue from porous rubber surfaces. The warmth of the water softens the adhesive, while the soap deftly breaks down the bond between the glue and the rubber. This dynamic duo ensures a seamless separation that leaves your rubber surfaces unscathed.
The Step-by-Step Guide:
Step 1: Prepare the Warm Soapy Oasis
Begin by selecting a basin or container that can comfortably accommodate your rubber item. Fill it with pleasantly hot water – not scalding. We want this experience to be as soothing for you as it is for your rubber companion.
Step 2: Add a Dash of Sudsy Goodness
Now, introduce a few drops of mild liquid dish soap into the warm water. Mix it vigorously until you create a delightful concoction of cleansing power. Ah, the aroma of cleanliness fills the air, fueling your determination to conquer that stubborn super glue.
Step 3: Take the Plunge
Submerge your porous rubber item fully into the soapy water, ensuring every inch is enveloped in its restorative embrace. Allow it to luxuriate in this revitalizing soak for a minimum of 30 minutes. For particularly tenacious glue battles, a longer soak may be necessary. Patience is key – victory awaits.
Step 4: Gently Scrub Away the Glue’s Grip
Emerging from its tranquil soak, your rubber treasure is ready for the next step. Armed with a soft-bristled brush or sponge, delicately scrub the affected area, applying just enough pressure to dislodge and remove the softened glue. Remember, a gentle touch is paramount to safeguarding the integrity of your rubber surface.
Specialized Adhesive Removers for Tough Stains
Brace yourselves for an epic journey as we explore the realms of solvents and chemicals specifically formulated to conquer even the most stubborn super glue stains. Get ready to embark on an exhilarating quest as we unveil the secrets of these remarkable products.
Acetone: The Mighty Dissolver:
Our first weapon of choice is the mighty acetone, a solvent renowned for its ability to dissolve super glue with ease. But beware. Like any hero, acetone has its limitations. Before unleashing its power, test this formidable solvent on a small, inconspicuous area to ensure it won’t leave behind any unwanted damage or discoloration.
Isopropyl Alcohol: The Gentle Guardian:
Next in our arsenal is the gentle yet effective isopropyl alcohol, also known as rubbing alcohol. This trusty ally offers an alternative solution, especially for delicate rubber materials. However, caution is still necessary. Test a small section of the rubber before proceeding with this mild-mannered defender.
Commercial Adhesive Removers: Unleashing the Superheroes:
For those adventurers seeking a foolproof solution without the hassle of experimentation, behold the commercial adhesive removers. These heroic concoctions are meticulously crafted to combat even the toughest stains, such as super glue. Armed with their powerful blend of solvents and chemicals, they are ready to break down those stubborn adhesive bonds and save the day.
Proceed with Finesse:
As we venture further into our quest for stain-free rubber surfaces, it is crucial to handle our precious equipment with finesse. Apply adhesive removers carefully, avoiding excessive scrubbing or rubbing that could potentially cause further damage or discoloration. Remember, our goal is to preserve and enhance, not to harm.
Safety: Our Shield and Armor:
In every adventure, safety should be our steadfast companion. Don your protective gloves, shielding your hands from the potent chemicals within these powerful removers. Create a fortress of ventilation to ensure harmful fumes are whisked away, allowing us to focus on our mission without any unwanted side effects.
Prevention Tips to Avoid Spills or Bonding of Super Glue on Rubber Surfaces
Super glue is a versatile adhesive, but when it spills or bonds to rubber surfaces unintentionally, it can create a sticky situation. Taking proactive measures to prevent these mishaps is crucial. By implementing these simple yet effective tips, you can ensure that your rubber surfaces remain free from unwanted bonding and spills, saving you time and effort in the long run.
Prepare and Plan Ahead:
Proper preparation and planning are essential to prevent super glue mishaps. Before starting any project, gather all the necessary materials and tools. This eliminates the need for rushing or fumbling with items, reducing the risk of spills or accidents. Take a moment to strategize how you will apply the glue and where it needs to go, ensuring a smooth and controlled process.
Shield with a Protective Barrier:
Safeguard the rubber surface by placing a protective layer such as plastic wrap or wax paper underneath it. This creates a barrier between the super glue and the rubber, making it easier to clean up any accidental spills. Additionally, it prevents the glue from bonding with the rubber and causing a sticky mess. Shielding your rubber surfaces ensures a hassle-free experience.
Opt for Precision Applicators:
Instead of applying super glue directly from the tube, consider using a small brush or precision applicator. These tools provide greater control and accuracy, minimizing the risk of spills or excess glue on unintended areas. Precision is key to avoiding bonding mishaps, allowing you to apply the glue exactly where it’s needed.
Work in a Well-Ventilated Area:
Super glue emits fumes that can be harmful if inhaled excessively. To avoid accidental spills or bonding due to dizziness or lack of focus, it’s important to work in a well-ventilated area. Open windows or turn on fans to ensure proper air circulation and minimize the chances of accidents. Fresh air keeps your mind clear and your projects glue-free.
Mindful Movements:
Maintaining awareness of your movements and surroundings while working with super glue is crucial. Even the slightest bump or jostle can result in spills or accidental bonding on unintended rubber surfaces. Take your time, stay focused, and create without the worry of sticky situations. Mindful movements ensure that the glue goes where it’s intended, not where it shouldn’t.
Read and Follow Instructions:
Different brands of super glue may have specific recommendations for preventing spills or bonding on rubber surfaces. It’s essential to read and follow the instructions provided by the manufacturer before using the product. These guidelines will help you use the glue correctly and avoid any unexpected mishaps. Following instructions ensures a smooth and trouble-free application process.
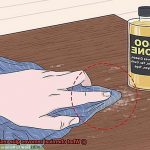
Patch Test Before Applying Solvents to the Entire Surface
Don’t fret. We’re here to rescue you and guide you through the process of safely banishing that stubborn adhesive. But before you dive headfirst, there’s a crucial step you must never skip – the patch test. In this captivating article, we’ll unravel the importance of conducting a patch test before applying solvents to the entire surface when removing super glue from rubber. So, gear up and let’s embark on this scientific adventure.
Why is a patch test necessary?
Picture this: armed with your trusty solvent, ready to conquer the super glue chaos, only to discover that it could wreak havoc on your rubber surface. Terrifying, right? That’s where the patch test swoops in to save the day. By performing a patch test, you can assess the compatibility of your chosen solvent with the rubber material, ensuring a safe and damage-free solution.
The patch test procedure:
- Gather your tools: To conduct a triumphant patch test, assemble the necessary materials – a small amount of your chosen solvent, a clean cloth or cotton swab, and a piece of rubber similar to the surface being treated.
- Seek out secrecy: Opt for an inconspicuous corner on the rubber surface as your patch test zone. This way, any potential harm will remain hidden from prying eyes.
- Apply with grace: Take a dab of the solvent and gently spread it onto the cloth or cotton swab.
- Tenderly caress the test area: Carefully rub the solvent onto the selected area of the rubber surface, paying close attention to any adverse side effects such as discoloration, swelling, softening, or deterioration.
- Observe and wait: Allow the solvent to settle on the patch for a few minutes. Some reactions may take time to unfold, so remain vigilant and patient.
- Gradually escalate: If no negative reactions occur, approach the next test area with caution, applying a slightly larger amount of the solvent. Observe any adverse effects and grant sufficient time for reactions to manifest. Repeat this process if necessary until you’re confident in the solvent’s safety for the entire surface.
Always Follow Instructions Provided by the Manufacturer When Using Adhesive Removers
In our previous chapter, we uncovered the wonders of patch testing and how it saves our rubber surfaces from super glue disasters. Today, we embark on a new quest: unraveling the secrets to triumphant removal by always following the manufacturer’s instructions. So don your lab coats and safety goggles, for we are about to unlock the true potential of adhesive removers.
The Crucial Role of Instructions:
Adhesive removers are like captivating elixirs, specially concocted to dissolve the grip of stubborn super glue on various surfaces. These magical potions take different forms – liquids, gels, sprays, wipes – each with its own set of instructions.
Neglecting these sacred scrolls is akin to embarking on a treacherous journey without a compass; it invites danger and can lead to disastrous outcomes.
Safety Above All:
Above all else, your safety is paramount. Adhesive removers may house potent chemicals that demand precision in handling. The manufacturer’s instructions will be your guiding light, illuminating critical safety precautions.
From donning protective gloves to ensuring proper ventilation, and avoiding skin and eye contact – these instructions safeguard our well-being. Remember, our mission is to rescue surfaces, not ourselves.
Formulations that Stand Apart:
Behold a fascinating truth – different adhesive removers possess unique instructions. Each formulation is carefully crafted for specific purposes and surfaces. Some might demand patience with longer application times or multiple rounds of treatment to fully dissolve stubborn super glue.
By paying heed to these instructions, you unlock the door to optimal results while averting damage and mishaps.
Preserving Prized Surfaces:
Following the manufacturer’s instructions not only shields you but also ensures the sanctity of your surfaces throughout the removal process. Within these precious scrolls lie invaluable insights into product requirements and the nuances of your working surface.
For instance, rubber surfaces may necessitate extra care to avoid any undesired harm. The manufacturer’s instructions become the guardian angels, leading you through the path of successful and gentle removal.
Be Careful Not to Damage or Scratch the Rubber Surface During Removal Process
Imagine the sinking feeling when you accidentally apply super glue to your beloved rubber possessions. The fear of damaging or scratching the surface can be overwhelming.
In this article, we will explore the importance of being cautious and provide you with step-by-step instructions on how to remove super glue without causing any harm to your cherished rubber items.
By following these careful guidelines, you can ensure the longevity and beauty of your rubber surfaces.
Why Be Careful?

Rubber surfaces are notorious for their susceptibility to scratches and abrasions. Mishandling during the removal process can exacerbate these imperfections, leaving your items blemished and unsightly. Here are two essential reasons why caution is crucial when removing super glue from rubber:
Prone to Scratches:
Rubber surfaces are incredibly vulnerable to scratches, especially when exposed to harsh chemicals or abrasive tools. These scratches not only mar the appearance but also compromise the structural integrity of the rubber, leading to accelerated wear and tear over time.
Damage Control:
By taking preventative measures and handling the removal process with care, you can minimize potential damage. A delicate approach ensures that your rubber items remain in pristine condition, maintaining their value and usefulness.
Step-by-Step Guide:
Now that we understand why it is vital to handle rubber surfaces gently, let’s dive into a detailed step-by-step guide on how to remove super glue without damaging or scratching your precious rubber possessions.
Choose Gentle Tools:
Start by gathering soft, non-abrasive materials such as a cloth or sponge. Avoid using harsh chemicals or abrasive tools that can exacerbate the situation and cause irreparable damage.
Apply a Gentle Adhesive Remover or Household Oil:
Begin by applying a small amount of a gentle adhesive remover or household oil, such as olive oil or coconut oil, onto the glued area. Allow it to sit for a few minutes to soften the super glue.
Gently Rub in Circular Motions:
Using the soft cloth or sponge, gently rub the area in circular motions, applying light pressure. This technique helps gradually loosen and lift the super glue from the rubber surface, preventing scratches and damage.
Repeat if Necessary:
If the super glue remains stubbornly attached, repeat the process multiple times until all traces of glue are successfully removed. Patience is key; rushing the removal process may cause more harm than good.
Z4_PG6g-yUs” >
Conclusion
Super glue can be a stubborn adhesive to remove from rubber surfaces.
Fortunately, there are several effective methods that can come to your rescue. One option is using acetone, a powerful solvent commonly found in nail polish removers.
Soak a cloth or cotton ball with acetone and gently rub the affected area until the super glue starts to dissolve. Another alternative is using isopropyl alcohol, which can also break down the bond of super glue.
Apply the alcohol onto a cloth and carefully wipe away the adhesive. Additionally, you can try using warm soapy water and a sponge to soften the glue and gently scrub it off.
Remember to always test any solution on a small, inconspicuous area first to ensure it doesn’t damage or discolor the rubber material.