Have you ever poured your heart and soul into a Mod Podge masterpiece, only to have it ruined by an unexpected spill or a sudden downpour? Well, fear not. I’m here to show you how to protect your precious creations from the perils of water.
Mod Podge may give your projects a glossy finish, but it’s not naturally waterproof. Lucky for us crafters, there are a few nifty tricks we can use to make our Mod Podge creations water-resistant. In this guide, we’ll dive into various methods that will keep your masterpieces looking flawless come rain or shine.
What can I put over Mod Podge to make it waterproof?
Contents
Step-by-Step Guide:
Gather Your Supplies:
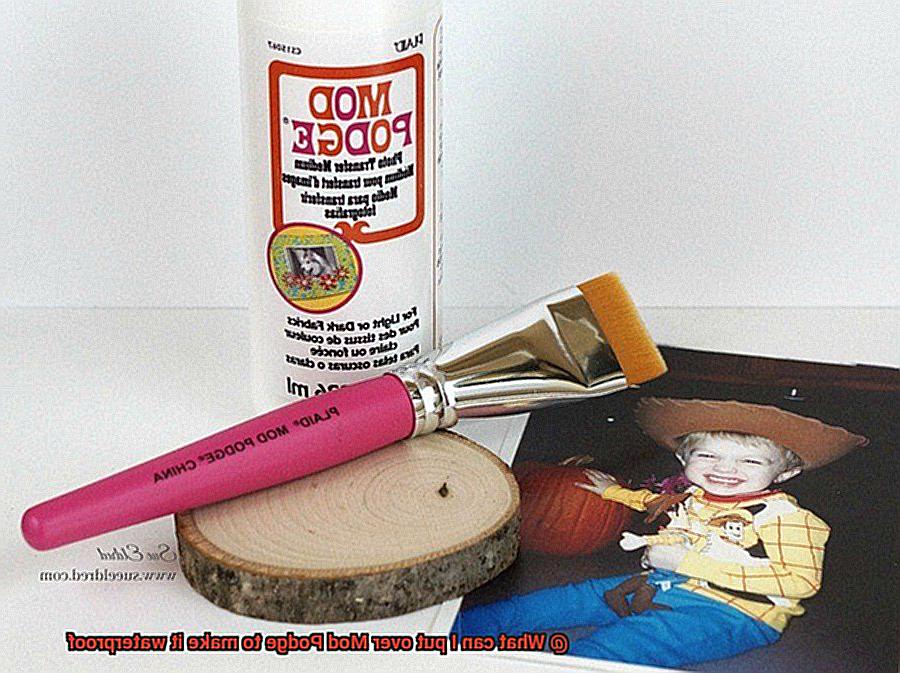
Before embarking on your waterproofing journey, gather the following materials: a trusty paintbrush, some trusty Mod Podge (gloss or matte), a waterproof sealer (like acrylic sealer or clear polyurethane spray), and a well-ventilated workspace.
Apply Multiple Layers of Mod Podge:
To build up that protective barrier for your artwork, start by applying multiple thin coats of Mod Podge using your paintbrush. Make sure each layer dries completely before adding the next one. This step is key in making your project more water-resistant.
Sanding (Optional):
For those who crave perfection and desire an ultra-smooth finish, grab some fine-grit sandpaper and gently sand each dried layer of Mod Podge. This step is especially helpful for larger projects or those needing that extra touch of finesse.
Apply the Waterproof Sealer:
Once your layers of Mod Podge are dry and ready, it’s time to bring out the big guns – the waterproof sealer. Head over to your local craft store and grab either acrylic sealer or clear polyurethane spray – both work like magic in keeping water damage at bay. Oh, and don’t forget to keep that workspace well-ventilated.
Follow the Manufacturer’s Instructions:
Before you go sealing away, take a moment to read and follow the manufacturer’s instructions on your chosen waterproof sealer. Give the can a good shake, and hold it about 8-12 inches away from your project for even application. Apply the sealer using short, smooth strokes, ensuring every nook and cranny gets covered.
What is Mod Podge?
Look no further than Mod Podge. In this blog post, we will dive into the world of Mod Podge, exploring its uses, features, and tips for making it waterproof. Get ready to unleash your creativity and discover why Mod Podge is an indispensable tool in every crafter’s arsenal.
What is Mod Podge?
Mod Podge is a versatile water-based sealer, glue, and finish that has taken the crafting world by storm. Developed by Plaid Enterprises in the 1960s, Mod Podge has become a staple for both beginners and experienced crafters alike. It is renowned for its exceptional ability to bond various materials together while providing a protective barrier.
Versatility at Its Finest:
Mod Podge offers endless possibilities when it comes to crafting. Here are some of its main uses:
- Adhesive: Whether you’re attaching paper cutouts to wood or fabric to glass, Mod Podge creates a strong and reliable bond between different materials.
- Sealant: Mod Podge acts as a protective layer, shielding your projects from moisture, dirt, and wear and tear. It ensures your creations stand the test of time.
- Finishes: With options like glossy, matte, satin, and sparkle, Mod Podge allows you to add the perfect touch of style and personality to your creations. Each finish offers a unique look and feel, ensuring your project stands out.
Tips for Making Mod Podge Waterproof:
While Mod Podge provides some level of protection against water, making it completely waterproof requires additional steps. Here are some effective methods you can try:
- Clear Acrylic Sealer: Apply a transparent acrylic sealer over the dried Mod Podge to create an extra layer of waterproofing. This sealant not only protects your project but also leaves a glossy finish, enhancing its overall appearance.
- Epoxy Resin: Combine and apply epoxy resin over Mod Podge for a durable and waterproof coating. This option not only provides excellent protection but also gives your project a professional and polished look.
- Beeswax: Melt and apply beeswax over Mod Podge to harness its natural water-repellent properties. This method offers a protective layer while providing a more natural alternative to other waterproofing options.
- Waterproof sprays or fabric protectors: Opt for a waterproof spray or fabric protector specifically designed for adding water resistance to your Mod Podge projects. Ensure you choose the right spray for your specific material.

Clear Acrylic Sealer
This liquid coating has gained immense popularity for its ability to add a waterproof barrier to Mod Podge projects. However, it is crucial to follow one essential step before applying this sealant – allowing the Mod Podge to dry completely. In this captivating exploration, we will dive into the reasons why this step is crucial and provide some invaluable tips for achieving flawless results.
Prevents Smudging and Streaking:
Imagine painstakingly perfecting your Mod Podge masterpiece, only to have it ruined by smudges and streaks. Allowing the Mod Podge to dry fully before applying clear acrylic sealer is the key to avoiding this heart-wrenching disaster. As the brush glides over the still-wet surface, a catastrophic disturbance occurs, resulting in an uneven and messy finish. By exercising patience and granting ample drying time, you can ensure that your project remains pristine.
Achieves an Even and Smooth Finish:
Aiming for a professional-looking result? Multiple thin coats of clear acrylic sealer are your secret weapon. Rather than slathering on one thick coat, this technique allows you to create an even and smooth finish that enhances the allure of your Mod Podge creation. However, if the Mod Podge underneath hasn’t dried completely, the sealer may fail to adhere properly, leading to an unsightly and uneven application. Don’t compromise on excellence – prioritize patience.
Adds a Glossy or Matte Finish:
Clear acrylic sealers not only shield against water damage but also bestow a breathtaking glossy or matte finish upon your Mod Podge masterpiece. The choice between these enchanting variations depends on personal preference and the desired aesthetic. A glossy finish amplifies colors and imbues a brilliant shine, while a matte finish exudes subtlety and understated elegance. Regardless of your preference, ensuring the Mod Podge has dried fully will help you achieve the desired level of glossiness or matte effect.
Follow Manufacturer’s Instructions:
Every brand of clear acrylic sealer has its unique guidelines for application and drying times. It is vital to follow these instructions scrupulously to achieve the best possible outcome. This includes applying the sealer in a well-ventilated area, far away from open flames or sparks. By adhering to these instructions, you ensconce yourself in safety and unlock the full potential of the clear acrylic sealer.
Test on Inconspicuous Areas:
While clear acrylic sealer can work its magic on various surfaces, it is wise to test it on a small, inconspicuous area before committing to the entire project. This precautionary step ensures that the sealer reacts harmoniously with the specific material you are working with, preventing any unwelcome damage or discoloration. Allow your masterpiece to triumph by proceeding with caution.
Epoxy Resin
Look no further than epoxy resin. This versatile material not only adds a waterproof layer to your creations but also gives them a glossy, professional finish. In this blog post, we will explore the captivating world of epoxy resin, its benefits over Mod Podge, application tips, and showcase some awe-inspiring projects that have utilized this magical combination.
The Power of Epoxy Resin:
- Water Resistance: Epoxy resin acts as a protective shield against water, making it ideal for coasters, tabletops, and jewelry that may come into contact with spills or moisture.
- Glossy and Professional Finish: When cured, epoxy resin unveils a stunning glossy effect that brings your Mod Podge designs to life. It enhances colors and details, adding a touch of elegance to your creations.
- Durability: Epoxy resin is renowned for its toughness. Once cured, it forms a strong bond with the Mod Podge layer below, ensuring your masterpiece stays intact even with regular use.
Application Tips:
- Follow Instructions: Meticulously read and adhere to the manufacturer’s instructions. The correct mixing ratio of resin and hardener is vital for successful curing and optimal results.
- Prepare the Surface: Cleanliness is key. Before applying epoxy resin, ensure both the Mod Podge layer and the surface underneath are free from dust or debris. A pristine canvas guarantees a flawless finish.
- Work Swiftly and Smoothly: Epoxy resin sets quickly, so it’s important to work swiftly and evenly when applying it. This prevents drips or uneven areas in the final coating. Remember, practice makes perfect.
Successful Projects:
- Dazzling Coasters: Elevate plain coasters by applying Mod Podge designs and sealing them with epoxy resin. The glossy finish not only protects against drink spills but also makes your coasters a conversation starter.
- Resplendent Jewelry: Create exquisite pendants or earrings with Mod Podge and seal them with epoxy resin for a waterproof finish. Your jewelry will remain pristine, even in rainy weather.
- Mesmerizing Tabletops: Breathe new life into tired tabletops by decoupaging them with Mod Podge and sealing the masterpiece with epoxy resin. Not only will it protect against scratches and spills, but it will also give your table a professional, high-end look.

Beeswax
Beeswax, derived from the wax glands of honeybees, is a natural substance that has been used for centuries for its remarkable waterproofing properties. This versatile material can enhance the durability and resistance to moisture of Mod Podge projects, making them more resilient in the face of water or other liquids.
One of the key advantages of using beeswax over Mod Podge is its natural composition. Unlike Mod Podge, beeswax is completely non-toxic, allowing you to use it on various surfaces without worrying about harmful chemicals or additives. This environmentally-friendly aspect makes it an ideal choice for those concerned about the impact of their crafting materials.
To apply beeswax over Mod Podge, ensure that the Mod Podge layer is completely dry to prevent smudging or mixing. Using a clean cloth or your fingers, gently rub a small amount of beeswax onto the surface, ensuring even coverage and paying special attention to edges and corners.
After applying the beeswax, use a heat source such as a hairdryer or heat gun to melt it into the Mod Podge layer. This creates a thin, protective barrier that resists water and other liquids. Take care not to overheat the surface, as this can cause damage or discoloration.
In addition to its waterproofing properties, beeswax adds a beautiful finish to your Mod Podge project. It provides a subtle sheen and enhances the overall appearance of your creation. For an even smoother and more polished look, buff the waxed surface with a soft cloth.
It’s important to note that while beeswax offers excellent waterproofing properties, it may not be suitable for full submersion or heavy exposure to water. It is best suited for light exposure to water or occasional splashes, making it perfect for coasters or jewelry that may come into contact with liquids.
Waterproof Spray or Fabric Protector
If you want to safeguard your creations from the perils of water damage, you’ve come to the right place. In this article, we’ll explore the wonders of waterproof spray and fabric protector and how they can transform your Mod Podge projects into resilience champions. Brace yourself for a journey into the realm of water resistance.
Understanding Waterproof Spray and Fabric Protector:
Picture this: a protective shield that forms an impermeable barrier on the surface of your Mod Podge projects. Waterproof sprays and fabric protectors are precisely designed for this purpose. No matter if you’re working with paper, wood, fabric, or ceramics, these products work their magic by preventing water from seeping through and wreaking havoc.
Choosing the Right Product:
Now that you’re convinced of these superheroes’ powers, it’s time to find the perfect sidekick for your Mod Podge project. Popular brands like Scotchgard, Rust-Oleum NeverWet, and Kiwi Camp Dry can save the day. Just remember to follow their instructions for application and drying times to maximize their protective potential.
Proper Application Tips:
To ensure that your waterproof spray or fabric protector works its magic to the fullest, here are some essential tips:
- Test it out on a small, inconspicuous area first to ensure compatibility and desired results.
- Apply multiple thin coats for better coverage rather than one thick coat.
- Allow each coat to dry thoroughly as advised by the manufacturer.
- Ensure proper ventilation during application for safety.
Limitations and Additional Benefits:
While these heroes excel at enhancing water resistance, they can’t guarantee invincibility in all situations. Factors like material type, extreme conditions, and continuous exposure to water can still impact durability. However, some products offer bonus benefits like stain protection, resistance against UV rays, and even mildew prevention. Perfect for outdoor projects or moisture-heavy environments.
Other Considerations
If you’re a fan of Mod Podge and want to protect your creations from the perils of water, you’ve come to the right place. In this comprehensive guide, we’ll dive into the expert considerations you need to keep in mind when waterproofing Mod Podge. So grab your glue, get ready to flex your creativity, and let’s explore the world of waterproofing.
Consideration 1: The Type of Mod Podge
Mod Podge offers different formulas, including Gloss, Matte, and Outdoor. For outdoor projects that face the elements, the Outdoor formula is your best bet. It’s specifically designed to withstand moisture, making it more water-resistant than other formulas. So whether you’re crafting garden decor or sealing a sign for your front porch, reach for the Outdoor formula as your base layer.
Consideration 2: Surface Matters
Not all surfaces are created equal when it comes to water absorption. Wood and paper, for instance, have a higher tendency to soak up moisture. To combat this, consider applying additional layers of protection over the Mod Podge. Clear spray sealants or varnishes act as an extra barrier against water damage, ensuring your project stays intact even in damp conditions.
Consideration 3: The Desired Finish
If you’re aiming for a glossy finish that screams professional craftsmanship, epoxy resin is your secret weapon. Adding a layer of epoxy resin over Mod Podge not only enhances its waterproofing properties but also gives your project a stunning glossy look. This durable coating acts as a shield against water damage while adding a touch of sophistication to your masterpiece.
Consideration 4: Appearance and Texture
While waterproofing is crucial, it’s important to remember that certain methods might alter the appearance or texture of your project. Clear sealants or resins can add a glossy or shiny finish, which may impact your desired aesthetic. Take this into account when choosing your waterproofing method to ensure it aligns with your vision.
Consideration 5: Proper Application Techniques
To achieve optimal waterproofing, precise application techniques are essential. Apply thin and even layers of Mod Podge, allowing each layer to dry completely before adding another. This ensures proper adhesion and provides a solid foundation for any additional waterproofing measures you choose to apply. By taking the time to apply Mod Podge correctly, you’ll maximize its water-resistance potential.
Consideration 6: Test Before Committing
Before immersing your entire project in waterproofing measures, it’s wise to conduct a small-scale test on an inconspicuous area. This allows you to see how your chosen method behaves with your specific project and identify any unforeseen effects. Testing beforehand will save you time, effort, and potential disappointment.
Tests Before Exposing to Water
We all know how devastating it can be when our hard work gets ruined by a simple splash. That’s why it’s crucial to conduct some tests before exposing your Mod Podge creation to water. Let’s dive in and explore the tests you should perform.
First and foremost, it’s essential to understand that Mod Podge itself is not waterproof. While it does provide some level of protection, it may not withstand direct contact with water for extended periods. But don’t worry, there are additional steps you can take to enhance its waterproofing abilities.
One popular option is to use a clear acrylic sealer. This fantastic product acts as a barrier between your Mod Podge project and water, preventing any moisture from seeping through. Before applying the sealer, make sure to conduct a patch test on a small, inconspicuous area of your project to ensure compatibility and desired results.
Another excellent choice is epoxy resin. This magical substance creates a strong, durable, and waterproof coating over your Mod Podge surface. It’s perfect for projects that need to withstand more intense water exposure. Just remember to carefully follow the manufacturer’s instructions when working with epoxy resin.
Now, let’s discuss the tests you should perform. Experiment with different combinations and techniques to achieve the desired level of water resistance. Some projects may require additional layers of Mod Podge or sealant for optimal protection.
Don’t forget about curing time. Both Mod Podge and any protective coatings or sealants applied need sufficient time to cure. The curing time may vary depending on the product used, so be sure to check the manufacturer’s instructions for specific guidance.
g4D60fQBXFs” >
Conclusion
Mod Podge is a fantastic adhesive and sealer, but it’s not inherently waterproof.
Thankfully, there are several options you can use to make your Mod Podge creations watertight. One popular choice is to apply a clear acrylic sealer over the Mod Podge layer.
This protective coat acts as a barrier against water damage, ensuring that your project stays intact and vibrant even when exposed to moisture. Another effective method is to use a waterproof spray sealant.
Simply spray a light, even coat over your Mod Podge surface and let it dry completely. This transparent shield will keep water at bay and preserve the integrity of your masterpiece.
For added protection, you can also consider using epoxy resin. This thick, glossy substance creates an impenetrable barrier that is not only waterproof but also adds depth and shine to your finished piece.
Whether you’re working on crafts, decoupage projects, or outdoor decorations, these techniques will help you achieve long-lasting durability and resilience against the elements.