Today, we’re tackling a topic that every homeowner, builder, or DIY enthusiast faces head-on: the magical question of what adhesive sticks to ceramic tiles. Whether you’re plotting a bathroom makeover, jazzing up your kitchen with a snazzy backsplash, or simply fixing a cracked tile, it’s crucial to know which adhesive will do the job right.
So whether you’re a seasoned pro or just dipping your toes into the adhesive pool, let’s get ready to unleash some serious sticking power on those tiles with the perfect adhesive.
What is Ceramic Tile?
Contents
Ceramic tile is an extraordinary material that brings both beauty and functionality to any space. It is a versatile and durable choice for flooring and wall coverings in both residential and commercial settings. Made from a mixture of clay, minerals, and water, ceramic tiles undergo a firing process at high temperatures to create a hard, resistant tile that can stand up to the test of time.
One of the remarkable qualities of ceramic tile is its ability to resist water, stains, and scratches. This makes it an ideal choice for areas with high moisture or heavy foot traffic, such as bathrooms, kitchens, and entryways. With its incredible durability, ceramic tile can withstand the demands of everyday life without losing its charm.
But ceramic tile isn’t just practical – it’s also incredibly versatile. It comes in a vast array of sizes, colors, and finishes, allowing for endless design possibilities. Whether you’re looking for a glossy glazed finish that catches the light or a more natural matte appearance, ceramic tiles have you covered. They can even mimic the look of luxurious materials like stone or wood, providing you with the desired aesthetic without the maintenance requirements or cost associated with those materials.
When it comes to installation, there are various methods for setting ceramic tiles. The most common method is thin-set installation, which involves using an adhesive called thin-set mortar to bond the tile to the surface. Thin-set mortar is a cement-based adhesive that offers excellent adhesion and flexibility. It is mixed with water before being skillfully applied to the substrate using a trowel.
Types of Adhesives for Ceramic Tiles
Before diving into the world of ceramic tiles, it’s crucial to know which adhesive is best for the job. With a plethora of options available, selecting the right glue can be as challenging as solving a tricky puzzle. Fear not. We’re here to guide you through the maze of adhesives with our top picks for sticking ceramic tiles. Let’s get started.
Cement-based Adhesives:
Strength and versatility define cement-based adhesives. These powdery wonders, made from a mix of cement, sand, and magical additives, provide a solid bond for both indoor and outdoor applications. Just add water, mix it up, and voila. The perfect glue to hold your tiles in place. Be aware though – this mighty adhesive requires a bit of muscle to work with.
Epoxy Adhesives:
Need a superhero-worthy bond? Look no further than epoxy adhesives. These dual-component glues, comprising resin and hardener, join forces to create an unbreakable connection between your tiles and their substrate. Ideal for high-stress areas like floors or moisture-prone places, epoxy adhesives are the Hercules of the adhesive world. Keep in mind though, they might take longer to cure than other options.
Acrylic Adhesives:
Versatility meets simplicity with acrylic adhesives. Available in liquid or powder form, these glues are easy to apply and dry in a jiffy. They offer good bonding strength while resisting the dreaded enemy – moisture. Suitable for various applications including ceramic tile installations, acrylic adhesives are like the friendly neighbor who’s always there when you need them.
Polyurethane Adhesives:
Flexibility is the name of the game when it comes to polyurethane adhesives. These mighty warriors provide a strong and durable bond while allowing for a little tile movement or expansion. Perfect for both indoor and outdoor projects, polyurethane adhesives are an excellent choice if you’re looking for resistance to water, heat, and chemicals. Just be prepared for a longer curing time.
Organic Mastics:
Looking for convenience and ease? Organic mastics have got your back. These pre-mixed paste-like adhesives are ready to go straight out of the tub. With good bonding strength and easy application, organic mastics are perfect for smaller tile installations or quick fixes. But beware, they might not be the best fit for high-moisture areas or heavy-duty jobs.
Silicone Adhesives:
When it comes to sealing and waterproofing, silicone adhesives are the champions. These tube heroes provide a waterproof bond that can withstand all sorts of wet adventures in bathrooms and kitchens. With their caulking gun in hand, they’re ready to match your tiles and grout with their wide range of colors. Keep in mind, though, that silicone adhesives are primarily used for sealing joints rather than bonding.
Thin-Set Mortar
In this guide, we’ll walk you through the process of using thin-set mortar for tiling, step-by-step. Whether you’re a seasoned DIYer or a newbie in the world of tile installation, this guide will have you laying tiles like a pro in no time.
Thin-set mortar is a type of adhesive commonly used for bonding ceramic tiles to various surfaces. It is made up of a mixture of cement, sand, and a polymer additive. The main advantage of thin-set mortar is its ability to provide a strong and durable bond between the tile and the substrate. It can withstand heavy foot traffic and is resistant to moisture, making it suitable for both indoor and outdoor tile installations.
Before diving into the world of thin-set mortar, it’s crucial to prepare the surface properly. Clean the area, removing any dust or debris that could interfere with adhesion. Ensure the surface is flat and level to avoid any future tile mishaps.
If you’re using powdered thin-set mortar, follow the manufacturer’s instructions to mix it with water to achieve the right consistency. If you prefer convenience, pre-mixed thin-set mortar is also available.
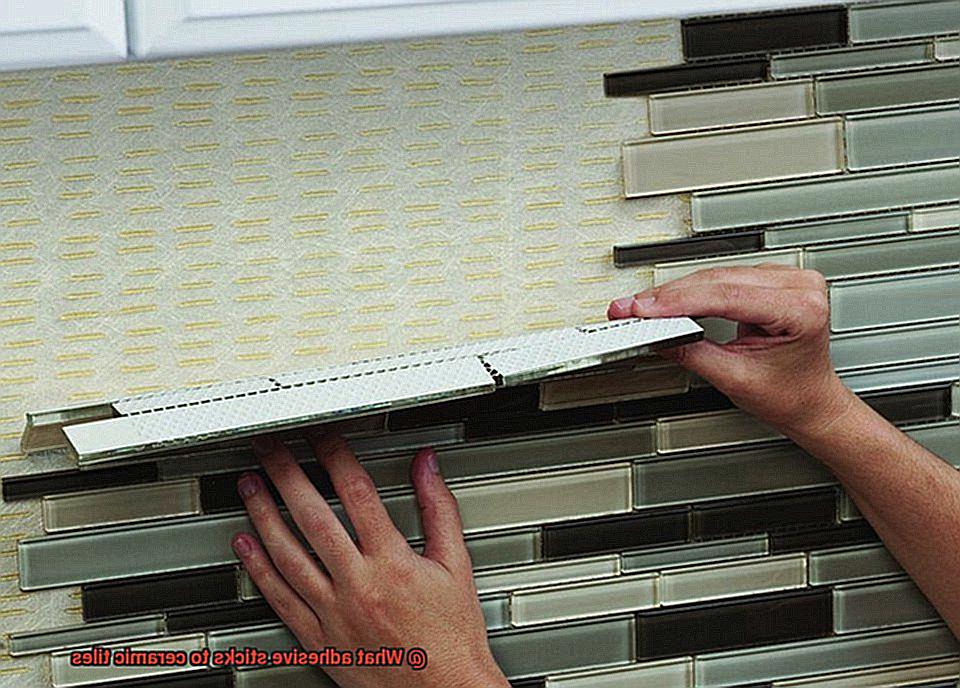
Grab a notched trowel – the size will depend on the size of your tiles. Scoop up some mortar and spread it evenly on the surface. The notches left by the trowel help create a strong bond between the tile and substrate. Remember to work in small sections at a time to prevent the mortar from drying out too quickly.
With the mortar applied, it’s time to place your tiles. Press each tile into the mortar with a slight twisting motion to ensure full coverage. Use spacers between each tile to maintain uniform spacing.
As you go along, use a level to ensure that your tiles are aligned and level. Adjust as needed before moving on to the next section.
Once all your tiles are in place, allow the thin-set mortar to cure fully. This typically takes around 24 hours but may vary depending on factors like temperature and humidity. Be patient – rushing this step can compromise the bond between the tiles and the substrate.
Once the thin-set mortar has cured, it’s time to grout. Follow the manufacturer’s instructions to mix the grout and apply it between the tiles. Use a grout float to spread the grout evenly, making sure to fill all the gaps. Wipe away any excess grout with a damp sponge.
After allowing the grout to dry for the recommended time, clean the tiles with a soft cloth or sponge to remove any haze left by the grout. Finally, apply a sealer to protect your newly tiled surface from stains and moisture.
Mastic
This water-based wonder comes in a smooth paste form, specially formulated to bond tiles to a variety of surfaces like walls, floors, and countertops. What sets mastic apart from its counterparts is its remarkable ability to withstand the trials of moisture and humidity. If you’re looking to tile your bathroom or kitchen, where water is an unwavering presence, mastic is your steadfast companion.
Flexibility is another feather in mastic’s cap. Unlike other adhesives that crumble under pressure or loosen with tile movement or expansion, mastic embraces change. It gracefully adapts to slight shifts in the surface without compromising the bond. So rest easy knowing your tiles will stay securely in place, no matter what life throws their way.
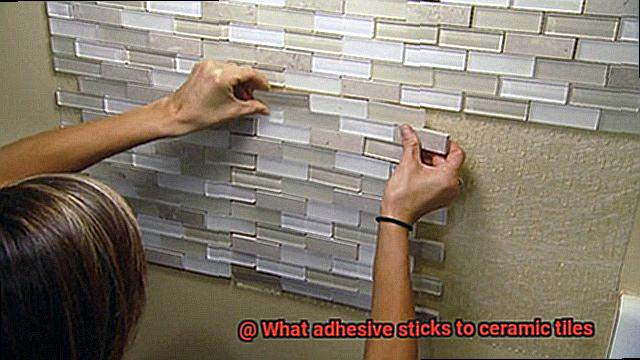
Now, let’s talk technique. To unleash mastic’s full potential, start with a meticulously cleaned and dry surface, free from any debris that could hinder adhesion. Armed with a notched trowel, apply an even layer of mastic, spreading it like a master artist creating textured brushstrokes on a canvas. Those notches in the trowel are crucial – they create ridges that enhance adhesion and prevent pesky air pockets from forming beneath your tiles.
With your adhesive masterpiece complete, it’s time to bring your tiles into the spotlight. Firmly press each ceramic tile into place, making sure they align seamlessly with their neighbors and sit level with the surrounding tiles.
For optimal results, work in smaller sections to ensure the mastic doesn’t dry out before you’ve finished your tile installation symphony.
But wait. The performance isn’t over just yet. Give your mastic the time it needs to cure fully – typically between 24 to 72 hours depending on environmental conditions and product specifications. During this intermission, avoid heavy foot traffic and excessive moisture that could disrupt the bonding process. Patience is the virtue that will reward you with a long-lasting, flawless tile installation.
Epoxy Adhesive
Finding the perfect adhesive for bonding ceramic tiles can be a daunting task. Luckily, there is a superhero in the adhesive world known as epoxy adhesive. This two-part system offers a multitude of advantages that make it the ideal choice for ceramic tile bonding.
Let’s explore the world of epoxy adhesive and discover why it is the ultimate solution for ceramic tile installations.
Unparalleled Adhesion:
Epoxy adhesive possesses an extraordinary ability to bond with various materials, including ceramic tiles. Its unique composition allows it to penetrate the smooth and non-porous surface of ceramic tiles, creating an incredibly strong and long-lasting bond. With epoxy adhesive, you can say goodbye to worries about your tiles popping off unexpectedly.
Enduring Durability:
Nobody wants their newly installed tiles to crumble or lose their charm over time. Thankfully, epoxy adhesive comes to the rescue with its exceptional durability. It can withstand both indoor and outdoor conditions, making it a reliable choice for any tiling project.
Moisture Resistance:
Ceramic tiles are often utilized in areas exposed to water, such as bathrooms and kitchens. The last thing you want is water seeping through the joints and causing damage. Enter epoxy adhesive. Its waterproof properties keep water at bay, ensuring your tiles remain intact and beautiful for years to come.
Temperature Fluctuations? No problem.
Whether you’re tiling a scorching hot patio or a freezing cold entryway, epoxy adhesive has got your back. It can handle extreme temperature changes without compromising its bond strength. So go ahead and let your imagination run wild with various tile projects, knowing that epoxy adhesive will hold up under any temperature conditions.
Specialized Adhesives
Imagine transforming your bathroom into a luxurious oasis with stunning ceramic tile. But to make that dream a reality, you need the perfect adhesive that will keep those tiles in place for years to come. Don’t worry, we’ve got your back. In this blog post, we’ll dive into the world of specialized adhesives for ceramic tiles and help you choose the right glue with confidence and ease.
First up, we have the mighty epoxy adhesive. This superhero of adhesives boasts exceptional bonding strength and unwavering resistance to moisture. It acts like a protective shield, ensuring your tiles stay put even in the face of steamy showers and splashing water.
Next on our list is the versatile cement-based adhesive. By mixing cement with other additives, this adhesive creates a paste-like consistency that offers a strong bond. Whether you’re tiling your kitchen floor or creating an outdoor patio oasis, cement-based adhesive is up to the task.
If you’re a DIY enthusiast looking for an easy-to-use option, acrylic adhesives are your go-to choice. They offer good flexibility, resistance to water and heat, and have a quick drying time. Perfect for those weekend tile projects that need to be done in a jiffy.
When choosing an adhesive, consider the specific requirements of your project. Factors such as tile type, environmental conditions, and moisture exposure all play a role in determining the best adhesive for the job. Some specialized adhesives may require additional preparation, such as roughening or cleaning the surface of the tiles before application.
To ensure optimal results, always read and follow the manufacturer’s instructions carefully. This will help you achieve maximum adhesion and longevity for your tile installation. And let’s not forget about grouting and sealing. These additional steps further enhance the durability and longevity of your ceramic tile installation.
If you’re feeling overwhelmed or unsure about which specialized adhesive to choose, don’t hesitate to seek expert advice. Consulting with a professional can provide valuable insights based on their experience and knowledge in the field.
Tips for Using Adhesives on Ceramic Tiles
When it comes to sticking ceramic tiles, choosing the right adhesive is crucial for a successful installation. Not all adhesives are created equal, and using the wrong one can result in tiles that come loose or don’t bond properly.
In this post, we’ll explore some tips for using adhesives on ceramic tiles to ensure a strong and long-lasting bond. So let’s dive in and stick it right.
Cleanliness is Key:
Before applying the adhesive, make sure the tile surface is squeaky clean. Wipe away any dirt, dust, or debris using a damp cloth or mild detergent. A clean surface ensures a strong bond between the adhesive and the tiles.
Apply Evenly:
Applying the adhesive evenly is crucial for a smooth and secure installation. Use just the right amount of adhesive – too much can create a messy finish, and too little may not provide enough bonding strength. Follow the manufacturer’s instructions to ensure precise application.
Choose the Right Trowel:

Selecting the correct trowel size is essential for proper adhesive application. Notched trowels create ridges on the surface, enhancing adhesion between the tiles and the substrate. Match the size of the notches on the trowel to your tile size for optimal results.
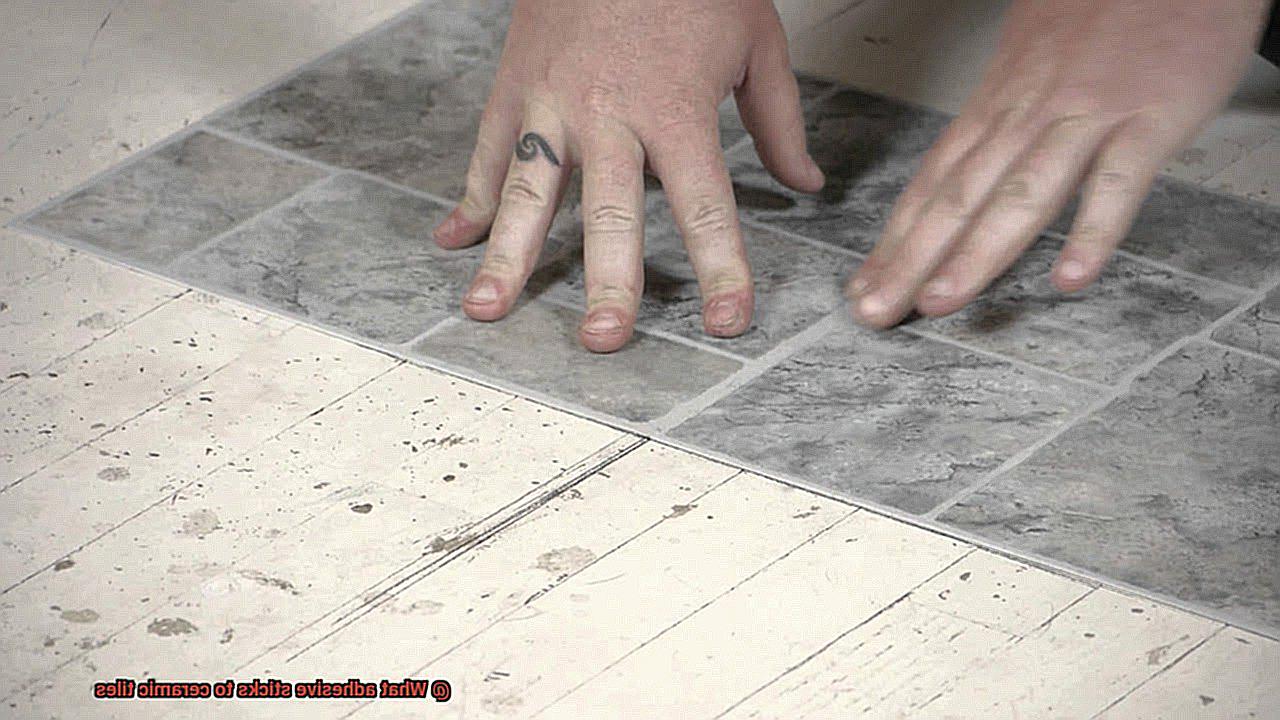
Press Firmly:
Once you’ve placed the tiles onto the adhesive, press them firmly and evenly into place. This eliminates air pockets and guarantees a strong bond. Gently tap each tile into position using a rubber mallet or wooden block.
Patience Pays Off:
Allow sufficient drying time for the adhesive before grouting. Rushing this step can compromise tile bonding, leading to loose or cracked tiles. Follow the manufacturer’s instructions regarding drying time, typically ranging from 24 to 48 hours.
Handle with Care:
Freshly installed ceramic tiles need some tender loving care. Protect them from excessive moisture or heavy foot traffic until the adhesive has fully cured. Use temporary barriers or warning signs to prevent accidental damage.
Alternatives to Adhesives for Ceramic Tiles
I shall unveil a world of alternatives that will leave you awestruck. Adhesives may be the usual suspects, but there are other methods that can forge a robust and unyielding bond between your tiles and their designated surface.
Let us commence with the mighty mortar or thinset, a concoction of sand, cement, and water that reigns supreme in the realm of tiling. These superhero mixtures bestow an unwavering connection, making them ideal for grand undertakings like flooring or walls. Should you seek a thinner layer of adhesive for more modest projects, look no further than thinset – a modified form of mortar that packs a punch.
For those craving even greater strength, behold the power of epoxy resin. This two-part adhesive boasts superior might and endurance, rendering it perfect for areas prone to water exposure or hefty loads. As if that weren’t impressive enough, it can even serve as a substitute for grout.
But perhaps adhesives have lost their allure in your eyes. In that case, mechanical fastening beckons with open arms. Picture screws, nails, or clips steadfastly securing each tile in place. This method thrives in commercial spaces or outdoor installations where frequent tile replacement may be required.
And if convenience and effortless installation are your heart’s desire, fear not. Tile systems exist that eliminate the need for adhesives altogether. These interlocking marvels fit together like puzzle pieces, granting you a secure and stable installation. Perfect for temporary setups or areas requiring easy removal and reinstallation.
Before you embark on this thrilling journey into alternative territory, hearken to a word of caution. Consider tile size and weight, surface condition, and environmental factors when selecting your preferred method. Only then shall you uncover the perfect alternative to adhesives for your ceramic tiles.
qrNu0g_zC74″ >
Conclusion
In conclusion, when it comes to finding an adhesive that sticks to ceramic tiles, there are several options available. From epoxy adhesives to construction adhesives, the key is to choose a product specifically designed for bonding ceramics. These adhesives offer strong and durable bonds, ensuring your tiles stay in place for years to come.
Epoxy adhesives are particularly effective for ceramic tile installations. They provide excellent bonding strength and can withstand high temperatures and moisture. With their ability to create a permanent bond, epoxy adhesives are ideal for projects where longevity is crucial.
Construction adhesives are another reliable choice for ceramic tiles. These adhesives are formulated to adhere well to various surfaces, including ceramics. They offer good initial tack and provide a strong bond once cured. Construction adhesives also have the added benefit of being resistant to water and extreme temperatures.
When using any adhesive on ceramic tiles, it’s important to prepare the surface properly. Clean the tiles thoroughly and remove any dirt or debris before applying the adhesive. Additionally, ensure that both the tiles and the substrate are dry before starting the installation process.
In summary, whether you’re working on a small DIY project or a large-scale tile installation, choosing the right adhesive is essential for ensuring your ceramic tiles stay securely in place. Consider using epoxy or construction adhesives specifically designed for ceramics, and follow proper surface preparation techniques for optimal results.