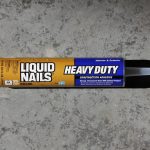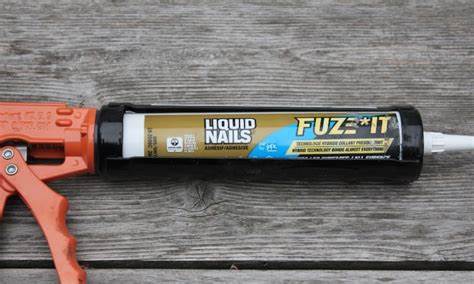
Liquid nails are a popular adhesive product used for bonding a variety of materials together.
It is an excellent choice for many DIY projects and home repairs, as it provides a strong, durable bond that can last for years.
We’ll go over everything you need to know about liquid nail drying times and temperatures in this article.
What is Liquid Nails?
Contents
- 1 What is Liquid Nails?
- 2 How Does Liquid Nails Work?
- 3 What Are the Benefits of Using Liquid Nails?
- 4 What Types of Materials Can You Use with Liquid Nails?
- 5 How to Prepare a Surface for Applying Liquid Nails
- 5.1 Clean the surface
- 5.2 Prime the surface
- 5.3 Apply Liquid Nails
- 5.4 Clean excess liquid
- 5.5 Apply a second coat if needed
- 5.6 Clean the excess Liquid Nails
- 5.7 Sand the surface with a file
- 5.8 Sand the surface with a sanding block
- 5.9 Clean the surface
- 5.10 Remove the tape strips
- 5.11 Seal the Liquid Nails with a second coat of Liquid Nails
- 5.12 Sand the surface one last time
- 6 Application Tips for Applying Liquid Nails
- 7 Drying Time and Temperature Considerations For Liquid Nails
- 8 Clean Up And Removal Of Liquid Nails
- 9 Conclusion
Liquid Nails is a construction adhesive that creates an incredibly strong bond between two surfaces.
It is designed to be used on wood, metal, glass, ceramic tile, and many other surfaces. It comes in several different forms, including tubes and spray cans.
How Does Liquid Nails Work?
When applied correctly, liquid nails work by forming a chemical bond between two surfaces.
The adhesive will penetrate into the pores of the material being bonded and create a strong bond. This bond will remain even after being exposed to extreme temperatures or moisture.
What Are the Benefits of Using Liquid Nails?
The main benefit of using liquid nails is their strength and durability.
It creates an incredibly strong bond that can last for years without breaking down or becoming loose over time.
Additionally, it does not require nails or screws to hold materials together, which makes it ideal for bonding pieces that would otherwise be difficult to attach with traditional fasteners.
What Types of Materials Can You Use with Liquid Nails?
Liquid nails can be used on almost any type of material, including wood, metal, plastic, glass, ceramic tile, and more.
However, some materials may require special preparation before applying the adhesive in order to ensure the strongest possible bond.
How to Prepare a Surface for Applying Liquid Nails
Home improvement projects can be challenging, especially when you need to attach small fixtures like shelves or doors to a wall.
To do this, you’ll need an adhesive like Liquid Nails, which dries strong and tough. When you apply liquid nails, you need to apply an even coat over the entire surface.
This way, the adhesive will bond strongly with the surface. Here is a step-by-step guide on how to prepare a surface for applying liquid nails.
Clean the surface
Start by cleaning the surface with a wet cloth and wiping off dust and debris. This will create a clean, dry surface for the adhesive to bond to.
Prime the surface
Apply the Liquid Nails Primer to the surface and let it dry for 10 minutes. This provides a strong bond for the liquid nails to bond to.
Apply Liquid Nails
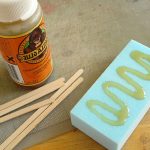
Apply an even coat of Liquid Nails to the surface using a paint brush or a roller. The paint should dry in 15 minutes.
Clean excess liquid
Wipe off any excess liquid nails with a wet cloth and let it dry.
Apply a second coat if needed
Add a second coat of Liquid Nails on top of the first coat and let it dry for 10 minutes.
Clean the excess Liquid Nails
Wipe off any excess liquid nails with a wet cloth and let it dry.
Sand the surface with a file
Go over the surface with a file to smooth out the liquid nails and remove any bubbles that may appear. This will further improve the bond of the liquid nails to the surface.
Sand the surface with a sanding block
Using a sanding block, go over the surface again to remove dust or debris and get the surface smooth again.
Clean the surface
Wipe off the liquid nails with a wet cloth and let them dry.
Remove the tape strips
Remove the tape strips after 24 hours and let the liquid nails dry for 24 hours.
Seal the Liquid Nails with a second coat of Liquid Nails
Apply a second coat of Liquid Nails over the surface and let it dry for 24 hours.
Sand the surface one last time
Go over the surface with a file to smooth out the liquid nails and remove any bubbles that may appear. This will further improve the bonding of the liquid nails.
Application Tips for Applying Liquid Nails
Knowing when to apply liquid nails properly can help you complete your tasks faster, especially when you are doing household repairs.
Liquid nails are a superglue that bonds wood, metal, concrete, and more. Liquid nails come in both clear and colored varieties, and depending on the length of your project, you can purchase either.
Liquid nails are very easy to use, but there are some things you should know before applying them.
Liquid nails work best when surfaces are clean and dry, so remove any dirt or dust from your surface before applying the liquid nails. For projects that will require liquid nails to bond metal, sand the surface first to ensure that the liquid nails have a solid base to stick to.
Liquid nails work best when applied straight from the bottle or tube, but if you need to apply liquid nails to a surface that is curved or irregularly shaped, apply the liquid nails with a brush. This will make it easier to apply the glue evenly to your surface.
Liquid nail varnish dries quickly, but for best results, you should let the liquid nail varnish cure for at least 24 hours before touching the surface. This will give the liquid nails a chance to dry completely.
Liquid nail is waterproof once it’s dried, but for better results, you should wipe off any excess liquid nail that drips off your project. Liquid nails dry quickly and are difficult to remove once dry.
Drying Time and Temperature Considerations For Liquid Nails
Liquid nails are a type of liquid adhesive that is commonly used for liquid nail projects.
Liquid nails dry fast, so it’s important to keep the temperature low while drying them. If liquid nail polish dries in a hot environment, it will change color and become brittle.
Also, if liquid nails dry in a cold environment, they will not dry properly. The optimal temperature for drying liquid nails is between 60 and 70 degrees Fahrenheit.
Clean Up And Removal Of Liquid Nails
This guide will help you clean up and remove liquid nails from any surface.
Liquid nail is a glue popular in the construction industry because it dries quickly, bonds strongly, and forms a permanent bond. However, liquid nail is notorious for becoming hard to remove once it dries, which makes it a hassle to clean up.
Fortunately, cleaning up liquid nails is not that difficult if you follow a few simple tips. First, make a mixture with 1 gallon of warm water and 2 tablespoons of liquid detergent.
Then, apply the detergent mixture to any surface that’s stained with liquid nail. Next, apply more detergent to any surfaces that still have liquid nails on them.
Finally, use a razor blade to scrape off any leftover liquid nail.
Also Read: What Is Liquid Nails Used For?
Conclusion
In conclusion, Liquid Nails has different drying times at different temperatures.
At the room temperature of 73 degrees, liquid nails take 30 minutes to dry. At 80 degrees, it takes 15 minutes to dry.
At 90 degrees, it only takes 5 minutes to dry. Therefore, when the temperature is above 80 degrees, you should use liquid nails.