In the vast universe of DIY projects and construction, finding an adhesive that can truly stand the test of time is like discovering a hidden treasure. We all crave a bond that goes beyond fleeting moments, one that firmly holds our creations together for years to come. Enter Liquid Nails, a name that echoes through workshops and job sites alike, promising extraordinary strength and unmatched versatility.
But let’s face it: not all glues are cut from the same cloth. And so, the burning question lingers in the minds of every DIY enthusiast: Is Liquid Nails permanent? Tired of being let down by inferior alternatives, we yearn for a solution that guarantees our hard work won’t crumble under pressure.
So here we are, ready to embark on an exhilarating journey into the realm of Liquid Nails’ permanence—a quest that will unveil the secrets behind this beloved bonding agent and deliver an honest verdict on its long-lasting potential.
Get ready to dive headfirst into the captivating world of adhesive science as we separate fact from fiction. Brace yourself for an exploration that will leave you armed with knowledge and equipped to decide if Liquid Nails is truly the permanent adhesive solution your projects have been longing for.
Without further ado, let’s unleash the power of Liquid Nails and uncover whether it stands tall as a beacon of permanence or simply fades away with time.
Factors Affecting the Permanence of Liquid Nails
Contents
- 1 Factors Affecting the Permanence of Liquid Nails
- 2 Different Types of Liquid Nails for Different Applications
- 3 The Application Process of Using Liquid Nails
- 4 Curing Time for Maximum Bond Strength
- 5 Factors That Can Impact the Longevity of a Bonded Surface
- 6 Advantages of Using Liquid Nails Over Other Adhesives
- 7 Disadvantages of Using Liquid Nails
- 8 Tips for Ensuring Maximum Bond Strength and Durability
- 9 Conclusion
When it comes to bonding materials, Liquid Nails is a go-to adhesive for many DIY enthusiasts and professionals alike. However, ensuring a strong and long-lasting bond requires understanding the factors that can affect its permanence. In this article, we will explore the key elements that influence how well Liquid Nails sticks, providing you with valuable insights for achieving optimal results.
First and foremost, surface preparation is crucial. Before applying Liquid Nails, take the time to clean the surfaces thoroughly. Remove any dust, grease, or loose particles that could hinder the adhesive’s ability to create a strong bond. A clean and dry surface is essential for maximizing the permanence of Liquid Nails.
Material compatibility is another important factor to consider. Different formulations of Liquid Nails are designed for various materials. To ensure optimal bonding strength and longevity, select the right type of Liquid Nails that suits the materials you are working with. This compatibility factor plays a significant role in determining how well the adhesive binds different surfaces.
Temperature and humidity also play a vital role in the permanence of Liquid Nails. Extreme temperatures can either slow down or speed up the curing process, affecting the bond’s strength and permanence. Similarly, high humidity levels can prolong curing time and weaken the adhesive’s performance. Follow the manufacturer’s guidelines regarding temperature and humidity conditions during application for optimal results.
A well-designed joint or seam helps distribute stress evenly across the bonded area, enhancing the adhesive’s ability to withstand movement and load-bearing. Pay attention to factors such as joint width, depth, and geometry when designing your joint for a stronger and more durable bond.
Applying Liquid Nails evenly and sufficiently on both surfaces is essential for a strong bond. Avoid excess or insufficient application of adhesive, as both can compromise its effectiveness. Additionally, proper clamping or support during the curing process helps maintain consistent pressure, improving the bond’s strength and durability.
The long-term permanence of Liquid Nails is influenced by environmental conditions such as sunlight, moisture, chemicals, and temperature fluctuations. Choosing a specific formulation of Liquid Nails designed for outdoor or high-moisture applications enhances its resistance to these factors, improving its longevity.
Different Types of Liquid Nails for Different Applications
The key to success lies in selecting the perfect adhesive that ensures a durable and long-lasting bond. Look no further than Liquid Nails. With its wide range of options, Liquid Nails has become a favorite among DIY enthusiasts and professionals alike.
In this article, we will delve into the different types of Liquid Nails available and their specific applications. By understanding these options, you can confidently choose the ideal adhesive for your project.
Original Liquid Nails – A Versatile Superhero:
Imagine having a superhero-like adhesive that can bond almost anything. Enter Original Liquid Nails, capable of forming strong and durable bonds between wood, metal, concrete, ceramics, and more.
This versatile adhesive offers reliable performance for both indoor and outdoor applications. Repairing furniture or installing baseboards? Original Liquid Nails is your go-to adhesive.
Heavy Duty Liquid Nails – Where Strength Meets Durability:
For heavy-duty projects that demand extra strength, Heavy Duty Liquid Nails is your steadfast companion. Formulated specifically for plywood, particleboard, and treated lumber, this adhesive can tackle the toughest jobs with ease.
Whether you’re building shelves or securing countertops, Heavy Duty Liquid Nails promises a bond that withstands the test of time.
Subfloor and Deck Construction Adhesive – Stability and Serenity:
Tired of creaky floors driving you insane? Fear not. Subfloor and Deck Construction Adhesive comes to the rescue. Designed for installing subfloors and decks, this specialized adhesive ensures a robust and enduring bond that eliminates those pesky squeaks.
Mirror Adhesive – Reflecting Perfection:
When it’s time to bond mirrors to various surfaces, trust Mirror Adhesive as your secret weapon. This specially formulated adhesive not only provides excellent adhesion but also prevents damage or discoloration to the mirror over time. Whether you’re hanging a mirror in your bathroom or creating a captivating statement piece in your living room, Mirror Adhesive will keep it securely in place.
Specialized Formulas – Tailored Solutions:
In addition to the main types of Liquid Nails, specialized formulas exist for specific applications. Need to install drywall or paneling? There’s an adhesive for that. These specialized formulas offer tailored solutions, ensuring a strong and reliable bond every single time.
The Application Process of Using Liquid Nails
To achieve optimal results, follow these steps in the application process.
- Preparation: Before applying Liquid Nails, ensure that your surface is squeaky clean. Clear away any dirt or debris and give it a thorough wipe down. Let it dry completely to guarantee a strong bond that will stand the test of time.
- Application: Now comes the fun part. Squeeze out Liquid Nails onto your surface in a zigzag or dot pattern, depending on the size of your project and the materials you’re working with. You want enough adhesive to create a strong bond, but not too much that it starts oozing out like a volcano.
- Bonding: Once you’ve applied the adhesive, it’s time to bring those surfaces together. Press them firmly and hold them in place for a few minutes to allow the adhesive to work its magic. For extra security, consider using clamps or any other means of keeping those materials snug as they cure.
- Curing Time: Ah, the waiting game we all love. The time it takes for Liquid Nails to fully cure can vary depending on factors like temperature and humidity. Check the product packaging for specific guidelines on curing time to be safe. Remember, patience is a virtue.
- Clean up: Once your Liquid Nails has fully cured, it’s time to clean up any excess adhesive that might be hanging around. Grab yourself a trusty putty knife or similar tool and carefully remove any visible adhesive without harming those bonded materials.
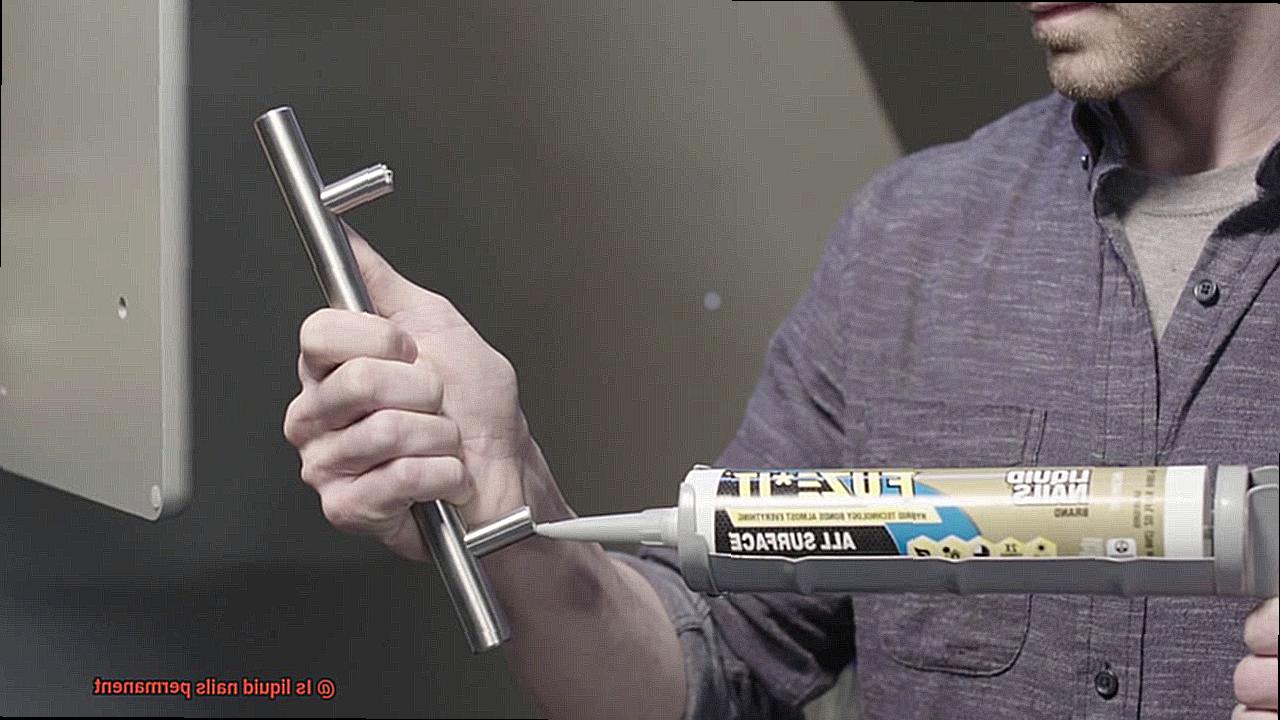
It’s important to note that Liquid Nails may not be suitable for every project or material out there. Always read the product instructions and consult with professionals if you’re unsure about compatibility. Safety first.
Curing Time for Maximum Bond Strength
Look no further. Today, we delve deep into the world of curing time for maximum bond strength when using Liquid Nails. Get ready to unveil the mysteries surrounding temperature, humidity, and materials in this sticky game.
Temperature: The Goldilocks Effect:
Just like Goldilocks and her porridge, temperature plays a crucial role in achieving the perfect bond with Liquid Nails. Too hot or too cold can lead to less-than-optimal results. In warmer temperatures, the curing time is accelerated, ensuring a faster bond. On the flip side, chilly conditions can slow down the process, so it’s best to avoid gluing during an Arctic blast.
Humidity: Friend or Foe?
Humidity levels can be your best ally or your greatest adversary when it comes to curing time. Higher humidity slows down the drying process, allowing for a more thorough bond.
However, if you find yourself in a dry environment, rejoice. Low humidity speeds things up, allowing you to complete your project in record time.
Materials: The Unsung Heroes:
Did you know that the materials being bonded also have a say in curing time? Porous surfaces such as wood or concrete tend to absorb some of the adhesive, which can extend the curing time. On the other hand, non-porous surfaces like metal or glass require less patience since they don’t absorb as much. So, choose your materials wisely and consider their impact on curing time.
The Waiting Game:
Now that you’ve applied Liquid Nails like a seasoned pro, it’s crucial to resist the temptation to rush things. Patience is key. Waiting for at least 24 hours allows Liquid Nails to reach its maximum bond strength. Trust us, your future self will thank you.
Factors That Can Impact the Longevity of a Bonded Surface
Unlocking the Secrets to a Lasting Bond: Factors That Impact the Longevity of a Bonded Surface
Introduction:
Have you ever experienced the frustration of a bond that just won’t hold? Whether you’re a DIY enthusiast or a professional craftsman, understanding the factors that can impact the longevity of a bonded surface is crucial for achieving successful and long-lasting results.
In this article, we delve into the world of adhesives and explore how factors such as adhesive quality, surface preparation, materials being bonded, environmental conditions, application technique, and maintenance can all play a role in determining the strength and durability of your bond.
Quality is Key:
Firstly, the quality of the adhesive itself is paramount. Not all adhesives are created equal. Liquid Nails, a trusted brand in the industry, offers a range of high-quality adhesives tailored for different purposes. It’s important to choose the right Liquid Nails product that matches your specific needs, whether you require temporary or permanent bonding.
Surface Preparation Matters:
Achieving a strong bond starts with proper surface preparation. Before applying any adhesive, ensure that the surfaces to be bonded are clean, dry, and free from contaminants. Dust, grease, or residue can compromise the adhesion process and weaken the bond over time.
Materials Make a Difference:
Consider the types of materials you’re bonding together. Liquid Nails is compatible with various materials like wood, metal, concrete, and ceramic. However, some materials may require additional treatments or primers to enhance adhesion and ensure a lasting bond.
Environmental Factors:
The environment in which your bonded surface will be exposed plays a significant role in its longevity. Temperature fluctuations, humidity levels, UV exposure, and moisture can all affect the performance of adhesives. Select an adhesive formulation that is suitable for your specific environmental conditions to maximize bond strength.
Mastering Application Technique:
Applying adhesive properly is crucial for a strong and durable bond. Follow the manufacturer’s instructions, ensuring even coverage and the appropriate amount of adhesive. Thin or uneven application can result in weak adhesion, compromising the longevity of the bond.
Maintenance and Care:
Even with high-quality adhesives, regular maintenance and proper care are essential for maintaining the integrity of the bond over time. Avoid subjecting the bonded surface to excessive stress, impact, or harsh chemicals that can weaken or damage the bond. Regular inspections and prompt repairs are key to prolonging the longevity of your bond.
Advantages of Using Liquid Nails Over Other Adhesives
In the vast world of adhesives, one product reigns supreme – Liquid Nails. This exceptional adhesive has become an essential tool in construction and DIY projects due to its unparalleled bonding power, versatility, ease of use, rapid drying time, resistance to moisture and heat, and its ability to be painted and sanded. Today, we will delve into the advantages of using Liquid Nails over other adhesives, showcasing why it is the go-to choice for professionals and DIY enthusiasts alike.
Unmatched Bonding Power:
Liquid Nails is not your average adhesive; it is a true force to be reckoned with. Regardless of whether you are working with wood, metal, concrete, or ceramics, this adhesive creates an incredibly strong and durable bond that can withstand heavy loads and temperature fluctuations. Say goodbye to weak connections and welcome a long-lasting bond that will never let you down.
Versatility at Its Finest:
Why bother purchasing multiple adhesives when you can have one that does it all? Liquid Nails is the ultimate jack-of-all-trades adhesive that can handle both interior and exterior projects with ease. Whether you are installing drywall, repairing furniture, or securing molding, Liquid Nails is your versatile solution for a wide range of materials and surfaces. With this adhesive in your toolkit, you will be prepared for any project that comes your way.
Effortless Application:
Struggling with a complicated adhesive application process is a thing of the past. Thankfully, Liquid Nails is renowned for its user-friendly experience. Available in convenient tubes or cartridges, applying this adhesive is a breeze. Simply squeeze it out with a caulking gun or apply it directly from the container. The consistency of Liquid Nails allows for smooth and even application, eliminating the hassle of uneven bonding or messy results.
Swift Drying Time:
Time is of the essence in any construction project, and Liquid Nails understands that perfectly. While drying times may vary depending on factors like humidity and temperature, most variants of Liquid Nails offer initial bonding within 24 hours. This fast-drying property allows for efficient progress, saving you precious time and ensuring your project moves along smoothly.
Battle-Tested Resistance:
Liquid Nails fearlessly faces challenging conditions head-on. Its exceptional resistance to moisture and heat makes it a trustworthy choice for both indoor and outdoor applications. Unlike some adhesives that weaken or break down when confronted with these challenges, Liquid Nails maintains its strength and durability, guaranteeing that your bond remains steadfast. So whether you are working in a humid bathroom or under the scorching sun, rest assured that your connection will remain intact.
Disadvantages of Using Liquid Nails
However, before diving in headfirst, it’s important to consider the drawbacks of using Liquid Nails. In this article, we will explore these disadvantages to help you make an informed decision for your next project.
Slow Drying Time:
One major drawback of Liquid Nails is its notoriously long drying and curing time. While this feature can be advantageous in certain situations that require repositioning or readjustment, it can be frustrating for those who need a quick and immediate bond. If time is of the essence, alternatives like instant adhesives or epoxy may be a better fit.
Limited Compatibility:
Not all surfaces or materials are created equal, and neither is Liquid Nails’ compatibility. It is crucial to carefully read the product label and instructions to ensure that it is suitable for the materials you are working with. Certain plastics or metals, for example, may not adhere well with this adhesive, making it less versatile in some situations.
Weaker Bonding Strength:
While Liquid Nails is effective in many applications, there may be instances where a stronger bond is required. Construction adhesives or structural epoxies provide superior strength and are preferred for heavy-duty projects where durability is key. Assess your bonding needs to determine if Liquid Nails will suffice or if a stronger alternative is necessary.
Strong Odor:
The pungent odor emitted by Liquid Nails can be off-putting and overwhelming, especially for individuals sensitive to strong smells or working in poorly ventilated spaces. To minimize exposure and discomfort, it is essential to use this adhesive in well-ventilated areas or consider wearing a mask for added protection.
Limited Resistance to Extreme Conditions:
Liquid Nails may not be as resistant to extreme temperatures or moisture as some other adhesives. This limitation can hinder its effectiveness in outdoor applications or environments with high humidity levels. If you are embarking on an outdoor project or need an adhesive that can withstand moisture, specialized options designed for these conditions would be more suitable.
Difficult Removal and Potential Surface Damage:
Removing Liquid Nails can be a painstaking process that often results in damage to the underlying surface. This can be problematic if you need to remove the adhesive or undo the bond. Exercise caution and follow manufacturer instructions when attempting to remove Liquid Nails, or consider seeking professional advice if unsure.
Tips for Ensuring Maximum Bond Strength and Durability
Introduction
Liquid Nails, an adhesive marvel, has the power to create unyielding bonds between various materials. Whether you’re a DIY enthusiast or a seasoned construction professional, achieving maximum bond strength and durability is paramount. By following these expert tips, you’ll be well on your way to creating unbreakable bonds with Liquid Nails.
Tip 1: Choose the Right Liquid Nails
Not all Liquid Nails are created equal. There are specific formulas tailored for different applications, from heavy-duty construction to paneling, molding, and even landscaping. Selecting the appropriate adhesive type for your project is essential to ensure the best results.
Tip 2: Prepare the Surfaces Properly
Before applying Liquid Nails, invest time in meticulous surface preparation. Thoroughly clean the surfaces to banish any dirt, dust, or grease that could sabotage the bonding process. Ensure complete dryness and eliminate any existing adhesive residue or paint using suitable cleaners or solvents. For smooth surfaces, unleash the power of sandpaper to roughen them up, enhancing adhesion.
Tip 3: Apply Evenly and in the Right Amount
The secret to success lies in uniform application of Liquid Nails. Utilize a caulk gun or other appropriate applicator to dispense a continuous bead of adhesive on both surfaces to be bonded. Steer clear of excessive or inadequate adhesive usage, as it can compromise bond strength. Consult the manufacturer’s instructions for precise guidance on the ideal amount of adhesive required.
Tip 4: Allow Sufficient Curing Time
Patience is your guiding light on the path to maximum bond strength with Liquid Nails. Once applied, give the adhesive ample time to cure. Curing duration depends on factors such as temperature, humidity, and the materials being bonded. Refer to the manufacturer’s instructions for recommended curing times. Avoid subjecting the bonded surfaces to stress or movement until they have fully cured.
Tip 5: Apply Pressure During Bonding
To forge an invincible bond, exert pressure on the bonded surfaces after joining them with Liquid Nails. Employ clamps, weights, or any suitable method to apply pressure. This eliminates pesky air pockets and ensures intimate contact between the adhesive and the surfaces being bonded.
Conclusion
Liquid Nails, the popular construction adhesive, is known for its strong bonding capabilities. But is it truly permanent? The answer lies in understanding its properties and intended use.
Liquid Nails is designed to create a durable bond between various materials such as wood, metal, concrete, and ceramics. Its advanced formula allows it to withstand extreme temperatures, moisture, and vibrations. When applied correctly and given sufficient time to cure, Liquid Nails can provide a long-lasting and reliable bond.
However, it’s important to note that the term “permanent” can be subjective in the world of adhesives. While Liquid Nails offers exceptional strength and durability, there may be certain circumstances where the bond could weaken over time.
Factors such as exposure to harsh weather conditions or constant movement can potentially affect the adhesive’s performance. Additionally, improper application or inadequate surface preparation can compromise the bond’s longevity.
To ensure the best results with Liquid Nails, it is crucial to follow the manufacturer’s instructions carefully. This includes properly cleaning and preparing the surfaces before applying the adhesive and allowing sufficient curing time as specified on the product packaging.
In conclusion, while Liquid Nails provides a strong and reliable bond for most applications, calling it “permanent” might be stretching the truth. It is more accurate to say that Liquid Nails offers a long-lasting solution when used correctly and under appropriate conditions.

