Are you tired of staring at that outdated, peeling wallpaper in your home?
Sick of its stubborn presence, you’ve pondered the idea of painting over it. But here’s the burning question: is it actually acceptable to slap on some paint and call it a day?
Don’t worry, my friend, because you’re not alone in this predicament. Many homeowners have found themselves trapped in the clutches of wallpaper glue uncertainty.
The mere thought of battling with that sticky residue can send shivers down your spine. So, let’s embark on this journey together as we explore whether it’s alright to paint over that pesky wallpaper glue.
Buckle up and get ready to bid farewell to that dated wallpaper as we embrace a fresh new look for your walls.
Assessing the Condition of Wallpaper Glue
Contents
- 1 Assessing the Condition of Wallpaper Glue
- 2 Assessing the Condition of Wallpaper Glue (continued)
- 3 Types of Paints and Their Adhesion Properties
- 4 Desired Outcome: Smooth and Flawless Finish
- 5 Using Primer Before Painting Over Wallpaper Glue
- 6 Step-by-step Guide: Painting Over Wallpaper Glue
- 7 Step-by-step Guide: Painting Over Wallpaper Glue (continued)
- 8 Common Issues and Troubleshooting Tips
- 9 Conclusion
When it comes to painting over wallpaper glue, it’s essential to assess its condition beforehand. Don’t let a shoddy glue job ruin your paint job. In this comprehensive guide, we’ll take you through the step-by-step process of assessing the condition of wallpaper glue, ensuring that you achieve the best results for your paint job.
Step 1: Visual Inspection
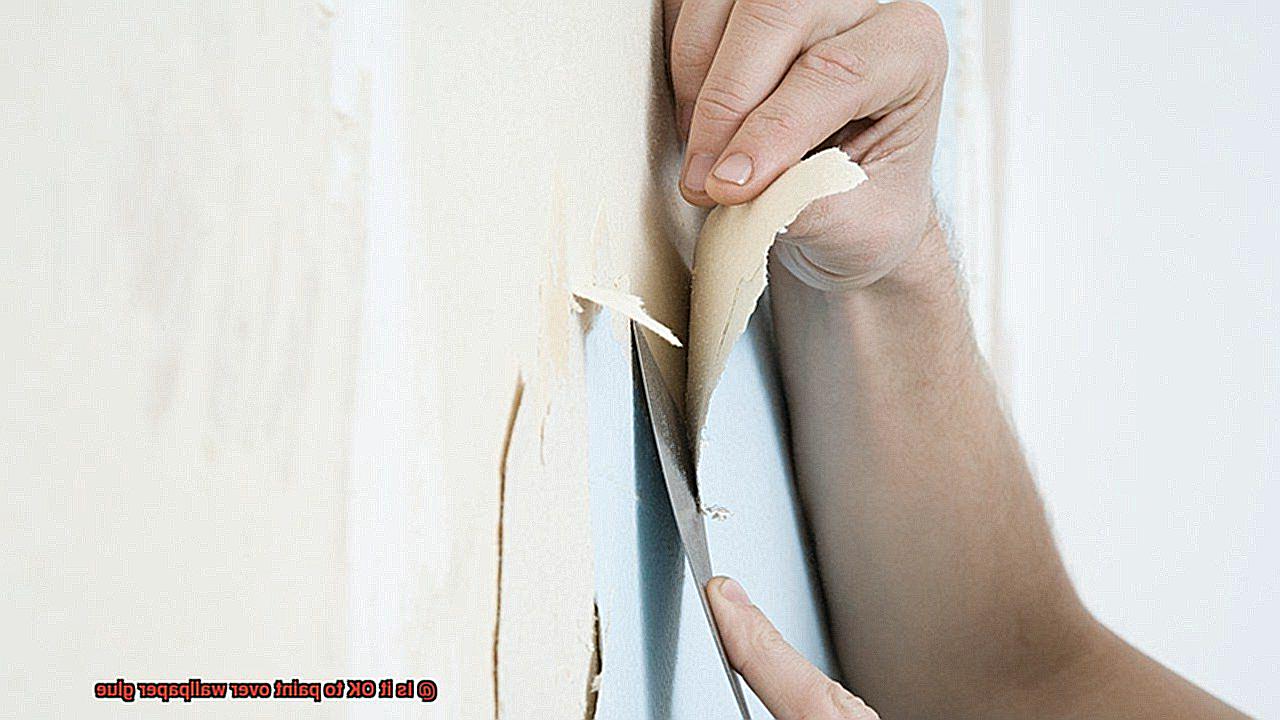
First things first, let’s visually inspect those walls. Get up close and personal with your wallpaper and look for any visible signs of damage or deterioration. Keep an eye out for those trouble spots where the wallpaper is loose or peeling away. If you notice that the glue is crumbling or flaking off, red flags should be waving in your mind. It’s an indication that this glue may not provide a stable base for paint. In such cases, removing both the wallpaper and the glue before painting is your best bet for a flawless finish.
Step 2: Conduct a Moisture Test
Moisture can be a sneaky saboteur when it comes to painting over wallpaper glue. To check if you’re dealing with a damp disaster, perform a moisture test. Grab a piece of plastic wrap and press it against the wall. Leave it there overnight, and then inspect the results in the morning. If you find condensation forming on the inside of the plastic wrap, Houston, we have a problem. It suggests that there may be trapped moisture behind the wallpaper, and painting over damp conditions is like building on quicksand – it’s destined to fail. In such cases, removing the wallpaper and glue is advised to prevent further damage.
Step 3: Consider the Age of the Wallpaper and Glue
Age ain’t just a number when it comes to wallpapers and their adhesive sidekicks. Older wallpapers tend to have weaker adhesive properties, which can result in a less-than-stellar bond between the glue and paint. So, take a moment to ponder the age of your wallpaper and glue. If they’ve been hanging around for several years, it may be time to say sayonara and remove both the wallpaper and glue before painting. This little extra effort will ensure a more durable and long-lasting finish.
Step 4: Evaluate the Type of Paint
Different types of paint have their own effects on wallpaper glue. Let’s get specific here. Oil-based paints, for example, pack a punch with their strong solvent content. They can dissolve weak or deteriorated glue faster than a speeding bullet. So, if you’re thinking of going the oil-based route, it’s advisable to remove the glue beforehand. On the other hand, latex or water-based paints are more forgiving. They tend to adhere better to intact glue, making it possible to paint over it without causing any issues.
Assessing the Condition of Wallpaper Glue (continued)
Before you crack open those paint cans, let’s not overlook a crucial step – assessing the condition of your wallpaper glue. Trust me, you don’t want a subpar glue job ruining your masterpiece.
So, what exactly should you be looking for when determining if it’s okay to paint over wallpaper glue? Let me break it down for you:
- Adhesion: Take a close look at the wall surface and check if the glue is still firmly stuck in place. No signs of peeling or lifting? Fantastic. You’re good to go. But if you spot any areas where the glue is loose or peeling off, it’s best to remove it entirely before painting.
- Compatibility: Some wallpaper glues contain substances that can react negatively with certain types of paint. To avoid issues like poor adhesion or discoloration, consult with a professional or conduct a compatibility test. Make sure your glue and paint will play nicely together.
- Wall Condition: While you’re assessing the glue, don’t forget to evaluate the condition of the wall itself. Check for visible damages like cracks, holes, or water damage. Don’t ignore these issues; address and repair them before painting over the wallpaper glue. Trust me; you don’t want them causing problems down the line.
- Previous Paint Layers: If you suspect multiple layers of paint hiding beneath that wallpaper glue, it’s time for some detective work. Applying new paint over too many layers can stress out your walls and lead to bubbling or cracking. Check for old layers and consider removing them or consulting a pro for advice.
By considering adhesive properties, compatibility with paint, wall condition, and previous paint layers, you’ll make an informed decision on whether to paint over the glue or remove it first. This extra step will pay off, giving you a flawless finish that will make your friends green with envy.
Types of Paints and Their Adhesion Properties
Painting over wallpaper glue can be a cost-effective way to update your walls without the hassle of removing the wallpaper. However, it’s essential to choose the right type of paint that will adhere well to the glue and provide a durable and beautiful finish.
In this blog post, we will explore the different types of paints and their adhesion properties to help you make an informed decision.
Latex Paint:
Latex paint is a popular choice for many homeowners due to its ease of use and quick drying time. It is water-based and has excellent adhesion properties, making it suitable for painting over wallpaper glue. Latex paint forms a flexible and durable film that can adhere well to different surfaces, including wallpaper glue. Its ability to bond effectively with the glue ensures a long-lasting finish that won’t peel or crack easily.
Oil-Based Paint:
Oil-based paint is known for its durability and longevity. It provides a smooth and glossy finish but requires longer drying time compared to latex paint. Oil-based paint generally has good adhesion properties and can effectively cover wallpaper glue. However, it is important to ensure that the wallpaper glue is clean and free from any residues before applying oil-based paint. This will ensure optimal adhesion and prevent any issues with the paint sticking properly.
Acrylic Paint:
Acrylic paint is a versatile type of paint that can be used on various surfaces, including walls with wallpaper glue. It is water-based like latex paint but dries to form a hard and durable finish. Acrylic paint has excellent adhesion properties and can effectively bond to wallpaper glue when applied correctly. Its ability to adhere well to the glue ensures a smooth and even surface, resulting in a professional-looking finish.
Water-Based Paint:
Water-based paint, such as latex and acrylic paints, is commonly used for interior painting projects due to its low odor and ease of cleanup. Water-based paints generally have good adhesion properties and can adhere well to wallpaper glue. However, it is important to ensure that the wallpaper glue is completely dry before applying water-based paint to prevent any issues with adhesion. This will ensure that the paint sticks properly and provides a seamless and long-lasting finish.
Surface Preparation:
Before painting over wallpaper glue, it is crucial to properly prepare the surface to ensure optimal adhesion and a smooth finish. Here are some steps to follow:
Clean the Surface:
Remove any loose or peeling wallpaper glue using a scraper or sandpaper. Wipe the surface clean with a damp cloth to remove any dust or debris. This will create a clean and smooth surface for the paint to adhere to.
Desired Outcome: Smooth and Flawless Finish
The thought of removing all that glue can be overwhelming, but fear not. I’m here to share with you the secrets to achieving a smooth and flawless finish when painting over wallpaper glue.
Let’s dive into the nitty-gritty. Painting over wallpaper glue is a great option because it saves you time and money, and allows for creative freedom with wall colors and designs. Plus, with the right techniques, you won’t even be able to tell there was ever any glue there in the first place.
To start, properly prepare the wallpaper glue. Remove any residual glue or adhesive by scrubbing the walls with warm water and mild detergent. This will eliminate dirt, grime, and excess glue that may be lingering around.
Once the walls are clean, allow them to dry completely. Moisture can interfere with paint adhesion, so ensure they’re dry as a bone.
Next, prime the walls. Priming is essential when painting over wallpaper glue as it creates a barrier between the old glue and new paint, ensuring better adhesion and a smoother finish. Look for primers specifically designed for adhesive surfaces – they work like magic.
After priming, it’s time to apply the paint. Opt for high-quality latex-based paint formulated for walls. These paints adhere well to different surfaces and provide excellent coverage.
When applying the paint, remember patience is key. Use even strokes and apply multiple thin coats instead of one thick coat to avoid streaks, drips, and uneven coverage. Lightly sand between coats for that extra smooth finish.
You’ve successfully painted over wallpaper glue and achieved a smooth and flawless finish. Sit back, relax, and enjoy your newly transformed walls.
Using Primer Before Painting Over Wallpaper Glue
If you’re ready to paint over that outdated wallpaper but find yourself facing the stubborn challenge of wallpaper glue, fear not. I’m here to provide you with expert advice on using primer before painting over wallpaper glue. Trust me, this step is crucial for achieving a flawless and professional finish.
Let’s dive into why using primer is so important. Wallpaper glue can be clingy and prevent your paint from adhering properly. This is where primer comes to the rescue. Acting as a sealant, it creates a protective barrier between the glue and your paint, preventing any interference or reactions that could ruin your hard work.
But wait, there’s more. Primer also plays a vital role in creating a smooth surface for your paint to stick to, minimizing imperfections caused by residual wallpaper glue. After all, nobody wants a bumpy or uneven paint job, right?
Choosing the right primer is key. Look for one specifically designed for use on wallpapered surfaces. These primers are formulated to tackle the challenges posed by stubborn glue, ensuring maximum adhesion and durability.
Now, let’s talk application. When applying the primer, make sure to carefully follow the manufacturer’s instructions. Apply it evenly across the entire wall – no skipping corners. Patience is key here; allow the primer to dry thoroughly before proceeding with painting. Check the instructions for the recommended drying time as it varies depending on the brand and type of primer used.
Once your primer is dry and ready to go, it’s time to unleash your creativity with paint. Opt for a high-quality paint that suits your desired finish – whether it’s matte, satin, or glossy. Depending on how well the primer covers the glue residue, you may need to apply multiple coats for full coverage.
However, it’s important to note that using primer doesn’t guarantee complete elimination of all wallpaper glue problems. In some cases, excessive or poorly applied glue can still cause issues, even with proper priming. If you encounter such challenges, it may be necessary to remove the wallpaper completely before painting.
Step-by-step Guide: Painting Over Wallpaper Glue
Say goodbye to outdated wallpaper without the hassle of removing it. Painting over wallpaper glue can give your walls a fresh and updated look. In this step-by-step guide, we’ll walk you through the process of achieving a smooth and professional finish.
Step 1: Inspect and Prepare
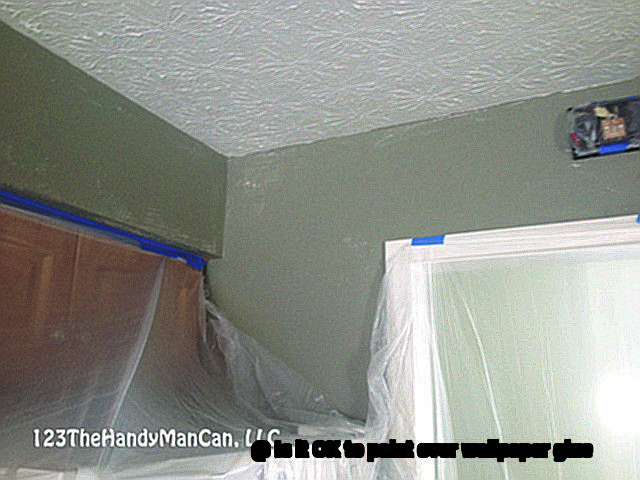
Check the condition of the wallpaper glue. If it’s loose or peeling, remove it. If it’s intact and firmly adhered, you can paint over it. Protect your floor with drop cloths and use painter’s tape to mark off areas that shouldn’t be painted.
Step 2: Clean the Surface
Thoroughly clean the wallpaper surface with warm water and mild detergent. Scrub gently with a sponge or cloth, being careful not to damage or wet the wallpaper too much. Let the surface dry completely before moving on.
Step 3: Apply Primer
Use a primer designed for wallpaper surfaces. This creates a smooth base and improves paint adhesion. Follow the manufacturer’s instructions for application and drying times. The primer acts as a superhero shield against the clingy villain – wallpaper glue.
Step 4: Paint Application
Once the primer is dry, it’s time to paint. Start at one corner of the wall and work across in smooth strokes using a brush or roller. Adjust your painting technique for any patterns or textures on the wallpaper. Let the first coat dry thoroughly before applying more coats if needed, following drying time instructions.
Step 5: Finishing Touches
After achieving your desired paint coverage, remove any painter’s tape and touch up any areas that need attention. Let the final coat dry completely before moving furniture back or hanging decorations.
Step-by-step Guide: Painting Over Wallpaper Glue (continued)
In the previous section, we discussed the importance of properly preparing the wallpaper surface before painting. Now, let’s dive into the nitty-gritty details of how to tackle that stubborn wallpaper glue.
- Assess the condition of the wallpaper glue: Before you begin, take a close look at the glue. Is it loose, peeling, or bubbling? If so, you’ll need to remove it entirely before painting. However, if the glue is intact and firmly adhered to the wall, you may be able to paint over it with proper preparation.
- Clean the walls: Time to roll up your sleeves and get cleaning. Start by dusting off any loose debris or dirt from the walls using a clean cloth or brush. We want a smooth canvas for our paint masterpiece. Next, mix warm water with a mild detergent or wallpaper stripping solution and get ready to scrub away any remaining glue residue. Be thorough and take your time to ensure all traces of glue are gone.
- Rinse the walls: Just like shampooing your hair, we need to rinse off any soap residue. Grab a clean sponge or cloth dampened with plain water and wipe down the walls. Ahh, freshness.
- Prime the walls: Now that your walls are clean and dry, it’s time to apply a primer specifically designed for painting over wallpaper glue. Think of it as the foundation for your artwork. We recommend using an oil-based primer as it has better adhesive properties and helps prevent future issues like peeling or bubbling.
- Apply the primer: Grab your favorite roller or brush and get ready to lay down that beautiful primer. Apply it evenly on the walls, following the manufacturer’s instructions regarding drying time and number of coats required. Remember, patience is key. Allow sufficient drying time between coats for optimal results.
By following these steps, you’ll be well on your way to transforming your wallpapered walls into a fresh and updated space. Remember, patience and proper preparation are key to achieving a successful paint finish. If you encounter any difficulties along the way, don’t hesitate to seek professional advice.
Common Issues and Troubleshooting Tips
Painting over wallpaper glue can be a challenging task, but with the right knowledge and troubleshooting tips, you can achieve a beautiful and long-lasting paint finish. In this article, we will discuss common issues that homeowners may encounter when painting over wallpaper glue and provide helpful troubleshooting tips to overcome them.
Issue: Bubbles or Blisters on the Painted Surface
When painting over wallpaper glue, bubbles or blisters may appear on the painted surface, giving it an uneven and unattractive look. This problem occurs when the wallpaper glue is not properly removed or sealed before painting.
Solution:
To troubleshoot this issue, it is crucial to remove the wallpaper glue completely from the wall surface before applying paint. Use a wallpaper removal solution and a scraper to gently scrape off any remaining glue residue. Once the wall is clean and dry, apply a primer specifically designed for sealing porous surfaces like wallpaper glue. This will create a smooth and even base for the paint to adhere to, reducing the likelihood of bubbles or blisters forming.
Issue: Poor Paint Adhesion
Poor paint adhesion is another common problem when painting over wallpaper glue. This can result in peeling, cracking, or flaking of the paint layer, leaving an unsightly finish.
Solution:
To address this issue, ensure that the wall surface is properly prepped before painting. Remove any loose or peeling paint and sand the surface to create a rough texture for better adhesion. Apply a high-quality primer before painting to enhance adhesion and durability. Additionally, choose a paint product specifically formulated for use on porous surfaces like wallpaper glue.
Issue: Discoloration or Staining of the Painted Surface
Discoloration or staining of the painted surface can occur if the wallpaper glue contains certain ingredients or chemicals that react with the paint.
Solution:
To prevent discoloration or staining, test a small inconspicuous area with both the wallpaper glue and the desired paint product before painting the entire wall. This will help identify any adverse reactions and allow for adjustments if needed. If discoloration or staining occurs, remove the paint layer and start the process again, ensuring that the wallpaper glue is completely removed and the surface is properly prepped before painting.
Issue: Uneven Paint Coverage
Uneven paint coverage can be a result of the wallpaper glue causing variations in surface absorption.
Solution:
To troubleshoot this issue, apply a coat of primer to the entire wall before painting. The primer will help create a consistent surface for the paint to adhere to, reducing the chances of uneven coverage. Additionally, use a high-quality paint roller or brush to ensure even application.
Issue: Lingering Odor from Wallpaper Glue
Some wallpaper glues may leave behind a lingering odor even after painting.
DIgO0NA7tIs” >
Also Read: How To Remove Adhesive From Wall Without Damaging Paint
Conclusion
Yes, it is generally okay to paint over wallpaper glue.
However, there are a few important factors to consider before doing so. Firstly, you need to ensure that the wallpaper glue has been properly removed or is no longer sticky.
If the glue is still tacky, it can cause issues with the paint adhering properly and result in a poor finish. Secondly, it’s essential to clean the walls thoroughly to remove any residue or dirt that may interfere with the paint’s adhesion.
Using a mild detergent and warm water should do the trick. Additionally, it’s a good idea to prime the walls before painting to create a smooth surface and improve paint adhesion.
This will help ensure that your paint job lasts longer and looks professional. Finally, always test a small area first before committing to painting the entire wall.
This will allow you to assess how well the paint adheres and whether any further preparation is needed.