Step right up, adhesive aficionados. We’re about to embark on a wild ride through the world of Gorilla Epoxy – the unrivaled heavyweight in the realm of durability. This mighty adhesive has earned its stripes, becoming the go-to choice for DIY enthusiasts and seasoned pros alike. But let’s cut to the chase: just how permanent is this stuff? Get ready for an adventure that will take you from jaw-dropping repairs to mind-boggling crafting feats as we uncover the secrets behind Gorilla Epoxy’s unyielding grip.
Picture this: a shattered heirloom, destined for the trash heap, suddenly comes back to life with a touch of Gorilla Epoxy. It’s like witnessing a magic trick right before your eyes. We’ll be diving headfirst into stories of objects once considered lost causes, only to be resurrected by the sheer power of this adhesive wizardry. Woodworking miracles, home repair triumphs, and awe-inspiring crafts await us on this journey into the heart of permanence.
Whether you’re a weekend warrior or a pro craving strength that can withstand anything life throws at it, prepare to be spellbound by Gorilla Epoxy’s legendary tales. Buckle up tight because we’re about to unravel the truth behind its seemingly eternal bond. From casual fixes that stand strong against time’s relentless march to professional demands for unbreakable strength, our expedition into Gorilla Epoxy’s permanence promises thrills and inspiration for readers from all walks of life.
So grab your tool belt and get ready for an adventure like no other. We’re about to peel back the curtain on the extraordinary resilience of Gorilla Epoxy. Let your imagination run wild as we explore what makes this adhesive marvel tick and discover why it has cemented its place as a force to be reckoned with. Are you ready to witness the unbreakable bond? Let’s dive in.
What is Gorilla Epoxy?
Contents
When it comes to repairing broken items or creating new projects, having a reliable adhesive is crucial. That’s where Gorilla Epoxy comes in. This two-part epoxy adhesive is known for its exceptional strength, versatility, and quick-setting properties. In this article, we will explore what makes Gorilla Epoxy stand out from other types of glue and why it should be your go-to choice for all your bonding needs.
Versatility and Compatibility:
Gorilla Epoxy is a true all-rounder. It can bond various materials together, including metal, wood, ceramics, glass, and most plastics. This wide range of compatibility makes it suitable for a variety of applications, whether you’re fixing a broken chair or creating a piece of art. Say goodbye to cluttered toolboxes filled with multiple adhesives – Gorilla Epoxy has got you covered.
Strength and Durability:
When it comes to bonding power, Gorilla Epoxy is second to none. Its high level of strength allows it to withstand heavy loads and stress, ensuring a long-lasting bond. Additionally, Gorilla Epoxy is resistant to temperature changes, making it ideal for both indoor and outdoor applications. No matter the project, Gorilla Epoxy will help you create durable and reliable bonds that stand the test of time.
Quick Setting Time:
Time is of the essence when it comes to repairs and projects. With Gorilla Epoxy, you won’t be kept waiting. Once applied, the epoxy starts to set within 5 minutes and reaches its full strength within 24 hours. This rapid setting time allows you to complete your projects efficiently without unnecessary delays.
Gap-Filling Properties:
Dealing with uneven surfaces or filling in gaps can be a challenge when it comes to gluing materials together. Luckily, Gorilla Epoxy excels in this area. Its excellent gap-filling properties ensure a solid and secure bond, even on irregular or rough surfaces. You can trust Gorilla Epoxy to provide a smooth and flawless finish.
Water and Chemical Resistance:
Once fully cured, Gorilla Epoxy is resistant to water and chemicals. This means that your bonds will remain intact even when exposed to moisture or harsh chemicals. Whether you’re working on an indoor or outdoor project, Gorilla Epoxy offers reliable protection against the elements.
Benefits of Gorilla Epoxy
Look no further than the superhero of adhesives – Gorilla Epoxy. This remarkable adhesive will save the day and make your projects last a lifetime.
One of the standout benefits of Gorilla Epoxy is its ability to form a permanent bond. Designed to create a strong and durable connection, Gorilla Epoxy can withstand heavy loads and extreme conditions with ease. Whether you’re repairing broken items or creating new projects, this adhesive ensures a secure bond that won’t let you down.
But wait, there’s more. Gorilla Epoxy is incredibly versatile, making it suitable for use on a wide range of materials. From metal to wood to ceramic and beyond, this adhesive has got you covered no matter what your project entails.
Now let’s talk about resistance. Gorilla Epoxy is water-resistant and can handle temperature fluctuations like a champ. Whether it’s humid environments or scorching heat, this adhesive won’t lose its grip. It’s a true warrior against the elements.
Efficiency is another area where Gorilla Epoxy excels. With a quick setting time of just 5 minutes and full strength reached within 24 hours, you won’t be left waiting around. And the convenient two-part syringe dispenser ensures precise application without any guesswork.
But here’s the cherry on top – Gorilla Epoxy dries clear. No unsightly residue or visible adhesive marks to distract from your finished project. It leaves behind a clean and professional look that will impress even the toughest critics.
Last but certainly not least, durability is where Gorilla Epoxy shines. Once cured, it forms a bond that can handle vibrations, impacts, and heavy loads without flinching. You won’t have to worry about frequent repairs or reapplications with this adhesive by your side.
How to Apply Gorilla Epoxy
When it comes to creating a strong and durable bond, Gorilla Epoxy is the go-to adhesive. This two-part adhesive is known for its ability to withstand tough conditions and bond various materials together. Whether you’re working on a DIY project or fixing something around the house, Gorilla Epoxy is a reliable choice. In this comprehensive guide, we will take you through the steps of applying Gorilla Epoxy and achieving a strong bond that will stand the test of time.
Step 1: Prepare the Surfaces for Bonding
Before applying Gorilla Epoxy, it is crucial to prepare the surfaces that need to be bonded. Ensure that the surfaces are clean, dry, and free from any dirt, grease, or oil. You can use soap and water or a suitable cleaning agent to thoroughly clean the surfaces. If the surfaces are smooth, it is recommended to roughen them slightly using sandpaper or a file. This will enhance the adhesion of the epoxy and ensure a stronger bond.
Step 2: Mix the Epoxy Components

Step 3: Apply the Epoxy Evenly
Once the epoxy components are mixed, it’s time to apply it to one of the surfaces that need to be bonded. Use your disposable tool to spread a thin and even layer of epoxy onto the surface. Make sure to cover the entire area that will be in contact with the other surface. Remember, Gorilla Epoxy has a working time of approximately five minutes, so it’s important to work quickly but carefully.
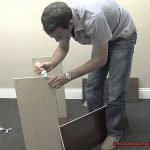
Step 4: Join the Surfaces and Apply Pressure
After applying the epoxy, carefully align the surfaces and press them firmly together. Apply continuous pressure for at least 30 seconds to ensure a proper bond. Take your time to make any necessary adjustments to ensure the surfaces are aligned correctly. Once the bond is made, avoid any stress or movement that could weaken it.
Step 5: Allow the Epoxy to Cure
Gorilla Epoxy needs time to cure and reach its maximum strength. It is recommended to let the bonded surfaces cure undisturbed for at least 24 hours. During this time, keep the surfaces stationary and within the recommended temperature and humidity range stated on the product packaging. Extreme conditions can affect the curing process, so providing a stable environment is essential.
Curing Time for Gorilla Epoxy
Today, we embark on a journey deep into the realm of Gorilla epoxy, unraveling the mysteries of its curing time. Prepare to witness the extraordinary power of this adhesive as we explore its transformative journey from liquid to solid. So, fasten your seatbelts and let’s dive into the world of Gorilla epoxy.
The Marvelous Curing Process:
Gorilla epoxy, like a master alchemist, undergoes a mesmerizing transformation during the curing process. Although it may dry to the touch in mere minutes, it takes a minimum of 24 hours to achieve a full cure. This remarkable metamorphosis is known as polymerization, where the adhesive transitions from a liquid state to a solid one. Remember, appearances can be deceiving – just because it feels dry doesn’t mean it’s fully cured.
The Dance of Variables:
- a) Temperature: Just like a superhero adapting to different environments, Gorilla epoxy’s curing time is influenced by temperature. Higher temperatures accelerate the process, while lower temperatures slow it down. To unlock the full potential of this adhesive, follow the manufacturer’s instructions regarding temperature requirements.
- b) Humidity: Beware the villainous moisture in the air. High levels of humidity can prolong curing times or even sabotage proper curing altogether. For optimal results, create your masterpiece in a well-ventilated area with moderate humidity levels. Let nothing impede the bonding magic.
The Power of Patience:
Ah, patience – the virtue that separates the masters from the novices. As tempting as it may be to test your newly bonded materials prematurely, it is crucial to allow Gorilla epoxy ample time to reach its maximum strength. Embrace your inner Zen and leave your creations undisturbed for at least 24 hours. This sacred period of incubation ensures a bond that is not only secure but also durable.
Ascend to New Heights:
For those seeking the pinnacle of strength, consider an extended curing period of up to 7 days. This heroic feat allows Gorilla epoxy to continue strengthening over time, forging an unbreakable bond capable of withstanding the most formidable trials. Your creations will possess the resilience of a superhero, ready to conquer any challenge that comes their way.
Strength and Durability of Gorilla Epoxy
When it comes to finding the perfect glue for your projects, strength and durability are at the top of the priority list. That’s where Gorilla epoxy truly shines. This incredible adhesive has earned its reputation for exceptional performance, creating strong, long-lasting bonds between a variety of materials.
Gorilla epoxy is like a superhero team-up, combining two powerful components: a resin and a hardener. When these two forces unite, a chemical reaction occurs, resulting in a bond that can withstand the test of time. It’s a true force to be reckoned with.
One of the standout features of Gorilla epoxy is its high tensile strength. Imagine a material’s ability to withstand pulling forces without breaking or deforming. Well, Gorilla epoxy has been put through rigorous testing and boasts an impressive tensile strength of several thousand pounds per square inch (psi). So whether you’re repairing a broken chair leg or bonding metal components, this epoxy has got your back.
But it doesn’t stop there. Gorilla epoxy also excels in shear strength, which is the ability to withstand forces acting parallel to its surface. Think about materials sliding or shearing against each other – this adhesive can handle it with ease. So go ahead and confidently fix that broken ceramic mug or metal bracket knowing that Gorilla epoxy will keep everything securely in place.
Durability is another area where Gorilla epoxy truly stands out. This adhesive can handle impact and vibration like a champion. It remains stable and strong even when subjected to sudden shocks or constant vibrations, making it ideal for projects that require long-term durability. Whether you’re working on woodworking projects that require resilience against hammer blows or creating jewelry that needs to withstand daily wear and tear, Gorilla epoxy won’t let you down.
And let’s talk about environmental conditions. Gorilla epoxy doesn’t back down either. It is highly resistant to water and most common solvents and chemicals once fully cured. This means that you can confidently use it in applications where exposure to moisture, oils, fuels, and other substances is expected. So whether you’re fixing a leaky pipe or creating an outdoor sculpture, rest assured that Gorilla epoxy will stay strong through it all.
While Gorilla epoxy is known for its exceptional strength and durability, it’s important to note that proper application is key to achieving optimal results. Surface preparation, correct mixing of the components, and following the manufacturer’s instructions are essential for creating strong bonds that stand the test of time.
Reversibility of Gorilla Epoxy
In the world of adhesives, Gorilla Epoxy stands as a superhero with its unmatched strength, durability, and resistance to environmental challenges. However, the question that lingers in the minds of many is whether this powerful adhesive is reversible. This article delves into the concept of reversibility of Gorilla Epoxy, exploring its characteristics and potential methods for undoing its unbreakable bond.
Understanding Gorilla Epoxy’s Reversibility:
Gorilla Epoxy is not designed to be easily reversed. Once it cures and forms a strong bond, separating the bonded materials becomes a formidable challenge that can potentially cause irreparable damage. During the curing process, a chemical reaction occurs, creating a cross-linked polymer network that gives the adhesive its exceptional strength and durability.
Methods for Reversing Gorilla Epoxy:
- Mechanical Force: In some cases where the epoxy has not fully cured or has been bonded for a short period, applying mechanical force may allow for separation. However, this method often results in damage or destruction of the materials being separated. Proceed with caution.
- Heat Application: Heat can be used to soften or weaken the cured epoxy, making separation more feasible. Careful temperature control is crucial to avoid damaging the materials further. Even with precise heat application, there is still a risk of irreversible damage.
- Chemical Solvents: Finding an effective solvent for Gorilla Epoxy can be challenging. While some solvents can partially dissolve the adhesive or require prolonged exposure, they may be impractical for most applications. Additionally, caution must be exercised as certain solvents may harm the materials involved.
Cautionary Advice:
Attempting to reverse Gorilla Epoxy bonding often leads to irreversible damage to the materials involved. Therefore, it is essential to exercise caution when using this adhesive and ensure proper alignment and preparation of materials before bonding. Always test any reversal method on a small, inconspicuous area before proceeding with the entire bond.
Alternative Adhesive Options:
If reversibility is a crucial requirement for your project, it is advisable to consider alternative adhesive options specifically designed for easy removal or repositioning. These alternatives offer the flexibility needed for projects that require adjustments or dismantling in the future.
Preparation for Bonding with Gorilla Epoxy
This superhero adhesive is known for its incredible strength and durability, making it perfect for those tough bonding projects. But before you dive in, it’s essential to prepare your surfaces properly to ensure a successful bond. So, grab your cape and let’s get started.
First things first, clean is key. Gorilla Epoxy likes to stick to clean surfaces. So, grab a clean cloth or paper towel and wipe away any loose debris. And if you’re dealing with stubborn stains or contaminants, don’t worry – a mild detergent or solvent can come to the rescue. Give those surfaces a good scrub, rinse thoroughly, and let them dry completely before moving on.
Smooth or non-porous materials like glass or metal need a bit of roughening up. That’s where sanding becomes your secret weapon. Use some fine-grit sandpaper and gently roughen up the surfaces in a circular motion. Be careful not to go overboard – we want those materials to be happy and ready for bonding.
Now, moisture is the villain we need to defeat. Even the tiniest bit of moisture can weaken our bond, so it’s crucial to make sure our surfaces are dry as a bone. You can use a moisture meter or perform a simple water bead test to check for any lingering moisture. If you see water droplets forming, give those surfaces some extra time to dry out before proceeding.
With our surfaces prepped and ready, it’s time to mix and apply Gorilla Epoxy. But hold on – each version may have different mixing ratios and curing times, so be sure to read those instructions carefully. Squeeze out equal amounts of resin and hardener onto a clean disposable surface and mix them together until the color is uniform.
Now comes the fun part – applying the epoxy. Use the provided applicator or a small brush to spread the epoxy evenly onto one of the surfaces. Don’t go crazy with the amount – too much epoxy can lead to messy overflow or weak bonds. Once you’ve applied the epoxy, firmly join the surfaces together, making sure they’re aligned perfectly. Hold them in place for the recommended curing time, allowing the epoxy to work its magic and achieve maximum bond strength.
And here’s a little tip: Gorilla Epoxy generally needs at least 24 hours to fully cure. So be patient, my glue-loving friends, and avoid putting any stress on the bond during this time.
Limitations of Using Gorilla Epoxy
Today, we’re going to dive into the world of adhesive superheroes and explore the limitations of using Gorilla epoxy. While this mighty glue is renowned for its strength and durability, it’s essential to understand that even superheroes have their kryptonite. So, let’s explore the limitations to ensure we make informed decisions when tackling our bonding projects.
Material Bonding:
Gorilla epoxy can conquer almost any material, from metals to ceramics and most plastics. However, it struggles with surfaces like polyethylene or polypropylene due to their low surface energy. These materials make it challenging for the epoxy to form a strong bond, so alternative adhesives may be required for these specific applications.
Temperature Sensitivity:
Our superhero adhesive is a bit sensitive when it comes to extreme temperatures. Constant exposure to high heat or extreme cold can weaken the bond created by Gorilla epoxy. So, it’s important to avoid using it in applications where temperature fluctuations are significant or if long-term exposure to extreme conditions is expected.
Surface Preparation:
Just like any superhero needs proper training and preparation, Gorilla epoxy requires meticulous surface preparation. Surfaces must be clean, dry, and free from contaminants or oils for optimal bonding. Neglecting this step can result in weak bonds or even complete adhesive failure. Remember, proper preparation saves the day.
Working Time:
Time is of the essence when working with Gorilla epoxy. Once you mix its two components together, you have a limited window of time within which the adhesive should be applied and materials joined. Missing this timeframe may lead to improper bonding, affecting the permanence of your project. So suit up quickly and get ready for action.
Flexibility and Movement:
Unfortunately, even superheroes have their limits, and Gorilla epoxy is no exception. This formidable adhesive is rigid and becomes hard and inflexible once cured. Hence, it may not be suitable for applications involving flexible or moving parts. Remember to choose the right adhesive for projects that require flexibility or movement.
As we conclude our exploration of Gorilla epoxy’s limitations, we hope you feel equipped with the knowledge needed to make informed decisions when selecting an adhesive for your bonding adventures. While Gorilla epoxy is a superhero in the world of adhesives, it does have its weaknesses. By understanding these limitations, you’ll be able to choose the right tool for the job and ensure a successful bonding experience.
xsvpAsSM7Do” >
Conclusion
In summary, Gorilla epoxy is indeed a permanent solution for various bonding needs. Its exceptional strength and durability make it an ideal choice for both small repairs and heavy-duty applications. Once cured, Gorilla epoxy forms a rock-solid bond that can withstand extreme temperatures, moisture, and even harsh chemicals.
This remarkable adhesive creates an unbreakable connection between different materials, including metal, wood, ceramic, plastic, and more. Whether you’re fixing a broken household item or working on a complex DIY project, Gorilla epoxy ensures long-lasting results that won’t let you down.
With its professional-grade formula and reliable performance, Gorilla epoxy proves to be a trustworthy companion for any repair or construction task. Its versatility extends beyond simple fixes; it offers a permanent solution that stands the test of time.
So next time you’re in need of a strong adhesive that truly lasts, look no further than Gorilla epoxy. With this powerful bonding agent in your toolkit, you can confidently tackle any project knowing that your hard work will endure for years to come.
Remember, when it comes to permanence and reliability in adhesives, Gorilla epoxy reigns supreme.