TWoodworking is an art that demands patience, my friends. It’s not just about carving intricate designs or mastering fancy techniques; it’s about paying attention to every teeny tiny detail – even the drying time of wood glue. Today, we’re going on a journey into the captivating world of letting wood glue dry before slathering on that sweet, sweet oil. We’ll unlock the secrets to achieving flawless finishes that will make your woodworking projects sparkle like a disco ball.
In this blog post, we’ll explore the necessary steps and crucial factors to consider when figuring out how long you should let that sticky stuff dry before reaching for the oil. Whether you’re a seasoned pro or just starting to dip your toes into the sawdust-covered waters of woodworking, fear not. We’ve got your back with practical tips and insights that will take your craftsmanship up a notch.
So grab your tools, don your imaginary woodworking apron, and join us as we dive headfirst into the art of waiting – waiting for wood glue to dry before adding that final touch of perfection. Let’s embrace the timeless beauty and meticulousness of woodworking together.
What is Wood Glue?
Contents
- 1 What is Wood Glue?
- 2 Types of Wood Glue and Their Drying Times
- 3 Factors Affecting Wood Glue Drying Time
- 4 Ventilation During the Drying Process
- 5 Clamping to Ensure a Strong Bond
- 6 Applying Oil or Other Finishes After the Glue Dries
- 7 Benefits of Oiling After Gluing
- 8 Proper Application Techniques and Drying Times for Oils
- 9 Conclusion
In the world of woodworking, precision and craftsmanship are paramount. But what is the secret ingredient that holds everything together? Enter wood glue, the unsung hero that ensures strong and lasting bonds between wood pieces. In this article, we will explore the composition, types, uses, and essential tips for achieving optimal results with wood glue.
Composition and Types:
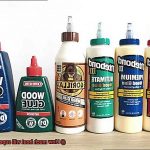
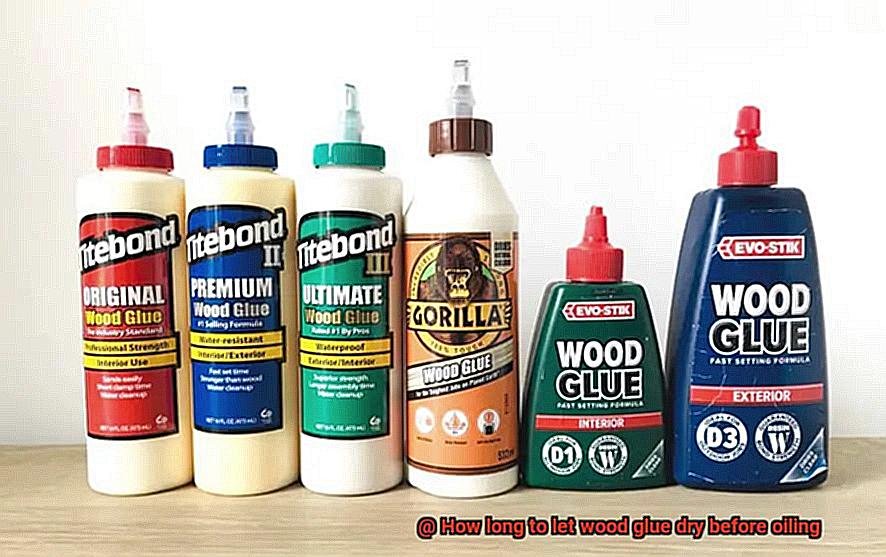
Wood glue is a unique blend of natural materials, such as animal collagen, and synthetic resins. This special concoction allows the glue to penetrate the porous structure of wood, creating a bond that withstands stress and time. Different types of wood glue are available, each with its own properties and recommended applications. The most common types include:
- White Glue: A versatile water-based adhesive that dries clear, making it suitable for general woodworking projects.
- Yellow Glue: Also known as carpenter’s glue or aliphatic resin glue, it offers a stronger bond and longer open time than white glue. Ideal for larger projects where clamping or assembly time is required.
- Polyvinyl Acetate (PVA) Glue: A multi-purpose adhesive suitable for various materials besides wood, such as paper, fabric, and ceramics.
Uses:
Wood glue excels in joining solid wood as well as wood composites like plywood and particleboard. From simple furniture repairs to intricate cabinetry work, wood glue provides the necessary strength and stability for a wide range of woodworking applications. Its ability to penetrate wood surfaces ensures a tight bond that holds up under pressure.
Tips for Successful Bonding:
To achieve optimal bonding results with wood glue, follow these essential tips:
- Prepare the Surfaces: Ensure surfaces are clean, dry, and free from dust or debris to promote better adhesion and prevent contamination.
- Apply an Even Layer: Use a thin layer of glue applied evenly on both surfaces for a strong bond. Excess glue can lead to weak joints and messy finishes.
- Allow Adequate Drying Time: Patience is key. Allow the glue to dry naturally at room temperature with proper ventilation. Most wood glues require around 24 hours to fully cure and reach maximum strength.
- Avoid Rushing the Drying Process: Applying excessive heat or using a hairdryer compromises bond strength. Let nature take its course for a sturdy and long-lasting joint.
Types of Wood Glue and Their Drying Times
Woodworking projects rely on the strength and durability of wood glue to create seamless bonds between wooden pieces. Understanding the different types of wood glue and their respective drying times is essential for a successful project. Let’s explore the various types of wood glue available on the market and delve into their features, benefits, and drying times.
Polyvinyl Acetate (PVA) Glue – The Versatile and Speedy Bond:
PVA glue, also known as white glue or carpenter’s glue, is a popular choice due to its versatility and ease of application. It dries relatively quickly, within 30 minutes to an hour, depending on temperature and humidity. For optimal results, let PVA glue dry for at least 24 hours before applying finishes. Its quick drying time makes it ideal for projects that require efficiency without compromising quality.
Epoxy Glue – The Unbreakable Bond:
Epoxy glue takes center stage when it comes to strength and durability. This two-part adhesive forms an incredibly strong bond but requires a longer drying time. Typically, it takes 6 to 24 hours to dry fully, but waiting 24 hours or more before adding finishes ensures a solid bond that can withstand heavy-duty usage. Epoxy glue is ideal for projects that demand maximum strength and longevity.
Cyanoacrylate Glue – The Quick Fix:
Cyanoacrylate glue, also known as super glue or instant adhesive, provides instant results. It dries within seconds to a few minutes, making it perfect for small woodworking projects or minor repairs. However, keep in mind that cyanoacrylate glue may not be suitable for projects that require longer drying times before applying finishes.
Specialty Glues – Tailored Solutions for Specific Needs:
Specialty glues are designed for specific applications. Waterproof wood glue, for example, withstands exposure to moisture and humidity. These glues often have longer drying times to allow for a stronger bond. Consider specialty glues when working on projects that require specific properties, such as resistance to water or extreme temperatures.
Factors Affecting Drying Time:
Drying times can be influenced by temperature, humidity, wood type, and project complexity. Higher temperatures and lower humidity levels promote faster drying, while lower temperatures and higher humidity levels extend the drying process. Consider these factors when planning your project to ensure the appropriate drying time and optimal results.
Factors Affecting Wood Glue Drying Time
Woodworking is an art that requires precision, patience, and a deep understanding of the materials being used. One critical element in any woodworking project is the glue that holds it all together. But have you ever wondered why wood glue takes different amounts of time to dry? In this article, we will delve into the factors that affect wood glue drying time, allowing you to become a master of timing in your woodworking endeavors.
Factor 1: Type of Wood Glue
Just like there are different types of wood, there are different types of wood glue. From white glue to yellow glue and polyurethane glue, each variant has its own unique properties and drying characteristics. White glue, for instance, dries faster compared to yellow glue, while polyurethane glue takes longer due to its chemical composition.
Factor 2: Temperature and Humidity
Mother Nature plays a significant role in the drying time of wood glue. Warmer temperatures and lower humidity levels accelerate the drying process, while higher humidity levels hinder it. So, if you’re working in a humid environment, be prepared to exercise some extra patience.
Factor 3: Application Thickness
The thickness of the wood glue application can also influence drying time. Thicker layers take longer to dry compared to thinner ones. Achieving an even layer is crucial for both proper adhesion and faster drying time.
Factor 4: Wood Type
Wood is as diverse as the colors in an artist’s palette, and each type has its own unique absorption rate and moisture content. Woods like pine or oak may have higher moisture content, thus requiring more time for the glue to dry properly.
Factor 5: Ventilation
Good airflow is essential for efficient drying of wood glue. Adequate ventilation helps evaporate moisture from the glue, speeding up the drying process. So, be sure to work in a well-ventilated area or use fans to promote air circulation.
Factor 6: Glue-to-Wood Contact
The amount of contact between the wood surfaces being glued together can impact drying time. Tightly pressed surfaces provide less exposure to air, which can slow down the drying process. Conversely, gaps or uneven pressure may cause certain areas to dry faster.
Ventilation During the Drying Process
The drying process of wood glue can sometimes feel like an eternity. It’s like watching paint dry, but with a lot more anticipation and excitement. That’s why ventilation is a critical factor to consider during this waiting game. It’s the secret ingredient that expedites the drying time and ensures a strong bond between the glued surfaces.
When you apply wood glue, it begins to dry through evaporation. The water content in the glue evaporates into the air, gradually transforming your project from a sticky mess to a solid masterpiece. But here’s where proper ventilation comes into play – it allows that moisture to escape, preventing the dreaded formation of bubbles or weak spots in the glue joint. Imagine painstakingly assembling your project, only to have it ruined by a simple oversight in ventilation. Don’t let that happen to you.
Insufficient ventilation is like putting your project on pause indefinitely. It can lead to prolonged drying times and may even result in incomplete curing of the glue. Nobody wants to wait longer than necessary for their creation to be ready for the next step. By providing a well-ventilated area for drying wood glue, especially for larger or more complex projects, you can save yourself time and frustration.
So how can you ensure proper ventilation during the drying process? Well, it’s as simple as opening windows and using fans or dehumidifiers to improve air circulation and remove excess moisture from the environment. These small steps not only speed up the drying time but also prevent any unwanted moisture-related issues.
But hold on, there’s more. Maintaining a moderate temperature and humidity level is equally important during the drying process. Extreme conditions can throw off the delicate balance of drying time and quality of bond. By keeping things just right – not too hot, not too cold – you’ll ensure that your project turns out as perfect as you envisioned.
Now, let’s talk safety. Proper ventilation doesn’t just benefit your project; it also protects you. Certain types of wood glues release fumes during the curing process. Without proper ventilation, these fumes can build up and pose a health hazard. Safety should always be a priority when working with any adhesive substances.
Lastly, remember that different types of wood glues may have varying ventilation requirements. Always read and follow the manufacturer’s instructions to ensure the best results for your specific glue. Don’t skip this step – it could make all the difference in achieving that flawless bond.
Clamping to Ensure a Strong Bond
While choosing the right glue and applying it properly are essential steps, we often overlook the importance of clamping. In this blog post, we will explore why clamping is vital for achieving a robust and durable bond in woodworking projects. So, let’s dive in.
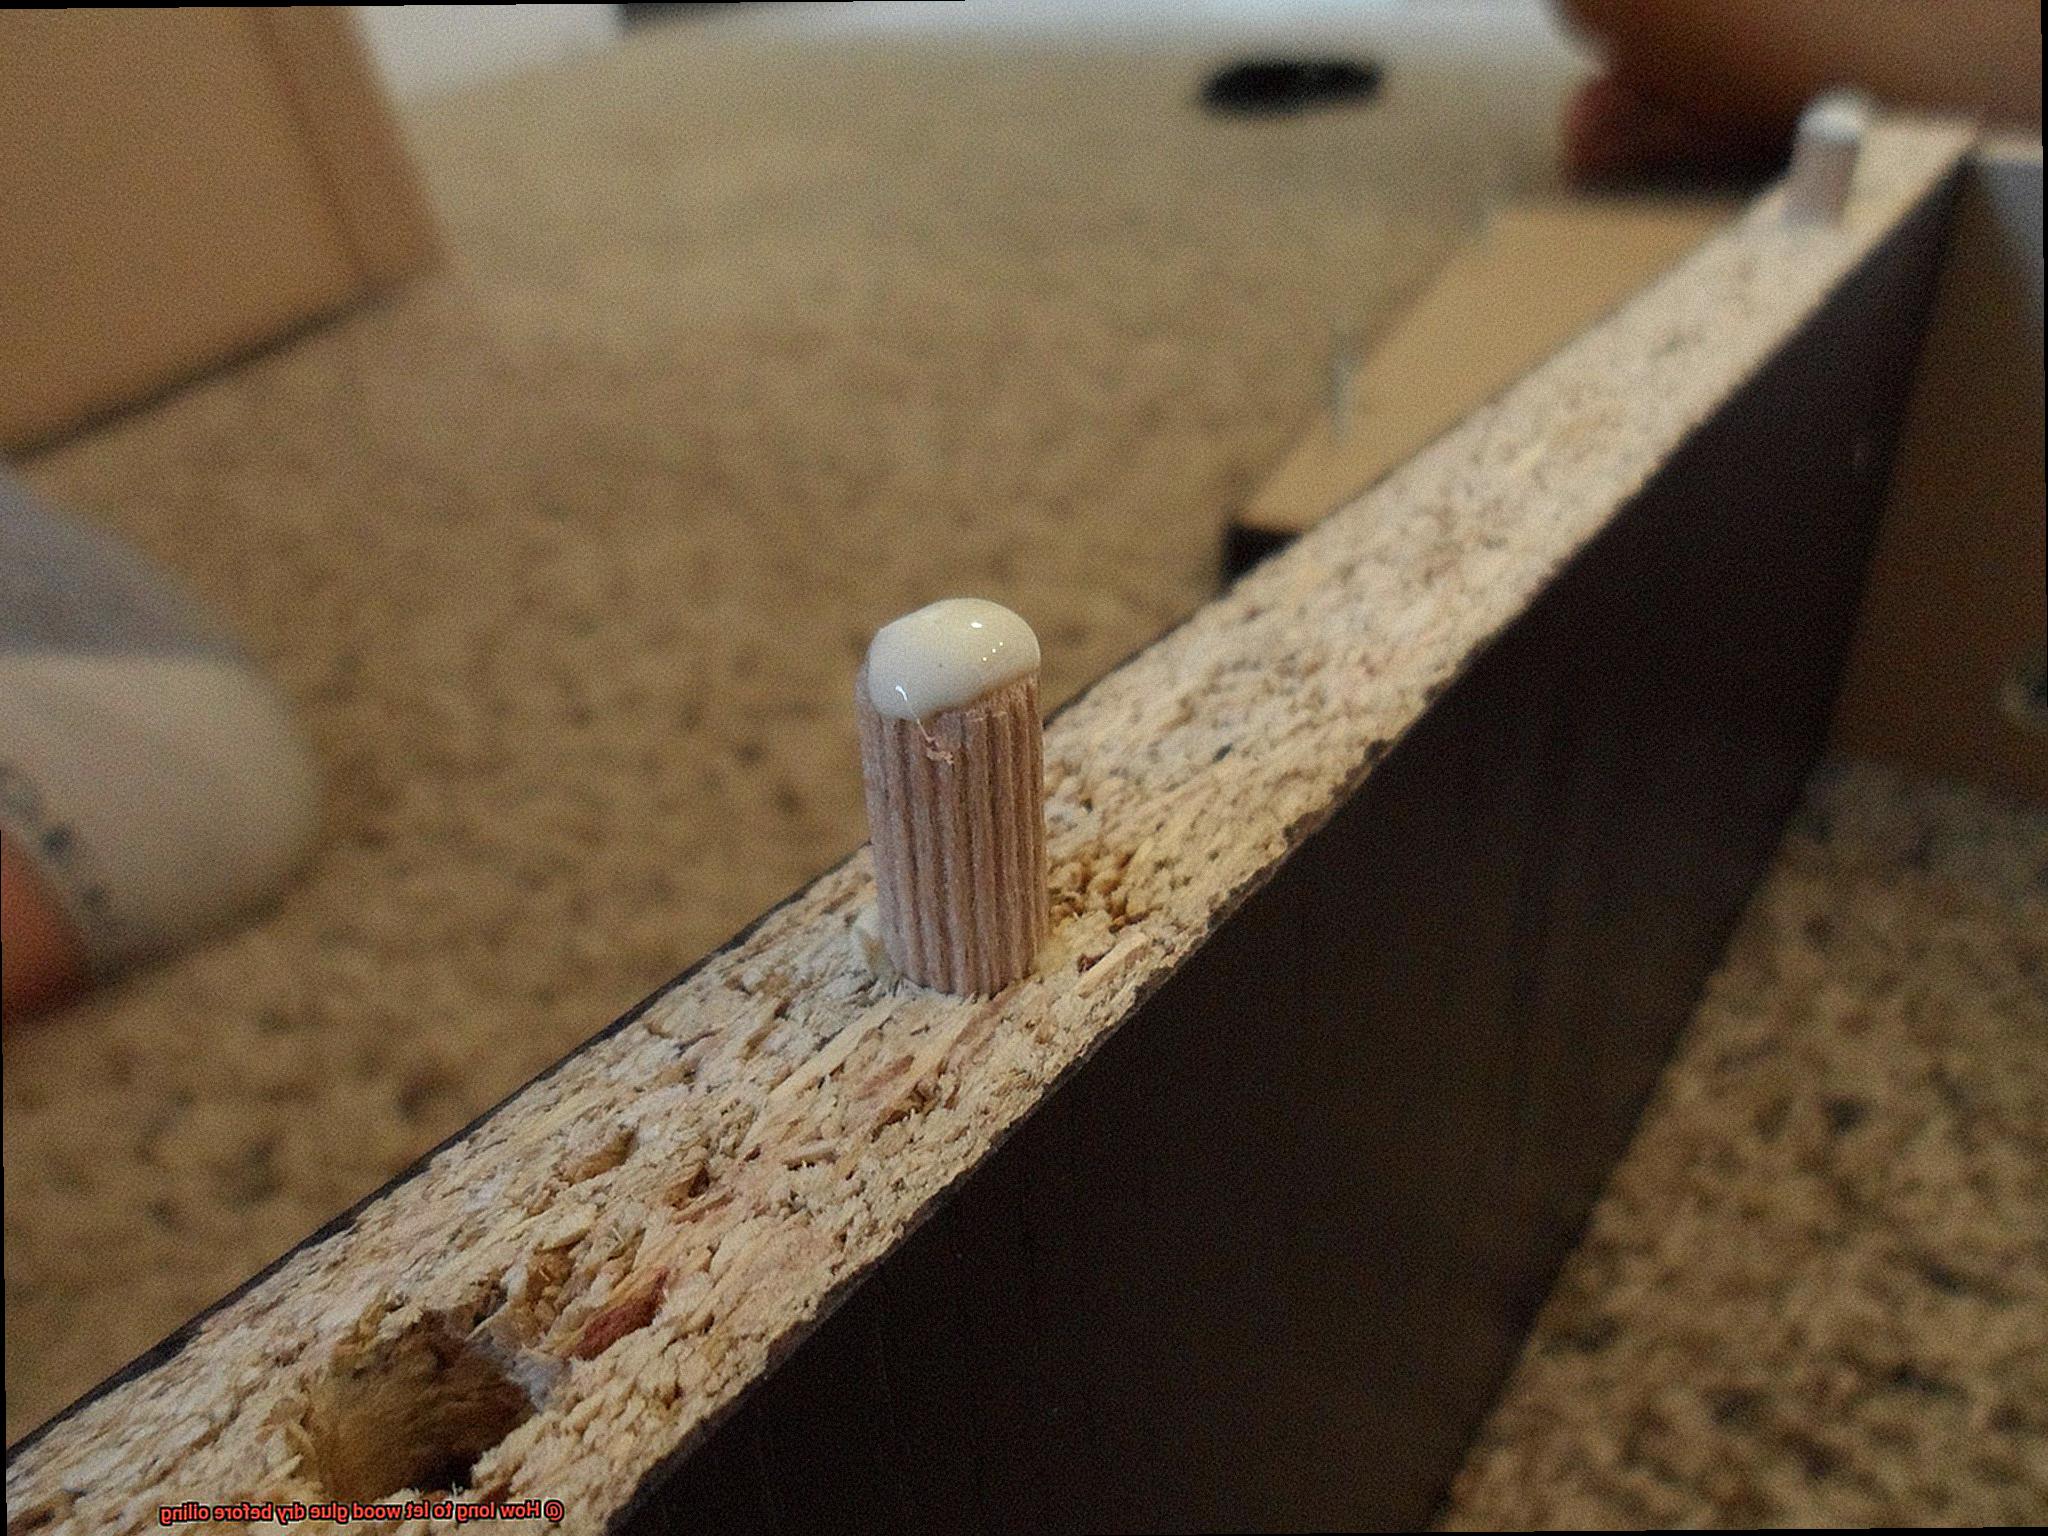
The Power of Pressure:
When it comes to gluing wood, clamping is the secret ingredient that ensures a strong bond between two surfaces. The pressure applied by clamps helps maintain proper contact between the wood pieces, minimizing gaps and voids that could weaken the bond. By keeping the surfaces tightly pressed together, clamping allows the glue to penetrate the wood fibers, creating an intimate connection.
Types of Clamps:
There are several types of clamps available for woodworking projects, each with its own advantages and ideal uses. The most common types include:

- Bar clamps: Ideal for larger projects and providing even pressure along the entire length of the joint.
- Pipe clamps: Versatile and adjustable, allowing for different lengths and providing significant pressure.
- C-clamps: Perfect for smaller projects or tight spaces where other clamps may not fit.
- Spring clamps: Quick and easy to use, suitable for lighter-duty applications or temporary holds.
Using Clamps Properly:
To ensure a strong bond, follow these simple steps when using clamps:
- Prepare your work surface: Clean, dry, and debris-free surfaces are essential for a solid bond.
- Apply glue: Evenly spread an appropriate amount of glue on both surfaces using a brush or roller.
- Align the pieces: Carefully position and align the wood pieces before applying clamps to avoid misalignment.
- Apply pressure: Gradually tighten the clamps until you see a slight squeeze-out of excess glue along the joint.
- Check for even pressure: Adjust the clamps if necessary to ensure that pressure is evenly distributed along the joint.
Clamping Time:
The amount of time required for clamping will depend on various factors, including:
- Type of wood: Hardwoods may require longer clamping times due to their denser nature compared to softwoods.
- Type of glue: Different glues have specific instructions regarding clamping times, which should be followed for optimal results.
- Environmental conditions: Temperature and humidity can influence drying times, with higher temperatures generally promoting faster drying.
Waiting for Full Strength:
While clamping time refers to the minimum time required for the glue to set and hold the pieces together, complete drying and achieving full strength may take longer. After removing the clamps, it is advisable to wait at least 24 hours before subjecting the glued joint to stress or load-bearing activities. This allows ample time for the glue to fully cure and achieve maximum strength.
Applying Oil or Other Finishes After the Glue Dries
In the world of woodworking, the glue is the unsung hero that holds our projects together. But what happens after the glue dries? How do we achieve that lustrous finish that takes our creations to the next level? In this article, we will explore the steps involved in applying oil or other finishes to wood after the glue has dried, ensuring a professional and polished result.
Step 1: Ensure Proper Curing Time
Before diving into finishing, it is crucial to allow the glue to fully cure. Follow the manufacturer’s instructions regarding drying time, usually ranging from 24 to 48 hours. Patience is key here.
Step 2: Remove Excess Glue Residue
After the glue has cured, remove any excess residue from the surface of the wood. Lightly sand or scrape off dried glue using a scraper or sandpaper to achieve a clean and smooth surface.
Step 3: Prepare the Wood Surface
To achieve a flawless finish, sand the wood surface using coarse grit sandpaper and gradually progress to finer grits. This step ensures an even application of the finish and enhances the wood’s natural beauty.
Step 4: Remove Dust and Debris
Before applying any finish, remove all dust and debris from the wood surface. Use a tack cloth or a soft brush to gently sweep away any remnants, ensuring a clean foundation for the finishing process.
Step 5: Choose the Right Finish
Consider both the type of wood and your desired outcome when selecting a finish. Different finishes offer varying degrees of protection and aesthetics, so choose one that suits your needs. Perform a test application on a small area to gauge compatibility.
Step 6: Apply Finish in Thin, Even Coats
Follow the manufacturer’s instructions for application techniques and drying times. Apply finishes in thin, even coats using brushes, cloths, or sponge applicators. This ensures better control over the finish and prevents uneven distribution.
Step 7: Allow Sufficient Drying Time
Give the finish ample time to dry and cure before handling or subjecting the wood to stress or moisture. Waiting at least 24 hours is generally recommended, but follow the instructions specific to your chosen finish.
Benefits of Oiling After Gluing
Are you a woodworking enthusiast looking to take your projects to the next level? Then you’ve come to the right place. In this article, we’ll explore the benefits of oiling wood after gluing and why it’s a secret weapon for achieving professional and polished finishes. So, grab your tools and let’s dive in.
Enhanced Durability:
Crafting a beautiful wooden masterpiece only to have it succumb to moisture damage or wear and tear over time is every woodworker’s nightmare. However, by oiling wood after gluing, you can create a protective barrier that prevents moisture absorption. This ultimately enhances the durability of your finished piece, ensuring long-lasting beauty and strength. Say goodbye to worries about warping, rot, or mold growth.
Improved Appearance:
Wood has a natural beauty that deserves to be showcased. When you oil wood after gluing, the oil seeps into the pores, highlighting the unique grain patterns and giving it a vibrant color. The added depth and character will make your creations visually stunning and leave everyone in awe of your craftsmanship. It’s like adding a touch of magic that brings out the true potential of the wood.
Smooth Finish:
We all strive for perfection in our woodworking projects. Oiling wood after gluing helps achieve that smooth finish we desire. As the oil penetrates the wood, it fills in imperfections and gaps, resulting in an even and polished surface. No more worrying about rough or unevenly glued pieces – the oil will work its magic, leaving you with a flawlessly smooth finish that begs to be touched.
Ease of Maintenance:
Who wants to spend hours stripping and reapplying finishes? Not us. Oiled wood requires minimal maintenance compared to other finishes like varnish or lacquer. Simply refresh the finish by applying a thin coat of oil when needed. It’s convenient, hassle-free, and perfect for those who prefer low-maintenance upkeep. Spend more time enjoying your creations and less time worrying about maintenance.
Natural Protection:
Nature knows best. Unlike synthetic finishes, oils used for wood are often derived from natural sources like linseed or tung oil. These oils not only protect the wood but also allow it to breathe, preventing moisture buildup, rot, or mold growth. Some oils even have antimicrobial properties – it’s like nature’s own defense system against decay-causing organisms. With natural protection on your side, your wood will stay healthy and beautiful for years to come.
Environmentally Friendly:
Let’s not forget about our planet. Choosing an oil finish after gluing is an environmentally friendly option. Many oils are made from renewable resources and have minimal impact on the environment. Plus, they have low VOC content, reducing air pollution and potential health hazards during application. By choosing an oil finish, you can create stunning pieces while minimizing your carbon footprint. It’s a win-win for you and Mother Earth.
Proper Application Techniques and Drying Times for Oils
To bring your vision to life and ensure lasting results, it is vital to understand and master the proper application techniques and drying times for oils. In this comprehensive guide, we will lead you through this artistic journey, equipping you with the knowledge needed to achieve woodworking excellence.
Application Techniques:
- Surface Preparation: The foundation of a strong bond lies in cleanliness. Prior to applying wood glue, meticulously clean and dry the surfaces involved, removing any dust or debris that may hinder adhesion. A clean cloth or brush will serve as your trusty ally in this endeavor.
- Thin and Even Layers: Artistry lies in balance. Apply a thin, uniform layer of wood glue onto one surface, avoiding excessive amounts that may lead to unsightly squeeze-out during the bonding process.
- Alignment Precision: Attention to detail ensures seamless craftsmanship. Press the two surfaces together firmly, verifying their correct alignment. Utilize clamps or weights to maintain consistent pressure until the glue reaches a complete cure.
Drying Times:
- The Virtue of Patience: Allow time for perfection. Most wood glues necessitate a minimum of 24 hours to dry thoroughly before the application of oil or any subsequent treatments.
- Consult Manufacturer Guidelines: Every masterpiece has its unique requirements. Different types of wood glue may have varying drying times, making it imperative to consult the manufacturer’s instructions for accurate information tailored to specific products.
- Controlled Environment: Craftsmanship thrives in optimal conditions. Maintain moderate temperature and humidity levels during the drying period, ensuring an ideal environment for impeccable results.
Benefits of Proper Application Techniques and Drying Times:
- Unyielding Strength: By following proper techniques, you forge an unbreakable bond, creating sturdy connections between wooden pieces that endure the test of time.
- Enhanced Aesthetics: Elevate your creation with the transformative power of oil. Applying oil after gluing magnifies the overall beauty of your project, captivating onlookers with its radiant allure.
- Seamless Perfection: Oil acts as a gateway to flawlessness. Its application results in a polished and seamless surface, highlighting the innate elegance of the wood grain.
- Effortless Maintenance: Practicality meets artistry. Oiled wood is not only visually stunning but also easier to clean and maintain, ensuring your masterpiece remains as pristine as the day it was crafted.
- Nature’s Guardian: Embrace nature’s armor. The oil serves as a natural shield, safeguarding your creation against moisture, UV rays, and the wear and tear of time.
- Eco-Conscious Choice: In harmony with nature. Opting for oil as a finish showcases your commitment to sustainability, as it is an environmentally friendly alternative to chemical-based finishes.
gnG0FNxisvk” >
Also Read: How to Glue PVC to Wood?
Conclusion
Before applying oil to wood glue, it is crucial to allow it sufficient time to dry completely.
The drying time can vary depending on various factors such as the type of wood glue used, temperature, humidity levels, and the size of the glued area. In general, most wood glues require at least 24 hours to dry before you can safely apply oil.
Rushing this process may result in a compromised bond and ultimately affect the longevity and quality of your woodworking project.