Woodworking is my jam, and I bet it’s yours too. And when it comes to adding that personal touch to our projects, Mod Podge is the secret weapon we all rely on.
But here’s the million-dollar question: how long does this magical stuff take to cure on wood? Well, fret not.
Whether you’re a seasoned pro or just starting out, get ready to discover the secrets of achieving that flawless, long-lasting finish on your wooden masterpieces.
Factors Affecting the Curing Time of Mod Podge on Wood
Contents
- 1 Factors Affecting the Curing Time of Mod Podge on Wood
- 2 General Guidelines for Applying Mod Podge on Wood
- 3 Tips to Speed Up the Curing Process
- 4 The Benefits of Using Mod Podge on Wood
- 5 Potential Issues with Applying Thick Layers of Mod Podge
- 6 Common Mistakes to Avoid When Working with Mod Podge
- 7 How to Know When Your Project Is Fully Cured
- 8 Conclusion
Mod Podge, a versatile adhesive beloved by crafters, offers endless possibilities for creating unique designs on wood surfaces. However, to achieve successful and efficient results, understanding the factors that affect the curing time of Mod Podge is essential. In this article, we will explore how environmental temperature and humidity, the thickness of application, the type of Mod Podge used, wood porosity, and air circulation can impact the drying and hardening process of Mod Podge on wood.
Environment Temperature and Humidity:
The environment in which you work plays a crucial role in the curing time of Mod Podge. Warm temperatures and low humidity levels facilitate faster evaporation of moisture, accelerating the drying process. Conversely, cooler temperatures and high humidity can extend the curing time as more moisture lingers in the air. To expedite drying, choose a well-ventilated area with optimal temperature and humidity conditions.
Thickness of Application:
The thickness of the Mod Podge layer applied to the wood surface directly affects the curing time. Thicker layers require more time for moisture to evaporate completely, resulting in longer drying times. Applying multiple thin layers instead of one thick layer allows for faster and more even drying.
Type of Mod Podge:
Different types of Mod Podge have varying curing times. Matte Mod Podge generally dries faster compared to gloss or satin finishes. Outdoor Mod Podge, designed for projects exposed to outdoor elements, often requires a longer curing time due to its added durability. Consider your project’s requirements when selecting the appropriate type of Mod Podge.
Wood Porosity:
The porosity of the wood surface impacts how quickly Mod Podge is absorbed and dries. Porous wood surfaces, such as unfinished or softwood, readily absorb Mod Podge, resulting in a faster curing time. In contrast, hardwood or sealed wood surfaces may take longer to dry as the glue has less porosity to be absorbed into.
Air Circulation:
Adequate air circulation is vital for expediting the drying process of Mod Podge on wood. Stagnant or confined air impedes the evaporation of moisture, prolonging the curing time. Ensure proper ventilation by placing your project in a well-ventilated area or using fans to increase air circulation.
General Guidelines for Applying Mod Podge on Wood
Well, prepare yourself for an adventure like no other as we delve into the secrets of this versatile craft glue. With your trusty paintbrush in hand, let’s uncover the general guidelines for applying Mod Podge on wood.
First and foremost, preparation is paramount. Before you begin your artistic endeavor, ensure that your piece of wood is pristine. Cleanse it of any impurities, ensuring it is dry and free from dust or debris. A gentle sanding can work wonders, creating a smooth surface that promotes optimal adhesion. Now that your wood is prepped and primed, it’s time to unleash the magic of Mod Podge.
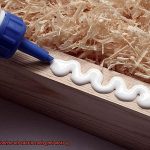
Pour a small amount of Mod Podge onto the wood’s surface, ready to work your creative prowess. Whether you opt for a brush or sponge applicator, make sure to spread the Mod Podge evenly and with finesse. Glide in one direction to achieve that flawless finish that will leave admirers in awe. Remember, thin layers are the key to success when it comes to Mod Podging on wood. Applying multiple thin coats allows each layer to dry thoroughly, minimizing the risk of unsightly bubbles or pesky wrinkles.
After each layer, exercise patience and grant it time to dry. The drying period may vary depending on factors such as humidity and temperature. Typically, each layer requires approximately 15-20 minutes to dry. However, it is advisable to wait at least an hour between coats for proper curing. If impatience gets the better of you (we’ve all been there), consider employing a hairdryer on low heat or a gentle fan to hasten the process. But beware, excessive heat may cause the Mod Podge to bubble or crack, so proceed with caution.
Now, we arrive at a crucial juncture: curing. This vital stage determines the Mod Podge’s destiny, molding it into a resilient and durable masterpiece. On wood, the curing process typically spans 2-3 weeks. During this time, handle your creation with care and shield it from excessive moisture. Once the curing period concludes, behold your Mod Podge marvel on wood, boasting a lustrous and protective finish that showcases your creative genius.
Should you dare to expose your Mod Podge project to the rigors of the great outdoors or a high-moisture environment, fortify its defenses with a waterproof sealer. This wise precaution shall safeguard your labor of love against the relentless forces of nature, ensuring its endurance through the passage of time.
Tips to Speed Up the Curing Process
We understand the excitement and impatience that comes with the drying and curing process. In this article, we will provide you with an extensive guide on how to speed up the curing process of Mod Podge on wood. Get ready to unlock the secrets to finishing your masterpiece in record time.
Opt for Thin Coats:
When it comes to applying Mod Podge on wood, remember that thin is in. Instead of slathering on a thick layer, opt for several thin coats. Thick layers take longer to dry and cure, but thin coats dry quicker. By applying two to three thin coats, you will maximize drying efficiency and achieve optimal results.
Harness the Power of Airflow:
Need a quick fix for the curing process? Enlist the help of a fan or blow dryer. Position a fan near your project or set your blow dryer on low heat. The circulating air will whisk away moisture, expediting the drying process. Exercise caution and maintain a safe distance to avoid overheating and potential damage.
Embrace Fresh Air:
Proper ventilation is crucial for hastening the drying of Mod Podge on wood. Ensure your workspace has adequate air circulation by opening windows, using fans, or working in a well-ventilated room. By allowing moisture to escape, you enable your Mod Podge to dry faster.
Unleash the Heat Gun:
If you possess a heat gun, it can be a game-changer for speeding up the curing process. Gently wave the heat gun over your project to evaporate the moisture present in the Mod Podge. However, exercise caution and adhere to safety instructions to prevent any mishaps or damage to your wood.
Embrace Warmth:
Give your project a warm embrace. Whenever possible, place it in a warm environment, such as near a heater or in indirect sunlight (if safe for your wood). The increased temperature will facilitate faster drying and curing of the Mod Podge.
Combat Humidity with a Dehumidifier:
Is humidity hampering your progress? Fight back with a dehumidifier. In humid climates, using a dehumidifier in your workspace can significantly reduce moisture levels and expedite the curing process. Bid farewell to sticky situations and hello to faster drying times.
The Benefits of Using Mod Podge on Wood
Wood crafting projects become even more extraordinary when Mod Podge enters the picture. This versatile glue is a game-changer, taking your creations to new heights of beauty and durability. Let’s delve into the benefits of using Mod Podge on wood and unlock the secrets of this crafting marvel.
First and foremost, Mod Podge acts as a protective shield for your wood projects. It forms a sealant that keeps moisture and other elements at bay, making it perfect for outdoor items or pieces that might come into contact with water. Say goodbye to warped and rotting wood. With Mod Podge, your crafts will withstand the test of time.
But it doesn’t stop there. Mod Podge works its magic by creating a flawlessly smooth surface on wood. It fills in gaps and imperfections, giving your project a pristine finish. No more unsightly knots or blemishes ruining your masterpiece. Whether you’re embarking on a decoupage adventure or creating a collage, Mod Podge ensures a polished look that will leave you in awe.
Now, let’s talk about the creative possibilities. Mod Podge makes it effortless to attach decorative elements to your wood crafts. Acting as both an adhesive and a sealant, it securely binds paper, fabric, or any other materials to the wood surface. Let your imagination run wild as you explore endless design options and personalize your creations with ease.
And let’s not forget about the finishes. Mod Podge offers a range of finishes to suit your desired aesthetic, whether you prefer a matte or glossy look. Not only does this add a professional touch to your projects, but it also provides protection against scratches and wear. Your wood crafts will shine with brilliance and grace.
What’s more, using Mod Podge on wood is an absolute breeze. It’s water-based, non-toxic, and cleans up effortlessly with soap and water. Simply grab a brush or sponge applicator and watch as your creations come to life. The quick drying time allows you to continue crafting without delay, unleashing your creativity in a seamless flow.
Potential Issues with Applying Thick Layers of Mod Podge
When it comes to taking your crafting projects to the next level, Mod Podge is a true game-changer. This magical glue can transform ordinary pieces of wood into stunning creations, providing a beautiful finish and protecting them from wear and tear. However, it’s important to tread carefully when applying thick layers of Mod Podge, as there are potential issues that can arise.
First and foremost, the drying time is a major concern when using thick layers of Mod Podge on wood. Thicker layers take significantly longer to dry compared to thinner ones. This is because the moisture in the glue needs ample time to evaporate for the curing process to occur. So if you’re working on a project with a tight deadline, it’s best to reconsider using thick layers that will prolong the drying time.
Another issue with applying thick layers is that they may not dry evenly, resulting in visible brush strokes or streaks on the surface. This can be quite disheartening, especially if you were aiming for a smooth and flawless finish. After putting in all that hard work, nobody wants their creation to look sloppy.
Additionally, thicker layers of Mod Podge can increase the risk of cracking or peeling once the glue is fully cured. Since thicker layers take longer to dry completely, any disturbance or movement before the curing process is complete can lead to unsightly cracks or peeling. This is undoubtedly a crafting nightmare that you’ll want to avoid at all costs.
Thankfully, there are strategies to navigate around these potential pitfalls. Instead of applying thick layers, try using multiple thin coats of Mod Podge. Thin coats dry more quickly and evenly, reducing the risk of streaks, brush marks, and bubbling. Just make sure each coat is completely dry before applying the next one.
In addition to this technique, proper ventilation and temperature control can greatly expedite the drying and curing process of Mod Podge. Working in a well-ventilated area with moderate temperature and humidity levels will yield the best results.
Lastly, always refer to the instructions provided by the manufacturer. Different types of Mod Podge may have varying drying times, so it’s crucial to follow the guidelines for the specific product you are using.
Common Mistakes to Avoid When Working with Mod Podge
Mod Podge is a versatile crafting tool that has the power to transform plain wood into stunning works of art. Whether you’re an experienced DIY enthusiast or just starting out, it’s crucial to be aware of common mistakes to avoid when working with Mod Podge. This article will provide valuable tips and insights to help you achieve a professional finish every time.
Applying thick layers:
One of the most prevalent mistakes is applying Mod Podge in thick layers. Although it may seem logical for even coverage, it actually prolongs drying times. Remember, Mod Podge needs air to dry and cure properly. To ensure faster drying times, apply thin, even coats that allow for better airflow.
Improperly preparing the surface:
Neglecting to prepare the wood surface adequately before applying Mod Podge is another common mistake. Dust, dirt, and oils can hinder proper adhesion and result in a less durable finish. Take the time to thoroughly clean and dry the surface before starting your project.
Using the wrong type of Mod Podge:
Mod Podge comes in various formulations, each designed for specific purposes and surfaces. Using the wrong type can lead to poor adhesion or an undesirable finish. Whether it’s matte, glossy, outdoor, or fabric Mod Podge, make sure to choose the right formulation for your project.
Rushing the drying process:
Patience is key when working with Mod Podge. Trying to expedite the drying process using heat sources or direct sunlight can lead to uneven drying and potential damage to your project. Allow Mod Podge to air dry naturally and give it ample time to fully cure before handling or applying additional coats.
Neglecting to seal the finished project:
While Mod Podge provides a protective layer, it may not be sufficient for heavy use or exposure to moisture. To ensure the longevity of your project, apply a clear sealant or varnish over the Mod Podge layer. This additional step will provide extra protection and preserve your work for years to come.
How to Know When Your Project Is Fully Cured
Mod Podge, a beloved adhesive in the crafting world, is frequently used on wood surfaces. To ensure the long-lasting success of your project, it is vital to determine when it is fully cured. In this article, we will explore various methods to ascertain if your Mod Podge wood project has reached complete curing.
The Significance of a Fully Cured Mod Podge Project:
A fully cured Mod Podge project signifies that the adhesive has dried and hardened completely. This ensures optimal durability and protection for your wood surface, allowing you to handle and use the project without any smudging or damage.
The Touch Test: Determining Curing Through Texture:
Performing a touch test is a simple way to check if your project is fully cured. Gently press your finger against the Mod Podge surface. If it feels tacky or sticky, it has not yet fully cured and requires more drying time. However, if it feels dry and smooth to the touch, it is likely fully cured and ready for use.
Visual Clues: Observing the Appearance:
Another method to determine if your project has fully cured is by observing its appearance. Initially, Mod Podge may appear cloudy or milky when wet. As it dries and cures, it transforms into a clear and glossy finish. Once the surface achieves the desired clarity and shine, you can consider it fully cured.
Influential Factors: Understanding Curing Time:
Multiple factors can affect the curing time of Mod Podge on wood. Temperature, humidity, and the thickness of the application all play a role. Higher temperatures and lower humidity levels expedite the curing process, while colder temperatures and higher humidity levels may extend it.
The Virtue of Patience:
Exercising patience is crucial when waiting for your Mod Podge wood project to fully cure. Rushing the process or handling the project prematurely can lead to smudges, smears, or fingerprints on the Mod Podge surface. Follow the recommended drying time provided by the manufacturer and allow ample time for the project to fully cure before handling or using it.
Conclusion
Mod Podge, a popular crafting adhesive, is commonly used to seal and protect wood surfaces. But how long does it take for Mod Podge to fully cure on wood? Well, the answer depends on various factors such as temperature, humidity, and thickness of application. Generally, Mod Podge takes around 24 hours to dry completely on wood. However, curing time can be affected by environmental conditions.
If you’re working in a warm and dry environment, the curing process might be faster. On the other hand, if you’re in a cold and humid space, it may take longer for the Mod Podge to cure. It’s crucial to consider these factors when planning your crafting projects.
To ensure optimal results, it’s recommended to apply Mod Podge in thin layers and allow each layer to dry thoroughly before adding another coat. This not only promotes better adhesion but also speeds up the overall curing process.
While waiting for Mod Podge to cure on wood, it’s important to avoid touching or using the finished piece until it has completely dried. Patience is key here. Rushing the process could lead to smudges or smears that can ruin your hard work.
In conclusion, if you’re wondering how long Mod Podge takes to cure on wood – plan for approximately 24 hours but keep in mind that external factors like temperature and humidity can affect this timeframe.

