Are you tired of anxiously waiting for your adhesive to dry, only to find yourself questioning how long it takes for Liquid Nails to harden?
Well, fret no more because I’ve got all the answers you need. Whether you’re a DIY enthusiast, a seasoned professional contractor, or simply someone with a knack for fixing things around the house, understanding the curing time of adhesives can be a total game-changer.
Enter Liquid Nails – the versatile and mighty construction adhesive that’s got everyone talking. But here’s the burning question: just how long does it take for this bad boy to become rock solid?
So grab yourself a steaming cup of joe and get ready to dive headfirst into this adhesive adventure.
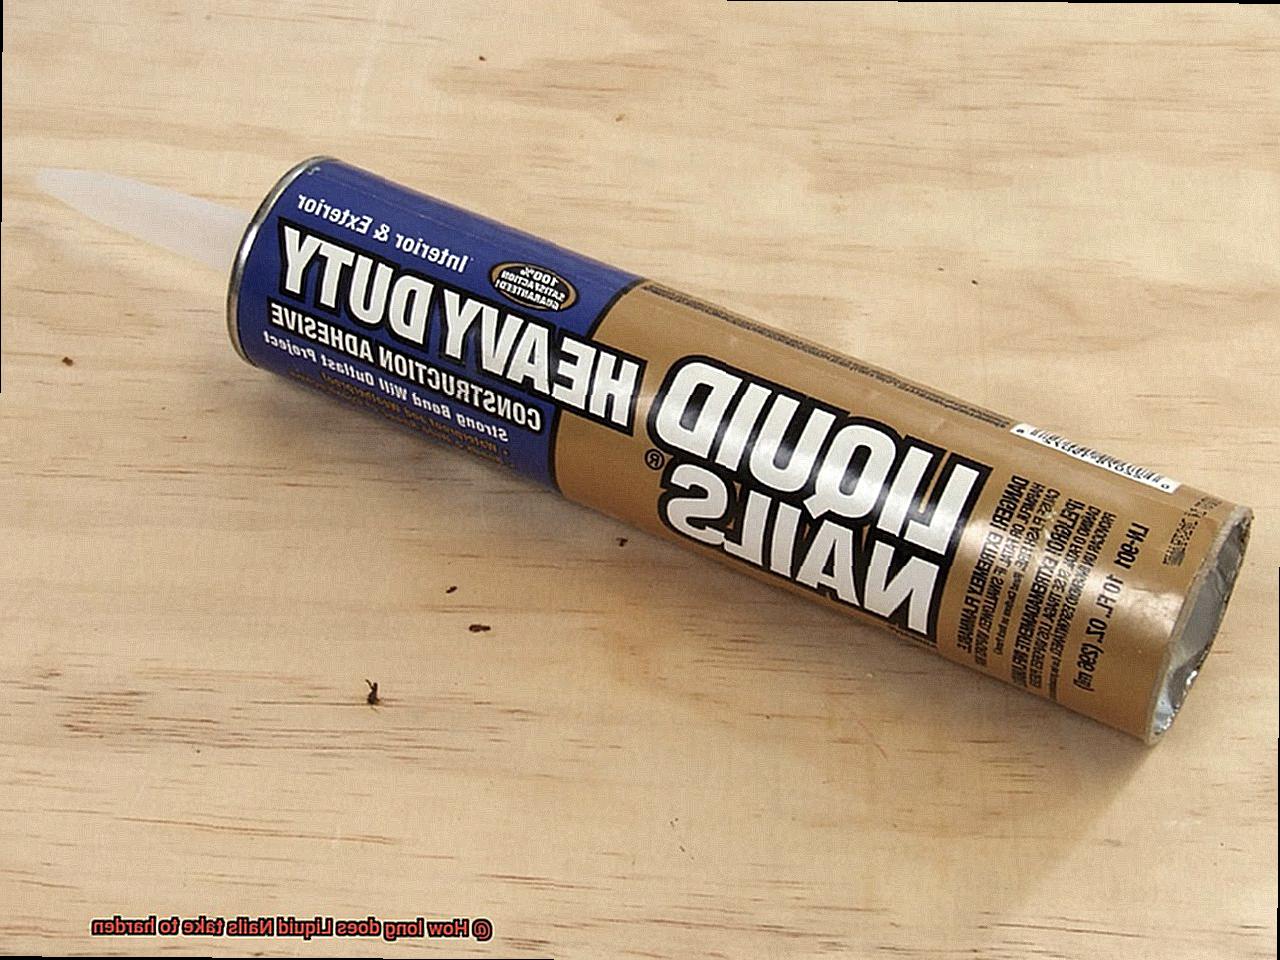
What is Liquid Nails?
Contents
- 1 What is Liquid Nails?
- 2 Factors that Affect the Curing Time of Liquid Nails
- 3 Common Hardening Times for Liquid Nails
- 4 Tips to Accelerate the Curing Process of Liquid Nails
- 5 Thickness of Adhesive Layer and its Effects on Curing Time
- 6 Temperature and Humidity Levels and their Effects on Curing Time
- 7 Manufacturer’s Instructions and Advice for Specific Products
- 8 Fast-Drying or Quick-Setting Versions of Liquid Nails
- 9 Conclusion
When it comes to construction and DIY projects, having the right adhesive can make all the difference. That’s where Liquid Nails comes in. This versatile and reliable construction adhesive is a must-have for both professionals and DIY enthusiasts. In this article, we will explore what Liquid Nails is, its uses, and why it is the go-to choice for bonding various materials together.
Strong Bonding Power:
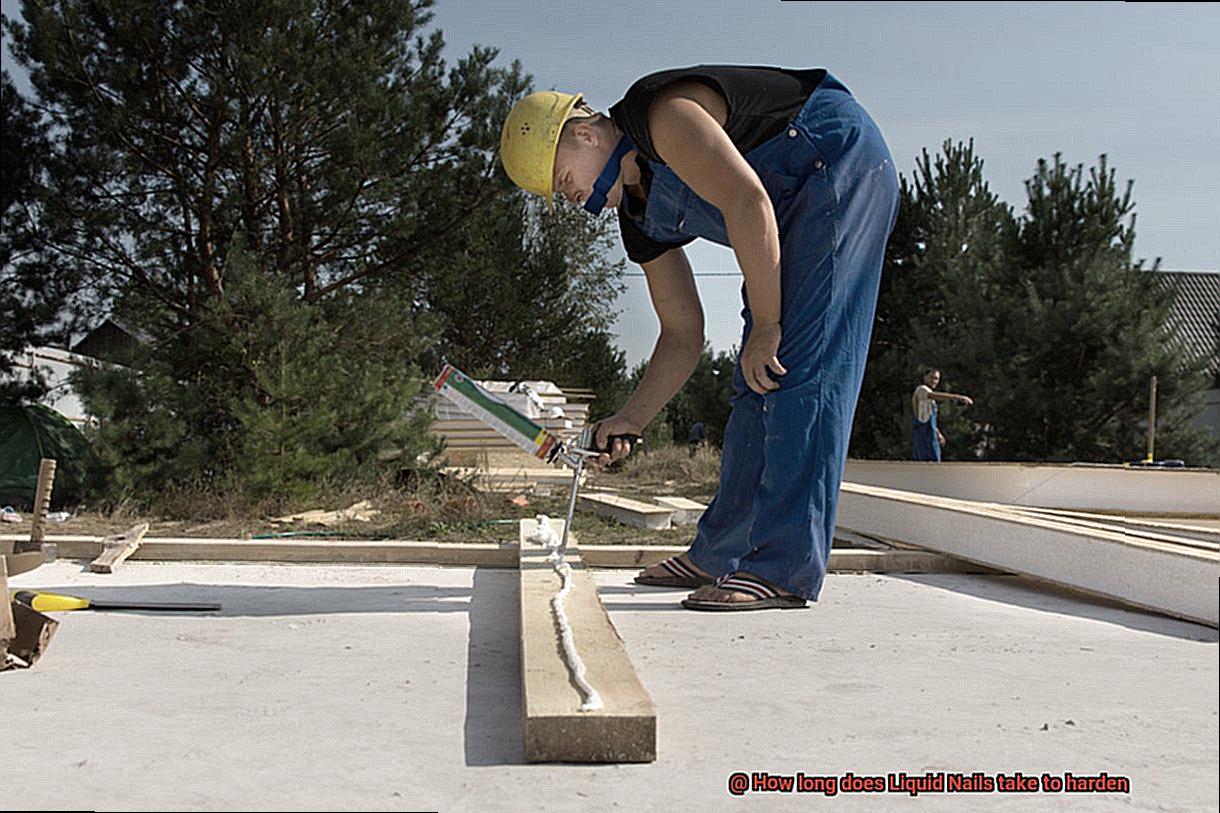
Liquid Nails is known for its exceptional adhesive properties, making it perfect for a wide range of applications. Whether you’re working with wood, metal, concrete, or ceramic, Liquid Nails provides a durable and long-lasting bond that can withstand heavy loads and extreme temperatures. It can be used to install baseboards, paneling, molding, and other decorative elements. It’s also great for repairing broken items or securing loose parts.
Formulations for Every Need:
Liquid Nails understands that different projects require different adhesives. That’s why it comes in various formulations to cater to specific needs. Some variants are designed for specific materials like wood or concrete, while others are more general-purpose adhesives suitable for bonding multiple materials. This ensures that you have the right product for your specific project requirements, providing optimal results every time.
Easy Application:
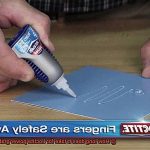
Using Liquid Nails is a breeze. Simply apply the adhesive onto the surface of the material you want to bond. Make sure the surfaces are clean and free from dust or debris for optimal adhesion. Once applied, press the two surfaces firmly together and hold them in place until the adhesive sets. The adhesive forms a skin within 10-15 minutes after application, but full curing takes longer.
Curing Time:
The drying and curing time of Liquid Nails can vary depending on factors such as temperature, humidity levels, and the materials being bonded. Generally, it takes 24 to 48 hours for Liquid Nails to fully cure and reach its maximum strength. However, it’s important to note that this timeframe may vary, so always refer to the manufacturer’s instructions for specific guidance.
Tips and Considerations:
- Thicker layers of adhesive may require more time to cure compared to thinner layers.
- Higher temperatures and lower humidity levels speed up the curing process, while lower temperatures and higher humidity levels slow it down.
- Prematurely disturbing or stressing the bond can result in a weak or failed bond, so be patient and allow ample time for the adhesive to fully cure.
Factors that Affect the Curing Time of Liquid Nails
Liquid Nails, the superhero of adhesives, possesses the power to unite objects with its formidable bond. However, have you ever pondered why it takes time for Liquid Nails to achieve its full strength? Let us delve into the factors that influence its curing time.
First and foremost, temperature undeniably reigns as a crucial determinant. Just like us, Liquid Nails prefers a cozy environment. Higher temperatures accelerate the curing process, whereas lower temperatures decelerate it. Thus, if you find yourself toiling away in a freezing garage, consider cranking up the heat to expedite Liquid Nails’ miraculous transformation. The optimal temperature range for efficient curing lies between 60°F and 80°F.
Another influential factor is humidity, an elusive force that can either befriend or frustrate. Elevated humidity levels prolong curing time due to excess moisture in the air hampering solvent evaporation within the adhesive. Conversely, lower humidity levels hasten curing time by reducing moisture interference. Nevertheless, extreme humidity levels must be avoided as they compromise the adhesive bond’s quality. Finding equilibrium is paramount.
The thickness of the adhesive layer and application method also exert their influence. Thicker layers necessitate more time to cure compared to thinner counterparts since a greater volume of adhesive must dry and harden. Furthermore, confining Liquid Nails’ application in spaces with restricted airflow or applying excessive pressure on top impedes evaporation and lengthens curing time. Hence, judicious usage and mindful application techniques are imperative.
The type and porosity of the substrate also contribute to curing time. Porous materials such as wood or concrete absorb some adhesive, impeding drying. In contrast, non-porous surfaces like metals or plastics do not absorb any adhesive, resulting in faster curing. Selecting the appropriate Liquid Nails formula for your specific substrate ensures optimal curing time and bond strength.
Lastly, the product formula and type of Liquid Nails wield influence over curing time. Certain formulations prioritize rapid drying, while others permit repositioning or adjustment during the curing process. Referencing the product label or manufacturer’s instructions provides essential details.
Common Hardening Times for Liquid Nails
In this blog post, we’ll dive into the common hardening times for Liquid Nails and explore the factors that can affect them.
Liquid Nails is a popular construction adhesive known for its strong bonding capabilities. Generally, Liquid Nails products have a recommended drying time of 24 hours. Yep, you heard that right – a whole day. But keep in mind, this is just a general guideline, and the actual drying time can vary.
So, what factors can affect the hardening time of Liquid Nails? Let’s break it down.
Temperature and humidity conditions play a significant role. In ideal conditions with temperatures ranging from 70-90°F (21-32°C) and humidity levels between 40-60%, the adhesive can dry and harden more quickly. However, colder temperatures and high humidity can slow down the drying process. So, if you’re working in extreme conditions, be prepared to exercise some patience.
The type of materials being bonded also affects the hardening time. Liquid Nails is versatile and can bond various surfaces like wood, metal, concrete, and ceramic. However, different materials have different absorption rates. Porous materials like wood may absorb more adhesive and thus take longer to dry compared to non-porous materials like metal.
Now, here’s an important tip: don’t rush the process. While the adhesive may feel dry to touch after a few hours, it may not have reached its full strength yet. Applying stress or load prematurely can weaken the bond and compromise its effectiveness. So be patient and give Liquid Nails the time it needs to unleash its true power.
But hey, we get it – sometimes you need things to dry faster. If that’s the case, here are a few tricks of the trade. Increasing ventilation in the area or using a fan can help promote faster drying. Applying light pressure on the bonded surfaces can also aid in creating a stronger bond and speeding up the hardening process.
Tips to Accelerate the Curing Process of Liquid Nails
Liquid Nails is the go-to adhesive for construction and DIY projects. But how long does it take to cure? While curing time depends on factors like temperature, humidity, and surface type, there are tips and techniques to speed up the process.
Tip 1: Clean Surfaces for Better Bonding
Before applying Liquid Nails, make sure surfaces are squeaky clean. Dirt, dust, or grease can hinder bonding and extend curing time. So grab that mild detergent and water and scrub away.
Tip 2: Thin Layers for Faster Drying
Thin is in when it comes to Liquid Nails. Applying a thin layer allows for better air circulation and faster drying. Apply even pressure while bonding surfaces for a rock-solid connection. Thin layers mean quick results.
Tip 3: Temperature Matters
Heat things up to speed up curing time. If you’re working in a chilly environment, gently warm up the adhesive with a heat gun or hairdryer. Just be careful not to scorch the surface.
Tip 4: Increase Air Circulation
Fresh air is the cure for slow drying. Get those fans running or open windows and doors to get the air flowing. Better airflow means faster curing. Let that breeze blow.
Tip 5: Moisture-Resistant Formulas
Humidity got you down? Don’t worry. Opt for moisture-resistant formulas of Liquid Nails. These special variants cure efficiently in damp conditions and provide superior moisture protection.
Tip 6: Patience is Key
While these tips can accelerate curing, don’t rush the process. Give Liquid Nails enough time to fully cure before subjecting it to stress or load. Curing times can range from hours to days, so check the manufacturer’s instructions for specifics.
Thickness of Adhesive Layer and its Effects on Curing Time
In this article, we will delve into the intricate details and explore how the thickness of the adhesive layer affects the curing time of Liquid Nails.
The Thickness Factor:
The adhesive layer’s thickness refers to the amount of glue applied to the surfaces being bonded. For optimal results, it is essential to apply a thin and even layer.
Slow and Steady:
Thicker adhesive layers take longer to dry and harden compared to thinner ones. This delay occurs because thicker layers impede the evaporation of moisture within the glue. These layers create a barrier that slows down the process of moisture escaping through the surface.
Penetration Matters:
In addition to slowing down moisture evaporation, thicker adhesive layers require more time for complete penetration and bonding with the surfaces involved. Porous materials like wood or concrete necessitate adequate time for the adhesive to seep into their pores, creating a strong bond.
Watch out for Air Pockets:
Excessively thick adhesive layers not only prolong curing time but also compromise bond strength. These thick layers can result in air pockets or gaps within the adhesive, leading to weaker adhesion.
Thin is In:
To achieve optimal curing time and bond strength, it is crucial to adhere to the manufacturer’s guidelines regarding the recommended thickness of the adhesive layer. Applying a thin layer promotes faster curing, facilitates quicker moisture evaporation, and ensures better penetration into porous surfaces.
Temperature and Humidity:
Although thickness is a critical factor, external conditions such as temperature and humidity can also influence curing time. Higher temperatures and lower humidity levels accelerate drying and curing, while lower temperatures and higher humidity levels can prolong the process.
Need for Speed:
If time is of the essence, using a thinner layer of adhesive or providing additional heat or airflow to the bonded surfaces can expedite the curing process.
Temperature and Humidity Levels and their Effects on Curing Time
Today, we’re diving into the fascinating world of adhesive curing and how temperature and humidity levels can have a significant impact on the process. Whether you’re a DIY enthusiast or a professional contractor, understanding these factors is essential for achieving a successful bond.
Temperature: The Goldilocks Zone
Just like Goldilocks searching for the perfect porridge, temperature plays a crucial role in the curing process. Liquid Nails adhesive thrives in temperatures between 60°F (15°C) and 80°F (27°C). When it’s too cold, your adhesive takes its sweet time to cure, resulting in frustratingly long waiting periods. Conversely, if it’s too hot, things speed up excessively, leaving you scrambling to keep up with the rapid bonding process.
Humidity: A Balancing Act
Humidity levels can make or break your adhesive’s curing time. High humidity means more moisture in the air, which can extend drying time. For areas like bathrooms or other moisture-prone spaces, it’s wise to factor in additional curing time to ensure a strong bond. On the other hand, low humidity levels can hasten the process, making it crucial to stay on top of your application to avoid any surprises.
Extreme Conditions: The Danger Zone
Extreme temperatures, whether scorching or freezing, are not kind to Liquid Nails. These conditions can compromise the performance of the adhesive and lead to longer curing times. To achieve optimal results, stick to those recommended temperature ranges mentioned earlier.
Ventilation: The Unsung Hero
Don’t forget about proper ventilation. Good airflow helps expel moisture from the adhesive, aiding in faster drying and hardening. So crack open a window or turn on those fans to optimize your curing time and ensure a strong and reliable bond.
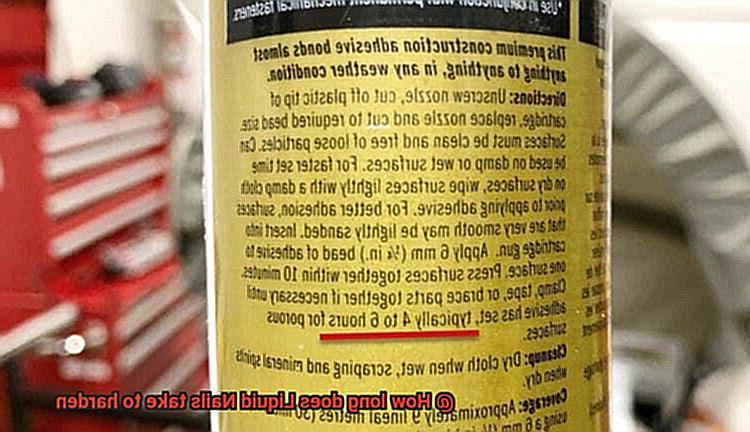
Manufacturer’s Instructions and Advice for Specific Products
Manufacturer’s Instructions and Advice for Specific Products are crucial guidelines provided by the manufacturer to ensure optimal performance and desired results when using a particular product. These instructions and advice are especially important when it comes to products like Liquid Nails, a popular construction adhesive superhero that can bond various materials together.
To start, proper surface preparation is key. Liquid Nails requires clean surfaces for optimal bonding. So, grab a cloth or brush and give those surfaces a good scrub to remove any dirt, grease, or loose particles. We want to create a welcoming environment for this adhesive superhero.
Once the surfaces are clean, it’s time to apply the adhesive. Liquid Nails suggests using a continuous bead or a series of dots or dabs on one surface. The key here is finding the perfect amount – not too little, not too much. We don’t want any oozing when we press the surfaces together. Goldilocks would be proud.
Speaking of pressing surfaces together, make sure you do it with gusto. Apply even pressure across the entire bond area. And if you’re working on a vertical surface or bonding heavy objects, don’t forget to enlist the help of clamps or heavy objects to hold everything in place. We don’t want any wobbly bonds here.
- Now, let’s address the burning question – how long does it take for Liquid Nails to harden? Well, my friend, it’s a bit of a waiting game. The initial drying time is around 30 minutes to an hour. But for the full cure and maximum bond strength, you’ll need to wait up to seven days. Patience is key here.
- One more thing – avoid extreme temperatures like the plague. Liquid Nails doesn’t like excessive heat or cold. So keep it cozy between 60°F and 80°F for optimal curing. And remember, the bond strength will continue to increase over time as the adhesive cures.
Fast-Drying or Quick-Setting Versions of Liquid Nails
When it comes to adhesive options, fast-drying or quick-setting versions of Liquid Nails are the superheroes of construction glue. These specially formulated adhesives are designed to dry and cure at lightning speed, making them a favorite among those who need to complete projects quickly.
One of the biggest advantages of using fast-drying or quick-setting versions of Liquid Nails is their speed. While regular Liquid Nails can take up to seven days to fully cure, these fast-drying versions can dry within 15 minutes or less, depending on the specific product and conditions. This makes them incredibly convenient for small repairs or time-sensitive projects.
However, it’s important to note that while these adhesives may dry quickly, they may still require additional time to reach their maximum strength. It is recommended to avoid putting excessive stress on the bonded materials until the adhesive has fully cured, which can take up to seven days in some cases. So, while fast-drying versions may save you time initially, it’s still important to exercise patience for optimal results.
Another factor to consider when choosing between fast-drying or quick-setting versions of Liquid Nails and regular Liquid Nails is bond strength. While fast-drying versions are convenient, they may not provide the same level of bond strength as the regular version. This means that for projects where maximum strength is crucial, such as heavy-duty construction or load-bearing applications, the regular Liquid Nails may be a better choice.
In terms of usage, both fast-drying and regular Liquid Nails have similar application processes. However, it’s important to carefully read and follow the instructions provided by the manufacturer for best results. Additionally, it is worth mentioning that fast-drying or quick-setting versions of Liquid Nails are typically identified by their packaging, which may mention “fast-drying” or “quick-setting” prominently.
hukFoQ4GIk8″ >
Conclusion
To wrap up, the hardening time of Liquid Nails is influenced by a variety of factors. These include temperature, humidity levels, and the thickness of the adhesive layer. Generally, you can expect it to take anywhere from 24 to 48 hours for Liquid Nails to fully cure and reach its maximum strength. However, it’s crucial to keep in mind that this timeframe can fluctuate, so always consult the manufacturer’s instructions for precise guidance.
Temperature and humidity are key players in the curing process. Warmer temperatures and lower humidity levels expedite drying and hardening, while colder temperatures and higher humidity levels slow things down. For optimal results, aim for an environment with temperatures between 60°F and 80°F.
The thickness of the adhesive layer also impacts curing time. Thicker layers necessitate more drying and hardening time compared to thinner ones. Additionally, the materials being bonded can affect curing time as well. Porous materials like wood take longer to dry than non-porous materials such as metal.
If you’re eager to speed up the curing process of Liquid Nails, there are a few handy tips you can employ. These include cleaning surfaces before applying the adhesive, using thin layers for quicker drying, enhancing air circulation through ventilation or fans, opting for moisture-resistant formulas in humid conditions, exercising patience by allowing ample time for full curing before subjecting the bond to stress or load.
It’s important to note that there are fast-drying or quick-setting versions of Liquid Nails available that can dry within 15 minutes or less. However, these versions may not offer the same level of bond strength as regular Liquid Nails. Consequently, they may be better suited for minor repairs or projects with tight deadlines rather than heavy-duty construction or load-bearing applications.
In summary, comprehending how long it takes for Liquid Nails to harden is vital for achieving successful bonding outcomes in your construction or DIY endeavors.