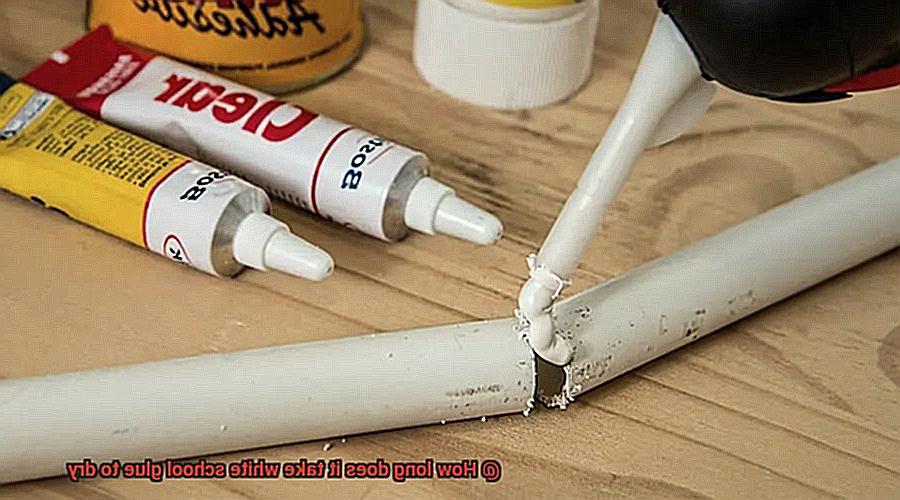
Welcome to our blog post, where we embark on a thrilling exploration into the enigmatic realm of white school glue and its elusive drying time.
We’ve all experienced it – whether we’re knee-deep in an artsy project, tackling a DIY endeavor, or simply engaged in a run-of-the-mill classroom activity – the agonizing wait for glue to dry can truly test our patience. But fret not, dear readers, as we are here to illuminate this pressing matter.
You may find yourself pondering: how long does it truly take for white school glue to dry? Well, hold on tight as we venture forth into a journey that will unveil the scientific intricacies behind glue drying, uncover the factors that influence this process, and equip you with handy tips and tricks to hasten the waiting game.
So sit back, relax, and prepare yourself for an enthralling unraveling of the mysteries surrounding white school glue’s drying time.
Factors that Affect Drying Time
Contents
- 1 Factors that Affect Drying Time
- 2 Average Drying Time for White School Glue
- 3 How to Speed Up the Drying Process
- 4 How to Slow Down the Drying Process
- 5 Tips for Ensuring Proper Drying of White School Glue
- 6 Benefits of Using White School Glue for Projects and Crafts
- 7 Common Mistakes to Avoid When Using White School Glue
- 8 Alternatives to White School Glue
- 9 Conclusion
The drying time of white school glue can be influenced by various factors. Understanding these factors can help users optimize their use of the glue for different projects. Here are some key factors that affect drying time:
- Composition of the glue: The specific formulation of white school glue, including the concentration of water and PVA resin, can impact drying time. Higher concentrations of PVA resin result in faster drying, while more water content leads to longer drying times.
- Thickness of the glue layer: The thickness of the glue layer directly affects drying time. Thicker layers take longer to dry as moisture needs to evaporate from both the surface and interior of the glue. Thin layers dry more quickly due to their larger surface area for moisture escape.
- Humidity levels: High humidity slows down evaporation and prolongs drying time, as moist air saturates the glue, making it harder for water to evaporate. In contrast, low humidity promotes faster evaporation and speeds up drying.
- Temperature: Temperature impacts molecular activity, affecting evaporation rates. Higher temperatures increase molecular movement and accelerate water evaporation, leading to faster drying times. Conversely, lower temperatures slow down evaporation and extend drying time.
- Air circulation: Adequate air circulation helps carry moisture away from the glue’s surface, promoting faster evaporation. Limited airflow or stagnant conditions can extend drying time.
- Application method: The application method influences drying time. Thicker application methods such as heavy brushing or multiple layers result in longer drying times compared to thin and even application methods.
- Porosity of the surface: The surface onto which white school glue is applied affects drying time. Porous surfaces like paper or wood absorb moisture from the glue, slowing down drying. Non-porous surfaces like glass or plastic do not absorb moisture, allowing for faster drying.
- Additives or modifications: Adding substances like baking soda to white school glue can speed up drying due to their ability to absorb moisture. Conversely, diluting the glue with water or adding other substances may extend drying time.
Average Drying Time for White School Glue
The average drying time for white school glue is influenced by a variety of factors. These factors can be categorized into three main groups: glue-related factors, environmental factors, and material and surface factors.
Glue-related factors include the brand and formulation of the glue. Different brands may have different formulas and compositions, resulting in varying drying times. Some brands may have faster-drying formulas than others. Another glue-related factor is the thickness of the glue application. Thicker layers of glue will take longer to dry compared to thin, even layers.
It is recommended to apply a thin layer for faster drying. Additionally, some glues may contain additives or accelerants that speed up the drying process. These additives can help reduce drying time but may also affect other properties of the glue, such as bond strength.
Environmental factors can also impact the drying time of white school glue. Temperature plays a crucial role, as higher temperatures generally promote faster drying while cooler temperatures can prolong drying time.
However, extreme temperatures, both hot and cold, can affect the quality of the adhesive bond. Humidity is another factor to consider, as lower humidity levels facilitate faster drying while higher humidity levels slow down the process. Good air circulation is also important, as it helps accelerate drying by facilitating the evaporation of moisture from the glue. Adequate ventilation in the drying area is recommended to ensure efficient drying.
Material and surface factors should also be taken into account when considering drying time. The porosity of the materials being glued together affects drying time. Materials with high porosity, such as paper or fabric, may absorb moisture from the glue, prolonging the drying process. Additionally, the amount of pressure applied during bonding can impact drying time. Applying pressure ensures better contact between surfaces, promoting a stronger bond. However, excessive pressure can squeeze out excess glue and extend drying time.
How to Speed Up the Drying Process
To speed up the drying process of white school glue, there are several techniques and tips that can be applied. These methods aim to accelerate the evaporation of the water content in the glue, which is the main factor affecting the drying time. Here are some strategies to consider:
Spread Thin Layers
When applying white school glue, it is best to spread it in thin layers rather than thick globs. Thin layers allow for more surface area to be exposed to air, which promotes quicker evaporation of the water content in the glue. Use a brush or your finger to create a thin and even layer when spreading the glue. This will help the glue dry faster.
Increase Air Circulation
Good air circulation can greatly accelerate the drying process. After applying the glue, place the glued item in a well-ventilated area. You can also use a fan to create airflow around the glue. The moving air helps to remove moisture from the glue more efficiently, reducing the drying time.
Use a Hairdryer
If you need an even faster drying time, you can use a hairdryer on a low heat setting. Hold the hairdryer a few inches away from the glued area and move it back and forth to evenly distribute the heat. Be careful not to hold it too close or use high heat, as this can cause the glue to bubble or warp.
Apply Gentle Heat
Another way to speed up drying is by applying gentle heat to the glued area. You can use a heat lamp, a heating pad, or place the item near a warm source like a radiator (but be cautious not to damage or melt the item). The heat helps evaporate the water content in the glue faster.
Optimal Temperature and Humidity
The temperature and humidity levels in your working environment can affect how quickly white school glue dries. It is best to work in a room with moderate temperature and low humidity, as these conditions promote faster evaporation. Avoid working in extremely cold or humid environments, as these can prolong drying time.
How to Slow Down the Drying Process
Slowing down the drying process of white school glue can be achieved through various methods. By using less glue, adding water, applying a sealant, controlling temperature and humidity, and using a fan, you can extend the drying time and have more flexibility when working on your projects.
To begin, using less glue is an effective way to slow down the drying process. The thickness of the glue layer directly affects the drying time. By applying a thinner layer, you can control the drying time and make adjustments or additions as needed. This allows for greater precision and flexibility in your project.
Adding water to the glue is another method to slow down drying. By diluting the glue with water, you create a thinner consistency that takes longer to dry. It is important to add water gradually and in small amounts to avoid compromising the adhesive properties of the glue.
Applying a sealant or barrier can also help slow down the drying process. Sealants such as petroleum jelly or clear nail polish create a protective layer that slows down evaporation. This extended drying time allows for more adjustments and corrections to be made before the glue sets.
Controlling temperature and humidity levels in the environment can have a significant impact on drying time. Higher temperatures and low humidity levels accelerate the drying process, while cooler temperatures and higher humidity levels slow it down. Adjusting these factors can help extend the drying time of the glue.
Using a fan to create airflow around the glued surface can also slow down drying. The moving air increases evaporation, allowing moisture to escape faster and reducing drying time. However, it is important not to place the fan too close to the glued surface, as this may cause uneven drying or displacement of lightweight materials.
Tips for Ensuring Proper Drying of White School Glue
White school glue is a versatile adhesive commonly used in arts and crafts projects. However, it can be frustrating when the glue takes a long time to dry. To ensure proper drying of white school glue, follow these tips and techniques:
Apply thin layers
When using white school glue, it’s important to spread a thin and even layer of glue on the surface. Thick layers of glue take longer to dry, as the water content in the glue evaporates more slowly. By applying thin layers, you promote quicker evaporation and faster drying time.
Consider temperature and humidity
The environment plays a crucial role in drying white school glue. Higher temperatures and lower humidity levels facilitate faster drying. Work in a well-ventilated area or use fans to circulate air around the project, helping to speed up the drying process.
Apply gentle pressure
To ensure proper adhesion and remove excess moisture, apply gentle pressure on the glued surfaces. Clamps or weights can be helpful in applying this pressure. However, be careful not to apply too much pressure, as it may cause the glue to squeeze out from the edges.
Be patient
Patience is key when it comes to drying white school glue. Resist the temptation to touch or move the glued surface before it is completely dry. Even if the surface appears dry, there may still be moisture trapped underneath that needs more time to evaporate. Waiting for at least 24 hours before handling or moving the glued object is recommended.
Use quick-drying options
In cases where quick drying is necessary, consider using a hairdryer on a low heat setting to gently blow air over the glued surface. This technique can help speed up the drying process, but be cautious not to use high heat, as it may cause the glue to bubble or melt. Additionally, certain types of white school glue are specifically formulated for faster drying and contain additives or chemicals that expedite the process. These specialized glues can be a good option when quick drying is a priority.
Benefits of Using White School Glue for Projects and Crafts
White school glue is a versatile adhesive that provides numerous benefits for various projects and crafts. Whether you’re a student working on a school project or an adult engaging in creative pursuits, using white school glue can enhance your crafting experience. Here are some key advantages:
- Strong Bonding Properties: White school glue has strong adhesion to a wide range of materials, including paper, cardboard, fabric, and some plastics. This makes it ideal for various projects such as paper crafts, bookbinding, and collage making.
- Non-Toxic and Safe: White school glue is non-toxic and safe for children to use. It doesn’t contain any harmful chemicals, making it a preferred choice for teachers, parents, and caregivers who want to ensure the safety of children during craft activities.
- Dries Clear: White school glue dries clear, allowing for a neat and professional-looking finish. This is particularly beneficial for projects where the glue may be visible after drying, especially when working with transparent materials or creating art pieces where the glue should not be visible.
- Long Drying Time: Unlike some other types of glue, white school glue has a relatively long drying time. This allows for repositioning or adjustments before the glue sets completely. It provides more flexibility during the crafting process and reduces the risk of mistakes or accidental bonding.
- Water-Soluble: White school glue is water-soluble when wet, making it easy to clean up any excess glue with water. This feature is convenient for children and beginners who may accidentally apply too much glue or get it on surfaces where it is not desired. Simply wiping away the excess glue with water helps maintain a clean workspace and prevents damage to materials.
- Affordable and Readily Available: White school glue is affordable and readily available in most stores. It is an accessible option for individuals and institutions with limited budgets or those who frequently engage in craft activities. Its affordability makes it suitable for large-scale projects as well.
- Versatility: White school glue can be used in combination with other materials and techniques. It can be mixed with water to create a decoupage medium or diluted for a more subtle adhesive effect. It can also be used as a base for adding glitter, sequins, or other embellishments to crafts. The versatility of white school glue allows for endless possibilities in creativity and experimentation.
Common Mistakes to Avoid When Using White School Glue
When it comes to using white school glue, there are a few common mistakes that you should avoid to ensure the best results. Let’s dive into these mistakes and learn how to avoid them:
- Apply the right amount of glue: One of the most common mistakes people make is applying too much glue. They think that more glue will create a stronger bond, but that’s not the case. Using too much glue can lead to longer drying times and a messy appearance. Instead, apply a thin and even layer of glue for optimal results.
- Allow sufficient drying time: Patience is key when it comes to using white school glue. It typically takes around 24 hours for the glue to fully dry, but this can vary depending on the brand and environmental conditions. Rushing the drying process by handling or moving the glued object too soon can weaken or break the bond. Be patient and give the glue enough time to dry completely.
- Use fresh glue: White school glue can lose its effectiveness over time. Always check the expiration date on the glue bottle before using it. If the glue has expired or appears thick and clumpy, it’s best to discard it and use fresh glue for better results.
- Apply enough pressure during bonding: To ensure a strong bond, apply firm and even pressure when gluing two surfaces together. This can be done using clamps, weights, or simply pressing down firmly with your hands for a few minutes after joining the surfaces. Insufficient pressure can result in weak bonds that may easily come apart.
- Follow safety precautions: While white school glue is generally safe to use, it’s important to take certain precautions. Avoid contact with eyes or skin and wash hands thoroughly after use. Also, make sure to use glue in well-ventilated areas when working with large quantities.
Alternatives to White School Glue
I’ve got a treasure trove of options that will make your crafting or project endeavors a breeze. Let’s explore the world of adhesives and discover the perfect fit for you.
First up, we have clear school glue. This magical adhesive dries transparent, leaving no visible residue behind. It’s perfect for projects where you want the glue to disappear into thin air.
Next, let’s twist things up with glue sticks. These nifty little sticks are mess-free and dry in a flash, making them ideal for small crafts or paper projects. Just twist, apply, and voila.
When you need a bond that can withstand the test of time, craft glue is your go-to. This superhero adhesive is designed specifically for crafting purposes and can handle various materials like fabric, wood, and plastic. It’s like having a trustworthy sidekick by your side.
For those tough nuts to crack, epoxy glue is the ultimate warrior. It creates a strong bond between materials like metal, glass, and ceramics. But beware, this mighty glue usually comes in two parts that need to be mixed before application and takes longer to dry compared to its counterparts.
If you’re in a hurry and need an instant bond, hot glue guns are your best friend. These guns offer a strong hold and are perfect for projects that require durability or when regular glue just won’t cut it.
But wait, there’s more. Double-sided tape is a quick and mess-free alternative that provides a secure bond. It works wonders in paper crafts and can be easily removed without leaving any sticky residue behind.
For all you fabric enthusiasts out there, fabric glue is a must-have. This adhesive is specially designed to keep your fabric creations intact. It dries clear and flexible, ensuring your masterpieces stand the test of time.
If you’re looking for something less permanent, rubber cement is the answer. It’s commonly used in artwork or photo mounting and can be easily removed without damaging the surface. It’s like a gentle touch that won’t leave a trace.
Enter Mod Podge, the chameleon of adhesives. This versatile glue can be used as a glue, sealer, or finish. It dries clear and glossy, making it perfect for decoupage projects or sealing your artwork with a touch of elegance.
And for all you eco-warriors out there, fear not. There are natural alternatives like cornstarch glue or homemade paste made from flour and water. These non-toxic options are easy to make and can be used for various crafts.
gnG0FNxisvk” >
Conclusion
The drying time of white school glue can vary depending on several factors. Generally, it takes anywhere from 30 minutes to 24 hours for the glue to completely dry. However, this timeframe can be influenced by factors such as temperature, humidity, and the thickness of the glue application.
When it comes to drying time, it’s important to note that white school glue typically dries faster than other types of adhesive. Its water-based formula allows for quicker evaporation, speeding up the drying process. This makes it a convenient option for various crafting projects or school assignments that require a quick turnaround.
To ensure optimal drying, it is recommended to apply a thin layer of glue evenly onto the surface. Thicker applications may take longer to dry as they retain more moisture. Additionally, higher temperatures and lower humidity levels can expedite the drying process.
It’s worth mentioning that while white school glue may appear dry on the surface within minutes, it is advisable to allow ample time for complete curing before handling or applying additional layers. Rushing this step could result in smudging or compromising the bond strength.
In conclusion, although white school glue generally dries within 30 minutes to 24 hours, it is always best to allow sufficient time for complete curing.

