You’ve got your hands on the legendary Rhino Glue, huh? Or maybe you’re just dipping your toes into the adhesive wonderland. Either way, I bet you’re dying to know: How long does it take Rhino Glue to cure? Well, fret not. In this blog post, we’re diving deep into the nitty-gritty of Rhino Glue’s curing process.
Get ready for all the juicy details that’ll make your projects stick like magic.
The Need for Speed:
Contents
- 0.1 The Need for Speed:
- 0.2 But Wait. There’s More.
- 0.3 The Plot Thickens: Factors Affecting Curing Time
- 0.4 Pro Tips for Curing Like a Boss:
- 1 What is Rhino Glue?
- 2 Factors Affecting Curing Time
- 3 Recommended Environmental Conditions for Proper Curing
- 4 Applying the Glue Sparingly and Evenly
- 5 Allow 24 Hours for Maximum Strength
- 6 Avoid Stress or Pressure During Curing Period
- 7 Different Materials Require Different Curing Times
- 8 Consult Manufacturer’s Instructions or Contact Rhino Glue Directly for Guidance
- 9 Conclusion
Let me tell you something exciting about Rhino Glue – it dries faster than a speeding bullet. Yep, this stuff reaches its initial bonding strength in a matter of seconds. No more twiddling your thumbs while waiting for glue to set. With Rhino Glue, you can get right down to business and move on with your life.
But Wait. There’s More.
Now, before you start celebrating too soon, let me give you the full scoop. While Rhino Glue cures at lightning speed initially, achieving its maximum bonding strength takes a little more time. We’re talking 24 to 48 hours here, folks. Patience is key if you want that ultimate durability and long-lasting bond.
The Plot Thickens: Factors Affecting Curing Time
So why does Rhino Glue take its sweet time to reach its full potential? Well, my friend, it all comes down to a few factors. First up is temperature and humidity – those sneaky culprits that love to mess with our plans. Higher temperatures speed up the curing process like an Olympic sprinter on steroids. On the flip side, colder temps can slow things down and test our patience.
And let’s not forget about those materials we’re trying to bond together. Rhino Glue is a versatile beast, capable of tackling wood, metal, plastic, ceramics, and more. But here’s the catch: porous materials like to play hard to get. They tend to absorb the adhesive and take longer to cure compared to their non-porous counterparts. Sneaky little devils.
Pro Tips for Curing Like a Boss:
Now that you’re armed with the knowledge of Rhino Glue’s curing game, let me drop some pro tips your way:
Prepare those surfaces: Give ’em a good cleaning and drying session before applying Rhino Glue. Dirt, grease
What is Rhino Glue?
With its quick curing time, exceptional bonding strength, and versatility in application, Rhino Glue is the go-to choice for a wide range of projects. In this article, we will explore what makes Rhino Glue unique and why it should be your adhesive of choice.
Fast Curing Time:
Rhino Glue stands out with its rapid curing time. Unlike traditional glues that may take hours or even days to fully cure, Rhino Glue sets in just seconds. This means you can continue working on your project without having to wait for the glue to dry. However, it is important to note that while an initial bond strength can be achieved within minutes, it is advisable to allow at least 24 hours for the glue to reach its maximum strength.
Superior Bonding Strength:
One of the standout features of Rhino Glue is its exceptional bonding strength. It can withstand heavy loads and provides a reliable bond that holds up over time. Whether you are repairing a broken object or creating something new, Rhino Glue ensures that your project stays intact. Its strong bond creates a durable and permanent connection between materials.
Versatility in Application:
With Rhino Glue, you get more than just a regular adhesive. It offers versatility in application, making it suitable for various purposes. Whether you need to bond different materials together, fill gaps or cracks, or even use it as a sealant, Rhino Glue has got you covered. Its convenient squeeze bottle or tube allows for precise application without any mess or waste.
Resistant to Environmental Factors:
Rhino Glue is designed to withstand various environmental conditions once it has fully cured. It is resistant to water, moisture, heat, and most chemicals, making it suitable for both indoor and outdoor use. Whether you are working on a project in a humid bathroom or a scorching hot garage, Rhino Glue will hold up and provide a long-lasting bond. Its resistance to these factors ensures that your projects remain intact under different circumstances.
Factors Affecting Curing Time
Rhino Glue is a superhero adhesive that can save the day with its lightning-fast curing time and Herculean bonding strength. However, to truly harness its power, it’s essential to understand the factors that affect its curing time. This article will explore these factors, providing valuable insights to ensure successful bonding and efficient curing.
Temperature:
The temperature of the environment plays a vital role in Rhino Glue’s curing time. Higher temperatures accelerate the process, while lower temperatures slow it down. Heat speeds up molecular movement, leading to quicker bonding and solidification. Cold temperatures restrict molecular movement, causing the glue to take longer to cure.
Humidity:
Humidity levels also impact curing time. High humidity can prolong the process as excess moisture interferes with drying and hardening. Conversely, low humidity facilitates solvent evaporation, speeding up curing. Finding the right balance is crucial.
Substrate Type:
Different materials require different strategies for curing. Porous materials like wood or fabric may take longer to cure as they absorb more adhesive. Non-porous surfaces like glass or metal allow for faster curing due to minimal absorption.
Thickness of Glue Application:
Thicker glue layers take longer to cure as solvents need more time to evaporate and cross-linking occurs throughout the entire thickness. Following manufacturer guidelines regarding application thickness is crucial for optimal results.
Surface Preparation:
Proper surface preparation is essential for achieving optimum bonding and curing results. Adequate cleaning and removal of contaminants ensure stronger bonds and shorter curing times.
Adhesive Quantity:
Applying too much glue can prolong the process, while insufficient adhesive may result in weaker bonding and faster curing. Finding the right balance is key.
Recommended Environmental Conditions for Proper Curing
Unlock the full potential of Rhino Glue, the superhero of adhesives, by understanding the recommended environmental conditions for proper curing. Temperature is a crucial factor in the curing process, with an optimal range of 60°F to 90°F (15°C to 32°C). Higher temperatures accelerate curing, while lower temperatures slow it down significantly.
Humidity also plays a role, with a moderate level of around 50% being ideal for proper curing. Excessively high humidity prolongs curing time, while extremely low humidity causes the glue to dry too quickly, affecting bond strength. So, work in an environment with moderate humidity levels.
Ventilation is essential during curing to disperse fumes emitted by the glue. A well-ventilated space ensures a healthy and safe working environment.
Proper surface preparation is crucial for successful bonding. Surfaces should be clean, dry, and free from contaminants like dust, oil, grease, or moisture. Any residue or foreign substances can interfere with bonding and affect curing time.
Applying pressure to the bonded surfaces promotes better adhesion and optimal curing. Follow the manufacturer’s guidelines for pressure application based on the materials being bonded.
Cure time for Rhino Glue varies from minutes to hours depending on temperature, humidity, and materials. Allow sufficient time for full curing before subjecting the bond to stress or load.
After the initial curing period, let the bond further cure for at least 24 hours before subjecting it to significant stress or load. This additional curing time ensures maximum bond strength and durability.
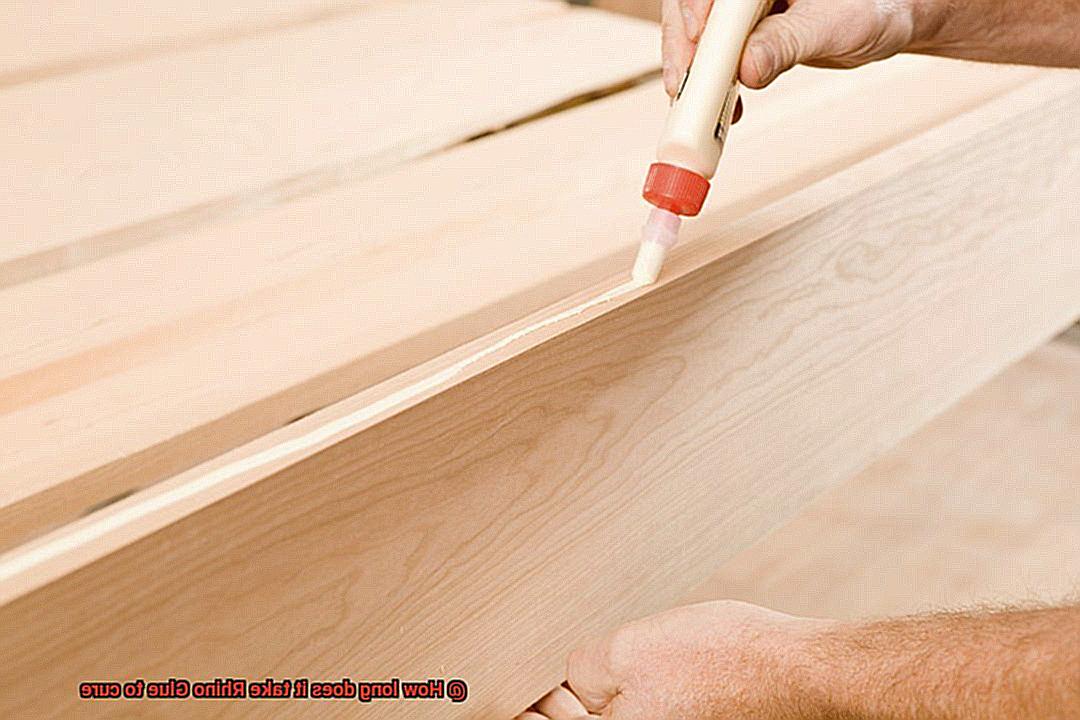
Applying the Glue Sparingly and Evenly
Applying glue may seem like a simple task, but when it comes to Rhino Glue, precision is key. In order to unleash the full power of this adhesive superhero, you must apply it sparingly and evenly. Let’s dive into why this is so important.
To start off, using Rhino Glue sparingly means using just enough to bond surfaces without excess oozing out like a messy monster. Nobody wants a gloopy mess, right? So, by using this glue with a light touch, you can ensure a clean and effective application.
How do you achieve this sparing application? It all begins with surface preparation. Clean those surfaces thoroughly, banishing dirt, dust, and grease that might interfere with the bonding process. Think of it as giving Rhino Glue a fresh canvas to work its magic on.
Once your surfaces are squeaky clean, it’s time to wield the glue. Apply a thin layer onto one surface, spreading it evenly like an artist perfecting their masterpiece. Whether you choose a brush, toothpick, or the glue applicator itself, the goal is to cover every inch of the surface that will be bonded. This ensures that no corner is left untouched by Rhino Glue’s mighty grip.
Now comes the crucial moment – pressing the surfaces together. Squeeze them with even pressure, creating a bond that could withstand an earthquake. Avoid any temptation to shift or move the surfaces once they’re joined in holy adhesive matrimony. Remember, Rhino Glue needs time to flex its muscles and work its magic.
Speaking of time, patience is key here. After pressing the surfaces together, let the glue cure undisturbed. The curing time for Rhino Glue varies based on factors like temperature and humidity. Typically, it takes about 24 hours for this adhesive superhero to reach its maximum strength and save the day.
During this curing process, keep those bonded surfaces in place and avoid any stress or movement that could jeopardize the bond. You don’t want your glued object crumbling like a sandcastle, do you? So, resist the urge to use or handle it until Rhino Glue has completed its heroic transformation.
And here’s a bonus tip for the curious minds out there: Rhino Glue has the power to bond an array of materials, from wood and metal to plastic and ceramics. However, it’s always wise to test this adhesive on a small, inconspicuous area before tackling larger surfaces. After all, even superheroes need a trial run before saving the world.
Allow 24 Hours for Maximum Strength
Imagine having a superhero adhesive at your disposal, ready to conquer any bonding challenge with its quick curing time and impressive strength. Rhino Glue is that hero, loved by DIY enthusiasts and professionals alike for its unrivaled performance. But did you know that patience plays a crucial role in unlocking the full potential of this adhesive? Join us as we delve into the importance of allowing Rhino Glue a 24-hour period to reach maximum strength and explore the fascinating process behind its curing capabilities.
Understanding the Intricate Curing Process:
Rhino Glue’s remarkable bonding ability lies in its unique curing process, where it forms a robust connection between different materials. As solvents within the adhesive evaporate, a transformation occurs – the glue hardens, solidifying the bond.
Factors Influencing Curing Time:
To harness Rhino Glue’s full strength, it’s essential to consider various factors that affect its curing time. Temperature, humidity, and the materials being bonded all play a role in determining how quickly the adhesive cures. Higher temperatures expedite the process, while lower temperatures slow it down. Similarly, high humidity can prolong curing time, whereas low humidity accelerates it. By understanding these factors, you can optimize your project’s curing time accordingly.
Initial Bond Strength vs. Maximum Strength:
Rhino Glue may provide an initial bond strength within minutes, instilling confidence that your project is secure. However, it’s vital to recognize that initial bond strength doesn’t equate to maximum strength and durability. To unleash Rhino Glue’s exceptional capabilities fully, we recommend allowing a full 24-hour period for complete curing.
Protecting Your Project from Stress and Strain:
During the critical 24-hour curing window, it’s imperative not to subject the bond to stress or strain. Although the adhesive may appear dry or hardened before the 24-hour mark, exercising caution and waiting for maximum strength ensures long-lasting results. Avoid heavy loads or rigorous activities that could compromise the bond’s integrity.
Manufacturer’s Recommendations:
To achieve optimal outcomes, adhere to the manufacturer’s instructions and recommendations regarding curing time. These guidelines consider various factors such as the specific materials being bonded and the surrounding environment. By following these guidelines diligently, you can achieve a bond that surpasses expectations in both strength and durability.
Additional Curing Time: Going the Extra Mile:
In certain circumstances, additional curing time may be necessary. Porous surfaces or less-than-ideal temperature and humidity conditions can extend the curing process. Porous surfaces absorb solvents from Rhino Glue, prolonging the bond’s full development. Similarly, unfavorable environmental conditions impede solvent evaporation, delaying maximum strength attainment.
Avoid Stress or Pressure During Curing Period
Today, we embark on a journey into the captivating world of glue, exploring the vital importance of avoiding stress or pressure on glued surfaces during the curing period. So grab your favorite DIY project, and let us dive into the secrets of maximizing adhesive strength.
The Science Behind Curing:
Imagine a hidden superhero, ready to save the day – that’s Rhino Glue during the curing period. Beneath its unassuming exterior, a remarkable transformation occurs. As Rhino Glue cures, a chemical reaction takes place, solidifying its bond and transforming it from a mere liquid into an extraordinary adhesive with exceptional strength.
Weakening the Bond:
Prematurely applying stress or pressure disrupts this delicate curing process. Just as a young sapling needs time to grow into a sturdy tree, Rhino Glue requires its curing time to reach its full potential. Any external force can weaken or even break the bond, leading to disappointment and wasted effort.
Proper Contact Matters:
Ensuring proper contact between the glued surfaces is crucial for a successful bond. Applying stress or pressure too soon can cause misalignment or shifting, resulting in a weak bond unable to withstand daily wear and tear. Gentle yet firm clamping or holding of the surfaces together allows Rhino Glue to work undisturbed, creating an unbreakable bond.
A Stable Environment:
Rhino Glue thrives in a stable environment during the curing period. Extreme temperature changes, humidity fluctuations, or direct sunlight exposure can interfere with the curing process, compromising the bond strength. To ensure optimal results, keep your glued surfaces in a controlled environment until they have fully cured.
Patience is Key:
Remember, good things come to those who wait. Adhering to the manufacturer’s instructions regarding the specific curing time required for Rhino Glue is crucial. Rushing the process by prematurely handling or subjecting the bond to stress can lead to disappointment. Allow Rhino Glue to cure completely, and you will be rewarded with a reliable and long-lasting adhesive bond.
Extra Support for Extra Strength:
Sometimes, additional support or reinforcement may be necessary to avoid stress or pressure during the curing period. Brace yourself (pun intended.) – braces, clamps, or supportive devices can secure glued surfaces together until the glue has fully cured, ensuring a robust and durable bond.
Different Materials Require Different Curing Times
Different Materials Require Different Curing Times
In the world of adhesives, one size does not fit all. Rhino Glue, like many other adhesives, requires different curing times depending on the materials it is used on. Understanding why different materials have varied curing times can help ensure successful bonding and prevent premature failures. So, let’s explore the fascinating science behind this phenomenon.
- Porosity: The porosity of a material plays a crucial role in determining its curing time. Porous materials, such as wood or fabric, have tiny nooks and crannies that the glue needs to seep into for a strong bond. This process takes time, so these materials typically require a longer curing time compared to non-porous materials like metal or glass.
- Temperature and Humidity: The environment in which the adhesive is applied also affects its curing time. Higher temperatures generally speed up the curing process, while lower temperatures can slow it down. So, if you’re working in a cozy warm environment, expect your glue to cure faster. On the other hand, high humidity levels can prolong the curing time due to increased moisture content.
- Thickness of Adhesive Layer: The thickness of the adhesive layer is another factor to consider when determining the curing time. Thicker layers take longer to cure as the glue needs more time to dry and harden completely. So, if you’re working with a thick adhesive layer, be patient and give it the time it needs to work its magic.
It’s important to note that Rhino Glue may offer different variants or formulations designed for specific materials or applications. These variants may have different curing times tailored to the characteristics of those materials. So, always check the instructions and recommendations provided by the manufacturer for optimal results.
Consult Manufacturer’s Instructions or Contact Rhino Glue Directly for Guidance
Consulting the manufacturer’s instructions or contacting Rhino Glue directly is crucial when it comes to understanding the curing time of this adhesive powerhouse. Rhino Glue is a versatile adhesive that can bond a wide range of materials, but the curing time can vary depending on several factors.
One of these factors is the type of materials being bonded. Different materials have different properties, such as porosity or smoothness, which can affect how quickly the glue cures. The manufacturer’s instructions will provide specific guidance tailored to your chosen materials.
Temperature also plays a significant role in the curing process. Higher temperatures generally speed up the curing time, while lower temperatures can slow it down. If you’re working in extreme heat or chilly conditions, it’s essential to know how this might impact the glue’s performance.
Humidity levels need to be just right for optimal curing. Too much moisture in the air can slow down the process, while too little can lead to quick but weak bonds. The manufacturer’s instructions will give you the sweet spot for ideal humidity conditions.
The amount of glue applied is another factor to consider. Applying too much or too little can throw off the balance and result in less-than-desirable bonding strength. The manufacturer’s instructions will guide you on how to achieve that Goldilocks amount of glue.
Consulting the manufacturer’s instructions or contacting Rhino Glue directly becomes your secret weapon in achieving the best results. They have a team of adhesive wizards who can provide accurate information and address any concerns or questions you might have.
By following the manufacturer’s instructions and seeking guidance when needed, you can ensure that you’re using Rhino Glue correctly and achieving optimal bonding strength. Each adhesive product has its unique quirks, and Rhino Glue is no exception.
2yBitj6g8dk” >
Conclusion
Rhino Glue, the mighty adhesive that promises to bond almost anything, is known for its quick curing time.
But just how long does it take for this super glue to set? Well, you’ll be pleased to know that Rhino Glue cures in a flash.
In fact, it can reach its maximum strength in just under 10 minutes. That’s right, in less time than it takes to make a cup of coffee or scroll through your social media feed, Rhino Glue will have successfully bonded your materials together.
So whether you’re fixing a broken vase or working on a craft project, Rhino Glue’s speedy cure time will have you back on track in no time.