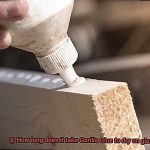
Do you know the feeling of despair when your favourite plastic item breaks into pieces? It’s a common occurrence, and most of us end up tossing it away. But what if we told you there’s a way to fix it instead of losing it forever? Enter J-B Weld, the ultimate solution for bonding and fixing items made of plastic. However, the question on everyone’s mind is, how long does it take J-B Weld to cure on plastic?
The answer to this question can make or break your repair job. That’s why we’ve done extensive research to bring you the most comprehensive answers. In this blog post, we’ll delve deep into the world of J-B Weld and plastic bonding, exploring curing times and revealing the secrets to getting the best results from this incredible product.
Whether you’re a DIY enthusiast or a professional repair person, this post is for you. We’ll cover everything you need to know about J-B Weld curing times on plastic – including factors that affect it, optimal curing times for different types of plastic, and tips for ensuring the highest quality bond possible. So sit back and get ready to learn all about how long it takes J-B Weld to cure on plastic – because once you master this skill, there’ll be no more throwing away your favourite items.
What is J-B Weld?
Contents
- 1 What is J-B Weld?
- 2 How Long Does it Take J-B Weld to Cure on Plastic?
- 3 Factors Affecting Curing Time of J-B Weld on Plastic
- 4 Types of Plastics That Are Difficult to Bond With Adhesives
- 5 Temperature and Humidity Levels for Optimal Curing
- 6 Preparing the Plastic Surface Before Applying J-B Weld
- 7 Tips for Applying J-B Weld to Plastic Surfaces
- 8 Conclusion
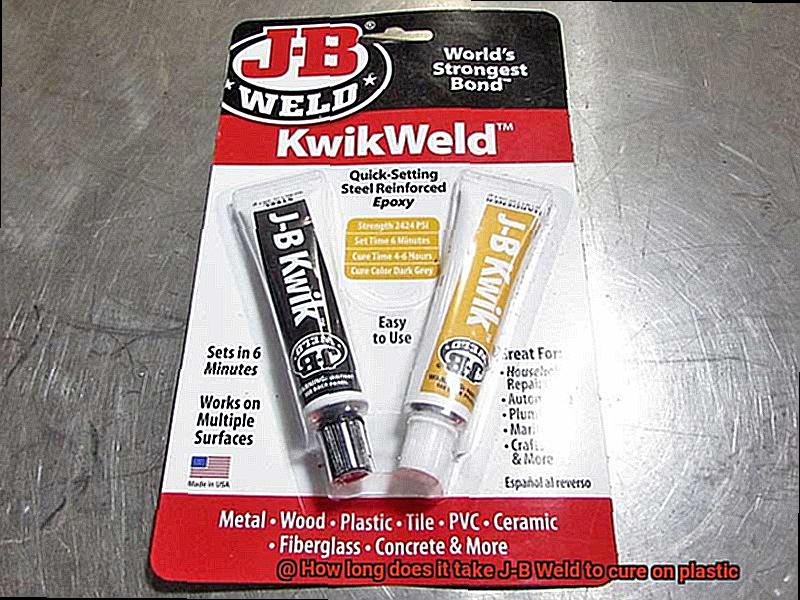
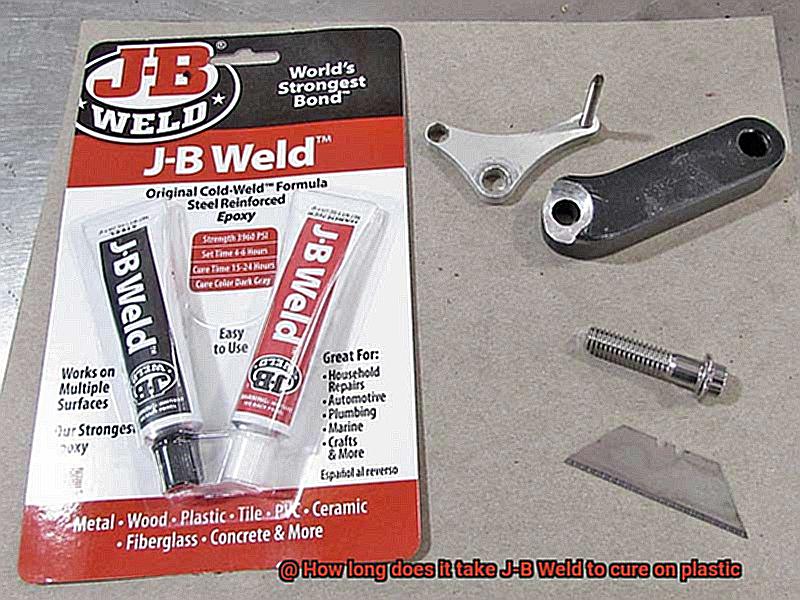
If you’re looking for an adhesive that can withstand the toughest of conditions, J-B Weld is the answer you’ve been searching for. This two-part epoxy adhesive is a game-changer in the world of adhesives, known for its exceptional strength and durability.
Originally developed for industrial use in the 1960s, J-B Weld has since become a household name among DIY enthusiasts and hobbyists alike. It’s versatile enough to bond virtually any surface, from metal and wood to plastic and ceramic.
The secret behind J-B Weld’s incredible bonding strength lies in its unique formulation. It comes in two tubes – one containing the resin and the other containing the hardener. When mixed in equal parts, the two components react to create a bond that can withstand high temperatures, pressure, and vibrations.
One of the key features of J-B Weld is its ability to cure under different conditions. The curing time can vary depending on the material being bonded and the temperature and humidity of the environment. However, once cured, J-B Weld creates a permanent bond that is resistant to water, chemicals, and vibrations.
When it comes to bonding plastic materials, J-B Weld is an excellent choice. Although curing time on plastic can vary depending on factors such as temperature and humidity levels, it generally takes around 4-6 hours to set and 15-24 hours to cure fully. Some plastics like polyethylene and polypropylene require special preparation before applying any adhesive due to their low surface energy.
To ensure optimal results when using J-B Weld, it’s crucial to follow the instructions carefully and allow ample time for the adhesive to fully cure before subjecting it to any stress or pressure. The ideal temperature range for curing J-B Weld is between 60-90 degrees Fahrenheit (15-32 degrees Celsius), while high humidity levels can slow down the curing process.
How Long Does it Take J-B Weld to Cure on Plastic?
Before you start your repair project, it’s important to understand how long it takes for J-B Weld to cure on plastic.
J-B Weld is a two-part epoxy adhesive that consists of a resin and hardener. When mixed together, they create a bond that can withstand tough conditions such as water, chemicals, and vibrations. This makes it ideal for repairing plastic damages.

When it comes to curing time, several factors can influence how long it takes for J-B Weld to fully cure on plastic. These factors include the type of plastic, thickness of application, and temperature and humidity levels. Generally speaking, J-B Weld takes around 4-6 hours to set and 15-24 hours to fully cure on plastic surfaces.
It’s essential to note that just because J-B Weld appears dry after a few hours doesn’t mean it has fully cured. It’s recommended to wait at least 24 hours before applying any stress or pressure to the repaired plastic item. In addition, avoid exposing the repaired plastic to extreme temperatures or moisture until it has fully cured.
Factors Affecting Curing Time of J-B Weld on Plastic
J-B Weld is a popular adhesive that can be used to repair plastic surfaces, but curing time can vary based on several factors. To ensure the strongest bond possible, it’s important to understand these factors and adjust your approach accordingly.
The type of plastic you’re working with is the first factor to consider. Different plastics have different properties that can impact how well J-B Weld adheres and how quickly it cures. Some plastics may be more porous than others, allowing the J-B Weld to seep into the material and bond more effectively. Other plastics may be less porous and more rigid, making it harder for the J-B Weld to bond with the surface. Knowing what type of plastic you’re dealing with can help you adjust your expectations and approach accordingly.
Temperature is another crucial factor that affects curing time. Colder temperatures will slow down the curing process of J-B Weld, while warmer temperatures will speed it up. You need to make sure that the temperature of both the environment and the plastic itself is just right. If your plastic is too cold, it may take longer for the J-B Weld to cure properly.
Pressure is also important when applying J-B Weld on plastic surfaces. Too little pressure may not allow enough contact between the two surfaces, making effective bonding impossible. On the other hand, applying too much pressure can cause the J-B Weld to spread out too thin or even crack under stress.
Proper preparation of the plastic surface is key to achieving a strong bond with J-B Weld. Before applying the adhesive, make sure to thoroughly clean and dry the surface as dirt or moisture can interfere with the bonding process and prolong curing time. Additionally, roughening up the surface with sandpaper can help create a better adhesion surface for the J-B Weld to bond with.
Types of Plastics That Are Difficult to Bond With Adhesives
When it comes to bonding plastics with adhesives, it’s important to know that not all plastics are created equal. Some types of plastics are more difficult to bond than others, and this can be attributed to a variety of factors such as surface energy, chemical composition, and texture. In this article, we will explore the types of plastics that are notoriously difficult to bond with adhesives and why.
Polyethylene (PE) is a commonly used plastic in packaging materials due to its flexibility and durability. However, it’s also one of the most challenging plastics to bond with adhesives. This is because PE has a very low surface energy, which means that it is resistant to wetting and therefore difficult for adhesives to adhere to. To bond PE successfully, it’s important to use an adhesive that is specifically designed for low surface energy plastics.
Polypropylene (PP) is another plastic that can be difficult to bond with adhesives. Like PE, PP also has a low surface energy, making it resistant to wetting and challenging for adhesives to create a strong bond. PP is commonly used in automotive parts and food containers, so finding a suitable adhesive is important for maintaining the safety and durability of these products.
Polycarbonate (PC) is another plastic that poses challenges when it comes to bonding with adhesives. PC is often used in electronic components and automotive parts due to its high impact resistance and optical clarity. However, its surface can be prone to oxidation, which can make it difficult for adhesives to create a strong bond. To bond PC successfully, it’s important to choose an adhesive that can penetrate the oxide layer on the surface of the plastic.
In addition to these specific types of plastics, there are other factors that can make bonding with adhesives challenging. For example, thermoplastic elastomers (TPE) have a unique combination of properties that can make them difficult to bond. TPEs have both elastic and plastic properties, which means that they can stretch and deform under stress. This can cause the adhesive bond to fail over time. Similarly, acrylonitrile butadiene styrene (ABS) and polystyrene (PS) can be challenging to bond due to their smooth surfaces and low surface energy.
Temperature and Humidity Levels for Optimal Curing
Look no further than the optimal temperature and humidity levels for curing. As an expert in this field, I’ve researched and compiled essential information to guide you towards success.
Temperature plays a critical role in the curing process of J-B Weld on plastic. The ideal range is between 60°F to 80°F (15.6°C to 26.7°C). If the temperature is too low, the curing process slows down, while excessively high temperatures can result in weak bonds from over-curing. Consistency is key when maintaining temperature throughout the curing process.
Now, let’s discuss humidity levels. The humidity level should be below 70% for optimal curing. High humidity levels can weaken the bond by interfering with the curing process. You can maintain low humidity levels by using a dehumidifier in the work area.
It’s important to note that curing times may vary depending on the type of plastic being used. Some plastics require longer curing times due to their composition and surface properties. Be sure to research and determine the appropriate time for your plastic type.
In summary, optimal temperature and humidity levels are crucial for creating strong bonds when using J-B Weld on plastic. Keep the work area at a consistent temperature and use a dehumidifier to maintain low humidity levels. Remember to research and determine the appropriate curing time for your specific plastic type. By following these guidelines, you can have confidence that your project will have a long-lasting and durable bond.
Preparing the Plastic Surface Before Applying J-B Weld
To create a sturdy and long-lasting bond between plastic surfaces, proper preparation is key before applying J-B Weld. As an expert in this field, I am thrilled to share my knowledge with you on how to prepare a plastic surface before using J-B Weld.
The first step is to clean the surface thoroughly with soap and water to eliminate dirt, grease, or oil. This step sets the foundation for successful adhesion by ensuring no contaminants interfere with the bond. After cleaning, dry the surface completely with a clean cloth.
The next step is to lightly sand the surface using sandpaper to create a rough texture for the J-B Weld to stick to. It’s crucial not to sand too aggressively, as this could damage the plastic and reduce the bond’s strength. Once you’ve finished sanding, wipe down the surface with a clean cloth or rag to remove any debris or dust created during sanding.
If necessary, use a plastic cleaner to further clean and prepare the surface. However, keep in mind that certain types of plastics such as polyethylene or polypropylene may not bond well with J-B Weld. In these cases, consider using a plastic-specific adhesive instead.
Once you’ve prepared the surface, follow the manufacturer’s instructions for applying J-B Weld. The curing time can vary depending on factors such as temperature and humidity but typically ranges from 4-6 hours for initial set and 15-24 hours for full cure.
Tips for Applying J-B Weld to Plastic Surfaces
J-B Weld is a popular epoxy adhesive that can be used to repair a wide variety of items, including plastic surfaces. However, applying J-B Weld to plastic surfaces requires some specific techniques to ensure a strong and durable bond. Here are five tips to keep in mind when working with J-B Weld on plastic surfaces.
Clean and Dry the Surface
Before applying J-B Weld, it’s essential to clean the surface thoroughly and dry it completely. Any residue or moisture can compromise the bond. Soap and water can be used for cleaning, or a solvent like acetone can be used for more stubborn stains.
Rough up the Surface
Smooth, non-porous plastics like PVC or nylon may require extra help in creating a strong bond. Using sandpaper or a file to rough up the surface before applying J-B Weld can greatly improve adhesion.
Use a Plastic Primer
To enhance adhesion and improve the overall strength of the bond, consider using a primer specifically designed for plastic surfaces before applying J-B Weld. This can also help prevent discoloration or fading over time.
Apply J-B Weld Evenly
Mixing the two parts of J-B Weld thoroughly and evenly is crucial to achieving a strong bond. Apply a thin layer of J-B Weld evenly onto the surface, avoiding applying too much as this can cause excess drips and mess. Applying the adhesive in a criss-cross pattern can help distribute it evenly.
Allow Ample Curing Time
The curing time for J-B Weld on plastic surfaces varies depending on factors such as temperature and humidity. Refer to the package instructions for specific guidelines on curing times. It’s generally recommended to wait at least 24 hours before handling the item, and up to 72 hours for maximum strength. Rushing this step can compromise the bond and lead to future repairs.
A0BtKeN5YnI” >
Conclusion
In summary, J-B Weld offers a reliable solution for bonding and repairing plastic items. However, the curing time can vary significantly depending on several factors such as temperature, humidity, and the type of plastic being used. Typically, it takes about 4-6 hours for J-B Weld to set and around 15-24 hours to fully cure on plastic surfaces. It’s crucial to follow the manufacturer’s instructions carefully and allow sufficient time for the adhesive to cure before exposing it to any stress or pressure.
The type of plastic being used is a crucial factor that affects curing time. Some plastics like polyethylene and polypropylene require special preparation before applying any adhesive due to their low surface energy. Additionally, certain types of plastics such as TPEs or ABS may be more challenging to bond with adhesives due to their unique properties.
To achieve optimal results when using J-B Weld on plastic surfaces, it’s essential to maintain consistent temperature and humidity levels during curing. Proper preparation of the surface by cleaning and sanding can also improve adhesion. By following these tips for applying J-B Weld evenly and allowing ample curing time, you can ensure a strong and durable bond between plastic surfaces.
In conclusion, repairing your favorite plastic items instead of throwing them away is not only cost-effective but also environmentally friendly. With J-B Weld’s excellent bonding capabilities coupled with proper preparation techniques, you’ll be able to give your old items new life while reducing waste in landfills.