Are you tired of waiting for your school glue to dry? I feel your pain. It’s like watching paint dry, but stickier. But don’t worry, because I’ve got the inside scoop on how long it actually takes for that gooey stuff to harden.
In this blog post, we’re going to explore all the factors that affect drying time. We’ll talk about temperature – is it hot or cold where you are? And humidity – is it damp and muggy or bone-dry outside? We’ll even dive into the type and amount of glue you’re using. Because let’s face it, not all glues are created equal.
But wait, there’s more. I’m also going to share some tips and tricks to speed up the drying process. No more twiddling your thumbs while your masterpiece remains sticky and fragile. With these secrets up your sleeve, you’ll be able to get back to creating in no time.
So get ready to say goodbye to waiting around for glue to dry. Let’s dive in and discover how you can become a master of quick-drying school glue.
Factors Affecting Drying Time
Contents
- 1 Factors Affecting Drying Time
- 2 Traditional School Glue Drying Time
- 3 How to Speed Up the Drying Process
- 4 Following Manufacturer Instructions
- 5 Faster Drying Formulas
- 6 Pros and Cons of Fast-Drying Glues
- 7 Tips for Successfully Applying School Glue
- 8 Common Mistakes to Avoid When Using School Glue
- 9 Conclusion
Today, we embark on a journey to unravel the secrets behind the factors that influence the drying time of school glue. So, grab your crafting materials and prepare to become a master of perfect timing.
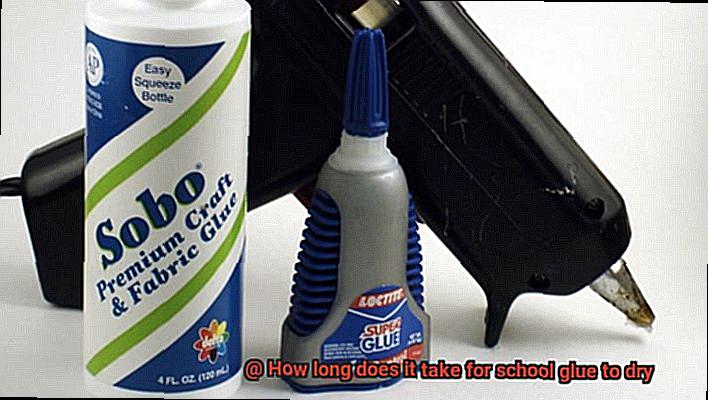
The Type of Glue:
The type of glue you choose can have a significant impact on drying time. School glues come in various forms, including white glue, clear glue, and gel glue. Each type possesses its own unique composition and characteristics that affect drying time. For instance, white glue, with its lower water content, tends to dry faster than clear glue. So, if time is of the essence, opt for white glue.
Temperature and Humidity:
The environment in which your glue dries plays a crucial role in determining how quickly it sets. Higher temperatures accelerate evaporation, leading to faster drying times. Conversely, colder temperatures slow down the process. Similarly, high humidity levels prolong drying as moisture in the air hinders evaporation. To expedite drying, work in a warm and well-ventilated area.
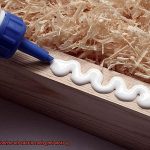
Thickness of Application:
The thickness of your glue application directly impacts drying time. Thicker layers require more time for the water content to evaporate fully. To ensure quicker drying, apply thin and even coats of glue. This way, you allow for efficient evaporation and minimize the waiting time.
Air Circulation:
Proper air circulation is key to expediting drying time. When there is adequate airflow around the glued surface, moisture evaporates at a faster rate. Consider placing your project near a fan or in a well-ventilated space to promote swift drying.
Porosity of Materials:
The materials being glued together can also affect drying time. Porous materials, such as paper or fabric, tend to absorb moisture from the glue, prolonging the drying process. Conversely, non-porous materials like plastic or glass do not readily absorb moisture, resulting in faster drying times. Take into account the porosity of your materials when considering drying time.
Brand and Quality of Glue:
Different brands and qualities of school glue may have varying drying times. Some brands even offer specific formulations designed for rapid drying. It is essential to follow the manufacturer’s instructions for optimal results. Experimenting with different brands can help you find the perfect glue that suits your needs.
Traditional School Glue Drying Time
The scent of school glue brings back memories of childhood crafts, but waiting for it to dry can be a test of patience. In this blog post, we will explore the fascinating world of traditional school glue drying time. From the factors that influence it to tips for faster drying, get ready to become a glue-drying expert.
Factors that Influence Drying Time:
Type and Brand of Glue:
Different types and brands of school glue have varying formulations and drying times. Quick-drying glues prioritize speed, while others focus on strength and durability. Always check the manufacturer’s instructions for specific drying time recommendations.
Thickness of Application:
Thicker layers take longer to dry than thin coats. Applying multiple thin layers allows for better air circulation and evaporation, expediting the process.
Environmental Conditions:
Humidity and temperature play a significant role in drying time. Higher humidity and lower temperatures prolong drying, while lower humidity and higher temperatures speed it up. Optimal conditions include a well-ventilated area with moderate humidity and room temperature.
Tips for Faster Drying:

Quick-Drying Formulas:
Choose glues with quick-drying formulas when time is of the essence. These specialized glues can dry in as little as 5-10 minutes, ensuring swift project completion.
Air Circulation:
Improve air circulation around your project to expedite drying. Use fans or open windows to facilitate evaporation and hasten the process.
Follow Manufacturer’s Instructions:
Always read and follow the glue manufacturer’s instructions. They often provide specific recommendations based on the brand and type of glue being used.
How to Speed Up the Drying Process
Well, we have some exciting tips and tricks to help you speed up the drying process. With these techniques, you’ll be able to complete your projects faster and enjoy the satisfaction of seeing your creations come to life in no time. Let’s dive in.
Thin is In:
Less is more when it comes to applying school glue. Using a thin layer not only ensures faster drying but also prevents messy seepage. Grab a brush or a small spatula and spread a thin, even layer of glue on your project. Watch as the glue dries before your eyes, allowing you to move on quickly.
Embrace the Breeze:
Air circulation is crucial for quick drying. Position a fan near your glued object or work in a well-ventilated area. Feel the gentle breeze as it blows away the moisture from the glue, leaving behind a dry and sturdy bond. The refreshing air will whisk away the waiting time and leave you with a finished project in record time.
Warm It Up:
Did you know that warmth can be the secret ingredient for quick drying? Place your glued object near a heater or use a hairdryer on low heat setting to gently blow warm air onto it. Feel the cozy warmth enveloping the glue, evaporating the moisture and speeding up the drying process. With a touch of warmth, your project will be ready to be admired sooner than you think.
Banish Humidity:
High humidity can be the arch-nemesis of fast-drying glue. Moisture in the air slows down evaporation, leading to longer drying times. Work in a dry environment or use a dehumidifier to reduce humidity levels and speed up drying. Say goodbye to the struggles of waiting and hello to quick-drying success.
Quick-Dry Glue Magic:
For those who crave even faster results, quick-drying school glues are the way to go. These glues contain special additives that promote quicker evaporation, allowing you to move on with your project in a flash. Look for them in your local craft store, and experience the joy of instant drying. With quick-dry glue, your creations will come to life before your eyes.
Following Manufacturer Instructions
Today, let’s delve into the world of school glue and why it’s absolutely crucial to follow those manufacturer’s instructions. I know it may seem like a no-brainer, but trust me when I say that those little labels hold vital information that can make or break your crafting experience. So, let’s explore why paying heed to those instructions is an absolute must.
First and foremost, the manufacturer’s instructions provide you with the holy grail of crafting knowledge – the drying time of the glue. Picture this: you’ve just finished creating a masterpiece with school glue, and impatience gets the better of you. You touch it before it’s fully dry, and disaster strikes. Your beautiful creation is ruined, all because you couldn’t wait a little longer. Different types and brands of school glue have different drying times – some take mere minutes while others require several hours, or even an overnight slumber. By following the instructions, you can plan your crafting session accordingly and avoid any mishaps.
Now, let’s talk about mishaps – ever heard of a glue-induced nightmare? No? Well, let me enlighten you. The manufacturer’s instructions often include recommendations for the optimal temperature and humidity levels for drying. Why does this matter? Because extreme temperatures or humidity can wreak havoc on your glue-adhered surfaces. If you want your project to stand the test of time, checking those instructions and creating an ideal drying environment is an absolute must.
But wait, there’s more. Following the manufacturer’s instructions also ensures that you’re applying the right amount of glue. Some glues require multiple layers for maximum bonding strength, but here’s the catch – each layer needs to dry completely before applying the next one. Skipping this crucial step can result in a weaker bond or even cause the glue to throw in the towel later on. Patience becomes your superpower in this crafting realm, my friends.
Now, I know we all love shortcuts, but let’s tread carefully when it comes to drying school glue. While some sources may suggest using a hairdryer or other heat sources to speed up the process, always check if this is approved by the manufacturer before diving headfirst. Incorrect use of heat can lead to undesirable outcomes, and nobody wants that. So, stick to the guidelines provided, pun intended.
Faster Drying Formulas
In the world of crafting and school projects, glue is the unsung hero that brings ideas to life. However, the long drying time of traditional white school glue can test even the most patient of souls. Luckily, manufacturers have developed faster drying formulas to minimize waiting times and maximize productivity. In this article, we will delve into the world of these innovative formulas to discover their advantages, disadvantages, and specialized usage requirements.
Advantages of Faster Drying Formulas:
- Time-saving efficiency: Say goodbye to endless waiting. Faster drying formulas reduce drying time to a mere 5 to 10 minutes. Students can swiftly move on with their projects, supercharging classroom efficiency.
- Instant fixes: Need a quick repair or an immediate strong bond? Instant drying glues are your new best friend. These formulas dry almost instantly upon contact with air or another surface, making them a prized tool in your crafting arsenal.
- Increased convenience: With faster drying formulas, completing projects within tight deadlines becomes a breeze. Whether it’s time-sensitive assignments or juggling multiple projects simultaneously, these formulas offer unparalleled convenience.
Disadvantages of Faster Drying Formulas:
- Compromised bonding strength: While faster drying formulas deliver rapid results, they may not match the bonding strength of traditional white school glue. Instant drying glues, in particular, sacrifice some bonding quality for speed.
- Limited working time: Intricate details demand a longer working time. Unfortunately, faster drying formulas leave little room for adjustments once applied, making them less suitable for such projects.
- Specialized usage requirements: Following proper usage guidelines is crucial with faster drying formulas. Overapplication or improper usage can affect bonding strength and overall performance. Additionally, not all projects are suitable for these formulas, so it’s essential to consider specific project needs.
Pros and Cons of Fast-Drying Glues
Fast-drying glues, also known as instant glues or cyanoacrylate glues, have revolutionized the crafting and DIY world with their lightning-fast drying times. These magical little bottles of adhesive offer numerous advantages, but they also come with a few drawbacks.
One of the biggest benefits of fast-drying glues is their time-saving aspect. With traditional white school glue, you could be waiting hours for your project to dry. But with fast-drying glues, you can have your project completed in seconds or minutes. This is perfect for those last-minute school assignments or when you’re working on a tight deadline.
Not only do these glues save you time, but they also provide strong adhesion. Once they dry, they create a durable bond that won’t easily come apart. This makes them suitable for a wide range of materials, from paper and cardboard to wood and plastic. You can trust that your glued items will stay firmly in place.
Another great advantage of fast-drying glues is their versatility. They can be used for a variety of applications, such as repairing broken objects, assembling models and crafts, and even in DIY projects. Their ability to bond different materials together makes them a convenient choice for all sorts of tasks.
However, there are some downsides to consider. One concern is their potential for causing skin irritation or accidental bonding. These glues are known for their strong adhesive properties, so any contact with skin can lead to bonding. It’s important to exercise caution when using these glues and take necessary safety precautions, such as wearing gloves or using applicators.
Another drawback is their limited repositioning ability. Once the glue has dried, it becomes difficult to make adjustments or reposition the glued items. This can be problematic, especially for intricate projects or when precise alignment is required. Planning and careful positioning are essential to avoid any irreversible mistakes.
Fast-drying glues also tend to have a strong odor, which can be unpleasant for some individuals. The fumes released during the drying process may cause irritation to the eyes, nose, and throat. It’s best to use these glues in well-ventilated areas or consider wearing a mask to minimize exposure to the fumes.
Lastly, fast-drying glues can be relatively expensive compared to traditional school glue. Their quick drying time and strong bonding properties often come at a higher price point. This may not be a major concern for occasional users, but for those who frequently rely on these glues, the cost can add up.
Tips for Successfully Applying School Glue
When it comes to craft projects, school glue is an indispensable tool. Whether you’re creating a masterpiece or completing a school assignment, applying school glue properly is essential for a strong and long-lasting bond. In this article, we will explore some valuable tips that will help you achieve just that.
Start with Clean and Dry Hands:
Before you dive into your project, take a moment to ensure that your hands are clean and dry. Oily or dirty hands can interfere with the adhesive properties of the glue, making it less effective at sticking things together. So, give your hands a good wash and pat them dry before you begin.
Prepare the Surfaces:
The secret to a strong bond lies in the preparation of the surfaces you plan to glue. Take the time to clean them thoroughly, removing any dirt, dust, or debris that may hinder the adhesive process. A quick wipe with a damp cloth or mild soap can do wonders. Just make sure to dry the surfaces completely before applying the glue.
Choose the Right Amount of Glue:
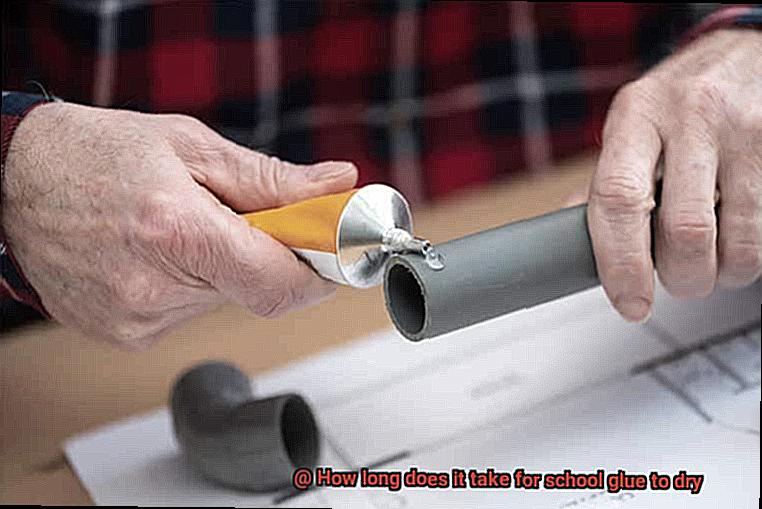
Finding the right balance is key when it comes to applying school glue. Too little glue may result in a weak bond, while using too much can create a messy finish and longer drying time. The key is to apply a thin, even layer of glue to ensure proper adhesion. Squeeze a small amount of glue onto a disposable surface, like a scrap paper or plastic plate, and use a brush, sponge, or toothpick to spread it evenly and thinly on one of the surfaces being bonded.
Apply Pressure:
Once you’ve applied the glue, it’s time to bring the glued surfaces together. Press them firmly, applying gentle pressure to eliminate any air bubbles and ensure a better bond. You can use clamps or simply hold the surfaces together for a few minutes to allow the glue to set. This step is crucial for achieving a strong and secure bond.
Allow Sufficient Drying Time:
Patience is key when it comes to working with school glue. Different types of glue require different drying times, so be sure to check the label for specific instructions. On average, most school glues take around 24 hours to fully dry and cure. Avoid the temptation to handle or move the glued objects until they are completely dry. Premature handling can disrupt the bond and lead to weaker adhesion.
Common Mistakes to Avoid When Using School Glue
Well, fear not. I am here to share some expert tips on the common mistakes to avoid when using school glue. By steering clear of these blunders, you will be well on your way to creating flawless masterpieces.
First and foremost, let’s tackle the issue of applying too much glue. It is a widespread misconception that more glue equals a stronger bond. In reality, excess glue can lead to longer drying times and messy finishes. So, remember, a little goes a long way. Be strategic and precise in your application.
Next up, don’t rush the drying process. Patience is key here, folks. School glue typically takes around 24 hours to dry completely. If you try to handle or manipulate your project before it’s fully dried, you risk smudging or even complete detachment – a total nightmare. Allow the glue ample time to set and solidify before proceeding.
Using the wrong type of school glue is another common mistake that can hinder your project’s success. There are different types available, such as white glue, clear glue, and gel glue. Each type has its own purpose and unique properties. So, make sure you choose the right one for your specific project to achieve optimal adhesion. Don’t underestimate the importance of selecting the correct glue – it can make or break your masterpiece.
Now, let’s delve into the realm of preparation. Before applying school glue, take the time to clean and dry the surfaces you’ll be gluing. Dust and grease can hinder the glue’s effectiveness and result in weak bonds. A little extra effort in preparing the surfaces will go a long way in ensuring success. Trust me, this step is worth every second of your time.
Speaking of rushing, avoid trying to speed up the drying process with external heat sources like hairdryers or direct sunlight. This may seem tempting when you’re eager to see the final result, but it can cause the glue to dry unevenly or too quickly, resulting in weaker bonds. Instead, embrace patience and allow the glue to dry naturally at room temperature for the best results. Your patience will be rewarded with a strong and durable bond.
Last but certainly not least, proper storage is essential for maintaining the quality of your school glue. Always tightly seal the bottle after each use to prevent drying out or contamination. Treat your glue like the precious resource it is. Additionally, extreme temperatures can also impact the glue’s effectiveness, so store it in a cool and dry place to ensure its longevity.
U0hhFjjW5EU” >
Conclusion
When it comes to school glue, timing is everything. You might be wondering just how long it takes for this adhesive wonder to dry completely. Well, on average, you can expect your project to be ready in just 30 minutes to an hour.
But hold on. Don’t forget that there are a few factors that can influence this drying time. The amount of glue you’ve used, the temperature and humidity in your surroundings, and even the type of surface you’re working with can all play a role in how quickly or slowly your glue sets.
So whether you’re eagerly awaiting the completion of your arts and crafts masterpiece or trying not to stick yourself together while repairing something broken, remember that patience is key when waiting for school glue to dry.