Are you a DIY enthusiast or a professional crafter? Then you must be aware of the wonders of E6000 adhesive. This heavy-duty glue is a go-to solution for bonding almost anything, from leather to metal, promising an unbreakable and durable hold. But, before you start your next project, there’s one question that needs answering – how long does it take for E6000 to cure?
The answer isn’t straightforward since curing time can vary depending on several factors. The type of material being bonded, the temperature and humidity of your environment, and the amount of adhesive used are all crucial players in determining curing time.
However, don’t worry; we’ve got some general guidelines to help you out. If you’re bonding non-porous materials like metal, glass or plastic, it can take up to 24 hours for E6000 to fully cure. But if you’re working with porous materials like wood or fabric, the curing time can be shorter – usually around 4-6 hours.
In this post, we’ll dive deeper into how long it takes for E6000 to cure. We’ll also explore what factors can influence curing time and how best to use this versatile and reliable glue. So keep reading to discover everything you need to know about using E6000 adhesive correctly and ensuring the best results from your projects.
How Long Does It Take for E6000 to Cure?
Contents
- 1 How Long Does It Take for E6000 to Cure?
- 2 Factors That Affect the Curing Time of E6000
- 3 Humidity and Temperature
- 4 Thickness of Glue
- 5 Type of Material Being Applied To
- 6 Feeling Dry to the Touch vs Fully Cured
- 7 Allow 24 Hours for the Glue to Cure Fully
- 8 Rushing the Process Could Result in Weak Bond or Failure
- 9 Conclusion
E6000 is a go-to adhesive for many industries, from automotive to jewelry-making. However, one of the most critical questions that arises while using E6000 is how long it takes to cure. Curing time can vary depending on several factors, including temperature, humidity, thickness of the adhesive layer, and the materials being bonded.
If you’re applying E6000 in an environment that is too cold or too humid, it may take longer for the glue to cure fully. As a general rule of thumb, the manufacturer recommends applying E6000 in a well-ventilated area with a temperature between 70°F and 85°F and a relative humidity between 50% and 70%. This will ensure that E6000 cures properly.
The thickness of the adhesive layer and the materials being bonded can also impact curing time. Thicker layers of glue or bonding two materials that don’t naturally adhere well may require more time for the adhesive to cure fully. In such cases, it’s best to allow ample time for E6000 to cure fully.
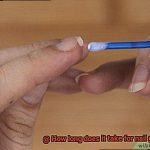
While E6000 may begin to set within ten minutes of application in optimal conditions, it may take several hours before it reaches its full strength. Rushing the curing process could result in a weaker bond or even complete failure of your project. Therefore, it is crucial to be patient and allow plenty of time for E6000 to cure fully.
To ensure that E6000 cures properly, it should be spread thinly and evenly on both surfaces being bonded, and pressure should be applied for several minutes to ensure adequate contact. The manufacturer recommends allowing 24 to 72 hours for the adhesive to fully cure.

Factors That Affect the Curing Time of E6000
Understanding the factors that can affect its curing time is crucial to achieving optimal results. As an expert in this field, I have researched and compiled a list of key factors that can impact the curing time of E6000.
Temperature is one of the most critical factors affecting the curing time of E6000. The ideal temperature range for optimal curing is between 70°F to 85°F. If the temperature is too low, the adhesive will take longer to cure, and if it’s too high, it will cure faster. Therefore, it’s important to check and control the temperature before applying E6000.
Humidity levels in the environment can also play a role in how quickly E6000 cures. High humidity levels can cause the adhesive to take longer to cure as it affects the evaporation rate of solvents in the adhesive. So, if you live in a humid climate, you may need to allow more time for E6000 to cure fully.
The thickness of the adhesive layer applied is another factor that influences curing time. A thicker layer will require more time to cure than a thinner layer. Therefore, applying thin and even layers of adhesive can help ensure optimal curing.
The type of material being bonded with E6000 can also affect its curing time. Porous materials such as wood or fabric may absorb some of the adhesive, making it take longer to cure. Therefore, it’s important to consider the material being bonded and adjust your expectations accordingly.
The amount of adhesive applied is also a critical factor in determining curing time. Applying too much adhesive can cause it to take longer to cure, while applying too little may result in weaker bonding. So, it’s best to apply just enough adhesive for a strong bond and avoid over-applying.
Lastly, surface texture and cleanliness can impact the curing time of E6000. A rough surface texture may provide more area for adhesion but may require more time for curing. On the other hand, a smooth surface may require less curing time but may not provide as strong adhesion as a rough surface. Therefore, it’s important to prepare the surface properly before applying E6000.
Humidity and Temperature
Let’s first delve into the effects of humidity.
If you’ve ever used E6000 glue in a high humidity environment, you may have noticed that it takes longer to cure. This is because moisture in the air can interfere with the chemical reaction that causes the glue to harden.
To combat this, it is essential to reduce humidity levels in your workspace by using a dehumidifier or air conditioning unit. It is also advisable to allow for extra drying time before handling or using the glued item to ensure a strong bond.
Now, let’s explore how temperature affects E6000 glue. In colder temperatures, the curing process of E6000 slows down, making it necessary to provide additional heat sources such as a space heater or heat lamp to speed up the process.
The ideal temperature range for curing E6000 is between 70-85°F (21-29°C). Conversely, high temperatures can accelerate the curing process of E6000 but exposing glued items to excessive heat can cause the glue to break down or become brittle over time.
Thus, it is best to avoid temperatures above 150°F (65°C).
Thickness of Glue
Firstly, the thickness of the glue plays a crucial role in determining the curing time. If you apply a thick layer of glue, it may take longer to cure compared to a thin layer. This is because thicker layers of glue have a lack of air exposure, which slows down the drying and hardening process. So, if you’re in a rush, it may be best to apply a thin layer of glue to speed up the curing time.
However, keep in mind that the thickness also depends on the materials being bonded. For porous materials like fabric or wood, a thick layer of glue may be necessary to ensure a strong bond. On the other hand, non-porous materials like metal or plastic may only need a thin layer.
To determine the appropriate thickness of glue for your project, consider the materials being bonded and the strength required for the bond. Conducting a test run with small pieces of material before applying a thick layer of glue to the entire project can also be helpful.
Remember, while it may be tempting to rush through the process, taking the time to properly apply and cure the glue will result in a successful and long-lasting project. Prioritizing a strong and secure bond over speed is key.
Type of Material Being Applied To
Well, let me tell you – the answer is more complex than you might think. The type of material being applied to can significantly impact the curing time of E6000.
One crucial factor to consider is the porosity of the material. Porous materials like wood or fabric tend to absorb more adhesive, which can slow down the curing process. Conversely, non-porous materials like metal or glass don’t absorb as much adhesive and thus cure faster.
Another essential factor that affects curing time is the thickness of the material. Thicker materials require more adhesive to ensure a strong bond, leading to longer curing times. Moreover, if you’re applying E6000 to a large surface area, it may take longer to cure than if you were only using a small amount of adhesive.
It’s also important to note that not all materials are compatible with E6000. Some plastics contain chemicals that react negatively with the adhesive and prevent it from curing properly. Thus, it’s crucial to check if your chosen material is compatible before starting your project.
Overall, while several factors can affect E6000’s curing time, following the manufacturer’s recommended curing time and application instructions is vital for achieving a robust and long-lasting bond. Remember that patience is key when it comes to crafting projects that stand the test of time.
In summary, here are some key takeaways to remember when considering the type of material being applied to:
Feeling Dry to the Touch vs Fully Cured
E6000 glue is a popular adhesive for DIYers and crafters alike. However, it’s essential to know the difference between feeling dry to the touch and being fully cured when working with it. Feeling dry to the touch means that the glue has formed a skin and is no longer wet to the touch, but it doesn’t mean that it’s ready for use.
The curing time for E6000 can range from 24-72 hours, depending on various factors such as temperature, humidity, and materials being bonded. So, don’t be in a hurry to use your project just yet. It’s important to be patient during the curing process and avoid using or stressing the bond before it’s fully cured.
To determine if the bond is fully cured, you can try a few methods. One is to gently press your fingernail into the glue. If it leaves an indentation, then the bond is not fully cured. Another is to try pulling apart the materials being bonded. If they easily separate, then the bond is not fully cured either.
Waiting for E6000 to be fully cured before handling or using the bonded materials is crucial. Otherwise, the bond may fail or weaken over time. In some cases, it can take up to a week for E6000 to reach its maximum strength. So, be patient and resist the urge to use or stress the bond before it’s fully cured.
In conclusion, feeling dry to the touch doesn’t mean that E6000 is fully cured and ready for use. It takes time for E6000 to reach its maximum strength, so waiting for it to be fully cured before using or handling the bonded materials is crucial. Your patience will pay off in the end with a strong and long-lasting bond. Remember these tips when working with E6000:
Allow 24 Hours for the Glue to Cure Fully
If you’re a fan of E6000 adhesive, then you might be wondering how long it takes to fully cure. As an expert on this topic, I can tell you that it’s crucial to allow 24 hours for the glue to cure completely. But why is this so important? Let’s dive deeper into this topic.
Firstly, E6000 is known for its strength and versatility when it comes to bonding materials like wood, metal, plastic, and glass. However, it’s easy to assume that the adhesive is ready to use once it feels dry to the touch. Unfortunately, this isn’t the case. In reality, it can take up to 72 hours or even a week for the glue to reach maximum strength. So, patience is key when using this adhesive.
Secondly, using or handling any items that have been glued with E6000 before it has fully cured can compromise its bond. This can lead to the item falling apart and potentially causing damage or harm. To avoid any mishaps, it’s best to leave the item alone for at least 24 hours after gluing it together.
Thirdly, several factors can affect the curing time of E6000 adhesive such as temperature and humidity levels. For instance, warmer temperatures and higher humidity levels will speed up the curing process, while colder temperatures and lower humidity levels will slow it down. Therefore, it’s essential to follow the manufacturer’s instructions carefully and apply the glue in a thin, even layer for optimal results.
In summary, allowing 24 hours for E6000 glue to cure fully is crucial for a strong and long-lasting bond. To help you remember this important point effectively, here are three things you need to keep in mind:
- First: Patience is key when using E6000 adhesive.
- Second: Avoid using or handling any items that have been glued with E6000 before it has fully cured.
- Third: Follow the manufacturer’s instructions carefully and apply the glue in a thin, even layer for optimal results.
Rushing the Process Could Result in Weak Bond or Failure
Rushing the process could result in a weak bond or even complete failure, so let’s delve into why taking your time is paramount.
E6000 adhesive sets relatively quickly, but it takes time to fully cure and achieve its maximum strength. The recommended curing time is 24-72 hours, depending on the materials being bonded and environmental conditions. It may be tempting to handle the items too soon, but doing so can compromise the bond and lead to potential damage or harm.
One of the most common errors people make is assuming that if the adhesive feels dry to the touch, it must be cured. However, just because the surface may feel dry does not mean that the adhesive has fully cured beneath the surface. This can lead to a false sense of security and result in a weak bond that won’t hold up over time.
In addition to weak bonds, rushing the curing process can also lead to messy or uneven applications. If you try to manipulate or move the materials too soon after applying E6000, it can cause the adhesive to shift and create an uneven bond. This can also result in excess adhesive oozing out and creating a messy application that ruins your project.
To avoid these issues, it’s crucial to give E6000 adhesive ample time to cure properly. By following the recommended curing time, you’ll ensure that the adhesive fully bonds with the materials and reaches its maximum strength potential. This will result in a strong and long-lasting bond that will stand up over time.
SBoLZJBGM5o” >
Conclusion
In conclusion, E6000 adhesive is a versatile and dependable solution for bonding various materials. However, it’s crucial to understand that the curing time of E6000 can vary depending on several factors, such as temperature, humidity, thickness of the adhesive layer, and the materials being bonded.
To ensure optimal results, it’s essential to follow the manufacturer’s instructions meticulously and apply the glue in a thin and even layer. Rushing through the curing process could result in weak bonds or complete project failure.
Temperature and humidity levels can significantly impact curing time. Therefore, it’s important to work in a well-ventilated area with a temperature between 70°F and 85°F and relative humidity between 50% and 70%. Additionally, the thickness of the adhesive layer applied and type of material being bonded can also affect curing time.
Remember that patience is key when working with E6000 adhesive. Allow at least 24 hours for the glue to cure fully before handling or using any items that have been glued together. This will ensure that you achieve a strong bond that will last over time.
So take your time, follow instructions carefully, and enjoy crafting with confidence.