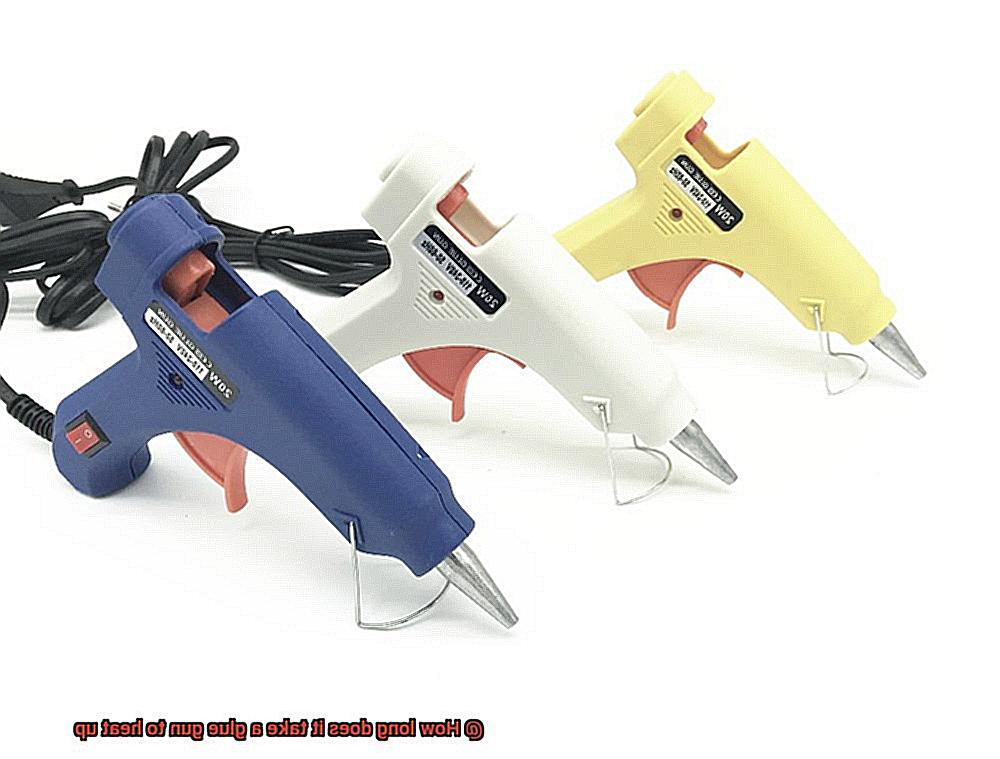
Are you a DIY enthusiast, a crafty creator, or just someone who loves fixing things around the house? If so, then you know that a glue gun is an absolute game-changer. It’s the ultimate tool for bonding wood, fabric, and everything in between. But before it can work its magic, the glue gun needs to go through a heating process to reach that perfect temperature for strong adhesion.
So, here’s the burning question on everyone’s mind: How long does it take a glue gun to heat up? In this blog post, we’ll dive into the nitty-gritty of this heating process. We’ll explore all the factors that affect heating time and give you an idea of how long you’ll have to wait before you can start sticking things together.
Factors Influencing Heating Time:
Contents
- 1 What is a Glue Gun?
- 2 How Long Does it Take for a Glue Gun to Heat Up?
- 3 Factors that Influence Heating Time
- 4 Types of Glue Guns and their Heating Times
- 5 Benefits of Using a Glue Gun with an Indicator Light
- 6 Tips for Operating a Glue Gun Safely
- 7 Common Mistakes to Avoid when Using a Glue Gun
- 8 Conclusion
The time it takes for your trusty glue gun to heat up can vary depending on a few key factors. One of them is wattage. Glue guns with higher wattage pack more power and heat up faster. On the flip side, lower wattage models might need a little extra time to get up to temperature.
Another factor is the type of glue gun you’re using. They come in all shapes and sizes – from cute little mini guns to heavy-duty industrial ones. Mini glue guns tend to heat up quicker because they’re smaller and have less thermal mass. Industrial-grade guns, built for tough jobs, might take a bit longer since they’re bigger and have more thermal capacity.
Typical Heating Time:
On average, your glue gun will take about 3 to 5 minutes to fully heat up. That’s assuming it falls within the typical wattage range of 20 to 100 watts and is a standard-sized model. Not too shabby. With such quick heating times, you can get right down to business in no time. But hold on, there’s more. If you’ve got one of those high-powered, higher wattage glue guns, you might be looking at a lightning-fast heat-up time of just 1 to 2 minutes.
Now, keep in mind that these heating times are rough estimates. Different manufacturers and models may have slight variations. Plus, the ambient room temperature can also play a role. So always check the manual that comes with your glue gun for precise heating instructions straight from the experts.
What is a Glue Gun?
Their convenience and quick heat-up time make them a popular choice. In this article, we will explore the fascinating world of glue guns, examining their functionality, types, and advantages.
Functionality:
A glue gun is a handheld tool that heats a solid adhesive stick inside a metal barrel until it reaches a molten state. This molten adhesive is then dispensed through a nozzle, allowing it to be applied to various materials. Once applied, the glue quickly solidifies, forming a strong bond.
Types of Glue Guns:
- Size and Capacity: Glue guns come in different sizes, from small and portable models to larger industrial-grade ones. The size determines the glue gun’s capacity, with larger guns able to hold more adhesive.
- Temperature: There are two main types of glue guns based on temperature settings: low-temperature and high-temperature models. Low-temperature glue guns reach temperatures between 250°F (121°C) and 300°F (149°C), while high-temperature models can reach up to 400°F (204°C) or higher.
Advantages of Glue Guns:
- Quick Heat-Up Time: One of the greatest advantages of glue guns is their quick heat-up time. On average, most glue guns take approximately 3-5 minutes to reach their operating temperature. This allows users to start their projects without delay.
- Versatility: Glue guns can bond a wide range of materials, including wood, fabric, plastic, and metal. They are perfect for tasks that require a fast-drying time or a strong hold.
- Flexibility: Some glue guns now offer adjustable temperature settings, giving users more control over the heat level. This flexibility ensures that different materials can be bonded without compromising their integrity.
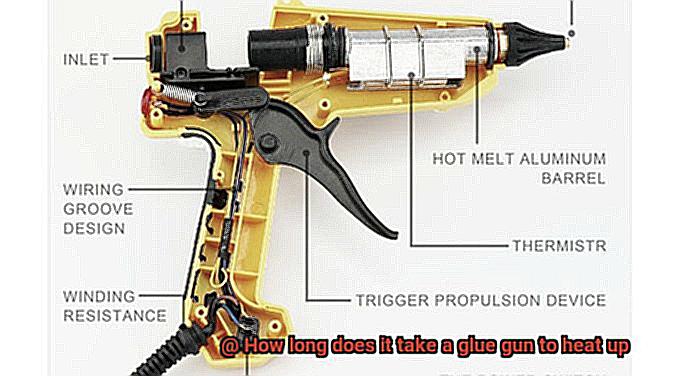
Factors Affecting Heating Time:
- Model and Brand: The heating time can vary depending on the model and brand of the glue gun. High-end or professional-grade glue guns may have faster heating times, reaching their operating temperature in as little as 1-2 minutes.
- Wattage: Glue guns with higher wattage tend to heat up faster than those with lower wattage. Wattage refers to the power output of the glue gun and can range from 10 watts to 300 watts.
- Ambient Temperature: The temperature of the room can impact the heating time. In colder environments, it may take slightly longer for the glue gun to heat up.
- Size of Glue Stick: The size of the glue stick being used can affect the heating time as well. Larger glue sticks may take longer to melt completely, thus increasing the overall heating time.
How Long Does it Take for a Glue Gun to Heat Up?
They come to the rescue when you need a strong bond between materials, and they do it with impressive speed. But just how long does it take for a glue gun to heat up? Let’s dive into the world of glue guns and uncover the answer.
Heating Time:
On average, a glue gun takes around 3-5 minutes to heat up to its maximum temperature. However, this time can vary depending on several factors.
Factors Affecting Heating Time:
Brand, Model, and Wattage:
The brand, model, and wattage of the glue gun play a significant role in determining the heating time. Generally, higher wattage glue guns heat up faster than their lower wattage counterparts. So, if you’re in a hurry to get started on your project, opting for a higher wattage glue gun might be the way to go.
Type of Glue Stick:
The type of glue stick being used also affects heating time. Different types of glue sticks have different melting points, which can impact how long it takes for the glue gun to reach its optimal temperature. It’s always a good idea to read the manufacturer’s instructions to understand the specific heating time and operating instructions for your particular glue gun model.
Additional Features:
Indicator Light:
Some glue guns have a built-in indicator light that turns on when they’re heated up and ready for use. This handy feature eliminates any guesswork and ensures that you don’t start gluing prematurely.
Adjustable Temperature Settings:
Glue guns with adjustable temperature settings may take a bit longer to heat up compared to those with fixed temperatures. This is because they require additional time for you to set your desired temperature. However, the ability to adjust the temperature is advantageous as it allows you to match the glue’s melting point with your specific project requirements.
Quick Heat-up Feature:
If you’re in a rush and can’t wait for several minutes for your glue gun to heat up, fear not. Some advanced glue guns have a quick heat-up feature that reduces the heating time significantly. With these guns, you can jump into your project in no time and save precious minutes.
Importance of Preheating:
It’s worth mentioning that preheating your glue gun for the recommended time is crucial for achieving optimum bonding strength. This ensures that the glue stick melts properly and guarantees a strong bond between your materials.
Factors that Influence Heating Time
Have you ever marveled at how some glue guns heat up with lightning speed while others seem to lag behind? Or why your trusty glue gun takes longer to reach its maximum temperature in certain situations? Today, we will dive into the captivating world of glue guns and explore the key factors that affect their heating time. So, put on your DIY cape, grab your glue gun, and let’s embark on this illuminating journey.
Wattage of the Glue Gun:
The wattage of a glue gun is a crucial factor in determining its heating time. Glue guns boasting higher wattage have a delightful knack for heating up faster than their low-wattage counterparts.
So, if you’re yearning for quick results and an instant creative fix, consider investing in a high-wattage glue gun. However, bear in mind that wattage can also influence power consumption and the size of projects you can tackle.
Type of Glue Gun:
Different types of glue guns possess distinct personalities when it comes to heating times due to their design and intended applications. Enter the low-temperature glue gun, which bursts into action with lightning speed as it requires lower temperatures to melt the glue sticks. On the other hand, high-temperature glue guns exude a slower simmer as they need higher temperatures to work their magic.
This versatile beauty accommodates both low and high temperatures, but its desire to please may cause it to take slightly longer to heat up.
Ambient Temperature:
The temperature of the environment in which you wield your glue gun can play a mischievous role in its heating time. In colder surroundings, your trusty companion may take a tad longer to reach its desired temperature. Thus, it is advisable to work in a room with a moderate temperature, providing the optimal conditions for your glue gun’s heating efficiency.
Glue Stick Composition:
The composition of the glue sticks you slide into your glue gun can weave its own tale in the enchanting realm of heating time. Different materials boast different melting points, and thus, glue sticks made from traditional hot melt adhesives or specialty adhesives like wood or fabric glue may demand varying amounts of time to heat up. To ensure efficient heating and a seamless bonding experience, be sure to choose the right glue stick for your project.
Types of Glue Guns and their Heating Times
Glue guns are like magic wands in the world of crafting and repairs. But did you know that not all glue guns are created equal? They come in different types, each with its own unique heating time. In this comprehensive guide, we will delve into the various types of glue guns and their respective heating times, helping you choose the perfect tool for your project.
Low-Temperature Glue Guns: Gentle Giants
Low-temperature glue guns are the gentle giants of the glue gun world. Perfect for delicate materials like fabric, foam, and paper, these glue guns typically heat up within 3 to 5 minutes. Operating at a cozy 250°F (121°C), they provide a gentle adhesive flow that won’t damage or burn sensitive materials. So whether you’re creating intricate fabric creations or crafting with paper, these glue guns are your gentle companions.
High-Temperature Glue Guns: The Heavy-Duty Heroes
When it comes to heavy-duty projects involving wood, metal, or plastics, high-temperature glue guns are the heavy-duty heroes you need. These guns heat up faster than their low-temperature counterparts, usually within 1 to 3 minutes. With temperatures reaching around 380°F (193°C), they provide a bond so strong it can withstand even the toughest conditions. From repairing broken furniture to tackling DIY metalwork, these glue guns have got your back.
Dual-Temperature Glue Guns: The Chameleons
For those who crave versatility, dual-temperature glue guns are the chameleons of the glue gun kingdom. With the ability to switch between low and high temperatures, these guns adapt to your project’s needs like a true chameleon. They usually take around 2 to 4 minutes to heat up, making them a convenient choice for projects that require different levels of adhesion. So whether you’re working on delicate crafts or heavy-duty repairs, these glue guns have got you covered.
Factors Affecting Heating Times: The X-Factors
While the general heating times mentioned above provide a good guideline, it’s important to note that several factors can influence the heating times of glue guns. The specific model and brand of the glue gun play a significant role, as some models may have faster heating elements or additional features that speed up the process. Furthermore, the ambient temperature and the initial temperature of the glue gun itself can also impact heating times. So be aware of these X-factors and always read the manufacturer’s instructions for accurate heating time information.
Importance of Reading Manufacturer’s Instructions: Knowledge is Power
To ensure optimal performance and adhere to safety protocols, it is crucial to read the manufacturer’s instructions for your specific glue gun model. These instructions provide valuable insights into heating times and other important details. By following these guidelines, you can make informed decisions and unleash the true power of your glue gun.
Benefits of Using a Glue Gun with an Indicator Light
The solution to your glue gun frustrations is here – a glue gun with an indicator light.
An indicator light on a glue gun is a small LED light located near the trigger or handle. It serves as a visual indication of when the glue gun has reached the desired temperature for use. But what’s so great about an indicator light? Let me tell you, it’s a game-changer. Here are some of the amazing benefits of using a glue gun with an indicator light:
- No more guesswork: With an indicator light, you no longer have to rely on your own judgment or wait for a certain amount of time before using the gun. The light will let you know exactly when the glue gun has reached the optimal temperature for use.
- Save time and avoid wasted glue: By knowing exactly when the glue gun is ready, you can start working immediately without any delays. Say goodbye to waiting around and hello to increased productivity.
- Safety first: The indicator light also serves as a safety feature. It alerts you when the glue gun is hot and potentially dangerous, preventing accidental burns or injuries. You can wait for the light to turn off before handling or storing the glue gun.
- Prevent overheating: Leaving your glue gun plugged in for too long can lead to overheating, which can damage the gun and even pose a fire hazard. With an indicator light, you’ll be reminded to unplug the gun once it reaches its optimal temperature, keeping it in good condition and preventing any mishaps.
- Improved accuracy and precision: Knowing exactly when the glue gun is ready allows you to apply the glue at the right moment, ensuring better adhesion and reducing the chances of mistakes or rework. Your crafts and DIY projects will thank you.
- Beginner-friendly: If you’re new to using a glue gun, an indicator light is especially helpful. It takes the guesswork out of the equation and provides a clear signal that the gun is ready for use. You can start using it confidently right from the get-go.
Tips for Operating a Glue Gun Safely
Glue guns are versatile tools that are used for various crafts and DIY projects. However, it is important to operate them safely to prevent accidents or injuries. In this article, we will discuss some essential safety tips for operating a glue gun.
Read the Instructions and Choose a Suitable Workspace
Before using a glue gun, it is crucial to read the manufacturer’s instructions thoroughly. Each glue gun may have different specifications and safety guidelines, so familiarizing yourself with them is essential. Additionally, choose a suitable workspace that is flat, stable, and heat-resistant. Keep it clear of any flammable materials to minimize the risk of accidents.
Use Protective Gear and Handle with Care
To protect yourself from burns or injuries, wear heat-resistant gloves and safety goggles while operating a glue gun. These items provide an extra layer of protection. When using the glue gun, handle it with care by holding it by the handle and avoiding contact with the hot nozzle or other heated parts.
Keep Children and Pets Away and Mind the Cord Placement
Glue guns can reach high temperatures, making them dangerous for children and pets. Keep them at a safe distance to prevent accidents or injuries. Additionally, be mindful of the cord’s placement to avoid tangling or tripping hazards. Do not place the cord near heat sources or water.
Use Appropriate Glue Sticks and Take Breaks
Ensure that you use the correct size and type of glue sticks recommended by the manufacturer. Using improper glue sticks can cause malfunctions or clogs, which can be dangerous. Additionally, take short breaks during extended periods of use to allow the glue gun to cool down and reduce the risk of burns or mishaps.
Properly Clean and Unplug the Glue Gun
After each use, clean the glue gun by removing any remaining glue sticks and wiping off excess adhesive from the nozzle and other parts. This helps maintain the tool’s functionality and prevents future issues. Always remember to unplug the glue gun when not in use to minimize the risk of accidents.
Common Mistakes to Avoid when Using a Glue Gun
Glue guns are versatile tools that can be used for a wide range of crafts and DIY projects. Whether you’re repairing a broken object or creating something new, glue guns provide quick and reliable adhesive solutions. However, there are common mistakes that many people make when using a glue gun that can lead to disastrous results. In this article, we will explore these mistakes and provide tips on how to avoid them.
- Using the wrong type of glue stick: One of the most common mistakes is using the wrong type of glue stick. It is crucial to match the type of glue stick to the material you are working with. For instance, fabric glue sticks should be used for fabric projects. Using the wrong glue stick can result in poor adhesion or even damage to the material.
- Applying too much glue: Another mistake to avoid is applying an excessive amount of glue. Although it may seem like more glue ensures a stronger bond, this is counterproductive. Too much glue can create messy and uneven bonds, and it takes longer for the glue to dry. To achieve optimal results, apply a thin and even layer of glue.
- Improper preheating: Many people make the mistake of not preheating the glue gun properly before use. Preheating is essential for reaching the correct temperature for effective bonding. Starting to use the glue gun before it has fully heated up can lead to insufficient melting of the glue, resulting in weak bonds.
- Accidentally touching the hot nozzle: One of the most common mistakes when using a glue gun is accidentally touching the hot nozzle. The nozzle can become extremely hot during use and cause burns or injuries. Always be aware of your fingers’ proximity to the nozzle and handle the tool with caution.
- Neglecting safety precautions: Safety should always be a priority when using a glue gun. Some common mistakes include not wearing heat-resistant gloves, not protecting your work surface with a heat-resistant mat or newspaper, and forgetting to unplug the glue gun when not in use. These oversights can lead to accidents and damage.
- Rushing the drying time: Glue guns provide quick bonding solutions, but it is crucial to allow sufficient time for the glue to dry and set properly. Rushing the drying time can result in weak bonds that easily come apart. It’s recommended to wait for the glue to cool and dry completely before handling the bonded materials.
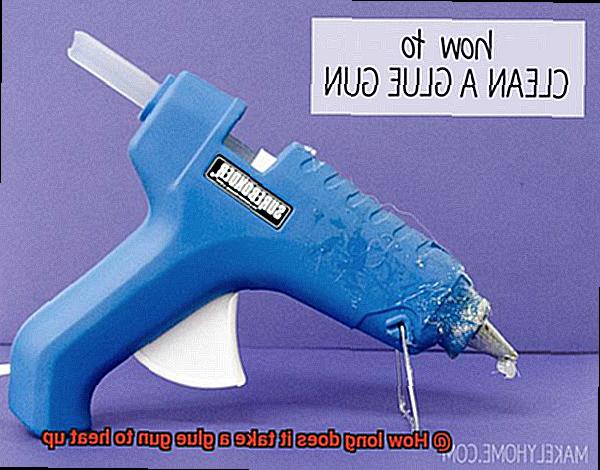
- Failing to clean the glue gun: Neglecting to clean the glue gun after use is another common mistake. Over time, residue from melted glue can build up inside the nozzle, affecting the glue gun’s performance. Regularly cleaning the glue gun ensures smooth operation and prevents clogs.
- Also Read: How Much Weight Can Hot Glue Hold?
Conclusion
The time it takes for a glue gun to heat up can vary depending on the model and brand. On average, it usually takes around 3-5 minutes for the glue gun to reach its optimal temperature. However, some high-quality glue guns with advanced heating elements can heat up in as little as 1-2 minutes.
When it comes to efficiency and convenience, knowing how long it takes for a glue gun to heat up is crucial.
In today’s fast-paced world, every minute counts. That’s why understanding the heating time of your trusty adhesive companion is essential.
As professionals who rely on precise craftsmanship, we need tools that are quick and reliable.

