Sick of wimpy tapes that ditch you when the going gets tough?
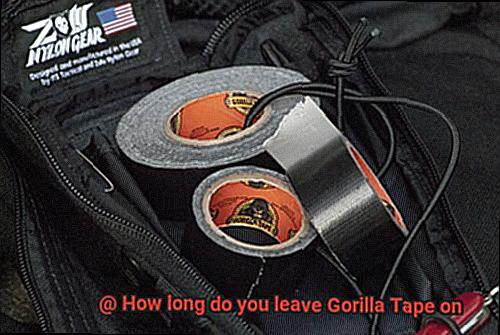
Enter Gorilla Tape, the heavyweight champ of adhesives. Whether you’re tackling a quick fix or an on-the-go emergency, it’s crucial to know how long to rock this bad boy for maximum stickiness.
Sure, it’s tempting to slap it on and forget about it, but taking a sec to master the best practices can make all the difference in its effectiveness. In this blog post, we’ll dig deep into the nitty-gritty, spilling the beans on how long you should keep Gorilla Tape on and keeping your projects rock-solid.
So grab a mug of joe, kick back, and let’s unravel the sticky tape secrets.
Factors to Consider When Determining How Long to Leave Gorilla Tape On
Contents
- 1 Factors to Consider When Determining How Long to Leave Gorilla Tape On
- 2 Clean and Dry the Surface Before Applying Gorilla Tape
- 3 The Type of Surface Impacts How Long Gorilla Tape Can Be Left On
- 4 Extreme Temperatures Can Affect Adhesive Properties of Gorilla Tape
- 5 Intended Use of Gorilla Tape Should Be Considered When Deciding Duration
- 6 Removing Gorilla Tape Carefully and Slowly Is Recommended
- 7 Adhesive Becomes Stronger Over Time, Making Removal More Difficult
- 8 Conclusion
When it comes to adhesive tape, Gorilla Tape is a popular choice for its strength and durability. However, knowing how long to leave it on can be a crucial factor in achieving optimal results. In this article, we will explore the key factors to consider when determining how long to leave Gorilla Tape on, ensuring that you get the most out of this versatile adhesive solution.
Factor 1: Surface Material
Different surface materials react differently to Gorilla Tape’s adhesive. Consider the following:
- Smooth surfaces like glass or metal provide excellent adhesion and can tolerate longer durations of tape application.
- Delicate surfaces such as painted walls or fabrics require more caution, and it is recommended to remove the tape sooner to avoid any potential damage or residue.
Factor 2: Environmental Conditions
Environmental conditions play a significant role in the longevity of Gorilla Tape. Take into account the following:
- High humidity can affect the tape’s adhesive properties, potentially reducing its effectiveness over time.
- Extreme temperatures, both hot and cold, can also impact the tape’s adhesion.
- Direct sunlight exposure can cause the tape to degrade faster. In such conditions, it may be necessary to remove the tape sooner than usual to prevent loss of adhesion and maintain its effectiveness.
Factor 3: Purpose of Application
Consider the purpose for which you are using Gorilla Tape. Different durations of tape application are typically sufficient for specific purposes:
- For temporary applications like holding up decorations or securing lightweight objects, shorter durations are usually adequate.
- For more permanent or heavy-duty applications such as repairing outdoor equipment or securing heavy objects, leaving the tape on for a longer period ensures maximum strength and durability.
Factor 4: Manufacturer’s Recommendations
Always refer to the manufacturer’s instructions and recommendations regarding application and removal of Gorilla Tape. The manufacturer conducts extensive testing and research on the product’s performance and can provide valuable guidance on how long it can safely remain in place. Following these guidelines ensures optimal results and minimizes any potential risks or damages.
Factor 5: Inspection and Monitoring
Regularly inspecting and monitoring the condition of Gorilla Tape is crucial. Factors like wear and tear, exposure to moisture, or changes in temperature can affect its adhesive strength over time. By checking the tape periodically, you can identify any signs of weakening adhesion or potential damage and take appropriate action accordingly.
Clean and Dry the Surface Before Applying Gorilla Tape
Attention, adhesive aficionados. For those who appreciate the power of Gorilla Tape, you’re surely aware that a strong bond is crucial for conquering any project. But did you know that the secret to that unyielding hold lies in cleaning and drying the surface before applying this mighty tape? In this article, we will delve into why it is of utmost importance to prep your surface properly and provide you with expert tips to guarantee optimal adhesive strength. So, let’s dive in and uncover the mysteries behind the mighty Gorilla Tape.
Why Cleaning is Crucial:
First and foremost, let’s tackle the critical role of cleaning in ensuring a formidable bond:
Removing Contaminants: Imagine trying to stick something to a dirty, dusty, or oily surface – it’s like attempting to plant a seed in infertile soil. Any contaminants on the surface can significantly hinder Gorilla Tape’s ability to adhere securely. By thoroughly cleaning the area beforehand, you eliminate these pesky culprits that could compromise the tape’s bond.
How to Clean Effectively:
Now that we understand why cleaning is paramount, let’s explore some effective methods:
- Wipe Away Loose Debris: Begin by wiping the surface with a clean cloth or paper towel to remove any loose dirt and debris. This simple yet essential step provides a clean starting point for your tape application.
- Tackling Stubborn Stains: For more stubborn stains or grime, consider employing the aid of a mild detergent or rubbing alcohol to clean the area thoroughly. After using any cleaning solution, rinse the surface meticulously to ensure no residue remains.
Why Drying is Essential:
Now that we have addressed cleaning, let us delve into the essential role of drying:
- Avoiding Moisture Mishaps: Moisture can wreak havoc on Gorilla Tape’s adhesion properties. It is crucial to ensure that the surface is completely dry before applying the tape, as any lingering moisture can significantly impact its effectiveness. Use a clean cloth to wipe away any excess moisture or allow for natural air drying to eliminate any potential obstacles.
- Temperature and Humidity Considerations: Extreme temperatures or high humidity can also influence the adhesive properties of Gorilla Tape. For optimal results, make sure to apply the tape at a temperature between 50°F and 100°F. This temperature range guarantees that the tape’s adhesive properties are at their peak, ensuring a reliable and long-lasting bond.
The Type of Surface Impacts How Long Gorilla Tape Can Be Left On
Unleashing the Power of Gorilla Tape: The Impact of Surface Type on Longevity
Introduction:
When it comes to heavy-duty adhesive tape, Gorilla Tape reigns supreme. Known for its strength and durability, this tape can bond to a wide range of surfaces. However, the type of surface can have a significant impact on how long Gorilla Tape can be left in place. In this article, we will dive into the fascinating world of adhesives, exploring how surface type affects the longevity of Gorilla Tape.
Smooth Surfaces: A Strong Foundation
Smooth surfaces like glass or metal provide a solid base for Gorilla Tape’s adhesive properties. These surfaces allow the tape to adhere securely, providing a strong and stable bond. On smooth surfaces, Gorilla Tape can be left on for extended periods without causing damage.
Rough or Porous Surfaces: A Different Story
On the other hand, rough or porous surfaces, such as wood or concrete, pose a unique challenge. The adhesive may struggle to fully bond with these surfaces, leading to peeling or lifting over time. To avoid any potential damage, it is recommended to remove Gorilla Tape from rough or porous surfaces within a shorter timeframe.
Environmental Factors: Taking the Heat
While surface type plays a significant role, environmental factors also come into play. Extreme temperatures can affect the adhesive properties of Gorilla Tape. In scorching heat or freezing cold, the tape may become less effective over time. Similarly, high humidity levels can weaken the bond, making it more prone to failure.
Manufacturer Recommendations: Timeframes and Warnings
It is essential to note that Gorilla Tape is not designed for permanent applications and should not be left on indefinitely. The manufacturer recommends removing the tape within 24 hours for optimal results. Leaving it on for longer periods increases the risk of damage when removing it.
Removing Gorilla Tape: A Delicate Dance
To remove Gorilla Tape from any surface, a combination of heat and gentle pulling is recommended. Applying heat with a hairdryer or heat gun can soften the adhesive, making it easier to peel off without leaving residue behind. Caution should be exercised, avoiding excessive force that can cause damage.
Extreme Temperatures Can Affect Adhesive Properties of Gorilla Tape
Extreme temperatures can have a significant impact on the adhesive properties of Gorilla Tape. This mighty tape, known for its strong sticking power, has its limits when it comes to temperature extremes.
Let’s talk about the heat. When things get hot, the adhesive on Gorilla Tape can become soft and lose its stickiness. Picture trying to stick something to a melted marshmallow – not exactly a recipe for success, right? The same principle applies here. In high temperatures, the adhesive becomes less effective, making it unreliable for those tough jobs.
Now, let’s flip the thermometer to the other extreme. When temperatures plummet, Gorilla Tape can become brittle and lose its bonding strength. It’s like trying to glue two icicles together – not exactly a match made in adhesive heaven. So if you’re planning on using Gorilla Tape in sub-zero conditions, think twice.
The folks at Gorilla Tape have your back. They provide guidelines on the temperature range in which their tape can be used effectively. Paying attention to these recommendations is crucial to ensure optimal adhesive performance. You don’t want your tape giving up on you when you need it most.
Here’s a pro tip: prolonged exposure to extreme temperatures can degrade the overall quality and durability of Gorilla Tape. So remember to periodically remove and replace the tape, especially if it has endured severe temperature fluctuations over time. Think of it as giving your tape a well-deserved break.
Intended Use of Gorilla Tape Should Be Considered When Deciding Duration
Gorilla Tape is a well-known heavy-duty adhesive tape that is loved for its strength, durability, and versatility. However, when deciding on the duration for which Gorilla Tape should be used, it is essential to consider the intended purpose. This article will delve into how the intended use of Gorilla Tape affects its durability and effectiveness. We will explore the various types of applications and why choosing the right type of tape is crucial. Additionally, we will discuss the factors that should be taken into consideration when determining the length of time Gorilla Tape should be used. Lastly, we will provide tips on maximizing the lifespan of Gorilla Tape for effective use.
Temporary Fixes and Repairs:
For quick fixes or temporary repairs, Gorilla Tape can be left on for shorter durations. It serves as a convenient solution until a proper repair can be made. In these cases, leaving the tape on for a few days to a couple of weeks is usually sufficient. However, it is important to regularly check the tape’s adhesion and ensure it remains securely in place.
Permanent Solutions and Extended Durations:
When using Gorilla Tape for more permanent solutions or securing items for an extended period, it proves its durability. In such instances, the tape can remain in place for several months or even years. However, it is crucial to consider the environmental conditions and stress factors that the tape will be subjected to.
Environmental Factors:
While Gorilla Tape is designed to be durable and long-lasting, certain environmental factors can impact its performance over time. Extreme temperatures, exposure to moisture or UV rays, and heavy stress or pressure can affect its adhesive properties and longevity. Regular inspections are recommended to identify signs of wear or deterioration.
The Importance of Regular Inspections:
To ensure optimal performance and longevity of Gorilla Tape, periodic inspections are essential. Signs of wear or deterioration should not be ignored. If observed, reapplying or replacing the tape becomes necessary to maintain its optimal functionality.
Removing Gorilla Tape Carefully and Slowly Is Recommended
Gorilla Tape, revered for its formidable adhesive strength, is a go-to solution for various fixing needs. However, when the time comes to part ways with this formidable tape, it is imperative to proceed with caution and patience. In this article, we will delve into the reasons why removing Gorilla Tape carefully and slowly is strongly recommended.
Why Careful Removal Matters:
- Shielding Surfaces: Gorilla Tape’s robust adhesive is engineered to create a secure bond with surfaces. Hastily removing it may wreak havoc on delicate materials like paint, wood, or plastic, leaving behind unsightly marks or even stripping layers.
- Evading Residue: Rushing through the removal process can leave behind sticky residue that clings stubbornly. This residue can prove challenging to eliminate and may necessitate additional cleaning steps or specialized products. Taking the time to remove the tape carefully can minimize residue and guarantee a pristine surface.
Tips for Careful and Slow Removal:
- Uncover an Edge: Begin by locating an edge or corner of the tape that can be effortlessly lifted. With finesse, delicately peel back the tape from this point, ensuring even pressure distribution to prevent tearing or surface damage.
- Apply Heat if Needed: When faced with stubborn tape that resists easy removal, employing heat can loosen its grip. A hairdryer or heat gun set on a low setting proves invaluable in this endeavor. Hold it a few inches away from the tape, moving it slowly back and forth to gently warm the adhesive and facilitate peeling.
- Steady Pulling: As you peel back the tape, maintain a constant pulling motion. Avoid sudden jerks or forceful yanks, as these actions may lead to tearing or residual remnants.
- Proper Residue Removal: Should any residue persist after tape removal, employ an adhesive remover or rubbing alcohol on a pristine cloth. Employ gentle motions to dissolve or rub off the residue. Exercise caution with select surfaces, such as unfinished wood or porous materials, which may necessitate additional steps for complete residue elimination.
Adhesive Becomes Stronger Over Time, Making Removal More Difficult
Gorilla Tape has earned its reputation as the king of adhesive tapes, revered for its unparalleled strength and durability. However, what sets it apart from other tapes is its unique ability to become even stronger over time. In this article, we delve into the fascinating science behind this phenomenon and offer expert tips on removing Gorilla Tape without any sticky residue or surface damage.
The Mighty Power of Gorilla Tape:
Gorilla Tape has rightfully claimed its throne as the heavyweight champion of adhesives. Its superior adhesive properties are designed to create an unyielding bond with surfaces, making it a go-to choice for all kinds of applications, whether you’re indoors or braving the elements outdoors.
The Curing Process:
When exposed to air and moisture, the adhesive on Gorilla Tape undergoes a transformative curing process. This mysterious alchemy can take hours or even days, depending on environmental conditions. As the adhesive cures, it strengthens, creating an even tighter bond that poses a formidable challenge when it comes time for removal.
The Battle of Removing Gorilla Tape:
Once the adhesive has fully cured, it forms an ironclad union with the surface it adheres to. Attempting to remove Gorilla Tape without proper technique can result in frustration, leaving behind stubborn residue or causing damage to the underlying material.
Strategies for Successful Removal:
- Anticipate Duration: Before applying Gorilla Tape, consider how long you’ll need it to stay put. If you anticipate needing to remove it within a short timeframe, it may be wise to opt for a less adhesive tape option.
- Weakening the Grip: If removal becomes necessary, weaken the adhesive bond by gently applying heat with a hairdryer or heat gun. This slight elevation in temperature softens the adhesive, making it easier to peel away.
- Expose an Edge: Locate an edge of the tape and deftly lift it using a plastic scraper or your trusty fingernails. Begin peeling slowly and steadily, applying even tension to prevent tearing or leaving adhesive remnants behind.
- Banishing Residue: If sticky residue persists after removing the tape, employ the power of a mild adhesive remover or rubbing alcohol. These solvents dissolve the residue, allowing for gentle scrubbing with a soft cloth or sponge.
sGRA8Dk1WYw” >
Conclusion
In conclusion, determining how long to leave Gorilla Tape on relies on various factors that must be considered. The nature of the surface material plays a significant role—while smooth surfaces like glass or metal can endure extended periods of tape application without issue, delicate surfaces such as painted walls or fabrics necessitate extra caution and earlier removal to prevent any harm or residue.
Moreover, environmental conditions exert their influence as well. High humidity levels can compromise the tape’s adhesive properties just as much as extreme temperatures and direct sunlight exposure do. Consequently, it becomes crucial to promptly remove the tape under such circumstances in order to preserve its efficacy.
Equally important is understanding the purpose behind applying the tape. For temporary applications or securing lightweight objects, shorter durations of tape application generally suffice. However, for more permanent or heavy-duty tasks, leaving the tape on for an extended period ensures maximum strength and durability.
It is imperative to always consult the manufacturer’s instructions and recommendations regarding both application and removal of Gorilla Tape. Additionally, regularly inspecting and monitoring the tape’s condition becomes crucial as wear and tear, exposure to moisture, or fluctuations in temperature can gradually diminish its adhesive strength over time.

