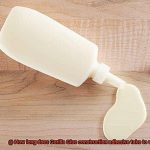
You’ve used Liquid Nails to secure your materials, and now you’re itching to give them a fresh coat of paint. But hold on a sec. Before you unleash your inner Picasso, let’s dive into the nitty-gritty details of painting over Liquid Nails adhesive. We’ll cover everything from drying times to precautions, so you can rock that flawless finish.
Understanding the Drying Process:
Contents
- 0.1 Understanding the Drying Process:
- 0.2 Determining the Waiting Period:
- 0.3 Preparing for Paint Application:
- 1 Factors Affecting Curing Time
- 2 Recommended Curing Time for Liquid Nails
- 3 Waiting for Completely Dry and Cured Adhesive
- 4 Cleaning the Surface Before Painting
- 5 Using a Primer to Improve Paint Adhesion
- 6 Testing an Area Before Painting Entire Surface
- 7 Tips for Working with Liquid Nails
- 8 Conclusion
Before we jump into the juicy stuff, let’s talk about how this magical adhesive actually dries. You see, Liquid Nails isn’t your average glue. It’s specially formulated to go from liquid to solid after application. And while it might feel dry to the touch in no time, it needs some good ol’ patience to reach its maximum strength.
Determining the Waiting Period:
Alrighty then, here comes the million-dollar question: how long do we have to wait before slapping on that paint? Well, my friend, it depends on a few factors like humidity levels, temperature, application thickness, and even the type of paint you’re using. But as a general rule of thumb, waiting a minimum of 24 hours is highly recommended. This gives that adhesive enough time to cure and dry properly.
Now hold your horses. Don’t forget to check the specific product instructions because different versions of Liquid Nails might have slightly different drying times. Trust me; it’s worth reading those guidelines for optimal results and avoiding any sticky situations (pun intended).
Preparing for Paint Application:
Alrighty then. The waiting game is over; it’s time to get down and dirty with that paintbrush. But before you start unleashing your artistic prowess, take a moment to prepare the surface for painting. Give that Liquid Nails adhesive a thorough inspection for any imperfections like air bubbles or uneven surfaces. If you spot any, grab some sandpaper and smooth ’em out like a boss.
But wait, there’s more. Don’t forget to clean the surface from any dust, debris, or loose particles. Grab a clean cloth or brush and give it a good wipe-down. This little step will make sure that your paint sticks like glue (pun intended again) and gives you that long-lasting, eye-catching finish you’re dreaming of.
In a nutshell, painting over Liquid Nails requires a pinch of patience and some serious attention to drying times.
Factors Affecting Curing Time
Liquid Nails, a popular construction adhesive, bonds materials together with strength and durability. However, before applying any paint or finish over the adhesive, it is crucial to allow it enough time to fully cure. The curing time of Liquid Nails can be influenced by various factors, each playing a significant role in determining how long you should wait before painting.
Firstly, the type of Liquid Nails used is a crucial factor affecting curing time. Different formulations are designed for specific applications, resulting in different chemical compositions and curing agents. It is essential to choose the appropriate formulation based on your project requirements and follow the manufacturer’s recommendations for optimal curing time.
Temperature and humidity levels also play a pivotal role in the curing process. Higher temperatures and lower humidity levels generally expedite the curing time, while colder temperatures and higher humidity levels can slow it down. Maintaining the recommended temperature and humidity range during application and curing is vital to ensure proper drying.
The thickness of the Liquid Nails adhesive layer can impact curing time as well. Thicker layers take longer to cure than thinner ones, so it is important to apply the adhesive in a controlled and sufficient manner to avoid extended curing times.
The porosity of the substrate onto which Liquid Nails is applied also affects curing time. Highly porous materials tend to absorb moisture from the adhesive, potentially increasing the curing time. Conversely, non-porous surfaces may not absorb any moisture, leading to faster curing times.
Proper ventilation during the curing process enhances drying and shortens curing time. Good airflow helps remove moisture and allows solvents in the adhesive to evaporate quickly. Adequate ventilation also prevents excess moisture accumulation, which can prolong curing.
The method used to apply Liquid Nails can influence curing time as well. Thoroughly mixing the adhesive before application ensures even distribution of curing agents, promoting uniform and efficient drying. Applying a thin layer of adhesive with consistent coverage allows for faster drying compared to uneven or excessive application.
Furthermore, external factors like sunlight exposure or extreme weather conditions can either expedite or hinder the curing process. It is crucial to consider these factors and take appropriate precautions during application and curing.
So, how long should you wait before painting over Liquid Nails? Generally, it is recommended to wait at least 24 hours before painting over the adhesive. This allows the adhesive to fully dry and bond the materials together securely. However, in some cases, especially when working with larger or heavier materials, it may be necessary to wait longer for the adhesive to cure completely.
Recommended Curing Time for Liquid Nails
Now, before you unleash your inner Picasso and paint over your creation, hold on just a minute. It’s crucial to let the Liquid Nails cure properly.
Curing time for Liquid Nails can vary depending on several factors. Factors like temperature, humidity, and the type of surface being bonded can all influence how long it takes for the adhesive to fully set. As a general rule of thumb, it’s recommended to wait at least 24 hours before painting over Liquid Nails. This ensures the adhesive has sufficient time to cure and will provide a strong bond that will stand the test of time.
However, there are cases where you may need to exercise a little more patience. When bonding porous surfaces like wood or drywall, these materials can absorb moisture from the adhesive, which can extend the curing time. In such instances, it may be advisable to wait longer before applying paint.
Temperature and humidity also play a role in the curing process. Higher temperatures and lower humidity levels can speed up curing time, while lower temperatures and higher humidity levels can slow it down. So, if you’re working in extreme weather conditions, adjust your expectations accordingly.
To get an accurate idea of the recommended curing time for your specific project, refer to the instructions provided by the manufacturer on the product packaging. They know their stuff and can give you the exact information you need.
Before you start slapping on that paint, ensure your surface is clean and free from dust or debris. This guarantees proper adhesion and gives you a smooth finish that would make Bob Ross proud.
Still unsure if Liquid Nails is ready for painting? Perform a quick test. Gently press your finger against the bonded surface. If the adhesive feels firm and leaves no residue on your finger, you’re good to go.
Remember, while Liquid Nails provides a strong bond, not all paints or finishes may be compatible with it. Always check the compatibility of your chosen paint.
Waiting for Completely Dry and Cured Adhesive
Waiting for completely dry and cured adhesive is a crucial step in ensuring a successful paint job. Liquid Nails, a popular construction adhesive, is often used to bond and secure materials before painting. But before you grab your paintbrush, it’s important to know when the adhesive is ready.
Determining if your Liquid Nails adhesive is dry and cured can be done with a simple touch test. Lightly touch the adhesive surface with your finger. If it feels tacky or sticky, it’s not fully dry yet. But if it feels dry and firm, congratulations – it’s time to paint.
However, keep in mind that drying and curing times can vary depending on factors like temperature, humidity, and the materials being bonded. In general, Liquid Nails typically needs at least 24 hours to dry and cure. To be on the safe side, waiting for 48 to 72 hours before painting is recommended.
Remember to check the specific instructions provided by the manufacturer of the Liquid Nails product you’re using for their recommended drying and curing times. They may have specific guidelines tailored to their product.
Once you’re confident that the adhesive is completely dry and cured, there’s one more step you shouldn’t skip – lightly sanding the surface. This helps create a smoother surface for better paint adhesion and a more professional-looking finish. Grab some fine-grit sandpaper and gently go over the cured adhesive before you start painting.
Patience is key when waiting for completely dry and cured adhesive. Rushing this process can lead to issues like poor bond, uneven paint application, and a compromised finish. By following the proper waiting time and surface preparation, you’ll ensure that the paint adheres well to the Liquid Nails, creating a durable bond and a visually pleasing result.
Cleaning the Surface Before Painting
Before you pick up that paintbrush and bring your imagination to life, there’s a crucial step that must not be overlooked – cleaning the surface before painting over Liquid Nails. This seemingly mundane task is the key to achieving proper adhesion, a flawless finish, and a masterpiece that stands the test of time. So, let’s dive into the world of glue and discover the secrets to creating a captivating paint job.
Why Cleaning is Essential:
Before we delve into the nitty-gritty of the cleaning process, let’s understand why it’s absolutely vital. Properly cleaning the surface removes any dirt, dust, grease, or other contaminants that could hinder adhesion. Think of it as priming a canvas before painting – you want a pristine, smooth surface for your colors to shine.
The Cleaning Process:
Remove Loose Debris:
Start by liberating the surface from any loose debris, dirt, or dust using a brush or vacuum. This simple step prevents these particles from becoming trapped under the paint, ensuring an impeccably even finish.
Gentle Detergent or Cleaner:
Mix a mild detergent or cleaner with water according to the manufacturer’s instructions. Avoid harsh chemicals that could harm the surface. With a sponge or soft brush, delicately scrub away grease, oil, stains, or stubborn dirt that may cling to the surface.
Rinse and Dry:
Thoroughly rinse the surface with clean water to eliminate any residue from the cleaner. Allow it to dry completely before proceeding with painting. Remember, painting on a damp surface can lead to poor adhesion and paint failure – patience is key.
Sanding (If Necessary):
Inspect the surface for any remaining rough patches or imperfections. Gently sand them down using fine-grit sandpaper, ensuring a buttery smooth and even surface for painting. Be sure to wipe away any sanding dust before moving forward.
Final Inspection:
Take a moment to caress the surface with your hand, detecting any rough areas or lingering debris. If needed, repeat the cleaning process until the surface is spotless and ready for your artistic touch.
When is Cleaning Particularly Important?
- High-Traffic Areas: Surfaces in high-traffic areas are prone to dirt, grease, and grime buildup. Clean these surfaces meticulously to ensure your paint adheres well and withstands wear and tear.
- Exterior Surfaces: Outdoor surfaces endure constant exposure to the elements, leading to dirt, mold, or mildew accumulation. Give them a thorough cleaning to extend the lifespan of your paint job.
- Previously Painted Surfaces: If you’re painting over an existing paint job, cleaning becomes even more critical. Ensure the old paint is clean and free from any contaminants that could compromise adhesion.
Using a Primer to Improve Paint Adhesion
Using a primer is a game-changer when it comes to improving paint adhesion over liquid nails. It’s like adding a secret ingredient that guarantees a strong bond between the surface and the paint. So, let’s dive into the nitty-gritty and uncover the magic of priming.
First things first, let’s talk about why primer is so important. It’s the unsung hero of the painting process, creating a solid foundation for your masterpiece. And when it comes to liquid nails, using a primer is an absolute must. Trust me on this one.

But hold your horses, my friends. Before you go slapping on that primer, make sure those liquid nails have fully cured. Patience is key here. The curing time can vary depending on the product used, so follow the manufacturer’s instructions religiously to ensure you’re giving it enough time to set.
Once those liquid nails are good to go, it’s time to clean that surface. Dust, dirt, and debris can be real troublemakers when it comes to paint adhesion. Grab a trusty rag and give that surface a thorough wipe-down. We want it squeaky clean and as smooth as a baby’s bottom.
- Now comes the fun part – applying the primer. Grab your weapon of choice, whether it be a brush or roller, and make sure to cover every nook and cranny evenly. A thin coat is all you need for this magic to work its wonders.
- Oh, and here’s a friendly reminder – let that primer dry completely before moving on to the next step. The label should have some helpful drying time instructions for you. Don’t rush it, my friends.
Now, what does all this primer madness accomplish? Well, my fellow DIY enthusiasts, it creates a smooth and uniform surface for your paint to adhere to. Say goodbye to peeling or flaking nightmares – your masterpiece is going to stand strong.
But wait, there’s more. Primer doesn’t just improve adhesion, it also works its magic to hide imperfections and stains on the surface. It’s like having a little artist’s trick up your sleeve.
One last thing – choose a primer that plays well with both the liquid nails and the paint you’re using. We want everything to work harmoniously together, like a symphony of colors. So, read those instructions and make sure you’re using the right primer for the job.
In some cases, multiple coats of primer may be necessary. Don’t fret. Just make sure each coat is dry before applying the next. Take your time, my friends, and the end result will be worth it.
So there you have it, my glue-loving comrades. Using a primer is the secret ingredient to achieving optimal paint adhesion when painting over liquid nails. It’s like giving your artwork a rock-solid foundation to shine on.
Testing an Area Before Painting Entire Surface
When it comes to painting a surface that has been treated with liquid nails, it’s essential to test a small area before diving into the whole project. Liquid nails is a powerful adhesive that forms a strong bond with materials like wood, metal, and concrete. It’s like the superhero of glues, providing a durable connection that can withstand the test of time. However, painting over liquid nails can present some challenges.
Before you start envisioning your beautiful new paint job, it’s crucial to ensure that the liquid nails is fully cured and compatible with paint. This is where testing becomes your best friend. Take a small amount of paint and apply it to an inconspicuous area. Watch how it adheres and dries. If the paint sticks well without any signs of bubbling or peeling, you’re good to go. This means that your liquid nails is fully cured and ready for its colorful transformation.
Keep in mind that different types of liquid nails may have specific recommendations from the manufacturer regarding painting. Always check the product label or contact the manufacturer for precise instructions and guidelines. They are the experts who know their product inside out.
Sometimes, priming the surface before painting may be necessary to ensure proper adhesion of the paint. Think of it as creating a solid foundation for your masterpiece. It helps achieve a smooth and even finish while preventing any potential issues with the liquid nails affecting the paint.
Speaking of paint, not all paints are created equal. Different types have different drying times and may require additional preparation steps before applying them over liquid nails. So, always read and follow the instructions on your paint can diligently.
By testing a small area before committing to painting the entire surface, you can identify any potential issues or incompatibilities early on. It’s better to be cautious than regretful. Plus, it saves you from costly mistakes and ensures a high-quality finish that will make your project shine for years to come.
But if you still feel unsure or have any doubts about painting over liquid nails, don’t hesitate to seek guidance from a professional painter or contact the manufacturer. They are the experts and can provide you with all the assistance you need for a successful painting project.
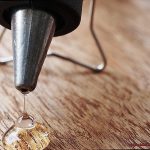
Tips for Working with Liquid Nails
Liquid Nails is a popular construction adhesive that is known for its strong and durable hold. Whether you’re working on a DIY project or a professional construction job, using Liquid Nails can help ensure a secure bond between materials. However, there are some important tips to keep in mind to ensure the best results when working with this adhesive.
Prepare the surface
Before applying Liquid Nails, it’s essential to prepare the surface properly. Make sure the area is clean, dry, and free from any dust, dirt, or grease. This will ensure proper adhesion and help the glue bond effectively. Use a brush or cloth to remove any loose particles or debris from the surface. If there are any stubborn stains or grease marks, you may need to use a mild detergent or solvent to clean the area thoroughly.
Choose the right type of Liquid Nails
Liquid Nails offers different formulations for various applications. It’s important to select the appropriate one for your project, whether it’s a construction adhesive, a heavy-duty adhesive, or a specific type designed for particular materials like wood, metal, or concrete. Read the labels carefully and choose the one that best suits your needs.

Use the right amount of adhesive
Applying Liquid Nails in a zigzag pattern on the surface ensures even distribution. Avoid using too much adhesive as it may lead to excessive squeeze-out and can be difficult to clean up. Use a caulking gun or adhesive applicator to apply an even amount of adhesive along the surface. A thin bead of adhesive is usually sufficient for most applications.
Allow sufficient drying time
The drying time for Liquid Nails can vary depending on factors such as temperature, humidity, and the type of material being bonded. It’s generally recommended to allow at least 24 hours for the adhesive to fully cure before painting over it. However, always refer to the manufacturer’s instructions for specific drying times. Keep in mind that colder temperatures and higher humidity levels can prolong the drying time, so plan accordingly.
Test for dryness
Before painting over Liquid Nails, it’s important to check if the adhesive is completely dry. Gently press your finger onto a small hidden area of the glue and see if it leaves an indentation. If it feels firm and does not leave any marks, it should be dry enough for painting. If there is any indentation or stickiness, give it more time to cure before proceeding with painting.
WSoaX4kgMeg” >
Conclusion
When it comes to painting over liquid nails, timing is everything. You don’t want to rush the process and end up with a messy and uneven paint job. So, how long should you wait before applying that fresh coat of paint?
The general rule of thumb is to give liquid nails at least 24 hours to fully cure before painting over them. This allows the adhesive to harden and ensures that it will provide a strong bond between surfaces.
But remember, patience is key here. If you try to paint too soon, you risk damaging the adhesive or causing it to peel off, leaving you with a less-than-desirable result. Nobody wants that.
So, take your time and let the liquid nails do their thing. Give them a full day to set and cure properly before grabbing that paintbrush and getting creative.
In some cases, particularly if you’re working with larger projects or thicker applications of liquid nails, you may want to wait even longer. It’s always best to consult the manufacturer’s instructions for specific guidance on drying times.
Once the waiting game is over and your liquid nails are cured and ready, it’s time to get painting. Just make sure to prep the surface properly by cleaning off any dust or debris and applying a primer if necessary.
Now go ahead and unleash your inner artist. With your patience rewarded and your surface prepped, you can confidently apply that beautiful coat of paint knowing that it will adhere securely thanks to those trusty liquid nails.
In conclusion, waiting at least 24 hours for liquid nails to cure before painting over them is crucial for achieving a professional-looking finish. Don’t rush the process – give the adhesive ample time to harden and create a strong bond. Remember, good things come to those who wait (and follow instructions).