Are you gearing up for your next DIY project and planning to sand Gorilla epoxy? If so, you’re in the right place. Epoxy is a fantastic adhesive that can be used for various applications. Its strength, durability, and resistance to damage make it an ideal option for sealing and bonding. However, one of the most common questions people ask after applying epoxy is – “How long before I can sand Gorilla epoxy?”
It’s crucial to know the answer to this question as sanding before the epoxy is fully cured can ruin your entire project. Rushing into sanding may lead to visible scratches, blemishes or even affect the adhesive properties of the epoxy.
So what’s the ideal waiting time before you can sand Gorilla epoxy? Well, there’s no fixed answer to this question as it varies depending on several factors such as temperature and humidity during curing.
In this post, we’ll dive into the factors that affect curing time for Gorilla epoxy and how to determine if it’s fully cured. We’ll also give you tips on how long you should wait before sanding so that your project turns out perfectly. So stick around because we’ve got all the info you need.
What is Gorilla Epoxy?
Contents
- 1 What is Gorilla Epoxy?
- 2 Factors Affecting the Curing Time of Gorilla Epoxy
- 3 How Long Does Gorilla Epoxy Take to Dry and Cure?
- 4 When Can You Start Sanding Gorilla Epoxy?
- 5 Tips for Sanding Gorilla Epoxy
- 6 What Happens if You Sand Too Early?
- 7 Types of Sandpaper to Use on Gorilla Epoxy
- 7.1 Aluminum Oxide Sandpaper
- 7.2 Silicon Carbide Sandpaper
- 7.3 Diamond Abrasive Discs
- 7.4 Foam-Backed Sandpaper
- 7.5 Wet/Dry Sandpaper
- 7.6 When sanding Gorilla Epoxy, it’s important to choose the right grit size of sandpaper. Start with a medium-grit sandpaper, such as 120 or 150 grit, and gradually work your way up to a finer grit, such as 220 or 320 grit. This will help you achieve a smooth and even surface without damaging the epoxy.
- 8 Conclusion
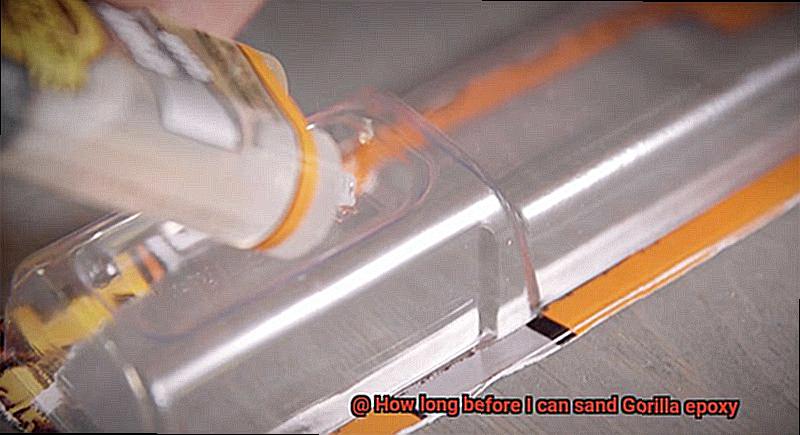
Look no further than Gorilla Epoxy, a two-part adhesive designed for bonding different surfaces with exceptional strength and durability.
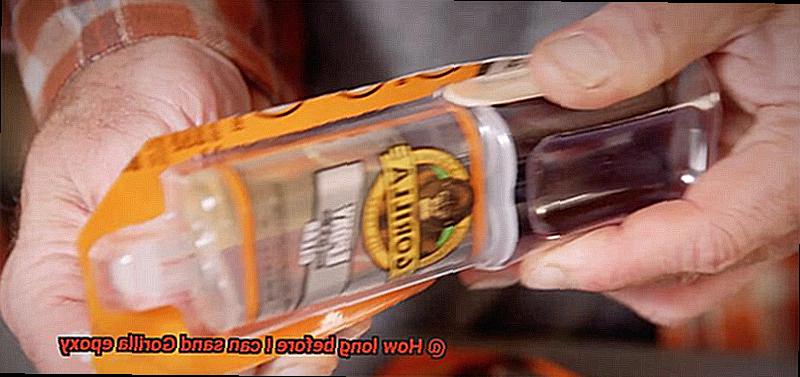
Versatility is the hallmark of Gorilla Epoxy. This adhesive can bond metal, glass, ceramics, wood, and many other materials with ease. The adhesive comes in two separate tubes- one containing the resin and the other the hardener. When these two components are mixed together in equal parts, they react chemically to form a strong bond that can withstand high stress and strain.
One of the key features of Gorilla Epoxy is its ability to cure quickly. The adhesive sets in just five minutes and reaches full strength within 24 hours. This makes it an ideal choice for projects that require fast bonding and quick turnaround times. But how long does it take to dry and cure before it can be sanded? Generally, Gorilla Epoxy takes about 24-72 hours to dry and cure completely.
It’s essential to follow the manufacturer’s guidelines carefully to ensure that the adhesive cures correctly and achieves its maximum strength. After curing, Gorilla Epoxy can be sanded down to achieve a smooth finish. However, it’s critical to wait at least 24 hours before sanding. Sanding too early can damage the adhesive surface and affect its bonding strength. Using coarse-grit sandpaper can also scratch or damage the cured epoxy surface, so it is recommended to use fine-grit sandpaper for a smoother finish.
Gorilla Epoxy offers excellent resistance to water, heat, and chemical exposure. It can withstand temperatures of up to 200°F (93°C) and is resistant to most common solvents and chemicals. This makes it a reliable adhesive solution for various projects that require strong bonding strength.
The benefits of Gorilla Epoxy don’t end there. Here are some additional reasons why this adhesive is a popular choice among DIY enthusiasts and professionals alike:
- It provides a permanent bond that won’t break down over time.
- It’s waterproof and can be used for outdoor projects.
- It’s paintable, allowing you to achieve a professional finish.
- It can fill gaps and holes, making it ideal for repairing damaged surfaces.
Factors Affecting the Curing Time of Gorilla Epoxy
Achieving maximum strength and durability with this adhesive requires an understanding of the various factors that can impact its curing time.
Temperature is the first and most significant factor that affects Gorilla Epoxy’s curing time. The ideal temperature range for proper curing is between 65°F and 75°F (18°C to 24°C). If the temperature dips below or rises above this range, it can result in a prolonged curing time or a weaker bond. To ensure your project’s success, work in a temperature-controlled environment.
Humidity levels are another critical factor that can affect Gorilla Epoxy’s curing time. High humidity levels can prevent the adhesive from drying out properly, leading to a weaker bond or longer curing times. To control humidity levels, work in a dry environment or use a dehumidifier.
The thickness of the epoxy layer also plays a significant role in determining the curing time of Gorilla Epoxy. A thicker layer will take longer to cure than a thinner one. It is crucial to follow the manufacturer’s instructions regarding the recommended thickness of the epoxy layer to ensure proper curing.
Lastly, mixing the epoxy components thoroughly and accurately is essential for proper curing. If the components are not mixed correctly, it can result in an incomplete cure or a weak bond. To ensure maximum strength and durability, take your time and mix the components accurately and thoroughly before applying them.
How Long Does Gorilla Epoxy Take to Dry and Cure?
The answer is not as simple as one might think. There are several factors that can affect the drying and curing times of Gorilla Epoxy.
Firstly, the drying time of Gorilla Epoxy can vary depending on the temperature and humidity of the environment. However, in general, it takes around 5 minutes to set and 24 hours to cure fully. But don’t be too hasty. It is recommended to wait for at least 72 hours before sanding the epoxy to ensure complete curing. This will prevent any damage or peeling of the epoxy.
Another thing to keep in mind is that thicker layers of Gorilla Epoxy will take longer to cure compared to thin layers. Therefore, it’s important to follow the instructions provided by the manufacturer for best results. Being patient and allowing enough time for curing is crucial.
Furthermore, it’s essential to ensure that the surface being bonded is clean and free from any oil, dirt, or debris before applying Gorilla Epoxy. This will ensure optimal bonding and reduce the risk of any issues during the curing process.
In summary, patience is key when using Gorilla Epoxy. Taking your time and allowing for sufficient curing time will give you a strong and durable bond. Here are some key takeaways:
- Gorilla Epoxy takes around 5 minutes to set and 24 hours to cure fully.
- Wait at least 72 hours before sanding the epoxy.
- Thicker layers take longer to cure than thin layers.
- Follow the manufacturer’s instructions for best results.
- Ensure a clean surface prior to application.
When Can You Start Sanding Gorilla Epoxy?
Timing is everything when it comes to sanding Gorilla Epoxy. Sand too early, and you’ll end up with a gooey mess. Wait too long, and you’ll be faced with a surface that’s hard as a rock and tough to work with. So, the question remains: when can you start sanding Gorilla Epoxy?

The answer is not as straightforward as you may think. Several factors come into play, such as the type of epoxy you’re using, the temperature and humidity of your workspace, and the size and shape of your project. For instance, Gorilla Epoxy takes around 24 hours to fully cure and harden, but this can vary depending on the conditions in which you’re working.
One significant factor to consider is temperature. If you’re in a warm environment, your epoxy will cure faster than in a cooler space. Similarly, humidity levels play a role, with high humidity taking longer for the epoxy to cure than in dry conditions. Additionally, thicker layers of epoxy and complex designs may require more time for the adhesive to solidify.
So, what’s the ideal time frame to start sanding Gorilla Epoxy? As a general rule of thumb, wait at least 24 hours after applying the adhesive before attempting to sand it. But remember to keep in mind the temperature and humidity of your workspace, as well as the size and shape of your project.
If you’re still unsure about when it’s safe to start sanding, don’t rush it. It’s always better to err on the side of caution and wait a little longer than risk ruining your project by sanding too soon. Take a deep breath, exercise some patience, and let that Gorilla Epoxy fully cure before grabbing your sandpaper.
To summarize, here are a few things to keep in mind when determining when to start sanding Gorilla Epoxy:
Tips for Sanding Gorilla Epoxy
Achieving a smooth and even surface when sanding Gorilla epoxy can be a challenging task. However, with the right tips and techniques, it can be made much more manageable. Here are five sub-sections explaining the different tips and tricks to make the sanding process for Gorilla epoxy more efficient and successful.
Allow the Epoxy to Cure Fully
Before attempting to sand Gorilla epoxy, it is essential to wait until it has fully cured. The curing time for Gorilla epoxy can range from 24-72 hours, depending on the specific product and environmental conditions. Attempting to sand the epoxy before it has fully cured can damage the surface, affecting the adhesive’s bonding strength. Waiting for it to cure fully will allow for a smooth and even finish.
Use the Appropriate Sandpaper Grit
Using the correct sandpaper grit is crucial when sanding Gorilla epoxy. For rough sanding, it is recommended to use a lower grit such as 60 or 80. For finer sanding, a higher grit such as 220 or 320 is recommended. Wet/dry sandpaper is also suggested to prevent clogging and prolong the life of the sandpaper.
Wear Protective Gear
When sanding Gorilla epoxy, it is vital to wear protective gear such as a dust mask and safety glasses to prevent inhaling any dust or debris. In addition, using compressed air or a vacuum can help remove any excess dust and debris from the surface, keeping it clean and free of contaminants.
Use a Sanding Block or Pad
Using a sanding block or pad helps provide an even and consistent sanding surface when working with Gorilla epoxy. It prevents uneven areas or scratches on the surface, ensuring that you achieve a smooth finish that looks professional.
Take Your Time
Rushing through the sanding process when working with Gorilla epoxy can result in mistakes and damage to the surface. Taking your time and working steadily is critical to achieving a smooth and even finish. It is essential to work with care and precision, ensuring that the surface remains intact while achieving the desired finish.
What Happens if You Sand Too Early?
Sanding is a crucial step in any project that involves Gorilla epoxy. However, if you rush this process and sand too early, you could be setting yourself up for failure. The consequences of sanding too soon can range from an uneven finish to a weakened bond between the epoxy and the surface it was applied to.
One of the biggest risks of sanding too early is that the epoxy may still be soft and not fully cured. This can cause the epoxy to gum up and clog the sandpaper, resulting in an unsightly finish. Not only that, but this can also cause damage to the surface you are working on. This is particularly problematic when working on delicate surfaces or intricate projects.
Moreover, sanding too soon can also compromise the strength of the bond between the epoxy and the surface it was applied to. This can be especially concerning if you are working on a structural repair or project that requires a strong adhesive. Sanding too early can cause the epoxy to pull away from the surface, creating an unstable hold that could lead to further damage down the line.
So, what’s the solution? The key is patience. You need to wait until the Gorilla epoxy has completely cured before attempting to sand it, which typically takes 24 hours. However, keep in mind that this timeframe may vary depending on factors such as temperature and humidity. It’s recommended to wait at least 48 hours before attempting to sand Gorilla epoxy.
When you do start sanding, it’s important to use the proper sandpaper grit. Coarse grits should be avoided as they can damage the surface. Instead, start with a fine grit sandpaper and gradually work your way up to a higher grit for a smooth finish.
Types of Sandpaper to Use on Gorilla Epoxy
When it comes to sanding Gorilla Epoxy, you need to use the right type of sandpaper to achieve the desired finish. There are different types of sandpaper available in the market, each with its unique properties that make it suitable for specific applications. Here are five types of sandpaper to use when sanding Gorilla Epoxy:
Aluminum Oxide Sandpaper
Aluminum oxide sandpaper is known for its durability and ability to handle tough materials. This type of sandpaper can help you remove material quickly and efficiently, making it an excellent choice if you’re working with a thick layer of Gorilla Epoxy. It’s also resistant to heat, which makes it ideal for use on epoxy that has been cured for a longer period.
Silicon Carbide Sandpaper
Silicon carbide sandpaper provides a fine finish and is often used in the final stages of sanding. It’s great for smoothing out rough surfaces and achieving a polished finish. However, it’s not as durable as aluminum oxide sandpaper, so it’s best used for finishing work.
Diamond Abrasive Discs
Diamond abrasive discs are highly durable and can be used wet or dry. They are great for smoothing out rough surfaces and removing scratches from Gorilla Epoxy. These discs come in various grit sizes, so you can choose the one that’s right for your project.
Foam-Backed Sandpaper
Foam-backed sandpaper provides a cushioned surface that conforms to the shape of the object being sanded. This makes it an excellent choice for sanding curved surfaces or objects with intricate details. It comes in various grit sizes, so you can use it for both coarse and fine sanding.
Wet/Dry Sandpaper
Wet/dry sandpaper can be used for both wet and dry sanding. When used with water, it lubricates the surface and prevents dust from becoming airborne. Wet sanding can help you achieve an even smoother finish than dry sanding alone.
When sanding Gorilla Epoxy, it’s important to choose the right grit size of sandpaper. Start with a medium-grit sandpaper, such as 120 or 150 grit, and gradually work your way up to a finer grit, such as 220 or 320 grit. This will help you achieve a smooth and even surface without damaging the epoxy.
It’s crucial to note that you should wait at least 24 hours after applying Gorilla Epoxy before beginning any sanding. This allows the adhesive to fully cure and harden, making it easier to sand and preventing any damage to the surface.
xsvpAsSM7Do” >
Conclusion
To achieve a smooth and even finish when using Gorilla Epoxy, it’s essential to understand the importance of waiting before sanding. Rushing into sanding too soon can cause visible scratches or damage that may affect the adhesive’s bonding strength. So, how long should you wait? The curing time for Gorilla Epoxy can vary depending on several factors such as temperature, humidity, thickness of the epoxy layer, and accurate mixing of components. Generally speaking, it takes around 24-72 hours to dry and cure completely.
When it comes to sanding Gorilla Epoxy, patience is key. Waiting at least 24 hours after application before attempting to sand will ensure maximum strength and durability when bonding different surfaces. But that’s not all – choosing the right type of sandpaper is also crucial for achieving a professional-looking finish.
Aluminum oxide sandpaper is durable and perfect for handling tough materials, while diamond abrasive discs are highly durable and great for removing scratches from cured epoxy surfaces. Foam-backed sandpaper provides a cushioned surface that conforms to the shape of objects being sanded while wet/dry sandpaper lubricates surfaces preventing dust from becoming airborne.
So there you have it – taking your time during the curing process of Gorilla Epoxy and following manufacturer guidelines carefully will ensure maximum strength and durability when bonding different surfaces. Waiting at least 24 hours before attempting to sand gives you a strong bond with an even finish that looks professional.