Are you tired of shelling out big bucks for sealers that never seem to do the job right? Or perhaps you’re working on a project that requires a special type of sealant that’s not easily found in stores. Well, what if we told you that glue could be your answer to sealing woes?
Yes, it’s true. Glue can be an incredibly effective and affordable sealer for a wide range of applications. And the best part is, it’s relatively simple to use.
But before you go grabbing any old bottle of glue, there are some things you need to know. For instance, selecting the right type of glue for your project is crucial. You’ll also want to ensure that the surface is clean and dry before applying it, and apply it evenly to avoid any unsightly clumps or bumps.
In this blog post, we’ll guide you through the step-by-step process of using glue as a sealer. We’ll highlight different types of glue suitable for various projects and provide tips and tricks for prepping surfaces like a pro. Plus, we’ll share some best practices for achieving a smooth and even finish.
So if you’re ready to ditch those pricey sealers and explore the world of glue as a sealer with us, then keep reading.
What is Glue and How Does it Work as a Sealer?
Contents
That’s where glue comes in – not only for bonding surfaces together but also as a sealer.
But what exactly is glue? It’s a versatile adhesive substance that can be made from natural materials like animal hides and bones, or synthetic materials like plastics and resins. Each type of glue on the market has its unique properties and uses.
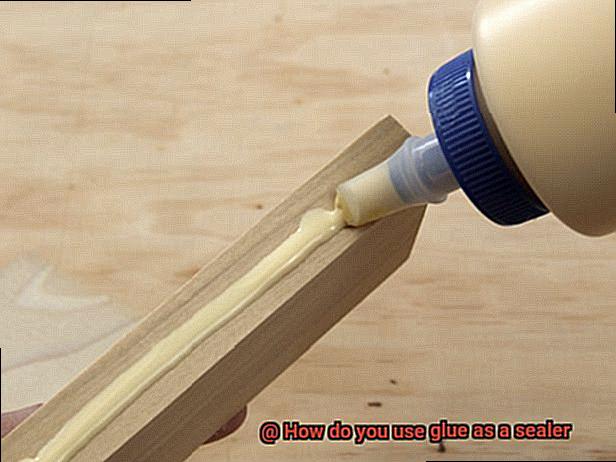
When using glue as a sealer, the technique varies depending on the type of glue and surface you’re sealing. For porous surfaces like paper or cardboard, diluting white glue with water creates a sealant that can be brushed on. Mix equal parts white glue and water, apply it thinly to the surface you want to seal, and let it dry completely before applying a second coat if necessary.
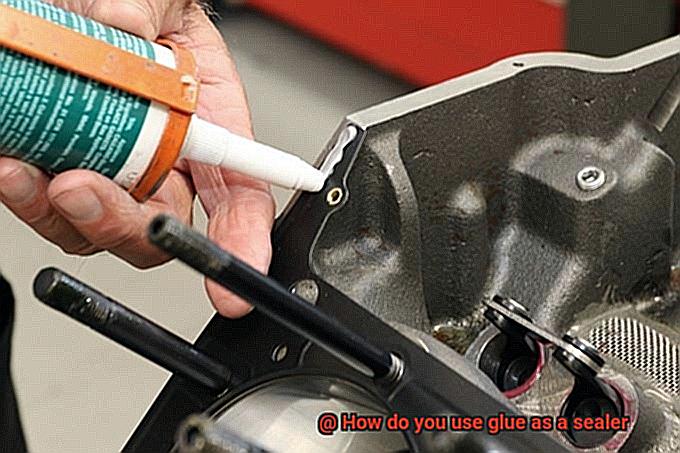
For non-porous surfaces like glass or metal, clear waterproof glues like silicone or polyurethane can do the job. Apply a thin layer to the surface and allow it to dry completely, repeating if necessary for maximum protection.
It’s important to note that not all glues are created equal when it comes to sealing. Choosing the right type of glue for the job at hand is vital, and testing it out on a small area first is recommended to ensure it won’t damage or discolor the surface. Always follow manufacturer’s instructions carefully when applying.
Types of Glue Used as Sealers
Look no further than glue. That’s right, glue isn’t just for bonding surfaces. It can also be used as a sealer. But which type of glue is best for your sealing needs? Let’s explore.
PVA glue is the go-to choice for sealing paper, cardboard, and wood surfaces. This water-based adhesive dries clear, can be easily applied, and creates a strong seal. If you need a stronger bond, look no further than epoxy resin. This two-part adhesive creates a durable and waterproof finish, making it perfect for sealing countertops and floors. However, be sure to follow the manufacturer’s instructions carefully when working with epoxy resin.
If you’re sealing metal surfaces, cyanoacrylate glue (also known as super glue) is your best option. This fast-drying adhesive creates a strong bond on metal surfaces but is not recommended for use on plastic or rubber surfaces.
Silicone sealant is another popular sealing option. It’s ideal for sealing gaps and cracks in windows, doors, and plumbing fixtures, preventing air or water leakage. Silicone sealant is waterproof and can be used in a variety of applications.
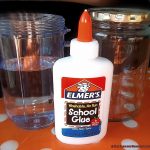
Diluting White Glue to Create a Sealant
Look no further than white glue as a sealant. By diluting it with water, you can create an effective protective layer at an affordable cost.
To make a diluted white glue sealant, mix the glue and water at a ratio of 1:1 or 2:1 (water to glue), depending on the intended use. Stir or shake the mixture thoroughly and strain it through a fine mesh strainer to remove any clumps or impurities.
Apply the sealant in thin, even layers using a brush or roller. Allow each layer to dry completely before adding additional coats. Keep in mind that white glue may not be suitable for high-heat or high-moisture areas, so consider alternative sealants like silicone or polyurethane in those cases.
Using Clear, Waterproof Glues as Sealers
These special glues are designed to create an unbreakable bond that can withstand exposure to water and other elements, making them the ideal choice for outdoor projects or areas exposed to moisture on a regular basis.
To use clear, waterproof glue as a sealer, start by ensuring that the surface is clean and dry. Once you’ve confirmed that the surface is clean, apply the glue evenly across the entire surface using a brush or roller, making sure to cover every area thoroughly. Follow the manufacturer’s instructions regarding application and drying times to ensure optimal performance.
Once the glue has dried, it will create a crystal-clear, waterproof barrier that will protect the surface from water damage, UV rays, and other environmental factors. This type of sealer is perfect for outdoor furniture, decks, and other wood surfaces that need protection from moisture.
It’s important to keep in mind that not all clear glues are waterproof or suitable for use as a sealer. Be sure to select a product that specifically states that it is waterproof and suitable for sealing surfaces. Additionally, it’s always best to test the product on a small, inconspicuous area before applying it to the entire surface to ensure compatibility and effectiveness.
Testing the Glue Before Use
When it comes to using glue as a sealer, there’s nothing worse than finding out it wasn’t strong enough for the job. That’s why it’s crucial to test its adhesive properties beforehand. Don’t worry, this easy step can save time and prevent potential failures in the long run.
First things first, consider the type of glue you’re using. For water-based glues like PVA, apply a small amount onto a scrap material and let it dry. Once dry, try pulling the material apart to see if the glue has formed a strong bond. Weak bond or easily separated material? Then the glue may not be strong enough for use as a sealer.
For solvent-based glues like epoxy or cyanoacrylate (super glue), apply a small amount onto a scrap material and let it cure fully. Then, try bending or twisting the material to see if the bond holds. If it is weak or easily breaks, then the glue may not be suitable for use as a sealer.
But that’s not all. It’s also crucial to consider the surface on which you’ll be applying the glue. Testing on different surfaces such as wood, metal or plastic can help determine if the glue will adhere properly. And, if you want to go above and beyond, test in different environmental conditions like high humidity or extreme temperatures to see if the glue will hold up over time.
Tips for Using Glue as a Sealer
Then using glue as a sealer is the perfect solution. However, not all glues are created equal, and there are some tips and techniques you should keep in mind for optimal results.
Choose the Right Type of Glue
The first and most important tip is to choose the right type of glue for the job. PVA glue is a popular choice for sealing paper, cardboard, and wood surfaces due to its water resistance and clear drying properties. On the other hand, epoxy and cyanoacrylate (super glue) are effective for metal, plastic, and glass surfaces due to their strong bonding capabilities.
Prepare the Surface
Before applying the glue, make sure the surface is clean and dry. Remove any dirt, dust, or debris with a damp cloth or brush. This ensures that the glue adheres properly to the surface.
Apply the Glue
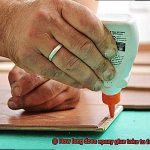
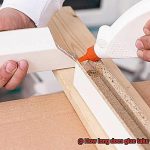
Apply a thin layer of glue evenly over the surface using a brush or sponge. Make sure to cover the entire surface and allow it to dry completely before applying another layer. Applying multiple layers ensures optimal protection.
Seal the Edges
To prevent moisture from seeping in through the edges, apply an extra layer of glue along the edges of the surface. This ensures that your work is protected from all angles.
Sand and Polish
Once the glue has dried completely, sand the surface lightly with fine-grit sandpaper to remove any bumps or imperfections. You can also polish the surface with a soft cloth or buffing wheel to give it a smooth and shiny finish. This step not only adds aesthetic value but also ensures that your work stays protected for longer.
Use Multiple Layers
Depending on the type of surface you are sealing, you may need to apply several layers of glue to achieve optimal protection. Allow each layer to dry completely before applying another layer. This ensures that your work is protected from wear and tear for a longer period.
It’s also important to follow safety precautions when using glue as a sealer. Wear protective gloves and work in a well-ventilated area as many types of glue can be toxic when ingested or inhaled. Lastly, always test out the glue on a small area first to ensure it won’t damage or discolor the surface you’re working on.
3HU_LhbX7-U” >
Also Read: Can you use Elmer’s glue as a sealant?
Conclusion
In conclusion, using glue as a sealer is a cost-effective and versatile solution for sealing a wide variety of surfaces. However, it’s important to choose the right type of glue for your specific project and ensure that the surface is thoroughly cleaned and dried before application.
For porous surfaces like paper or cardboard, diluting white glue with water creates an excellent sealant. On the other hand, non-porous surfaces like glass or metal require clear waterproof glues such as silicone or polyurethane.
Before applying glue as a sealer, it’s crucial to test its adhesive properties to avoid any potential issues in the future. Additionally, taking safety precautions such as wearing protective gloves and working in a well-ventilated area is essential.
To achieve optimal protection for your work, follow these steps: select the appropriate glue, prepare the surface properly, apply it evenly with multiple layers if necessary, seal the edges, and sand and polish the surface.