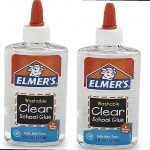
Attention all DIY enthusiasts and professional crafters. Are you on the hunt for a reliable adhesive that can handle any project? Look no further than Elmer’s glue-all Max. This powerhouse glue is a game-changer for anyone looking to create long-lasting bonds on a variety of surfaces.
But how exactly do you use Elmer’s glue-all Max? Fear not, because we’ve got you covered. In this article, we’ll explore the multiple ways this versatile glue can be used, from bonding wood and metal to fixing broken ceramics and glass. We’ll also share some tips to help you achieve optimal results and avoid common mistakes.
Whether you’re building furniture, repairing a beloved family heirloom, or constructing a model airplane, Elmer’s glue-all Max is the perfect solution. Its waterproof formula ensures it can be used both indoors and outdoors with confidence. Plus, its easy-to-use nozzle makes application a breeze – even if you’re new to crafting.
ake your projects to the next level with Elmer’s glue-all Max. Get your hands on a bottle today and start creating.
What is Elmer’s Glue-All Max?
Contents
This high-strength glue is an improved version of the original Elmer’s Glue-All formula, with added strength and durability. It can bond quickly and securely to almost any surface, including wood, metal, plastic, ceramic, and more.
What sets Elmer’s Glue-All Max apart from other adhesives is its exceptional holding power. If you want a strong and durable bond that can stand up to wear and tear over time, this glue is the answer. It can handle a wide range of applications such as woodworking, metalworking, and even DIY home repairs.
With its impressive versatility, Elmer’s Glue-All Max can be used for multiple tasks. From bonding wood and metal to sealing and coating surfaces, this adhesive is perfect for anyone who wants a single adhesive that can handle a variety of projects.
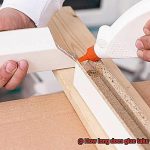
Using Elmer’s Glue-All Max is simple too. Start by ensuring that the surfaces you want to bond are clean and dry before applying a thin layer of glue evenly. Press the surfaces together firmly and hold them in place for a few seconds to allow the glue to set. For best results, clamp or weigh down the surfaces until the glue has fully cured.
Even if you accidentally get Elmer’s Glue-All Max on your skin or clothing, there’s no need to worry. This glue can be easily removed with warm soapy water before it dries. Stubborn stains can be removed with acetone or rubbing alcohol.
Preparing the Surface for Bonding
To achieve the best possible results, it’s essential to know how to prepare your surface for bonding.
To start, make sure that the surface is immaculately clean and free of any contaminants such as dust, dirt, oil or grease. A mild detergent and a damp cloth or sponge will do the trick. Avoid using harsh chemicals or solvents as they can damage the surface.
After cleaning, it’s crucial to ensure that the surface is thoroughly dry before applying the glue. Any moisture on the surface can weaken the bond. Use a clean cloth or paper towel to remove any excess moisture.
To create a stronger bond on smooth or glossy surfaces such as metal, glass, or plastic, roughen up the surface with sandpaper or a wire brush. This process creates tiny grooves and scratches that provide more area for the glue to grip onto.
For porous surfaces like wood or paper, it’s advisable to apply a primer before using Elmer’s Glue-All Max. This step seals any pores on the surface and provides a better base for the glue to adhere to.
Applying the Glue
Before you dive in, it’s important to know how to apply the glue correctly to ensure a strong and lasting bond.
The first step is to make sure your surfaces are squeaky clean and completely dry. Any dirt or moisture can weaken the bond, so take the extra time to prep your surfaces. Once they’re ready, apply a thin layer of glue to one surface and press the two surfaces together firmly. Don’t be afraid to give it some elbow grease; applying enough pressure is crucial for proper adhesion.
For larger projects, working in sections is key to prevent the glue from drying out before you have a chance to press the surfaces together. And don’t skimp on the glue. Use enough to cover the entire surface area for maximum bonding power.
But what if you accidentally go overboard with the glue? No worries. Grab a damp cloth and wipe away any excess before it dries. Trust us, you don’t want to deal with dried glue that’s hard to remove.
One of the best things about Elmer’s Glue-All Max is that it dries clear and is waterproof, making it perfect for a variety of projects. Just remember that it may take up to 24 hours for the glue to fully cure and reach its maximum strength.
Pressing the Surfaces Together
Well, let’s make sure you’re equipped with the knowledge to get the job done right. One of the most critical steps in using this powerful adhesive is pressing the surfaces together correctly.
Before applying the glue, it’s essential to prep the surfaces properly. Make sure they’re clean and dry, as any dirt, dust, or moisture can weaken the bond. Once the surfaces are ready, apply a thin layer of glue to one surface. Don’t go overboard with the glue, as too much can create a mess and compromise the bond.
Now, it’s time for the magic – pressing the surfaces together. Align them carefully and apply even pressure across the entire surface. You can use your hands or a roller/clamp to ensure that everything is firmly pressed together. By doing this, you’ll create a bond that is not only strong but also long-lasting.
While it might be tempting to check your progress frequently, patience is crucial when using Elmer’s Glue-All Max. It takes around 24 hours for the adhesive to reach maximum strength, so avoid disturbing the bond during this time. If you need to make any adjustments, gently pry apart the surfaces and reapply glue as needed.
Curing Time and Clamping
Then you’ll want to pay close attention to two crucial factors: curing time and clamping. These are the keys to achieving a strong and durable bond that can withstand daily wear and tear.
Curing time refers to how long it takes for the glue to fully dry and reach its maximum strength. Rushing this process can result in a weak bond that won’t hold up over time. Typically, Elmer’s glue-all Max has a curing time of 24 hours, but this can vary depending on the temperature and humidity of your environment.
To ensure that your bond reaches its full potential, clamping is essential during the curing process. By applying pressure using clamps or other tools, you create a secure bond between the materials being glued. This prevents them from shifting or separating while the glue dries.
But be careful not to over-clamp. Too much pressure can actually weaken the bond between materials. Instead, use just enough pressure to hold them together firmly without squeezing out all of the glue.
When clamping with Elmer’s glue-all Max, make sure that the surfaces being glued are clean and dry before applying a thin layer of glue to one surface. Then press the two surfaces together firmly and use clamps or other tools to hold them in place while the glue dries.
After 24 hours, you can remove the clamps and check that the bond is strong and secure. Following these simple guidelines for curing time and clamping will ensure that your projects will last for years to come.
Removing Accidental Glue Spills
You’ve had an accidental glue spill. We’ve all been there, especially when working with versatile Elmer’s glue-all Max. But fear not, as an expert in this area, I have gathered some simple steps to help you clean up those pesky spills with ease and get back to your crafting project.
First and foremost, time is of the essence when dealing with glue spills. The longer it sits, the more difficult it will be to remove. If the glue is still wet, quickly grab a damp cloth or paper towel to gently blot up as much of the excess glue as possible. Avoid spreading the glue around or smearing it further into the fabric or surface.
For dried glue spills, there are a few different methods to try. One option is to use a scraper or dull knife to gently scrape away as much of the dried glue as possible. Then, apply a small amount of Elmer’s glue-all Max directly onto the remaining glue and let it sit for a few minutes. Once the glue has softened, grab a cloth or sponge to scrub away the remaining residue.
Another effective method is using vinegar or rubbing alcohol to help dissolve the glue. Apply a small amount of either substance onto the affected area and let it sit for a few minutes before using a cloth or sponge to wipe away the softened glue.
It’s important to note that Elmer’s glue-all Max may not work on all types of spills and surfaces. Always test any cleaning methods on a small, inconspicuous area first before attempting any major cleaning or removal tasks.
WMC05w1wn-s” >
Also Read: Is Elmer’s glue waterproof after it dries?
Conclusion
In a nutshell, Elmer’s Glue-All Max is the ultimate adhesive that can tackle any project, regardless of your crafting level. Its superior strength and durability make it the go-to glue for bonding various surfaces such as wood, metal, plastic, and ceramics.
To ensure optimal results when using Elmer’s Glue-All Max, preparation is key. Make sure the surface is clean and dry before applying the glue evenly to avoid weak spots in your bond. Additionally, curing time and clamping are critical factors to consider. Giving the glue enough time to cure fully before removing clamps guarantees a robust bond that can withstand wear and tear over time.
If you accidentally spill Elmer’s Glue-All Max on your skin or clothes, don’t panic. It’s easily removable with warm soapy water before it dries.
Overall, Elmer’s Glue-All Max is an excellent choice for all your adhesive needs. Whether you’re a DIY enthusiast or professional crafter, this versatile glue will not disappoint.