Step into the world of interior design and craftsmanship, where the marriage of brass and MDF has taken center stage. The fusion of brass’s warmth and sophistication with MDF’s versatility and affordability opens up a realm of possibilities for creating awe-inspiring decorative pieces, furniture, and more. But let’s be real – sticking brass to MDF is no easy feat. It requires finesse, technique, and a touch of magic to achieve that flawless and long-lasting bond we all desire.
In this comprehensive guide, we’ll dive deep into the step-by-step process of expertly adhering brass to MDF. We’ll uncover the essential tools and supplies you’ll need for this adventure, while also sharing invaluable tips that will ensure your success.
How do you stick brass to MDF?
Contents
Step 1: Preparation
Like any great endeavor, preparation is key. Gather your materials – a pristine MDF board, dazzling brass sheet or foil, contact adhesive suitable for both brass and MDF, clamps (those trusty assistants), a roller (the unsung hero), a utility knife (for precision), sandpaper (to rough things up), and a cleaning agent (to wipe away imperfections).
Step 2: Surface Preparation
To create an unbreakable bond between brass and MDF, you must first create a clean canvas. Gently sand both surfaces using fine-grit sandpaper to remove any coatings or irregularities that may hinder adhesion. This will ensure that your adhesive sticks like glue (pun intended).
Step 3: Cleaning
Now it’s time to get down and dirty – well, not really dirty. Clean both the brass and MDF surfaces thoroughly with a residue-free cleaning agent. Remember to dry them completely before moving forward; moisture is not our friend in this delicate dance.
Step 4: Applying the Adhesive
Ah, the moment of truth. Apply a thin, even layer of contact adhesive to both the brass and MDF surfaces using your trusty roller. Let it dry according to the manufacturer’s instructions – you’re looking for that sweet spot where it’s tacky but doesn’t transfer upon touch.
Step 5: Alignment and Bonding
Now comes the artistry. Align your brass sheet with precision on the MDF board, making sure every detail is just right. Once aligned, press down firmly from the center and work your way outward. Applying even pressure across the entire surface will
What Is MDF?
Medium Density Fiberboard (MDF) is a game-changer in the world of construction, furniture making, and crafting. Its affordability and reliability have made it a top choice for many projects. In this guide, we will delve into the fascinating realm of MDF, exploring what it is and its countless uses.
Composition and Benefits:
MDF is an engineered wood product created by compressing wood fibers with a synthetic resin binder under high temperature and pressure. This process results in a material that boasts uniform density and thickness, ensuring stability and consistency in various applications. Its tightly packed wood fibers create a smooth surface ideal for painting, veneering, and laminating.
Versatility in Cutting-Edge Applications:
MDF is more than just an affordable alternative to solid wood. Its resistance to warping, cracking, and splitting sets it apart from its natural counterpart. The smooth and consistent texture of MDF allows for precision machining and shaping using standard woodworking tools. From intricate designs to large-scale projects, MDF proves its worth.
Grades and Thicknesses:
MDF comes in a range of grades and thicknesses, offering flexibility for different purposes. Higher grades guarantee better quality and smoother surfaces, perfect for achieving flawless finishes. Whether you’re looking for thin sheets or thicker boards, MDF has got you covered.
Bonding Brass to MDF:
Thanks to its composition and density, MDF provides a solid foundation for attaching other materials like brass. Adhesive glue specifically designed for metal-to-wood bonding is a reliable choice for creating a durable bond between brass and MDF surfaces. For smaller pieces or temporary applications, double-sided adhesive tape can be a convenient option.
Adhesive Glue Method
Epoxy Glue:
- Offers high strength and durability, perfect for bonding heavy brass pieces to MDF.
- Thoroughly clean surfaces before application.
- Mix equal parts of epoxy resin and hardener for a strong adhesive.
- Apply the mixture to both surfaces and press them firmly together.
- Secure the bond by clamping or applying pressure.
Cyanoacrylate Glue (Super Glue):
- Provides fast-acting and instant bonding properties.
- Ideal for smaller and lightweight brass components.
- Apply a thin layer to both surfaces and join them together, exerting pressure until the bond sets.
- Not suitable for large or heavy brass pieces due to lower strength compared to epoxy glues.
Polyurethane Adhesive Glue:
- Creates a strong and flexible bond between brass and MDF surfaces.
- Typically comes in two parts – resin and activator.
- Mix the components according to the manufacturer’s instructions.
- Apply adhesive to both surfaces, join them together, and apply clamping pressure until the bond cures.

Considerations:
- Follow manufacturer’s instructions for drying and curing time, as well as the working temperature range.
- Ensure proper ventilation when working with adhesive glues.
- Take necessary safety precautions, such as wearing gloves and eye protection.
Preparing the Surfaces
Are you a DIY enthusiast with a project in mind that involves sticking brass to MDF? If so, you’ve come to the right place. Preparing the surfaces is key to achieving a strong and durable bond between these two materials. Let’s dive into the necessary steps to get those surfaces ready for glue.
Cleaning the Brass Surface:
- Start by grabbing a clean cloth and dampening it with warm water and mild soap.
- Gently wipe down the brass surface in circular motions, removing any dirt or dust particles that might hinder the adhesive’s effectiveness.
- This step ensures that the brass is squeaky clean and ready for the next stage.
Roughening Up the Brass Surface:
- To promote better adhesion, lightly sand the brass with fine-grit sandpaper.
- This creates a textured surface that allows the adhesive to grip more effectively.
- Remember not to go overboard with the sanding, as excessive pressure could damage the brass.
Wiping Away Residue:
- After sanding, use a clean cloth or brush to wipe away any residue left on the brass surface.
- This ensures that no loose particles interfere with our bonding process.
Cleaning the MDF Surface:
- MDF has a smooth and non-porous surface, which can pose challenges for adhesion.
- Thoroughly clean the MDF using warm water, mild soap, and a cloth to remove any dirt or dust.
- Allow the MDF to dry completely before moving on to priming.
Priming the MDF Surface:
- Instead of sanding, we’re going to prime the MDF to enhance adhesion.
- Apply an even coat of primer specifically designed for MDF using a brush or roller.
- This primer seals the porous nature of MDF and provides a better surface for the adhesive to stick to.
- Follow the manufacturer’s instructions for application and drying time.
Applying Adhesive:
- Now that both surfaces are prepped and ready, it’s time to apply your chosen adhesive.
- Whether it’s epoxy glue, cyanoacrylate glue, or polyurethane adhesive glue, follow the manufacturer’s instructions for mixing and application.
- Always work in a well-ventilated area and prioritize safety by wearing gloves and eye protection.
- Allow the adhesive to dry and cure for the recommended time to ensure a strong and long-lasting bond.
Applying the Adhesive
In this comprehensive guide, we will walk you through the process of applying adhesive to brass and MDF surfaces, ensuring a bond that is not only strong but also durable enough to withstand the test of time.
First and foremost, selecting the right adhesive is essential. You need an adhesive that possesses both strength and compatibility for bonding brass to MDF. Among the top contenders is the ever-reliable two-part epoxy. Renowned for its high strength, this adhesive can seamlessly unite various materials, including metals and wood.
Now that you have your adhesive in hand, it’s crucial to prepare the surfaces properly. Cleanliness is key. Ensure that both the brass and MDF surfaces are spotless, dry, and completely free from dust or debris. A gentle wipe with warm soapy water followed by thorough drying should do the trick.
To enhance adhesion further, grab some sandpaper or a sanding block and gently roughen up the surfaces. This creates a better texture for the adhesive to grip onto, guaranteeing a stronger bond between the brass and MDF. Just remember to exercise caution and avoid excessive sanding.
Next up, let’s mix up that epoxy adhesive. Carefully follow the instructions provided by the manufacturer, combining equal parts of resin and hardener. Stir it up vigorously until you achieve a smooth, well-blended mixture.
Now comes the exciting part – applying the adhesive. You can opt for a brush or a small spatula to evenly spread the adhesive onto either the brass or MDF surface. Be mindful not to go overboard; a thin layer is sufficient to cover the surface without any excess. Too much adhesive can squeeze out when pressure is applied later on.
With the adhesive expertly applied, it’s time to join forces between brass and MDF. Carefully position the brass onto the MDF surface, ensuring even pressure across the entire area. This guarantees a robust and uniform bond. In case of need, you can employ clamps or weights to secure the brass in place while the adhesive cures.
Speaking of curing, exercise patience. Allow the adhesive to cure according to the manufacturer’s instructions. This typically involves leaving it undisturbed for a specific amount of time. Refrain from moving or disturbing the bonded pieces during this critical period to ensure optimal bonding.
Once the adhesive has fully cured, it’s time to put its strength to the test. Gently attempt to separate the brass from the MDF. If it remains steadfast without any signs of weakening, congratulations. You have successfully applied adhesive to stick brass to MDF.
Pressing the Brass onto MDF
Prepare to embark on an exhilarating journey into the captivating world of pressing brass onto MDF. Get ready to discover the secrets behind achieving a bond that even Hercules would marvel at. So, grab your adhesive and let’s dive in.

Preparing the Surfaces:
Before we embark on our pressing extravaganza, let’s ensure that both the brass sheet and MDF surface are pristine. Dust, dirt, or debris can be major obstacles when it comes to achieving strong adhesion. Grab that trusty dust cloth and get ready to make those surfaces shine like never before.
Choosing the Perfect Adhesive:
Pressing brass onto MDF is already a mechanical marvel, but why not add some adhesive magic to it? With countless options available, like epoxy, super glue, or contact cement, selecting the right adhesive is crucial. Be sure to choose one that plays nicely with both brass and MDF.
Applying the Adhesive:
Now it’s time to flex those adhesive muscles. Follow the instructions provided by your chosen adhesive and apply it evenly onto either the brass sheet or the MDF surface. A brush or roller can be your trusty companions in ensuring a smooth and uniform distribution.
Aligning the Brass:
Imagine this: you’re all set with your adhesive prepped and ready to go. Gently position that dazzling brass sheet onto the MDF surface, ensuring perfect alignment and coverage. Take a moment to breathe and avoid applying excessive pressure just yet – we don’t want any mishaps.
Let’s Get Pressing:

Alright, it’s showtime. Apply consistent pressure across the entire surface of the brass using your weapon of choice – a roller, press machine, or trusty clamps. Think of it as a perfectly choreographed dance routine, where every move counts.
Patience is a Virtue:
After giving it your all, it’s time to step back and let the magic happen. Allow the adhesive to cure and bond effectively. Remember, different adhesives have varying drying times, so consult the manufacturer’s instructions and resist the urge to rush.
The Finishing Touches:
Congratulations, my glue-savvy friend. Your brass-MDF masterpiece is almost complete. Take a moment to inspect the assembly for imperfections or areas that could use a little TLC. A gentle sanding or polishing of the brass surface can elevate your creation to pro-level status.
Choosing an Appropriate Adhesive
Today, we’re diving into the world of adhesive selection for bonding brass to MDF. Believe it or not, this decision can make or break your project. So, let’s unravel the secrets to achieving a strong and durable bond that will withstand the test of time.
To begin, understanding the materials is key. Brass comes in various forms, from sheets to plates, and MDF can have different thicknesses and densities. Knowing these specifics will guide you towards an adhesive that is compatible with both materials, ensuring a successful bond.
Next, consider the purpose of your brass-MDF assembly. If it’s simply for decorative purposes, a general-purpose adhesive might do the trick. However, if your creation will face moisture or temperature fluctuations, you’ll need an adhesive that can handle these challenges without losing its grip.
One popular choice for this task is epoxy resin. This mighty adhesive provides a robust bond and excellent resistance to moisture and temperature changes. It’s perfect for both indoor and outdoor applications where strength is paramount. Imagine your brass-MDF masterpiece shining brightly in any weather condition.
Another option to consider is a polyurethane-based adhesive. These adhesives offer flexibility and the ability to bond different materials together. They allow for slight movement between the brass and MDF, which can be handy if dimensions change due to temperature or humidity. So, no need to worry about your project falling apart when faced with changing environmental conditions.
But remember, my friends, preparation is key. Some adhesives require surface roughening with sandpaper to enhance their grip. Additionally, ensuring surfaces are free from dust and grease will improve adhesion. Think of it as priming your canvas before painting a masterpiece.
Lastly, always follow the adhesive manufacturer’s instructions. Apply the adhesive in the recommended thickness and allow ample curing time before subjecting your creation to any stress or load. Patience is a virtue, my friends, and in this case, it’s the secret ingredient to a successful bond.
Double-Sided Tape Method
Today, we embark on an adhesive adventure, exploring the secrets to sticking brass to MDF. This decision is crucial for the success of your project, so let’s uncover the key to achieving a bond that will endure the test of time.
First and foremost, understanding your materials is paramount. Brass comes in various forms, while MDF can have different thicknesses and densities. Knowing these intricacies will guide you towards selecting an adhesive that harmoniously bonds both materials, ensuring a triumphant union.
Consider the purpose of your brass-MDF assembly. If it’s purely decorative, a general-purpose adhesive may suffice. However, if your creation will face moisture or temperature fluctuations, you need an adhesive that can withstand these challenges without relinquishing its grip.
Enter epoxy resin – a mighty adhesive that boasts a robust bond and exceptional resistance to moisture and temperature changes. It’s perfect for indoor and outdoor applications where strength reigns supreme. Imagine your brass-MDF masterpiece gleaming brightly regardless of weather conditions.
Another option worth contemplating is a polyurethane-based adhesive. These adhesives offer flexibility and the ability to unite different materials seamlessly. They allow for slight movement between brass and MDF, which proves advantageous when dimensions shift due to varying environmental conditions. Rest easy knowing your project won’t crumble under pressure.
However, my friends, preparation is key. Some adhesives necessitate roughening surfaces with sandpaper to enhance their grip. Additionally, ensuring surfaces are free from dust and grease will amplify adhesion – think of it as priming your canvas before painting a masterpiece.
Now, let’s dive into the double-sided tape method – a popular and effective way to adhere brass to MDF. Here are the steps involved:
- Select a high-quality double-sided tape specifically designed for heavy-duty applications.
- Clean both the brass and MDF surfaces thoroughly with a mild detergent or alcohol-based cleaner, ensuring they are free from dust, dirt, and grease.
- Cut the double-sided tape into strips or pieces according to the size and shape of the brass piece.
- Remove the protective backing from one side of the tape and apply it firmly onto the brass surface.
- Remove the protective backing from the other side of the tape and carefully position the brass piece onto the desired location on the MDF.
- Apply even pressure across the entire surface of the brass piece using your hands or a roller tool.
- Allow sufficient time for the adhesive to set and cure, following the manufacturer’s recommended curing time.
- Check the bond by gently applying pressure or tapping on the brass surface to ensure it is secure.
The double-sided tape method offers a strong bond while allowing for future removal or repositioning if needed. However, keep in mind that it may not be suitable for extreme temperature or moisture exposure.
Benefits of Using Double-Sided Tape
When it comes to bonding brass and MDF surfaces, double-sided tape offers a multitude of advantages over traditional adhesives like glue. Whether you’re a DIY enthusiast or a professional, double-sided tape provides a strong and secure bond without the mess and hassle of glue.
- Ease of Use: Double-sided tape eliminates the need for mixing and special tools. It can be applied directly to the surfaces without any fuss, making it a convenient option for anyone looking for a hassle-free bonding solution.
- Versatility: Double-sided tape is incredibly versatile. It can be used to attach brass sheets or components to MDF surfaces, ensuring a seamless and smooth finish. Whether you’re working on a furniture project or a decorative installation, double-sided tape can handle the job.
- Repositioning and Adjustment: Unlike glue, double-sided tape allows for easy repositioning and adjustment. This is particularly useful when working with intricate or delicate brass pieces that require precise placement. You can easily make adjustments without damaging the materials or compromising the bond.
- Clean Appearance: Double-sided tape offers a cleaner finish compared to glue. It eliminates the risk of excess adhesive seeping out from the edges, leaving behind unsightly marks or residue. With double-sided tape, your bond will look professional and seamless.
- Durability: Double-sided tape distributes stress evenly across the bond line, preventing distortion or warping of the brass or MDF. This ensures a long-lasting bond that can withstand heavy loads or vibrations.
- Temperature and Moisture Resistance: Double-sided tape is resistant to temperature changes and moisture, making it suitable for both indoor and outdoor use. It can withstand fluctuations in humidity without compromising the bond between brass and MDF.
- Quick Bonding Process: Unlike traditional adhesives that require curing or drying time, double-sided tape provides an instant bond. This saves you time and effort, allowing you to move on with your project quickly.
- Easy Removal: Double-sided tape is easily removable without causing damage to either the brass or MDF surface. This makes it a practical choice for temporary installations or projects that may require future adjustments or repairs.
rZVscv9AxZo” >
Conclusion
When it comes to sticking brass to MDF, there are a few methods you can try. One option is to use an adhesive specifically designed for metal bonding, such as epoxy or super glue. These strong adhesives create a secure bond between the brass and MDF surface.
Before applying the adhesive, it’s important to prepare both surfaces properly. Make sure the brass and MDF are clean and free from any dust or debris. You can use a mild detergent or rubbing alcohol to clean the surfaces thoroughly.
Next, apply a thin layer of adhesive onto either the brass or MDF surface. Be careful not to use too much, as excess adhesive can seep out and ruin the appearance of your project. Press the brass firmly onto the MDF surface and hold it in place for a few minutes to allow the adhesive to set.
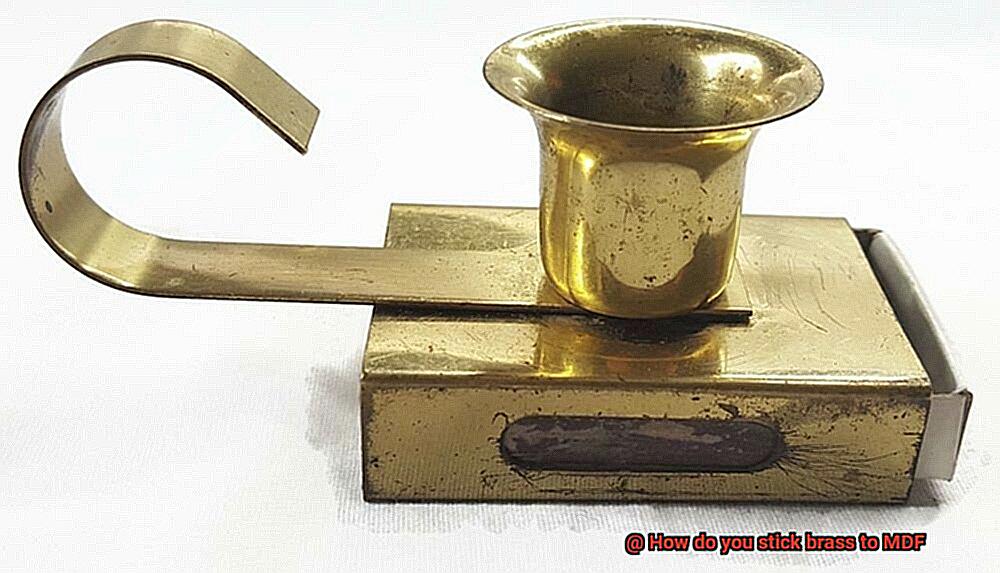
Another method you can try is using brass screws or nails to attach the brass to the MDF. Pre-drill holes into both materials before screwing them together. This will prevent splitting or cracking of the MDF.
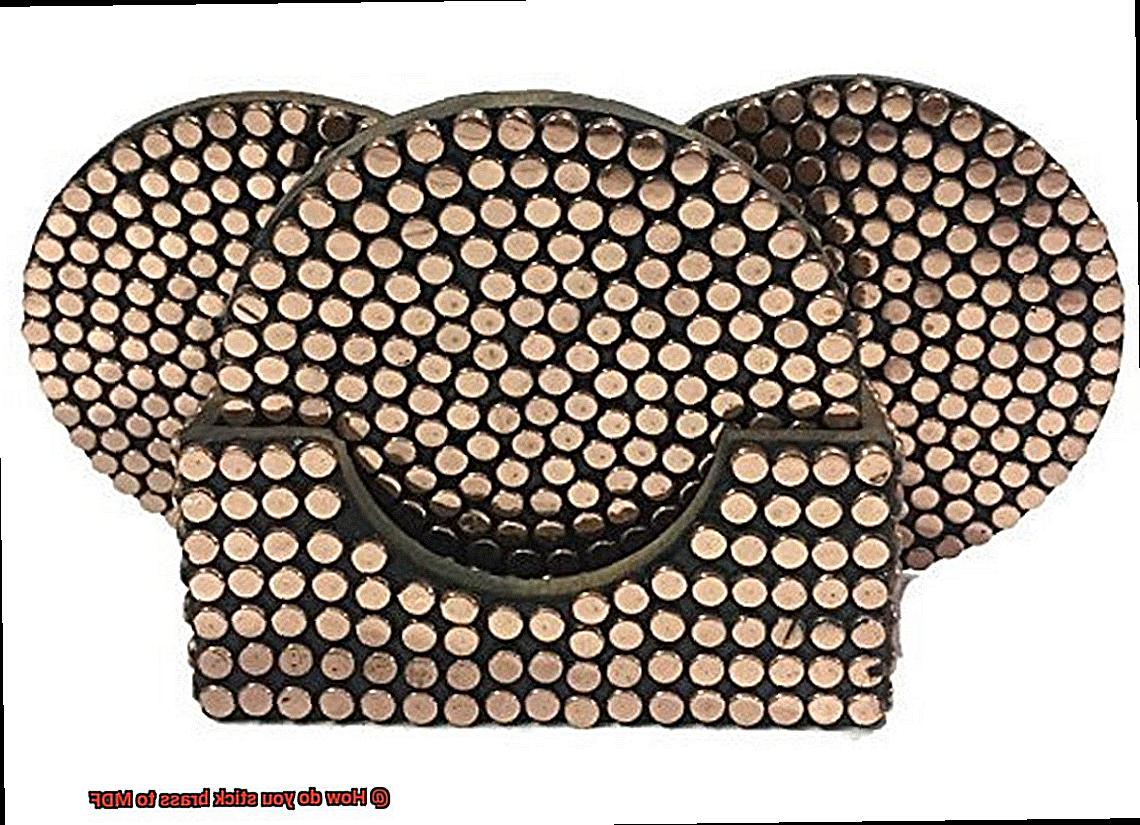
If you want a more decorative approach, you can also consider using brass tacks or brads. These small decorative fasteners can be hammered into the MDF at regular intervals, securing the brass in place while adding visual interest.
In conclusion, sticking brass to MDF requires proper surface preparation and choosing the right adhesive or fastening method.