Sick of the whole nail-banging ordeal just to hang a mirror? Who needs that headache? Lucky for you, we’ve got some genius alternatives that will have your mirror stuck to the wall in no time. Whether you’re a renter who can’t make permanent changes or just someone who likes flexibility, this guide has got your back. Say goodbye to nails and hello to hassle-free mirror hanging.
In this post, we’ll spill the beans on all the tested and proven methods for securely hanging mirrors without nails. From adhesive hooks and double-sided tapes to mounting brackets and picture-hanging strips, we’ve got options for every mirror size and wall type. Get ready as we dive into the world of mirror-hanging solutions that will transform your space into a stylish sanctuary.
Adhesive Hooks or Strips
Contents
- 1 Adhesive Hooks or Strips
- 2 Double-Sided Adhesive Tape or Mounting Squares
- 3 Liquid Adhesives and Mirror Mastic
- 4 Preparing the Surface for Installation
- 5 Following Manufacturer Instructions for Adhesive Hooks, Strips, and Tape
- 6 Applying Liquid Adhesive or Mirror Mastic
- 7 Positioning the Mirror on the Wall
- 8 Allowing Sufficient Curing Time
- 9 Conclusion
When it comes to hanging mirrors, many people want a solution that is secure, damage-free, and hassle-free. This is where adhesive hooks and strips come in. These innovative products provide an easy and convenient way to hang mirrors on the wall without the need for nails or drilling holes. In this post, we will explore how to effectively use adhesive hooks or strips to hang a mirror and transform your space with ease.
Step 1: Preparation
Before applying any adhesive, it’s important to prepare the wall surface. Clean it thoroughly to remove any dust, dirt, or grease that may hinder proper adhesion. Ensure that the wall is smooth and free from imperfections. A clean and prepared surface will ensure a strong bond between the adhesive and the wall.
Step 2: Choose the Right Product
Adhesive hooks and strips come in various sizes and weight capacities. It’s crucial to select the appropriate product that can support the weight of your mirror. Before purchasing, read the packaging carefully to determine the weight limit of each hook or strip. Choosing the right product is essential for a secure and damage-free mirror installation.
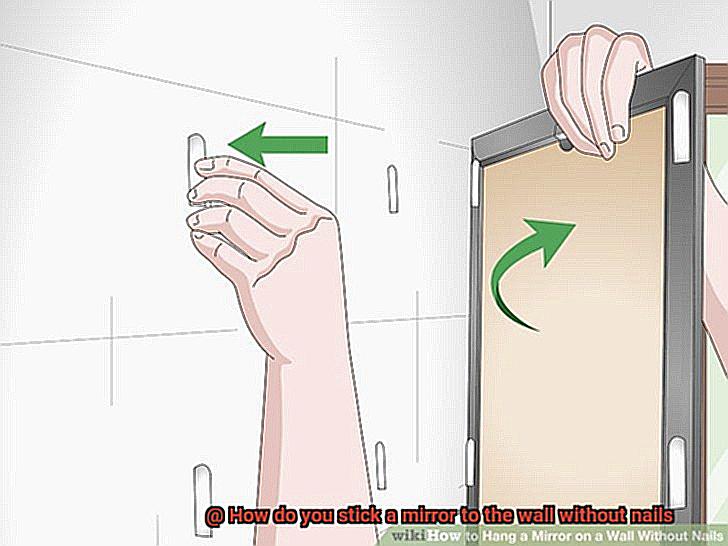
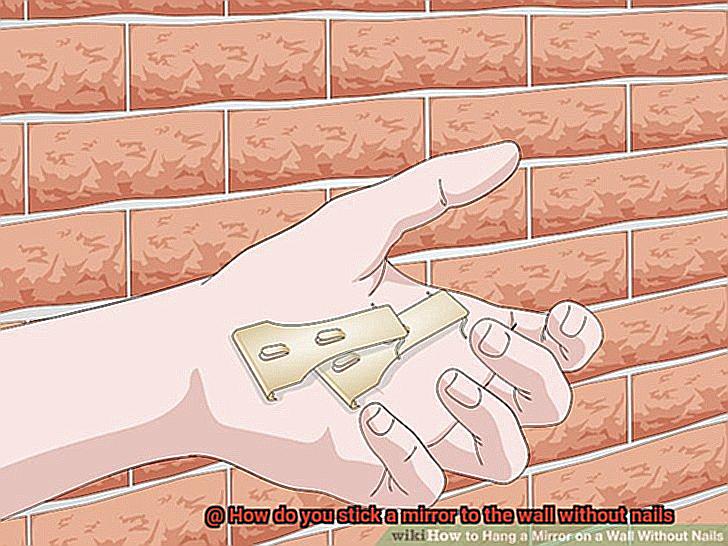
Step 3: Attaching Adhesive Hooks
For adhesive hooks, start by determining the desired height and position on the wall. Remove the protective backing from the hook’s adhesive side and press it firmly against the wall for a few seconds to ensure proper adhesion. If necessary, use multiple hooks to distribute the weight evenly and provide additional support.
Step 4: Using Adhesive Strips
Adhesive strips offer more versatility when it comes to hanging mirrors. Cut them into smaller pieces if needed, and attach them to the back of the mirror. Peel off the protective backing from each strip and press the mirror against the wall, applying firm pressure for about 30 seconds. This ensures a strong bond between the mirror and the wall.
Step 5: Follow Manufacturer’s Instructions
Each adhesive product may have specific guidelines regarding weight limits, application techniques, and curing times. It’s crucial to read and follow the manufacturer’s instructions for your specific adhesive hooks or strips. By doing so, you can ensure that your mirror is securely hung on the wall and will stay in place for a long time.
Double-Sided Adhesive Tape or Mounting Squares
Well, I’ve got some fantastic news for you. There’s a much simpler and easier way to stick a mirror to the wall without nails – double-sided adhesive tape or mounting squares. These little wonders provide a strong and durable bond that can hold up heavy mirrors, and they’re super easy to use.
Before we dive into the exciting world of double-sided adhesive tape and mounting squares, let’s make sure we’re starting off on the right foot. Remember, cleanliness is key. Ensure that the surface you’re sticking your mirror to is clean and free from dust, grease, or any other debris. This will guarantee a strong and long-lasting bond between the adhesive and the wall. Now, let’s get down to business.
If you choose to go with double-sided adhesive tape, here’s what you need to do: cut it into small strips and apply them to the back of your mirror. Make sure to press firmly to ensure a secure bond with the wall. On the other hand, if mounting squares are more your style, peel off the backing from one side of the square and stick it to the back of your mirror. Then, remove the remaining backing and press the mirror firmly against the wall.
For maximum support, it’s best to use multiple strips or squares evenly spaced along the edges of your mirror. This will distribute the weight evenly and prevent any sagging or wobbling. To ensure that your mirror stays securely in place, choose a product specifically designed for mounting mirrors and capable of supporting its weight adequately.
Here’s a little tip: when shopping for double-sided adhesive tape or mounting squares, look for ones labeled as strong or heavy-duty. These products are specially formulated to provide a secure and long-lasting bond for heavier objects like mirrors.
So there you have it – a simple and hassle-free way to stick a mirror to the wall without nails. Just follow these steps, choose the right adhesive product for your mirror’s weight, and voila. Your mirror will be securely and beautifully hung on your wall in no time.
Liquid Adhesives and Mirror Mastic
Say goodbye to those days as we unveil the secret to effortlessly mounting mirrors without nails. In this blog post, we will explore the advantages and considerations of using liquid adhesives and mirror mastic. Get ready to discover a whole new world of convenience and stability.
Advantages of Liquid Adhesives and Mirror Mastic:
- Versatility: Liquid adhesives, such as construction adhesive or heavy-duty adhesive, and mirror mastic can be used on various wall surfaces, including drywall, plaster, concrete, or tile. No more need for different methods depending on the wall material; installation becomes much more convenient.
- Strength and Stability: These adhesives provide a strong bond that securely holds mirrors in place. When applied correctly, they evenly distribute the weight across the mirror’s surface, ensuring stability and minimizing sagging or wobbling.
- Resistance to Moisture: Mirror mastic is specifically designed for mirror installations and is resistant to moisture. This makes it an ideal choice for bathrooms or other humid environments where traditional adhesives might weaken over time.
Considerations for Successful Installation:
- Surface Preparation: Clean the wall surface thoroughly before applying the adhesive. Remove any dust, grease, or debris that could compromise the bonding process. A clean surface ensures optimal adhesion and prevents issues with the mirror falling off in the future.
- Accurate Placement: Measure and mark the desired position for the mirror on the wall before applying the adhesive. This step ensures accurate placement and avoids mistakes during installation. Having another person assist with holding the mirror in place during application prevents accidents or mishaps.
- Curing Time: Follow the manufacturer’s instructions for curing time. Allow the adhesive to set and bond properly before removing any temporary supports or hooks used during installation. Waiting at least 24 hours is generally recommended to ensure a secure bond.
- Mirror and Wall Surface Compatibility: Consider the weight and size of the mirror, as well as any specific instructions provided by the manufacturer. In some cases, additional support such as brackets or clips may be necessary to ensure proper installation and prevent accidents.
Preparing the Surface for Installation
Preparing the surface for installation is a critical step when it comes to sticking a mirror to the wall without nails. This process ensures that the mirror adheres securely and remains in place. By following a few simple steps and using the right materials, you can achieve a professional-looking installation that will stand the test of time.
Gather the necessary materials:
Before you begin, make sure you have all the required materials on hand. These include a mirror adhesive, a clean cloth or sponge, and a level. Having these tools ready will streamline the installation process and ensure a smooth outcome.
Clean the wall thoroughly:
Start by giving the wall a thorough cleaning. Removing any dirt, dust, or grease is essential for proper adhesion. Use a clean cloth or sponge dampened with warm water and mild soap to wipe down the wall. Rinse off any soap residue and allow the wall to dry completely before proceeding.
Smooth out imperfections:
Inspect the wall for any rough areas or imperfections that could affect the mirror’s adhesion. Use sandpaper or a sanding block to gently smooth out these uneven surfaces, creating a flat base for the mirror adhesive.
Mark the desired location:
Using a level, mark the desired location for your mirror. Ensuring that it is straight is crucial for an aesthetically pleasing result. Measure and mark the center points on both the top and bottom of where you want your mirror to be placed. These markings will serve as your guide during installation.
Test the adhesive:
Before applying the adhesive, it’s always wise to test it on a small, inconspicuous area of the wall. This step allows you to identify any adverse reactions between the adhesive and the wall surface. Follow the manufacturer’s instructions for testing and allow enough time for drying.
Apply the mirror adhesive:
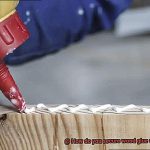
Now it’s time to apply the mirror adhesive. Take your mirror adhesive and apply a thin, even layer onto the back of the mirror. Using a zigzag or crisscross pattern ensures complete coverage. Be careful not to apply too much adhesive, as it may ooze out when you press the mirror against the wall.
Position and secure the mirror:
Carefully position the mirror on the wall, aligning it with the marked center points. Press firmly but gently against the wall to ensure proper adhesion. Hold the mirror in place for a few minutes to allow the adhesive to set. Refer to the manufacturer’s instructions for recommended drying time.
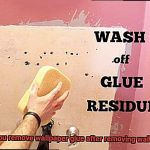
Remove excess adhesive:
Once the adhesive has fully dried, remove any excess or visible adhesive around the edges of the mirror. To do this, use a razor blade or a putty knife, taking care not to scratch or damage the mirror surface.
Following Manufacturer Instructions for Adhesive Hooks, Strips, and Tape
Fear not. Today, we embark on a journey into the world of adhesive hooks, strips, and tape, uncovering the secrets to hanging your mirror without using nails. But wait, there’s a catch – we must follow the manufacturer’s instructions. Don’t fret; it’s simpler than it seems.
Dive into the Instructions:
Before embarking on this magical mirror installation adventure, grab a cup of coffee (or tea) and cozy up with the manufacturer’s instructions. Each brand dances to its own tune, so take the time to acquaint yourself with their steps. Trust me; it’ll be worth it in the end.
Canvas Preparation:
Your wall is the canvas for your masterpiece, so make sure it’s squeaky clean and ready for action. Grab some mild detergent or rubbing alcohol, banish dirt and grease, and let it dry completely. This step guarantees maximum adhesion and wards off any mishaps down the road.
Balancing Act: Weight Limits:
To prevent your mirror from taking an unexpected plunge, pay careful attention to the weight limits set by the manufacturer. Weigh your mirror using its product information or a trusty bathroom scale. Exceeding weight limits is a definite no-no.
The Art of Application:
When it comes to applying adhesive hooks or strips, remember these three words: peel, press, prevail. Peel away that protective backing, press firmly against the wall for a few glorious seconds, and voila – you’ve mastered the art of adhesion.
Tape It Like a Pro:
For tape enthusiasts, listen up. Different tapes require different techniques. Some demand immediate pressure after sticking, while others call for patience before mounting the mirror. Read those instructions closely to avoid any sticky situations.
When Size Matters:
Before proceeding with adhesive hooks, strips, or tape, consider the size and weight of your mirror. Keep in mind that these methods generally cater to temporary or semi-permanent installations. If you possess a hefty or oversized mirror, it’s time to explore alternative installation methods.
Applying Liquid Adhesive or Mirror Mastic
Whether you’re a renter looking to avoid damage or simply prefer a sleeker, nail-free look, liquid adhesive or mirror mastic is your secret weapon. In this guide, we’ll delve into the step-by-step process of applying this mystical adhesive to securely attach your mirror to the wall. So grab your wand… I mean, adhesive, and let’s get started.
Step 1: Prepare the Wall Surface
Just like a sorcerer preparing their spell, you need to ensure that the wall surface is clean and ready for a magical bond. Remove any dust, dirt, or grease by wiping it down with a damp cloth. This will ensure the adhesive sticks firmly.
Step 2: Measure and Mark
Using your trusty tape measure and level, mark the desired location for your mirror on the wall. Double-check that it’s straight and at the perfect height. Precision is key.
Step 3: Apply the Adhesive
Now comes the fun part – applying the liquid adhesive or mirror mastic. With a steady hand, squeeze a generous amount onto the back of the mirror in a zigzag pattern. This helps distribute the adhesive evenly and ensures a secure bond.
Step 4: Press and Hold
Gently but firmly press the mirror against the wall at the marked location. Apply even pressure to allow the adhesive to spread evenly. Feel free to use an incantation or two (just kidding.).
Step 5: Secure with Tape
To prevent any unexpected surprises while the adhesive dries, use masking tape or painter’s tape to hold the mirror in place. This will keep it from sliding down or shifting during the curing process.
Step 6: Patience is a Virtue
Allow the adhesive to work its magic by drying completely according to the manufacturer’s instructions. This usually takes several hours or overnight. Be patient – good things come to those who wait.
Step 7: Unveiling the Magic
Once the adhesive is fully cured, remove the tape and marvel at your handiwork. Gently tap on different areas of the mirror to ensure it’s firmly in place. Congratulations – you’ve successfully hung your mirror without nails.
Final Thoughts:
While liquid adhesive or mirror mastic may seem like a magical solution, it’s important to note that not all walls or mirrors are created equal. Consult with a professional or follow manufacturer guidelines for specific instructions based on your wall and mirror type.
Now that you’ve mastered the art of mirror hanging without nails, go forth and create stunning displays that will leave your guests spellbound.
Positioning the Mirror on the Wall
Are you itching to hang that stunning mirror on your wall but want to avoid the hassle of using nails? No problem. There are alternative methods available to securely position your mirror without leaving a trace. Let’s explore these options step by step.
First, consider the weight and size of your mirror. This will determine the type of adhesive or hanging method you should use. One popular choice is adhesive hooks or strips, specially designed to hold objects securely without causing damage. Make sure to choose hooks or strips that can support the weight of your mirror.
Before applying the adhesive hooks or strips, thoroughly clean the wall surface to ensure proper adhesion. A gentle scrub with mild detergent and water should do the trick. Allow the wall to dry completely before proceeding.
Next, mark the desired position of the mirror on both the wall and the mirror frame itself. This will ensure accurate placement later on.
Now it’s time to apply the adhesive hooks or strips according to the manufacturer’s instructions. Usually, this involves removing a protective backing and firmly pressing them onto the wall surface. Take care to align them with the marked positions.
Once the hooks or strips are in place, it’s time to hang your mirror. Carefully align it with the marked positions and give it a gentle press for a secure attachment.
If adhesive hooks or strips don’t appeal to you, double-sided mounting tape is another fantastic option. Like adhesive hooks, this tape is designed specifically for hanging objects on walls. Clean and dry the wall surface before applying the tape. Cut pieces of tape according to the size of your mirror and affix them to the back of the mirror frame.
Remove one side of the protective backing from the tape and firmly press it onto the wall at your desired position. Then, remove the other side of the backing and carefully attach the mirror to it, applying gentle pressure for a strong bond.
Remember to always follow the manufacturer’s instructions when using adhesive hooks, strips, or double-sided mounting tape. This ensures a secure attachment and prevents any damage to the wall or mirror. Additionally, check the weight capacity of your chosen adhesive to ensure it can support your mirror’s weight.
Allowing Sufficient Curing Time
Today, we embark on an exploration of adhesive bonding and delve into the crucial topic of allowing sufficient curing time when attaching a mirror to the wall without nails. So grab your favorite glue, because we’re about to dive deep into this sticky subject.
Understanding Curing Time:
Curing time is the duration required for the adhesive to achieve its maximum strength and stability. It’s important to note that different adhesives have distinct curing properties. To ensure optimal results, always follow the manufacturer’s instructions.
Patience is Key:
Most adhesives require a minimum of 24 hours to fully cure, creating a strong bond between the mirror and the wall. However, it’s worth noting that some adhesives may need longer periods, such as 48 or even 72 hours, to reach their maximum strength. Rushing the process can weaken the bond, compromising both safety and durability.
Temperature and Humidity Factors:
Temperature plays a significant role in curing time. Higher temperatures generally accelerate the curing process, while lower temperatures can slow it down. Additionally, humidity levels can impact curing time as well. To ensure optimal results, follow the adhesive manufacturer’s recommendations regarding temperature and humidity conditions.
Tackiness is not Enough:
While some adhesives may appear tacky within minutes of application, this preliminary stage does not indicate full curing or readiness to securely hold the mirror. It is crucial to allow additional time for complete bonding beyond the initial tackiness stage.
Planning Ahead:
To ensure you allow sufficient curing time, it’s essential to plan ahead before mounting your mirror without nails. Prepare in advance by ensuring you have at least 24 hours, or as advised by the adhesive manufacturer, where the mirror can remain undisturbed. By prioritizing safety and avoiding rushing the process, you can give the adhesive ample time to cure and create a strong and secure bond.
By understanding the significance of allowing sufficient curing time, you are well-equipped to achieve a robust and secure bond between your mirror and the wall. Remember, patience is key when it comes to adhesive bonding. Take your time, follow the instructions diligently, and enjoy the peace of mind that comes with knowing your mirror is securely mounted for all to admire.
m3Zl0hbkOfU” >
Conclusion
When it comes to hanging a mirror without nails, there are several clever methods you can try.
One popular option is using adhesive hooks specifically designed for hanging mirrors. These hooks have a strong adhesive backing that sticks firmly to the wall surface.
Another alternative is using double-sided tape or heavy-duty mounting tape. These tapes are incredibly strong and can securely hold your mirror in place.
Additionally, you can consider using mirror adhesive or construction adhesive to attach the mirror directly to the wall. Just make sure to follow the manufacturer’s instructions and allow sufficient drying time for a secure bond.
These strips are easy to apply and remove without leaving any damage behind.