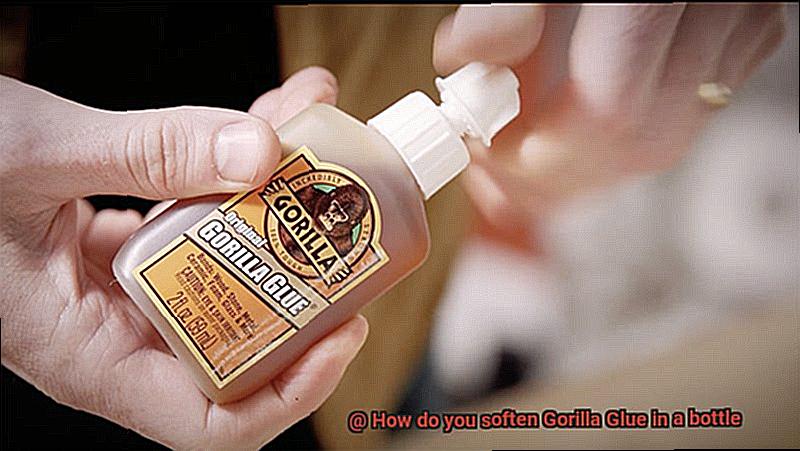
Today, we’re diving headfirst into the captivating world of adhesive alchemy. Ever found yourself stuck with a stubborn bottle of Gorilla Glue that refuses to cooperate? Don’t sweat it. We’re here to spill the beans on how to soften this super glue and unleash its true potential.
Gorilla Glue is famous for its unparalleled strength and durability. But sometimes, its unwavering toughness makes it a challenge to work with once it hardens inside the bottle. But fear not, my friends. We’ve got some expert tricks up our sleeves that’ll help you soften this mighty adhesive and bring it back to life.
Get ready as we delve into the art of Gorilla Glue softening, revealing tried-and-tested methods that’ll blow your mind. Whether you accidentally left your bottle uncapped or simply want to salvage every last drop for future projects, our insights will be your saving grace.
From everyday pantry staples to trusty tools in your workshop, we’ll explore an array of materials that can assist in this transformative process. Say farewell to wasted glue and hello to revived adhesive power. Prepare yourself for a magical journey where practicality meets craftsmanship, breathing new life into your Gorilla Glue.
So, gather round, fellow explorers, as we embark on this adventure together – uncovering the secrets behind softening Gorilla Glue in a bottle. Are you ready to melt away those hardened edges and restore its fluidity? Then let’s dive right in and unveil the wizardry behind this adhesive phenomenon.
What is Gorilla Glue?
Contents
- 1 What is Gorilla Glue?
- 2 Why Would You Need to Soften Gorilla Glue?
- 3 Heat Method to Soften Gorilla Glue
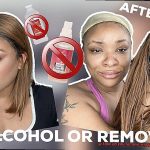
- 4 Acetone Method to Soften Gorilla Glue
- 5 Isopropyl Alcohol Method to Soften Gorilla Glue
- 6 Mechanical Removal Method to Soften Gorilla Glue
- 7 Pros and Cons of Each Method
- 8 Tips and Safety Precautions for Softening Gorilla Glue
- 9 Conclusion
When it comes to adhesive products, one name stands above the rest – Gorilla Glue. With its exceptional strength, water resistance, and variety of formulations, Gorilla Glue has become the go-to choice for DIY enthusiasts and professionals alike. In this article, we will delve into the versatile world of Gorilla Glue and uncover why it is the adhesive of choice for all your bonding needs.
Exceptional Bonding Capabilities:
Gorilla Glue’s claim to fame lies in its ability to create unbreakable bonds between different materials.
From porous to non-porous surfaces, this polyurethane-based glue can handle it all. Repair broken ceramics? Check. Attach wood pieces? Check. Bond metal objects? Check.
Gorilla Glue delivers a strong and durable bond that can withstand heavy loads and resist impact with ease.
Water Resistance:
Unlike many other glues on the market, Gorilla Glue doesn’t crumble when faced with moisture. Its water-resistant properties make it suitable for both indoor and outdoor applications.
Need to repair a garden ornament or fix a bathroom tile? Gorilla Glue has got you covered, rain or shine.
Various Formulations for Every Project:
Gorilla Glue comes in different formulations to cater to every bonding need. The original Gorilla Glue, with its thick consistency and distinctive brownish color, is perfect for general applications. If you require instant bonding power, look no further than Gorilla Super Glue, which provides a quick and formidable bond.
For woodworking projects, there’s Gorilla Wood Glue – designed specifically to offer excellent adhesion for wood surfaces.
Tips for Optimal Results:
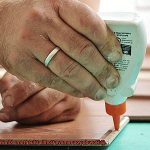
To ensure optimal results when using Gorilla Glue, here are a few tips to keep in mind. First, activate its curing process by dampening one of the surfaces before applying the glue. This will result in a stronger bond.
Additionally, remember to clamp the glued objects together for at least two hours to allow for proper adhesion. These simple steps can make a significant difference in the effectiveness of Gorilla Glue.
Why Would You Need to Soften Gorilla Glue?
Gorilla Glue, known for its legendary strength and durability, is a force to be reckoned with in the world of adhesives. But even the mightiest glue can sometimes require a little softening. So why would you need to soften Gorilla Glue? Let’s explore the various scenarios where this powerful adhesive may need to be tamed.
First off, picture this: you’ve just painstakingly glued two pieces of wood together, only to realize that you’ve made a mistake or need to reposition them. Don’t panic. Softening Gorilla Glue comes to the rescue, providing you with a second chance to perfect that bond and fix any blunders.
Accidents happen, right? Perhaps some Gorilla Glue spilled on surfaces it wasn’t meant to or adhered to unintended areas. In these sticky situations, softening the glue becomes essential. It allows you to effectively clean up the mess and restore order in your DIY kingdom.
But that’s not all. Have you ever stumbled upon an expired or partially used bottle of Gorilla Glue buried in your workshop? Over time, this adhesive can become thick or hardened, rendering it useless. But fear not. Softening the glue can breathe new life into that neglected bottle, reviving its adhesive powers and saving you from having to buy a fresh one.
Now, before you reach for a hairdryer or a bottle of nail polish remover, it’s crucial to understand that softening Gorilla Glue should only be done in specific situations. This glue is designed to create a strong and permanent bond, so tampering with its chemistry may compromise its performance and strength.
To ensure success and avoid any unintended mishaps, always read and follow the instructions provided by the manufacturer. Different types of Gorilla Glue may require different methods for softening.
Speaking of methods, how do you actually soften Gorilla Glue? Well, it typically involves using heat or solvents. These techniques help break down the glue’s chemical composition and reduce its adhesive properties. But remember, patience is key. Take your time, protect the surfaces involved, and use gentle techniques to avoid any unintended damage.
So there you have it – the lowdown on why you would need to soften Gorilla Glue. Whether you need to fix a mistake, clean up a mess, or revive an old bottle, understanding these scenarios and employing the appropriate method will help you conquer any sticky situation that comes your way.
Heat Method to Soften Gorilla Glue
Step 1: Gather Your Weapons:
Before diving into the heat method, make sure you have the right tools at your disposal. You’ll need a heat source such as a hairdryer, a heat gun, or a bowl of hot water. Remember, not all Gorilla Glue bottles are created equal, so ensure yours is heat-resistant to avoid any unfortunate meltdowns.
Step 2: Submerge or Blast:
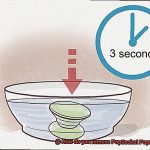
If you opt for the hot water method, grab a bowl and fill it with steaming hot water. Submerge the Gorilla Glue bottle in the water, ensuring it’s completely covered while keeping water away from the inside of the bottle. Let it soak for approximately 10-15 minutes and let the heat work its magic.
Alternatively, if you prefer the hairdryer or heat gun route, set your device to low or medium heat. Hold it about 6 inches away from the bottle and move it in a circular motion to evenly distribute the warmth. Be patient – Rome wasn’t built in a day, and neither is softened Gorilla Glue.
Step 3: Test the Waters:
After a few minutes of heating, remove the bottle from the water or turn off your hairdryer/heat gun. Thoroughly dry the bottle before opening it to avoid any unwanted water contamination. Now it’s time to put that softened glue to the test.
Step 4: Squeeze and Assess:
Squeeze a small amount of the softened Gorilla Glue onto a disposable surface to assess its consistency. Is it still too thick or hardened? Don’t fret. Repeat the heating process until you achieve your desired results. Remember, patience is key – rushing the process may lead to disappointment.
Step 5: Safety First:
While we’re all about DIY victories, it’s important to exercise caution when using heat sources. Follow safety precautions, handle them with care, and keep them away from flammable materials.
Acetone Method to Soften Gorilla Glue
We’ve all experienced the frustration of discovering a hardened bottle of Gorilla Glue when we need it most. But fear not. With the acetone method, you can effortlessly soften that stubborn glue and get back to your DIY projects in no time. In this guide, we’ll take you through the step-by-step process of using acetone to soften Gorilla Glue while prioritizing safety precautions.
Step 1: Gather Your Materials
To begin, make sure you have the following materials at hand:
- Acetone: This potent solvent breaks down the bond of hardened glue.
- A container: Select one large enough to fully submerge the Gorilla Glue bottle.
- A brush or scraper: This will be used to remove the softened glue.
Step 2: Submerge the Glue Bottle
Pour an ample amount of acetone into the container, ensuring that it fully submerges the hardened Gorilla Glue bottle. Complete coverage is crucial for effective results.
Step 3: Let It Soak
Allow the glue bottle to soak in the acetone for a minimum of 24 hours. This generous timeframe allows the acetone sufficient time to penetrate and soften the glue. Remember, patience is key.
Step 4: Remove and Scrape
After 24 hours, carefully extract the bottle from the acetone. Employ a brush or scraper to gently scrape away any softened glue clinging to the sides of the bottle.
Step 5: Repeat if Necessary
If traces of hardened glue persist, repeat the process by immersing the bottle in fresh acetone for another 24 hours. Persistence pays off.
Safety Precautions:
- Work in a well-ventilated area to avoid inhaling fumes.
- Keep acetone away from open flames or sparks, as it is highly flammable.
- Perform a patch test on a small, inconspicuous area to ensure the acetone won’t damage certain materials like plastic or painted surfaces.
- Dispose of the acetone responsibly by taking it to a hazardous waste disposal facility or a local recycling center that accepts solvents.
Isopropyl Alcohol Method to Soften Gorilla Glue
There’s nothing more frustrating than discovering a hardened bottle of Gorilla Glue in the midst of a project. But fret not. I’m here to share with you a simple, yet highly effective method for softening that stubborn adhesive using isopropyl alcohol. So grab your glue and let’s dive into this handy solution.
Step 1: Gather Your Supplies
To start, gather the following supplies:
- Isopropyl alcohol: This common household solvent can easily be found at drugstores or supermarkets.
- Container: Make sure it’s made of glass or metal to withstand the effects of isopropyl alcohol.
- Stir stick: Anything suitable for gently mixing the solution.
Step 2: Mix It Up
Now, it’s time to mix the magic potion:
- Pour a small amount of isopropyl alcohol into the container. Remember, the container should be resistant to alcohol.
- Carefully pour an equal amount of Gorilla Glue into the container, maintaining a 1:1 ratio.
- Gently stir the mixture, ensuring no air bubbles form.
Step 3: Let It Sit
Allow the mixture to sit for approximately 10-15 minutes. This gives the isopropyl alcohol enough time to penetrate and soften the glue. Meanwhile, prepare your workspace and get excited about conquering that stubborn glue.
Step 4: Check Consistency and Safety Tips
After the designated time has passed, check the consistency of the glue. If it has softened to your desired level, it’s ready to use. However, keep in mind:
- Even when softened, Gorilla Glue may still possess some adhesive properties. Handle it with care and avoid contact with skin or surfaces until fully dried.
- If necessary, repeat the process with a higher concentration of isopropyl alcohol or try alternative methods like warm water or heat.
Mechanical Removal Method to Soften Gorilla Glue
In this article, we will explore the mechanical removal method, a powerful technique to soften and eliminate Gorilla Glue. Get ready to embark on a transformative journey as we dive into the step-by-step process.
Step 1: Gather Your Tools
Before you begin, arm yourself with the necessary tools for mechanical removal. You’ll need a plastic scraper or putty knife, sandpaper or a sanding block, and a damp cloth or sponge for cleaning.
Step 2: Test on a Small Area
Caution is key. Test the mechanical removal method on a small, inconspicuous area before proceeding to the entire surface. This ensures that no damage or discoloration occurs.
Step 3: Apply Heat
Heat is your secret weapon. Use a hairdryer or heat gun on low heat to warm up the glue. The heat breaks down the adhesive properties, making it easier to remove.
Step 4: Gently Scrape Off the Glue
Strike delicately. Once the glue has been softened by heat, take your plastic scraper or putty knife and gently scrape off as much of the glue as possible. Work in small sections, exercising patience and precision.
Step 5: Sand Away Residue
Smooth it out. After scraping off most of the glue, you may notice some residue left behind. Use sandpaper or a sanding block to gently sand away any lingering traces until the surface is flawlessly smooth. Apply just enough pressure to avoid damaging the material below.
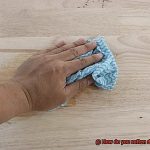
Step 6: Clean Thoroughly
Finishing touches matter. Once you’ve successfully removed the Gorilla Glue, take a damp cloth or sponge and meticulously clean the surface. This ensures that all residue and debris are banished, leaving you with a pristine and polished finish.
Pros and Cons of Each Method
When it comes to softening Gorilla Glue in a bottle, you have several methods at your disposal. However, it’s crucial to weigh the pros and cons of each approach before diving in. In this article, we’ll explore the advantages and disadvantages of four popular methods: heat, solvent, mechanical, and a combination.
Heat Method:
Pros:
The heat method offers a quick and simple process, speeding up the removal of Gorilla Glue. It effectively breaks down the glue, making it easier to remove or manipulate.
Cons:
However, be cautious as excessive heat can damage the bottle or the glue itself. Moreover, it may make the glue even more stubborn and difficult to remove. Not suitable for all surfaces or materials due to potential discoloration or warping.
Solvent Method:
Pros:
The solvent method utilizes readily available household or hardware store items like acetone or rubbing alcohol. These solvents are generally effective in softening Gorilla Glue.
Cons:
Yet, be aware that solvents can be harsh on certain surfaces or materials, causing damage or discoloration. Always test on a small area first. Strong odors and potential harm may occur if used in a poorly ventilated area.
Mechanical Method:
Pros:
The mechanical method is a safe option for certain surfaces or materials as it doesn’t involve heat or solvents. It is particularly effective for thick layers of glue or when other methods have failed.
Cons:
However, it’s important to note that the mechanical method is time-consuming and labor-intensive, especially for large areas or multiple layers of glue. Improper technique may cause damage to the underlying surface, requiring additional repairs or refinishing.
Combination Method:
Pros:
The combination method provides a comprehensive approach to soften and remove Gorilla Glue. It combines solvents and mechanical methods based on the situation, ensuring effective results.
Cons:
On the other hand, the combination method requires more time, effort, and resources compared to using a single method. Proper safety precautions should be taken when using solvents and mechanical tools to avoid accidents or injuries.
Tips and Safety Precautions for Softening Gorilla Glue
Gorilla Glue is a powerful adhesive known for its strength and durability. However, there may be instances where you need to soften Gorilla Glue, whether it’s to remove a spill or make adjustments to a project. In this article, we will provide you with tips and safety precautions to consider when attempting to soften Gorilla Glue.
Read and Follow Instructions:
Before attempting any method to soften Gorilla Glue, it is crucial to read and understand the instructions provided by the manufacturer. This will give you valuable information about the glue’s properties and any specific precautions or recommendations they may have.
Use Heat with Caution:
One common method to soften Gorilla Glue is by using heat. You can do this by placing the bottle in a bowl of warm water or using a hairdryer on low heat. However, it is important to be cautious when using heat, as excessive heat can cause the glue bottle to burst or release toxic fumes. Always keep the heat source at a safe distance from the glue.
Approach Gradually:
Gorilla Glue is designed to be a permanent adhesive and may not soften easily. It is best to approach the process gradually. Start by applying mild heat and allow the glue to warm up slowly. This gradual approach helps prevent sudden reactions or dangers associated with rapid softening.
Ensure Ventilation:
When attempting to soften Gorilla Glue, make sure you are working in a well-ventilated area. Open windows or use fans to increase air circulation and minimize exposure to any potentially harmful fumes that may be released during the softening process.
Wear Protective Gear:
Always prioritize your safety when working with chemicals or adhesives like Gorilla Glue. Wear protective gear such as gloves, safety goggles, and a face mask if necessary. These precautions will help protect your skin, eyes, and respiratory system from any potential hazards.
Be Patient:
Softening Gorilla Glue may require patience and persistence. Give the chosen method enough time to work effectively. Rushing or using excessive force to remove the glue can lead to accidents or damage to the surface you are working on.
Test a Small Area:
Before attempting to soften Gorilla Glue on a larger scale, it is advisable to test the method on a small, inconspicuous area. This will help you gauge how effective the technique is without potentially causing any damage or unwanted results.
BmBDIe7fB94″ >
Conclusion
If you find yourself in a sticky situation with Gorilla Glue trapped in its stubborn bottle, fear not. There are ways to soften this tenacious adhesive and regain control. By employing a few simple techniques, you can loosen the grip of Gorilla Glue and make it more malleable for your needs. So, let’s dive into the methods that will have you saying goodbye to hardened glue and hello to flexibility once again.
One effective method to soften Gorilla Glue is by using heat. Heat has the power to break down the glue’s molecular structure, making it easier to manipulate. You can achieve this by placing the bottle in warm water or using a hairdryer on low heat setting. Be cautious not to overheat the glue or expose it to an open flame – we want softness, not a fiery disaster.
Another technique involves introducing moisture to the equation. Gorilla Glue is activated by water, so adding a small amount of H2O can help loosen its grip. However, be mindful of not adding too much water as excessive moisture may affect the glue’s effectiveness once softened.
If heat and moisture alone don’t do the trick, consider using acetone. Acetone is a powerful solvent that can effectively dissolve many adhesives, including Gorilla Glue. Apply a small amount of acetone directly onto the hardened glue and gently rub it in with a cloth or sponge. Allow some time for the acetone to work its magic before attempting to soften and remove the adhesive.
Remember, safety should always be your top priority when handling any chemicals or solvents like acetone. Ensure proper ventilation and use protective gloves when working with these substances.
In conclusion, while Gorilla Glue may seem unyielding at first glance, there are ways to soften its stronghold on that pesky bottle. Whether through gentle heat application, moisture introduction, or utilizing acetone as a solvent – you have the power to regain control.