Are you a DIY enthusiast, crafter, or artist looking for a cost-effective and straightforward method to protect and seal your projects? Look no further than PVA glue. Also known as white glue or school glue, this versatile adhesive can be used to preserve and enhance the beauty of your work.
In this blog post, we’ll explore the world of PVA glue and show you how to use it to seal a variety of surfaces. From paper crafts to woodwork, sealing with PVA glue is an easy way to provide a protective coating that can last for years.
But why choose PVA glue over other sealants? For starters, it’s affordable and readily available at most craft stores. Plus, it dries clear and doesn’t yellow over time like some other adhesives.
To get started, gather your supplies: PVA glue, a brush or sponge applicator, and the surface you want to seal. Then follow our step-by-step process for the best results.
And don’t worry if you’re new to using PVA glue – we’ve got some tips and tricks up our sleeves to help you achieve the perfect seal every time.
Finally, we’ll showcase some examples of how you can use PVA glue to protect your projects. Whether you’re looking to preserve a cherished artwork or keep a wooden surface looking new, PVA glue has got you covered.
So let’s dive in and discover the wonders of sealing with PVA glue.
Preparing the Surface for Sealing with PVA Glue
Contents
- 1 Preparing the Surface for Sealing with PVA Glue
- 2 Applying the Glue Evenly and in One Direction
- 3 Drying Time Between Layers of Glue
- 4 How Many Layers of PVA Glue Should You Apply?
- 5 Is PVA Glue Waterproof?
- 6 Protecting Paintings and Artworks with PVA Glue
- 7 Advantages of Using PVA Glue for Sealing Surfaces
- 8 Tips for Successful Application of PVA Glue
- 9 Conclusion
Preparing a surface for sealing with PVA glue requires careful attention to detail. Skipping any of the necessary steps can lead to an uneven finish and weak adhesion. To achieve optimal results, follow these steps:
Step 1: Thoroughly Clean the Surface
The first step in preparing the surface is to ensure it is free of dirt and debris. Use a damp cloth to clean off dust and other particles from the surface. For surfaces made of specific materials like metal or glass, you may need to use a specialized cleaning solution. Make sure the surface is completely dry before proceeding to the next step.
Step 2: Sand the Surface
Creating a smooth surface is crucial for proper adhesion of PVA glue. Use fine-grit sandpaper to sand down any rough or uneven areas on the surface. Sand in circular motions until the surface is smooth. Wipe off any dust or debris with a clean cloth.
Step 3: Apply a Sealer (If Needed)
Some surfaces like wood or concrete are porous and may require a sealer before applying PVA glue. The sealer prevents the glue from seeping into the pores and creating an uneven finish. You can use a clear acrylic sealer for this purpose.
Step 4: Apply PVA Glue
Using a brush or sponge, apply a thin layer of PVA glue evenly on the surface. Make sure to apply it in one direction to avoid streaks. Allow the first layer to dry completely before applying another layer. Depending on the material and desired level of sealing, you may need to apply multiple layers of PVA glue.
Step 5: Allow Drying Time
After applying the final layer of PVA glue, allow it to dry completely before using or touching the surface. The drying time may vary depending on the number of layers applied and humidity levels.
Applying the Glue Evenly and in One Direction
I am here to provide you with expert tips on how to apply PVA glue evenly and in one direction for a flawless finish.
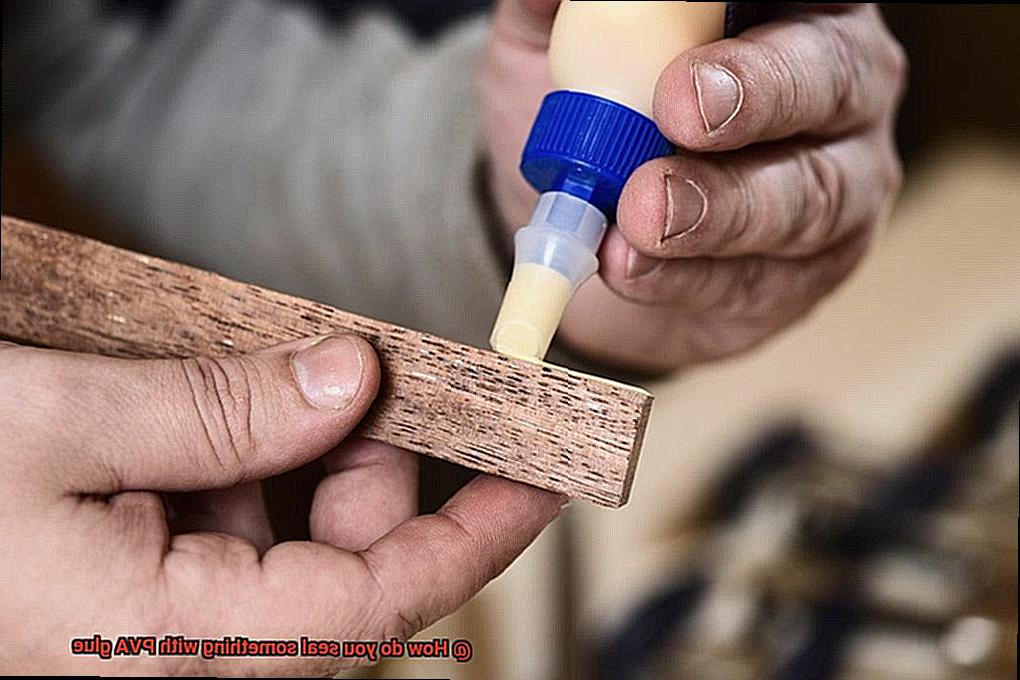
To start, preparation is key. Begin by thoroughly cleaning the surface you wish to seal and ensuring it is completely dry and free of any debris. Once your surface is prepped, grab a soft-bristled brush and dip it into the PVA glue.
When applying the glue, it’s important to avoid over-applying as this can create clumps or bumps. Instead, apply a thin layer of glue onto the surface in one direction. This will help the glue spread evenly and prevent any unsightly bumps from forming.
After applying the first layer, allow it to dry completely before applying another layer. This may take some patience, but it’s worth it to achieve an even finish. Taking this step will prevent any bubbles or bumps from forming between layers. Keep in mind that PVA glue dries clear, so it can be difficult to see where it has been applied. To help with this, consider using a light-colored pencil or marker to mark where the glue has been applied.
Drying Time Between Layers of Glue
Don’t underestimate the importance of this small detail – it can make all the difference in the outcome of your project.
Let’s explore why drying time between layers of glue matters so much:
- Thin is in: Resist the urge to slather on a thick layer of glue to speed up the drying process. Thick layers take longer to dry and can result in a weaker bond overall. Stick to thin, even layers and be patient between each coat.
- Climate control: Environmental factors like humidity and temperature can affect PVA glue drying time. If it’s particularly humid or cold, you may need to wait longer between coats. Keep in mind that ideal conditions are around 70 degrees Fahrenheit with 50% humidity.
- Don’t blow it: While it may be tempting to use a hair dryer or fan to speed up the drying process, this can actually weaken the bond. Allow the glue to dry naturally at room temperature for best results.
- One layer at a time: If your project requires multiple layers of glue, make sure each layer is completely dry before applying the next one. This will help prevent bubbling or wrinkling of the surface.
How Many Layers of PVA Glue Should You Apply?
First and foremost, it’s crucial to consider the type and thickness of the material you are working with. For thin paper or fabric, one or two layers of PVA glue should suffice. However, thicker materials like wood or cardboard require more layers. In general, two to three layers are recommended for most materials.
But don’t rush the process. It’s essential to let each layer dry completely before applying the next one. Not only does this prevent clumping and unevenness, but it also allows the glue to penetrate and bond correctly.
However, keep in mind that too many layers can make your material stiff and brittle over time. This leads to cracking or peeling, which is not what you want. So finding the right balance between strength and flexibility is crucial. Experiment with different numbers of layers to achieve your desired outcome for your specific material.
One more thing to consider is the quality of PVA glue used. Higher quality glues tend to be thicker and more concentrated, so fewer layers may be required compared to lower quality ones.
Is PVA Glue Waterproof?
PVA glue, also known as white glue or school glue, is a versatile adhesive used in various applications. It’s made from polyvinyl acetate and water, making it easy to clean up and non-toxic. However, when it comes to the question of whether PVA glue is waterproof, the answer isn’t a simple yes or no.
Most PVA glues are not entirely waterproof, meaning they can withstand some moisture but may break down when exposed to prolonged or heavy water exposure. This is because water can cause the glue to weaken and lose its bond over time.
However, there are specific types of PVA glue formulated to be waterproof that are labeled as “water-resistant” or “weatherproof.” These contain additional additives that make them more resistant to water and other environmental factors.
If you’re planning to use PVA glue for outdoor projects or in wet environments, it’s best to opt for a waterproof or water-resistant option. It’s crucial to read the labeling carefully before purchasing to ensure the glue meets your needs. Even with these specialized options, it’s still important to take precautions when using them in wet environments. For example, ensuring all surfaces are dry before applying the glue and allowing ample time for it to dry before exposing it to moisture can help ensure a strong bond.
It’s worth noting that even with waterproof or water-resistant PVA glue, it may not be the best option for projects requiring a truly waterproof adhesive. In such cases, specialized adhesives like marine-grade epoxy or silicone sealant may be a better choice.
Protecting Paintings and Artworks with PVA Glue
Fortunately, PVA glue, also known as polyvinyl acetate, is a versatile adhesive that can provide an extra layer of protection against damage.
To use PVA glue to seal your artwork, you need to start by ensuring that the surface is clean and dry. Any dirt or debris on the surface can affect the adhesion of the glue. Once the surface is clean, apply a thin layer of PVA glue evenly using a brush or roller.
Depending on the size of your painting or artwork, you may need to apply several layers of PVA glue to ensure complete coverage. Each layer should be allowed to dry before applying the next. Once you have applied enough layers of PVA glue, allow it to dry completely before handling or storing your artwork.
Using PVA glue as a protective layer can help prevent damage from dust, moisture, and other environmental factors. However, it’s important to keep in mind that this is not a permanent solution. Over time, the glue may yellow or crack, and it may need to be reapplied.
In addition to regular maintenance, there are some things you can do to further protect your artwork from damage. Here are some tips:
- Keep your artwork away from direct sunlight or heat sources.
- Avoid exposing your artwork to extreme temperature or humidity changes.
- Store your artwork in a cool, dry place.
- Use acid-free materials when framing your artwork.
Advantages of Using PVA Glue for Sealing Surfaces
Firstly, PVA glue is incredibly versatile. It can be used on a wide variety of surfaces, including paper, wood, fabric, and even certain types of plastic. This versatility makes it an ideal option for sealing different types of materials, which is perfect for those who love to experiment with different mediums.
Another major advantage of PVA glue is that it’s non-toxic and safe to use. Unlike some harsher chemicals, PVA glue is easy to clean up with water and won’t harm children or pets. This makes it a great option for projects that involve little ones or furry friends.
But what really sets PVA glue apart is its clear finish. When it dries, PVA glue becomes transparent and doesn’t leave any unsightly residue behind. This makes it the perfect choice for sealing surfaces where appearance is important – think photographs or artwork.
And while PVA glue might not be the strongest adhesive out there, it still creates a solid bond between surfaces. This makes it an effective option for sealing items that won’t be subjected to heavy wear and tear.
Finally, let’s talk about affordability. PVA glue is an incredibly cost-effective option for sealing surfaces, and can be easily found at most craft stores and online retailers. For those who want to protect their creations without breaking the bank, PVA glue is the way to go.
Tips for Successful Application of PVA Glue
If you’re looking to apply PVA glue for sealing various materials, there are several steps you need to follow to ensure a successful outcome. Here are five sub-sections that will guide you through the process of applying PVA glue effectively:
Prepare Your Surface
Preparation is key when it comes to applying PVA glue. Make sure the surface you’re sealing is clean, dry, and free from any dust or debris that could affect the bond between the glue and the surface. Use a damp cloth to wipe down the surface, and allow it to dry completely before applying any glue.
Apply a Thin and Even Layer of Glue
Applying too much glue can lead to messy results and longer drying times, while too little glue may result in a weak bond. As a rule of thumb, apply a thin and even layer of glue to the surface. This will allow for better penetration into the material being sealed and help prevent any air bubbles from forming.
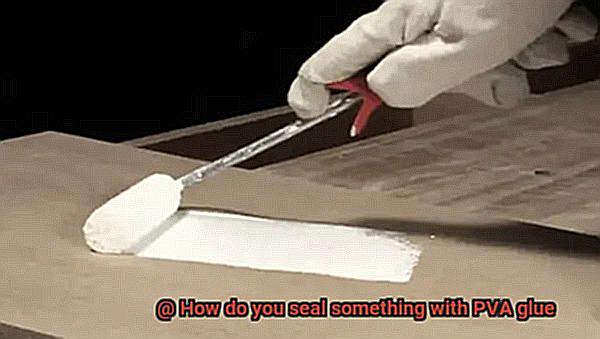
Spread Glue Evenly
Use a brush, roller, or spreader to evenly distribute the glue over the surface. This will help ensure that the entire area is covered with an even layer of glue. Avoid applying too much pressure when spreading the glue as this can cause it to squeeze out from the edges and create a mess.
Allow for Drying Time
PVA glue typically dries clear, but it does take some time to dry completely. Depending on the brand and conditions, it can take anywhere from 30 minutes to several hours for the glue to dry. Avoid touching or disturbing the glued surface until it is completely dry.
Use Clamps or Weights
For larger projects or surfaces, use clamps or weights to hold the pieces together while the glue dries. This will help ensure a strong and secure bond between the surfaces.
W_b5MnYIZ_k” >
Also Read: Can you use Elmer’s glue as a sealant?
Conclusion
In conclusion, PVA glue is a jack-of-all-trades when it comes to sealing and protecting various surfaces. Whether you’re a DIY enthusiast, artist, or crafter, this cost-effective adhesive can provide an extra layer of protection that can last for years. Its clear finish and non-toxic properties make it an ideal choice for sealing surfaces where appearance is crucial, such as photographs or artwork.
To achieve the best results when using PVA glue, it’s essential to follow the proper steps for preparation, application, and drying time. This includes cleaning the surface thoroughly, applying a thin and even layer of glue in one direction, allowing ample drying time between layers and using clamps or weights for larger projects.
While PVA glue may not be the strongest adhesive out there, it still creates a solid bond between surfaces. However, choosing the right type of PVA glue for your project needs is crucial. If you’re planning to use PVA glue in wet environments or outdoor projects, opt for waterproof or water-resistant options.
Overall, with some patience and attention to detail, anyone can successfully seal their projects with PVA glue. So go ahead and protect your cherished creations with this versatile adhesive.