Welcome to our blog post all about sealing a hole in an air mattress.
We’ve all been there – that annoying sound of air sneaking out of your beloved inflatable bed. But fear not, because we’re here to help you fix it and get back to dreamland in no time.
Sealing a hole in an air mattress is actually pretty straightforward, and you can do it yourself without breaking a sweat. In this guide, we’ll take you through the whole process step by step, from finding the pesky hole to picking the perfect sealing method.
So grab your tools, let’s tackle those holes together, and ensure you’ll wake up on a fully inflated cloud of cozy goodness.
Identify the Location of the Hole
Contents
Air mattresses offer convenience and versatility, but unfortunately, they can develop holes over time. Locating these sneaky leaks may seem like a daunting task, but fear not. In this comprehensive guide, we will walk you through the process of identifying the elusive location of a hole in your air mattress. With our expert techniques, you’ll be able to seal the hole and restore your mattress to its original comfort, ensuring a peaceful night’s sleep.
Method 1: The Soapy Water Detective
- Inflate your mattress to its maximum capacity.
- Mix a small amount of liquid dish soap with water in a spray bottle.
- Spritz the soapy solution onto the mattress surface, focusing on potential leak areas.
- Watch intently for the mesmerizing dance of bubbles that form on the surface—these indicate escaping air from the hole.
- Pay close attention to seams, valve openings, and visible damage or wear on the mattress material.
- Meticulously move across every inch of the surface, ensuring no spot remains unexamined.
Method 2: The Listening Connoisseur
- Inflate your mattress to its maximum capacity.
- Press your ear against different sections of the mattress’s surface.
- Move slowly and embrace the symphony of silence as you listen for that distinctive hiss of escaping air.
- This method is particularly effective for larger holes or leaks that reveal themselves through sound.
Alternative Methods:
- Submerging in water: For those elusive pin-sized holes that refuse to reveal themselves, immerse your mattress in water and watch for tiny bubbles emanating from the leak.
- The Flashlight Detective: In low-light conditions, use a flashlight to inspect the surface for minuscule pinpricks of light seeping through—these pinpoint the location of smaller, harder-to-detect holes.
Choosing the Right Sealant:
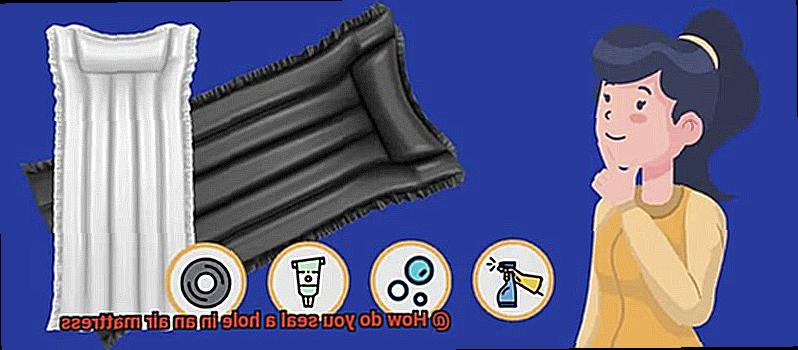
Once you have triumphantly identified the elusive hole, it’s time to seal it and restore your air mattress to its former glory. Consider these options:
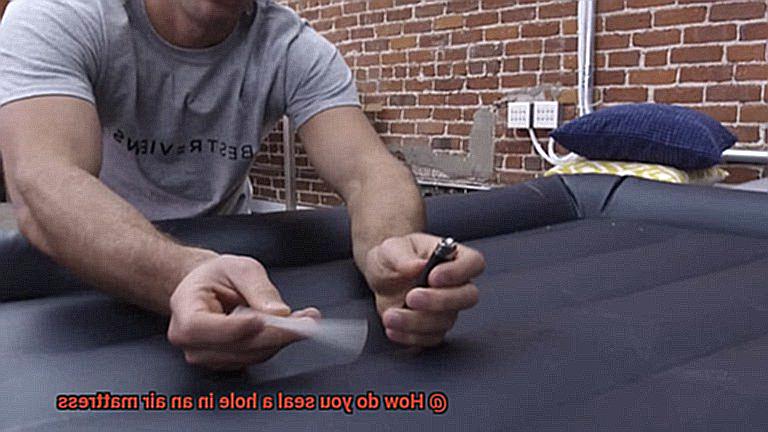
- Adhesive patches: Crafted specifically for air mattress repairs, these patches come in various sizes. Peel off the backing and firmly press the patch onto the hole, following the provided instructions.
- Liquid sealants: Harness the power of rubber cement or specialized sealants, applying them directly to the hole using a brush or applicator. Allow ample drying time before reinflating your mattress.
- Household heroes: As a temporary fix, you can rely on trusty duct tape or super glue, knowing that while they may not provide a long-lasting repair, they will get you through the night.
Clean and Dry the Area
Your beloved air mattress has sprung a leak, but don’t panic just yet. With a little detective work and some handy repair techniques, you can have your mattress back in tip-top shape in no time. However, before we dive into the exciting world of patching and sealing, let’s start with the crucial first step: cleaning and drying the area.
Identifying the Hole:
To begin, we need to locate that pesky hole. Inflate your mattress fully and engage your keen sense of hearing to listen for any hissing sounds or feel for escaping air. Once you’ve found the culprit, mark the spot with a small piece of tape or a pen so that it’s easily visible during the repair process.
Deflating and Prepping:

Now that we’ve pinpointed the hole’s location, it’s time to deflate the mattress completely. This step is vital as it prevents any moisture from getting trapped inside during cleaning and drying. Use the appropriate valve or pump to remove all the air, ensuring a blank canvas for repair.

Stripping Off Coverings:
Next, let’s strip off any bedding, sheets, or covers from the air mattress. By doing this, you provide better access to the affected area and prevent any debris or dirt from interfering with the repair process.
Cleaning with Care:
To achieve a successful repair, we must ensure a clean surface. Take a moment to prepare a mild detergent or soapy water solution. Gently scrub the area around the hole with a soft cloth or sponge, removing any dirt, dust, or oils that may hinder proper adhesion. Rinse off the cleaning solution thoroughly and pat dry with a clean towel.
Drying Time:
Patience is key at this stage. Allow sufficient drying time for the area to be completely dry before proceeding with the repair. Moisture can compromise the effectiveness of adhesives or patches, so make sure there’s no residual water or dampness on the surface. Consider placing the mattress in a well-ventilated area or using a fan to speed up the drying process.
Choose an Appropriate Sealant
Choosing the perfect sealant to repair a hole in your air mattress requires careful consideration of several factors. The material of the air mattress is the first and most important factor to assess. Is it vinyl, PVC, or rubber? Each material may require a different type of sealant for optimal results.
For vinyl or PVC air mattresses, a patch repair kit specifically designed for these materials is the ideal choice. These kits typically include a super-strong adhesive and a patch that can be applied over the hole to create an airtight seal. Ensure that the patch is large enough to cover the entire hole and that the adhesive is suitable for use on vinyl or PVC.
If your air mattress is made of rubber, such as those used for camping, a flexible rubber sealant is your best bet. This type of sealant is applied directly to the hole, creating a durable and flexible seal. To ensure success, choose a rubber sealant that is compatible with the specific type of rubber used in your air mattress.
In some cases, an all-purpose adhesive or glue may suffice for sealing small holes. However, always check if it’s suitable for your specific air mattress material. Carefully read labels and follow the manufacturer’s instructions to avoid any mishaps.
Don’t forget about drying time and curing process when selecting a sealant. Some sealants require several hours or even days to fully cure before you can inflate and use your air mattress again. Patience is key here. Stick to the recommended curing time for a proper and long-lasting repair.
To sum it all up, consider the material of your air mattress, opt for a sealant specifically designed for that material, and follow the manufacturer’s instructions for application and curing. With these tips in mind, you’ll be sleeping soundly on your repaired air mattress in no time.
Adhesive Patches: How to Apply Them for a Successful Repair
Are you tired of being awakened in the middle of the night by your deflated air mattress? Fear not. We have the solution for you. In this comprehensive guide, we will walk you through the process of applying adhesive patches to successfully repair any holes in your air mattress.
Step 1: Gather Your Materials
To begin, gather all the necessary materials for the repair. You will need an adhesive patch specifically designed for your type of air mattress. For vinyl or PVC mattresses, a vinyl repair kit is recommended. For rubber mattresses, a flexible rubber sealant is ideal. Ensure that you choose a patch that is large enough to fully cover the hole.
Step 2: Prepare the Surface
Now it’s time to prepare the surface for patch application. Thoroughly clean the area around the hole using a mild soap and water solution or rubbing alcohol. This will eliminate any dirt, debris, or oils that might hinder proper adhesion. After cleaning, make sure to completely dry the area before proceeding.
Step 3: Apply the Adhesive Patch
Here comes the exciting part – applying the adhesive patch. Begin by carefully peeling off the backing from the patch, making sure not to touch the sticky side with your fingers. Position the patch over the hole, ensuring complete coverage of the damaged area. Apply firm pressure to the patch, smoothing out any wrinkles or air bubbles. This will facilitate a strong bond between the patch and the mattress.
Step 4: Allow for Proper Curing
After applying the patch, it’s crucial to allow sufficient time for curing. Check the packaging of the adhesive patch for recommended curing time. During this period, avoid placing any weight or pressure on the repaired area to ensure proper bonding.
Step 5: Inspect and Confirm Repair
Once the curing time has elapsed, inspect your handiwork. Gently press on the patch to ensure it is securely attached and there are no signs of lifting or peeling. If everything looks good, congratulations. You have successfully repaired your air mattress.
It is important to note that adhesive patches may not be suitable for all types of air mattresses or certain types of damage. In cases where the patch is not holding up or the hole is too large, alternative repair options such as using a vinyl repair kit or seeking professional assistance from the manufacturer may be necessary.
Liquid Sealants: Application Tips for Maximum Effectiveness
Air mattresses are a convenient and comfortable sleeping solution, but when they develop a hole, it can be quite frustrating. Luckily, liquid sealants provide an easy and effective way to seal these holes.
In this guide, we will walk you through the application tips for maximum effectiveness in sealing holes in air mattresses using liquid sealants. By following these steps, you can ensure a successful repair and get back to enjoying a good night’s sleep.
Locate the Hole:
The first step in effectively sealing a hole in your air mattress is to locate it. Inflate your air mattress and listen for any hissing sounds, which indicate the location of the hole. If you can’t hear anything, apply a soapy water solution to the surface and look for bubbles.
Once you’ve found the hole, mark it with a pen or tape for easy identification.
Clean the Area:
Before applying the liquid sealant, it’s crucial to clean the area around the hole thoroughly. Use a mild detergent or soap and water solution to remove any dirt or debris that may hinder adhesion. Gently scrub the area with a soft brush or cloth, paying close attention to the immediate surroundings of the hole. Rinse with clean water and pat dry with a clean cloth to ensure a clean and dry surface.
Apply the Liquid Sealant:
Once the area is clean and dry, it’s time to apply the liquid sealant. Shake the bottle well to mix the contents thoroughly. Then, apply a small amount of sealant directly onto the hole using either a brush or your finger.
Spread it evenly over the entire area, making sure to cover not only the hole but also its immediate surroundings. Avoid overapplying the sealant as excess can create a messy appearance and hinder drying.
Let it Dry:
After applying the sealant, allow it to dry completely before using or inflating your air mattress again. Refer to the manufacturer’s instructions for specific drying times, as they may vary depending on the type of sealant used. During this time, it’s crucial not to touch or disturb the sealed area to ensure a strong bond.
Test for Leaks:
Once the sealant is dry, it’s important to test the repaired area for any remaining leaks. Inflate your air mattress and check if there are any signs of air escaping. Apply pressure on the repaired area or use soapy water to check for bubbles. If necessary, reapply the sealant or consider alternative repair methods if the leak persists.
Household Items as Temporary Fixes
Whether it’s a leaky air mattress, a broken chair leg, or a loose screw, there are often simple solutions hiding right under our noses. In this guide, we will explore the creative ways in which common household items can be used as temporary fixes. These items are readily available in most households and can provide a quick solution until a more permanent repair can be made.
- Duct tape: The MVP of temporary fixes, duct tape is incredibly versatile and can solve countless household problems. From sealing holes in an air mattress to patching up a broken window screen or holding together a broken chair leg, its strength and adhesive properties make it an indispensable tool. Simply cut a piece of duct tape slightly larger than the area you need to fix and firmly press it onto the affected surface. Smooth out any wrinkles or air bubbles for a secure seal.
- Super glue: When it comes to small repairs, super glue is the go-to solution. It can fix everything from broken ceramics and plastic toys to loose tiles and jewelry. Apply a small amount of super glue directly onto the broken or loose parts and press them together firmly. Allow the glue to dry completely before using the item again.
- Rubber bands: Don’t underestimate the power of rubber bands. These stretchy wonders can hold things together in ways you never thought possible. Use them to secure loose cables, keep drawers closed, or even fix a wobbly table leg. Simply wrap a rubber band tightly around the problem area to provide temporary stability.
- Paper clips: Paper clips are not just for holding papers together; they can also serve as handy tools for quick fixes. Bend them into shape to create makeshift hooks, hangers, or even zipper pulls. Need to unclog a spray bottle? Straighten out a paper clip and use it to clear the nozzle. The possibilities are endless.
- Toothpaste: Surprisingly, toothpaste can be used as a temporary fix for minor scratches on furniture or appliances. Apply a small amount of toothpaste to the scratch and gently rub it in using a soft cloth. The abrasive properties of the toothpaste can help buff out the scratch, making it less noticeable.
- Rubber gloves: Have a stubborn lid that just won’t budge? Grab a pair of rubber gloves from your cleaning supplies. The extra grip and traction provided by the gloves can make opening jars, bottles, or even stuck drawer handles much easier.
Test the Repair
Dealing with a leaky mattress can be frustrating, but we’re here to help you ensure a successful repair using glue. In this article, we will discuss two practical and reliable testing techniques that will give you peace of mind when it comes to your repaired air mattress.
Method 1: Pressure Test
To start, inflate the air mattress to its maximum capacity. With your hands, apply firm pressure to the repaired area and run your fingers along the edges of the fixed section. Pay close attention for any changes in air pressure or escaping air. If you feel or hear any air escaping, it indicates that the repair may not have been successful, and further steps need to be taken.
Method 2: Soapy Water Solution Test
For an alternative testing method, mix a small amount of liquid soap with water in a spray bottle. Lightly spray the soapy water solution over the repaired area and gently press down on the inflated mattress around the repair. Observe if any bubbles form. The presence of bubbles indicates the presence of a leak that needs revisiting.
Extended Testing:
For more comprehensive testing, leave the repaired air mattress inflated overnight. Monitor for any significant loss of air pressure or frequent reinflation. If you notice these issues, it suggests that the repair was unsuccessful and further action is needed.
Alternative Testing:
In cases of larger holes or severe damage, additional stress testing may be necessary. Place heavy objects on top of the repaired area to simulate real-life usage scenarios. Additionally, apply extra stress by sitting or lying on the mattress to ensure the repair holds up under normal conditions.
Conclusion:
Proper testing of your repaired air mattress is crucial to ensure its functionality and leak-free performance. By using the pressure test, soapy water solution test, and extended testing methods, you can have confidence in the effectiveness of your repair. Remember, a well-repaired air mattress guarantees a comfortable night’s sleep without any worries.
lk4PFcI3lyc” >
Conclusion
In conclusion, sealing a hole in an air mattress is a breeze when you have the right tools and know-how. This DIY repair can be done from the comfort of your own home, saving you time and money. So, let’s dive into the steps to patch up that pesky hole.
First things first, you need to play detective and find the exact location of the leak. You can become a soapy water detective by applying a mixture of soap and water to the surface of the mattress and looking for bubbles. Or, if you’re feeling fancy, be a listening connoisseur by using your ears to detect the hissing sound of escaping air.
Once you’ve pinpointed the hole, it’s crucial to clean and dry the area thoroughly before moving on to the repair stage. This ensures that your chosen sealant will adhere properly and provide a lasting fix.
Now comes the fun part – choosing your weapon of choice for sealing. If you have a vinyl or PVC air mattress, adhesive patches are your best bet. These sticky saviors will create an airtight seal that will keep your mattress inflated all night long. On the other hand, if you’re dealing with a rubber mattress, liquid sealants are here to save the day. Just follow the manufacturer’s instructions for application and curing time to ensure optimal results.
In some cases, quick fixes like duct tape or super glue can provide temporary relief until you find a more permanent solution. But beware. These Band-Aids may not hold up in the long run, so proceed with caution.
To make sure your repair job is solid as a rock, it’s essential to put it to the test. Pressure testing and using a soapy water solution are great ways to check for any lingering leaks. For extra peace of mind or if you’re dealing with larger holes or severe damage, consider extended testing or alternative stress testing methods.
With these steps under your belt, you can rest easy knowing that your air mattress will stay inflated and provide a comfortable night’s sleep.


