Imagine this: you’ve just snagged a fresh new ensemble that has you feeling like a fashion superstar. With excitement building, you gingerly peel off the tags and stickers, only to be left with a sticky mess that threatens to tarnish your style triumph. But fret not, my fellow fashionistas and trendsetters. We possess the definitive solution to banish sticker residue from your pristine garments.
In today’s blog post, we’re delving deep into the realm of sticker residue removal, equipping you with the knowledge to safeguard your precious wardrobe investments. Whether it’s the stubborn aftermath of a price tag or an accidental adhesive mishap, we’ve got your back.
Main points to be covered:
- Unraveling the Science of Sticky Remnants: We’ll explore why these tenacious residues cling on for dear life and delve into the composition of sticker adhesives.
- Prepping for Battle: A Step-by-Step Guide: We’ll provide you with an easy-to-follow plan on how to prime your garment for an effective residue removal process, emphasizing the significance of inconspicuous testing.
- Time to Eradicate That Mess: From natural remedies to store-bought solutions and DIY concoctions, we’ll unveil an array of tried-and-tested methods to tackle sticker residue without harming your beloved clothing.
- Salvage Tactics for Stain-Free Success: Sometimes, sticker residue can leave behind unsightly marks on fabric. Fear not. We’ll spill insider secrets on effortlessly fading or eliminating any discoloration.
Don’t allow sticker residue to become the arch-nemesis of your new clothes. Armed with our comprehensive guide, you’ll possess all the tips, tricks, and techniques necessary to conquer sticky situations.
Bid farewell to those unattractive marks and embrace a wardrobe that’s as flawless as your fashion choices. So, let’s dive in and restore the splendor of your favorite garments together.
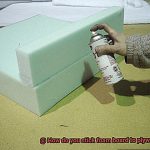
Step One: Don’t Panic and Gently Scrape Away Excess Residue
Contents
- 1 Step One: Don’t Panic and Gently Scrape Away Excess Residue
- 2 Solution One: Rubbing Alcohol or Isopropyl Alcohol
- 3 Solution Two: Diluted Vinegar or Lemon Juice
- 4 Delicate Fabrics: Consult a Professional Dry Cleaner
- 5 Prevention is Better Than Cure
- 6 Additional Tips to Remove Sticker Residue From Clothes
- 7 Test the Fabric Before Applying Solutions
- 8 Avoid Pulling at the Residue Forcefully
- 9 Conclusion
Picture this: you’ve just splurged on a stunning new ensemble, only to discover an unwelcome guest in the form of sticky sticker residue.
This comprehensive guide will walk you through the first step in conquering this sticky situation with finesse – gently scraping away excess residue.
Prepare to restore your new clothes to their original glory by following these expert techniques.
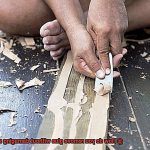
- Assemble your arsenal of tools: Before embarking on this mission, arm yourself with the necessary equipment. Reach for a trusty dull-edged object like a credit card, a plastic scraper, or even your own fingernail. Remember, the key is to avoid sharp objects that could potentially wreak havoc on your fabric.
- Inspect and pinpoint loose edges: Lay your garment flat on a surface, gripping it firmly with one hand. With your other hand, conduct a meticulous examination of the affected area, searching for any telltale signs of loose or raised residue edges. These will serve as your starting point for the gentle scraping process.
- Employ light pressure and scrape in one direction: Armed with your chosen tool, delicately scrape away the excess residue in a single direction. Apply only the gentlest of pressure and utilize short, purposeful strokes. Vigorous rubbing is strictly forbidden, as it may inadvertently spread or embed the residue deeper into the fabric’s fibers.
- Strive for maximum residue elimination: As you deftly scrape away, rejoice as portions of the stubborn residue begin to surrender. Do not despair if remnants persist; remember that our primary objective at this stage is to rid the garment of as much excess residue as possible before moving on to subsequent steps. Embrace patience as your guiding principle, ensuring that you work diligently without causing any harm or stretching to the fabric.
- Assess the area and address lingering residue: Once you have skillfully scraped away the majority of the excess residue, subject the area to a vigilant inspection. Should any tenacious remnants of stickers or adhesive remain, do not fret – we’ll address those challenges in future steps. For now, focus solely on ensuring that no loose residue remains on your precious garment.
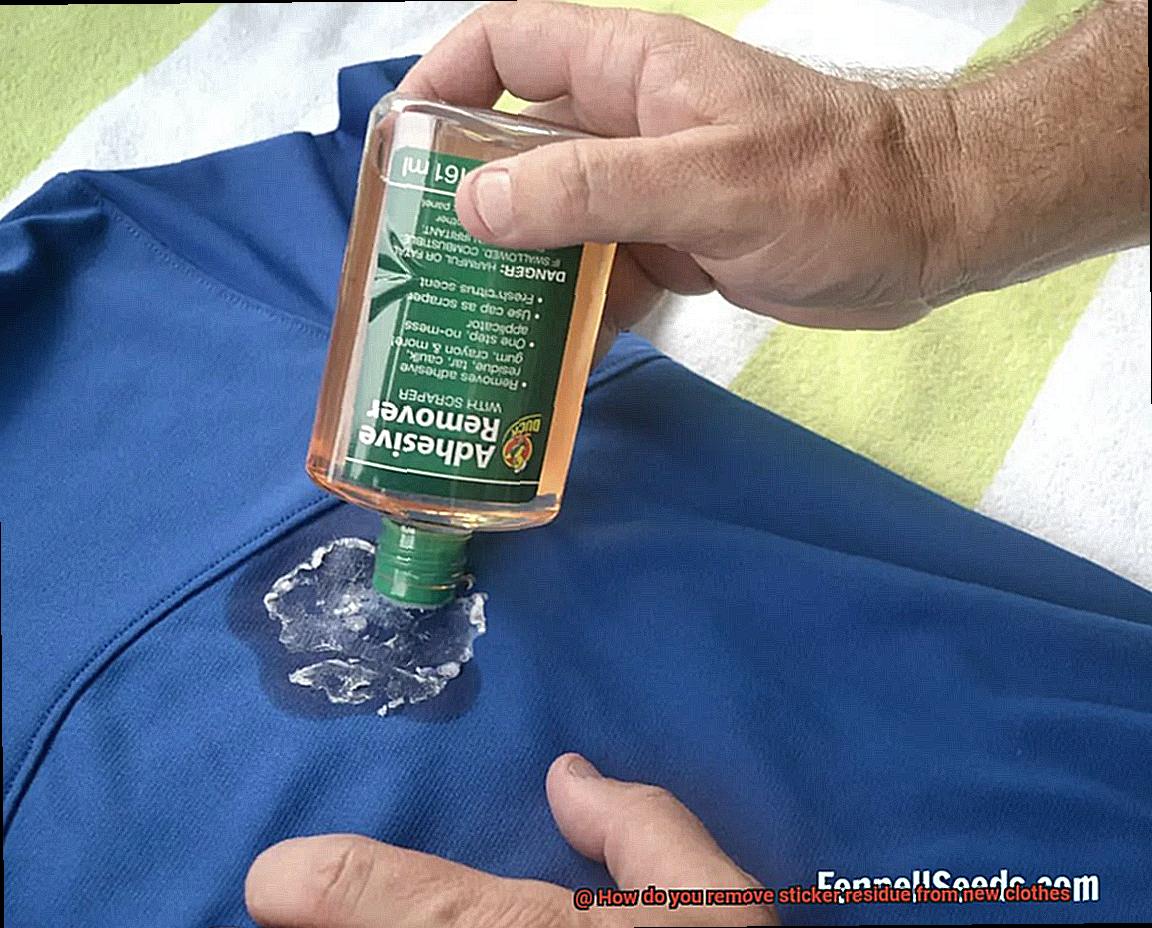
Solution One: Rubbing Alcohol or Isopropyl Alcohol
Today, I’m here to unveil a secret weapon that will restore your garments to their pristine condition. Enter rubbing alcohol, also known as isopropyl alcohol, a true hero in the battle against sticker residue.
Why is rubbing alcohol so effective? Well, this mighty solution is a solvent that has the power to dissolve the adhesive found in sticker residues. It’s like a magic potion that breaks down the stickiness and makes it a breeze to remove. Prepare to witness a transformation right before your eyes.
Before we embark on this journey, it’s crucial to prioritize safety. Always check the care label on your clothing before using rubbing alcohol. We want to ensure that it won’t cause any damage or discoloration. Remember, fashion is about looking good and feeling good, so let’s proceed with caution.
Now, let’s gather our tools for this mission. You’ll need a clean cloth or cotton ball and a small amount of isopropyl alcohol. With these in hand, we can conquer those stubborn residues once and for all. Here’s our step-by-step guide:
- Test the waters: Before taking action, test the rubbing alcohol on a small, inconspicuous area of your clothing. This precautionary measure ensures that there are no unwanted effects such as color fading or fabric damage.
- Gentle dabbing: Once the coast is clear, dampen the cloth or cotton ball with rubbing alcohol and gently dab it onto the sticker residue. Remember, light pressure is the key here to avoid any unintended damage.
- Patience pays off: Allow the rubbing alcohol to work its magic by letting it sit on the residue for a few minutes. This gives it enough time to dissolve the adhesive and weaken its grip.
- Circular motions: After patiently waiting, it’s time for action. Gently rub the residue in circular motions using the cloth or cotton ball. Watch as the residue starts to loosen and make its way off your clothes. It’s like witnessing a magic trick unfold right in front of you.
- Persistence prevails: If some stubborn residue still clings on, don’t fret. Simply apply more rubbing alcohol and continue rubbing until every last bit is gone.
Solution Two: Diluted Vinegar or Lemon Juice
I have a secret weapon that will save the day: diluted vinegar or lemon juice. These natural solutions are the key to removing sticker residue and restoring your clothes to their original glory.
Vinegar, a potent natural acid, works wonders in breaking down the adhesive of sticker residue. To harness its power, simply combine equal parts vinegar and water in a bowl. Immerse a clean cloth or sponge into this diluted solution and gently dab it onto the sticky residue. Let the solution seep into the residue for a few minutes, loosening the adhesive. Then, with either a soft brush or your fingers, delicately scrub the area in circular motions. To finish, rinse the clothing with warm water, ensuring all traces of residue and vinegar are gone.
Lemon juice is another remarkable option due to its citric acid content, which effectively dissolves sticky residues. For this method, mix equal parts lemon juice and water in a bowl. Soak a clean cloth or sponge in this diluted solution and gently apply it to the sticker residue. Once again, allow the solution to sit for a few minutes before commencing a gentle circular scrubbing motion. Rinse the clothing with warm water and launder as you normally would to eliminate any lingering odors.
Before diving in headfirst, it is crucial to test these solutions on a small, inconspicuous area of your clothing. This precaution ensures no damage or discoloration occurs. Furthermore, delicate fabrics like silk or wool should steer clear of vinegar or lemon juice, as they can be too harsh and potentially cause harm.
Delicate Fabrics: Consult a Professional Dry Cleaner
Imagine the excitement of rediscovering a beautiful silk blouse, only to find it marred by the sticky remnants of a stubborn sticker. Panic sets in as you realize that removing this residue without causing further damage is no easy feat. But fear not, for the solution lies in entrusting your delicate fabrics to the expertise of a professional dry cleaner.
Why is it so crucial to consult a professional when it comes to delicate fabrics? Let’s delve into the reasons:
- Specialized care for delicate fabrics: Delicate fabrics like silk, satin, lace, and chiffon require gentle handling and specialized care. Attempting to remove sticker residue from these fabrics on your own can result in weakened fibers or unsightly discoloration. By seeking the assistance of a professional dry cleaner, you can be confident that your delicate materials will be treated with the utmost care.
- Expert techniques and solvents: Professional dry cleaners possess a treasure trove of knowledge and access to specialized cleaning techniques and solvents designed specifically for delicate fabrics. These gentle yet effective solvents will safely remove sticker residue without causing any harm. Rest assured that your garment will be in capable hands, with the most suitable methods employed to restore it to its original condition.
- Timeliness is key: Time is of the essence when it comes to sticker residue on delicate fabrics. The longer it sits on the fabric, the more difficult it becomes to remove. By promptly taking your garment to a professional dry cleaner upon discovering the residue, you increase the likelihood of successful removal without lasting damage.
- Pre-treatment and meticulous cleaning: When consulting a professional dry cleaner for sticker residue removal, they will take all necessary precautions to preserve your delicate fabric. This may involve pre-treating the affected area with a solvent specifically formulated for delicate fabrics, gently loosening the adhesive before proceeding with the cleaning process. After eliminating the residue, the garment will undergo a thorough cleaning to ensure any remaining traces are eradicated.
- Pressing and restoration: Once the sticker residue has been successfully removed, the professional dry cleaner will go the extra mile to restore your delicate fabric to its original glory. Whether through meticulous pressing or steaming, they will ensure that your garment regains its flawless appearance and smoothness.
Prevention is Better Than Cure
Imagine the disappointment of bringing home a fresh new garment, only to find it marred by the unsightly remnants of a stubborn sticker. It’s a fashionista’s nightmare, but fear not. In this captivating blog post, we will unravel the secrets of preventing sticker residue on new clothes. By following these practical tips, you can maintain the pristine appearance and quality of your garments without the hassle of dealing with sticky situations.
Remove Stickers Before Wearing or Washing:
Before donning your new clothing masterpiece, take a moment to remove any stickers or labels. This simple yet often overlooked step can save you from the frustration of sticky residue tarnishing your favorite pieces.
Embrace Gentle Removal Techniques:
When it comes to liberating your clothes from stickers or labels, tread lightly. Use your fingernail or a plastic scraper to delicately lift the edge of the sticker and slowly peel it off. Say no to sharp objects like scissors or knives that can cause fabric damage and amplify your woes.
Check Garment Care Instructions:
Before reaching for any adhesive materials, consult the garment care instructions. Pay heed to any warnings regarding stickers or labels and adhere to the recommended guidelines for removal. By doing so, you can ensure that your prevention efforts do not inadvertently cause unintended harm.
Explore Alternative Attachment Methods:
Escape the clutches of sticker residue by seeking out alternative attachment methods. Some stores provide removable adhesive tags designed to leave minimal to no residue upon removal. Alternatively, engage store employees and inquire if they can utilize clips or string for price tag attachment. Such small requests can save you from future sticker-related headaches.
Mindful Storage Habits:
Preserve your new clothes’ pristine condition by being mindful of where you store them. Avoid placing them in areas that might expose them to adhesive substances or surfaces adorned with sticky residue. By making conscious storage choices, you can shield your garments from unnecessary stickiness.
Regular Maintenance and Proper Storage:
To prevent sticker residue from ever becoming a concern, practice regular maintenance and proper storage of your clothes. Prioritize cleanliness and ensure that your garments are free from any sticky substances before stowing them away. Utilize appropriate storage containers or hangers that safeguard your garments from potential contact with adhesive materials.
Additional Tips to Remove Sticker Residue From Clothes
We’ve all experienced the infuriating frustration of sticky sticker residue on our brand new clothes. But fear not. We have some additional tips that will banish that pesky residue without causing any harm to your beloved garments. Get ready to bid farewell to sticker residue and say hello to clothes that are spotless and pristine.
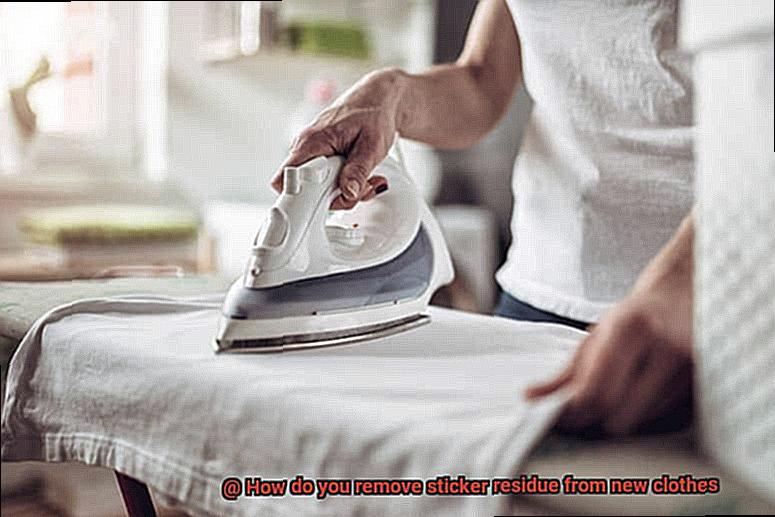
Harness the Heat with a Hairdryer:
One highly effective method for removing sticker residue is by harnessing the power of a hairdryer. Set it to a low or medium heat setting and hold it about six inches away from the residue. Allow the warm air to work its magic, softening the adhesive.
Then, using your nimble fingers or a gentle plastic scraper, delicately peel off the residue. Remember, exercise caution to prevent any damage to delicate fabrics.
Rubbing Alcohol: A Residue-Dissolving Solvent:
In the absence of a hairdryer, fear not. Rubbing alcohol can come to your rescue. Moisten a clean cloth with rubbing alcohol and gently dab it onto the sticky residue. Give it a few minutes to allow the alcohol to penetrate and dissolve the adhesive. Next, employ the aid of a soft-bristled brush or your dexterous fingers to gently scrub away the residue in circular motions. Rinse the area with water and launder your garment as you normally would.
Dish Soap: The Unsung Hero:
Another unsung hero in fighting sticker residue is humble dish soap. Apply a small amount directly onto the sticky residue and massage it in with your fingertips or a soft cloth. Let it sit for a few minutes, allowing it to penetrate and work its magic on the adhesive. Rinse off the area with warm water and proceed to wash your clothes as per usual.
Vinegar: The Mighty Residue Dissolver:
Don’t underestimate the power of vinegar when it comes to eliminating sticker residue from your clothes. Mix equal parts of white vinegar and water in a bowl. Dip a clean cloth into the vinegar solution and gently rub it onto the stubborn residue. Allow it to sit for a few minutes, giving the vinegar time to dissolve the adhesive. Then, with the aid of a soft brush or your nimble fingers, scrub away the residue. Rinse the area with water and launder your garment as usual.
Baking Soda: A Gentle Abrasive Savior:
For a gentle yet effective approach, turn to baking soda. Create a thick paste by mixing baking soda with water. Apply this paste onto the sticky residue and let it sit for approximately 10-15 minutes. Then, with a soft brush or your skillful fingers, gently scrub away the residue. Rinse the area with water and proceed to wash your clothes as per usual.
Test the Fabric Before Applying Solutions
Sticker residue on new clothes can be a nightmare, but before you take any action, it’s crucial to test the fabric. In this article, we’ll explore why testing is vital and provide you with an effective method to ensure your garments remain unscathed.
The Perils of Neglecting the Fabric Test:
Don’t risk ruining your favorite attire in an attempt to remove sticker residue. Different fabrics react differently to cleaning solutions, making the fabric test an absolute must.
Selecting the Perfect Test Area:
To avoid any noticeable damage, choose an inconspicuous spot like inside seams or hems for testing. This way, any adverse effects will remain hidden when you wear the clothes.
Dab and Observe:
Take a clean cloth or cotton swab and apply a small amount of your chosen cleaning solution. Gently dab the solution onto the fabric and closely observe its reaction. Keep an eye out for changes in color, texture, or signs of damage.
No Negative Reactions? Proceed with Caution:
If there are no adverse effects after a few minutes, such as fading or discoloration, it’s likely safe to use the cleaning solution on the entire garment. However, exercise caution by applying it in a small, controlled area first.
Giving Delicate Fabrics Extra TLC:
Fabrics like silk or satin demand special attention. Always follow the care instructions provided by the garment’s manufacturer. These delicate fabrics may require gentler cleaning solutions or professional assistance to avoid damage.
Cease If Adverse Reactions Occur:
If the cleaning solution triggers any negative reactions during the fabric test, halt its use immediately. Trying different solutions or seeking professional help may be necessary to prevent further damage.
Prevention is Key:
Remember, prevention is always better than cure. Avoiding stickers or labels on delicate fabrics can spare you the hassle of residue removal later on. Taking a proactive approach will keep your clothes intact and residue-free.
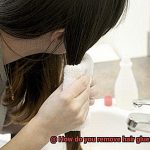
Avoid Pulling at the Residue Forcefully
Prepare yourself for an epic battle against sticker residue on your fresh new clothes. Fear not, fellow warriors. As a seasoned expert in the art of sticker residue removal, I have gathered invaluable research notes to guide you through this treacherous quest. Today, we will delve into the crucial topic of avoiding forceful pulling when banishing sticker residue from your beloved garments. So gather your weapons and let us embark on this exhilarating adventure together.
Topic 1: The Perils of Forceful Tugging
Let’s face it – our instinct is to yank that sticky residue off forcefully. But beware, for such recklessness can spell disaster for your clothes. Here’s why you must resist the urge to pull with all your might:
Fabric Devastation:
Forceful pulling can stretch or tear the delicate fibers of your garment, leaving behind permanent scars or rendering it unwearable. No brave warrior wants battle wounds on their favorite shirt, right?
Topic 2: Gentle Techniques for Sticky Predicaments
Now that we understand the risks involved, let us explore alternative methods to tackle sticker residue without causing harm.
Delicate Scraping:
Arm yourself with a dull knife or a plastic card and gently scrape off as much residue as possible. Remember, apply only a light touch, avoiding excessive pressure that could harm the fabric.
Enchanting Solvents:
When stubborn remnants refuse to surrender, turn to specialized solvents or adhesive removers designed specifically for fabrics. Apply a small amount onto a clean cloth and delicately dab at the residue, refraining from vigorous rubbing.
Embrace Patience:
Prepare yourself for multiple rounds of solvent application and gentle dabbing until the residue vanishes completely. Haste in this endeavor may result in irreversible fabric damage, so exercise caution and perseverance.
Topic 3: Testing, Testing, 1-2-3.
Different fabrics react in diverse ways to solvents and adhesive removers. To avoid any unpleasant surprises, it is wise to test the product on a small, inconspicuous area before unleashing it upon a larger, more visible section of your clothing item. Remember, better safe than sorry.
v12zw8WIKuk” >
Conclusion
Removing sticker residue from new clothes can be a frustrating task.
However, with the right techniques and a little bit of patience, you can restore your garments to their pristine condition. One effective method is to use rubbing alcohol or nail polish remover.
Simply apply a small amount onto a clean cloth and gently rub the residue until it starts to lift off. Another option is to use vinegar or lemon juice, which have natural acidic properties that can break down the stickiness.
Apply either of these liquids onto the affected area and let it sit for a few minutes before scrubbing away the residue with a soft brush or cloth. If all else fails, try using an adhesive remover specifically designed for fabrics.
Remember, always test any solution on a small, inconspicuous area of the garment first to ensure it doesn’t cause any discoloration or damage.