Ever entered a room only to recoil in horror at the sight of that worn-out linoleum floor, clinging stubbornly to its existence despite the passage of time? If you’ve been there, you know the frustration that comes with trying to remove old glued down linoleum. But fear not. Today, we embark on an expedition to unravel this sticky puzzle and bid farewell to that adhesive bond.
Imagine the thrill of uncovering hidden gems beneath that outdated surface, revealing the untapped potential of your space. From dazzling tiles to gleaming hardwood, once you conquer this task, a world of flooring options opens up before you.
In this comprehensive guide, we’ll unveil essential techniques, top tricks, and pro tips for effectively removing old glued down linoleum. Together, we’ll dive into the nitty-gritty details, exploring the tools at our disposal and tackling any challenges that may arise.
From deciphering the type of glue used to understanding different removal methods available, this journey will equip you with knowledge and confidence needed for this arduous task. Whether you’re a determined DIY-enthusiast or a reluctant homeowner, this guide is your invaluable companion for embarking on your linoleum liberation project.
So grab those demolition boots and slip on those safety goggles – it’s time to free your floors from the clutches of old glued down linoleum. Let’s dive in and unlock the secrets of successful removal for a floor transformation like no other.
Gather the Necessary Tools and Materials
Contents
- 1 Gather the Necessary Tools and Materials
- 1.1 Safety Equipment: Prioritize Your Protection
- 1.2 Utility Knife: Slice Through the Challenge
- 1.3 Heat Gun or Hair Dryer: Unleash the Power of Heat
- 1.4 Scraper or Putty Knife: Pry with Precision
- 1.5 Adhesive Remover: Defeat Stubborn Residue
- 1.6 Solvents (if necessary): Break Down the Toughest Adhesives
- 2 Prepare for Safety
- 3 Cut the Linoleum into Manageable Sections
- 4 Apply Heat to Soften the Adhesive
- 5 Use a Putty Knife or Scraper to Peel Away the Linoleum
- 6 Apply Solvent or Adhesive Remover for Stubborn Areas
- 7 Clean the Subfloor Thoroughly
- 8 Rinse and Dry Completely
- 9 Conclusion
Removing old glued down linoleum can be a daunting task, but fear not. With the right tools and materials at your disposal, you’ll breeze through the process. In this comprehensive guide, we will explore the essential equipment needed to successfully remove old glued down linoleum, leaving you with a clean and prepared surface for your new flooring installation.
Safety Equipment: Prioritize Your Protection
Safety should always be your number one concern. Equip yourself with protective gloves, safety goggles, and a dust mask to shield against potential hazards such as dust particles and chemical fumes.
Utility Knife: Slice Through the Challenge
A trusty utility knife is your secret weapon in tackling linoleum removal. Score the linoleum into manageable sections and effortlessly slice through the adhesive holding it down. Remember to exercise caution and avoid cutting too deeply, as you don’t want to damage the underlying subfloor.
Heat Gun or Hair Dryer: Unleash the Power of Heat
Harness the power of heat to soften the adhesive and make removal a breeze. Use a heat gun or hair dryer to direct warmth onto the surface, transforming that stubborn glue into a pliable substance that’s easy to remove.
Scraper or Putty Knife: Pry with Precision
Once the adhesive has been softened by heat, arm yourself with a sturdy scraper or putty knife. This trusty tool allows you to easily pry up and peel away the loosened linoleum with precision, leaving no trace behind.
Adhesive Remover: Defeat Stubborn Residue
Sometimes, even after removing the linoleum, there may be stubborn adhesive residue clinging on for dear life. Enter the adhesive remover. Choose a specialized product designed specifically for linoleum removal, allowing it to dissolve and loosen the residue for effortless scraping. Always follow the manufacturer’s instructions and select a product tailored to your needs.
Solvents (if necessary): Break Down the Toughest Adhesives
For particularly tough adhesives, solvents may be necessary. Consult the manufacturer’s guidelines or seek professional advice to determine if a solvent is required and which one is best suited for your project. Remember to prioritize safety by following proper ventilation and handling protocols.
Prepare for Safety
You’ve embarked on a mission to vanquish that stubborn old glued down linoleum. But before you unsheathe your trusty utility knife and scraper, let’s delve into the realm of safety. Brace yourself with the necessary precautions to ensure a triumphant and injury-free linoleum removal quest.
First and foremost, equip yourself with the ultimate defense – your safety gear. Think of it as your impenetrable armor against potential hazards. Don your protective gloves, safety goggles, and a steadfast dust mask. These stalwart companions will shield you from injuries and ward off harmful substances that might cross your path during the removal process.
Now, let’s discuss the air we breathe – a vital component of this undertaking. Ventilation is the key to success. Unleash the power of fresh air by flinging open those windows wide. Harness the wind with mighty fans to keep it circulating, reducing the risk of inhaling any fumes emitted by the chemicals in your arsenal.
Before plunging headlong into battle, clear the battlefield of impediments and treacherous stumbling blocks. Banish furniture, rugs, and any other potential saboteurs that lurk in your path. Remember, safety reigns supreme.
But wait – preparedness is our watchword. Stand ready for unforeseen skirmishes by keeping a trusty first aid kit close at hand. Arm yourself with band-aids, antiseptic solution, and adhesive tape – stalwart allies should cuts or scrapes attempt to thwart your progress.
Our duty extends beyond ourselves; we must protect innocent bystanders – adjacent surfaces or areas that remain untouched. Envelop them in plastic sheets or drop cloths, shielding them from the ravages of spills or debris. Let us leave no trace of collateral damage in our wake.
Now, heed this golden rule – knowledge is power. Immerse yourself in the wisdom bestowed by the instructions accompanying any chemicals you intend to employ. No shortcuts shall be tolerated. Utilize these products within the confines of a well-ventilated domain, diligently averting direct contact with your precious skin and eyes. Enlist the support of safety goggles and gloves, your steadfast comrades in this epic struggle.
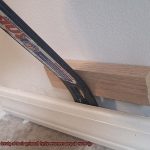
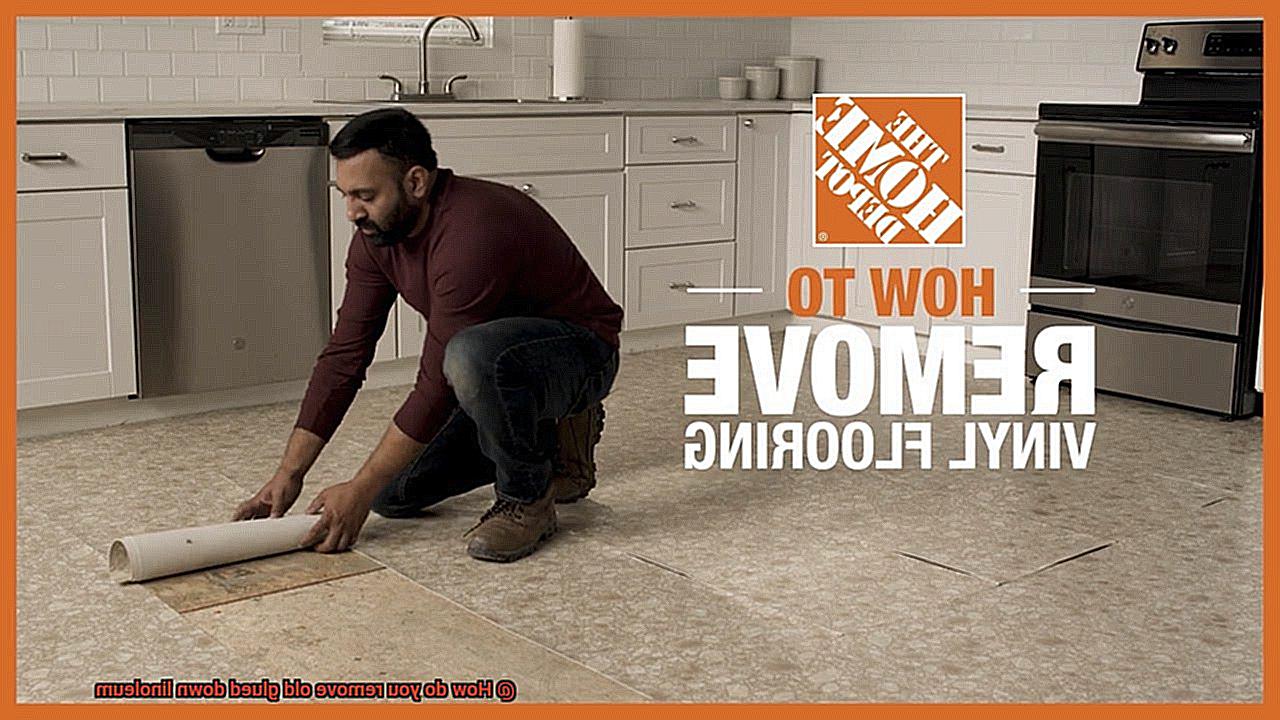
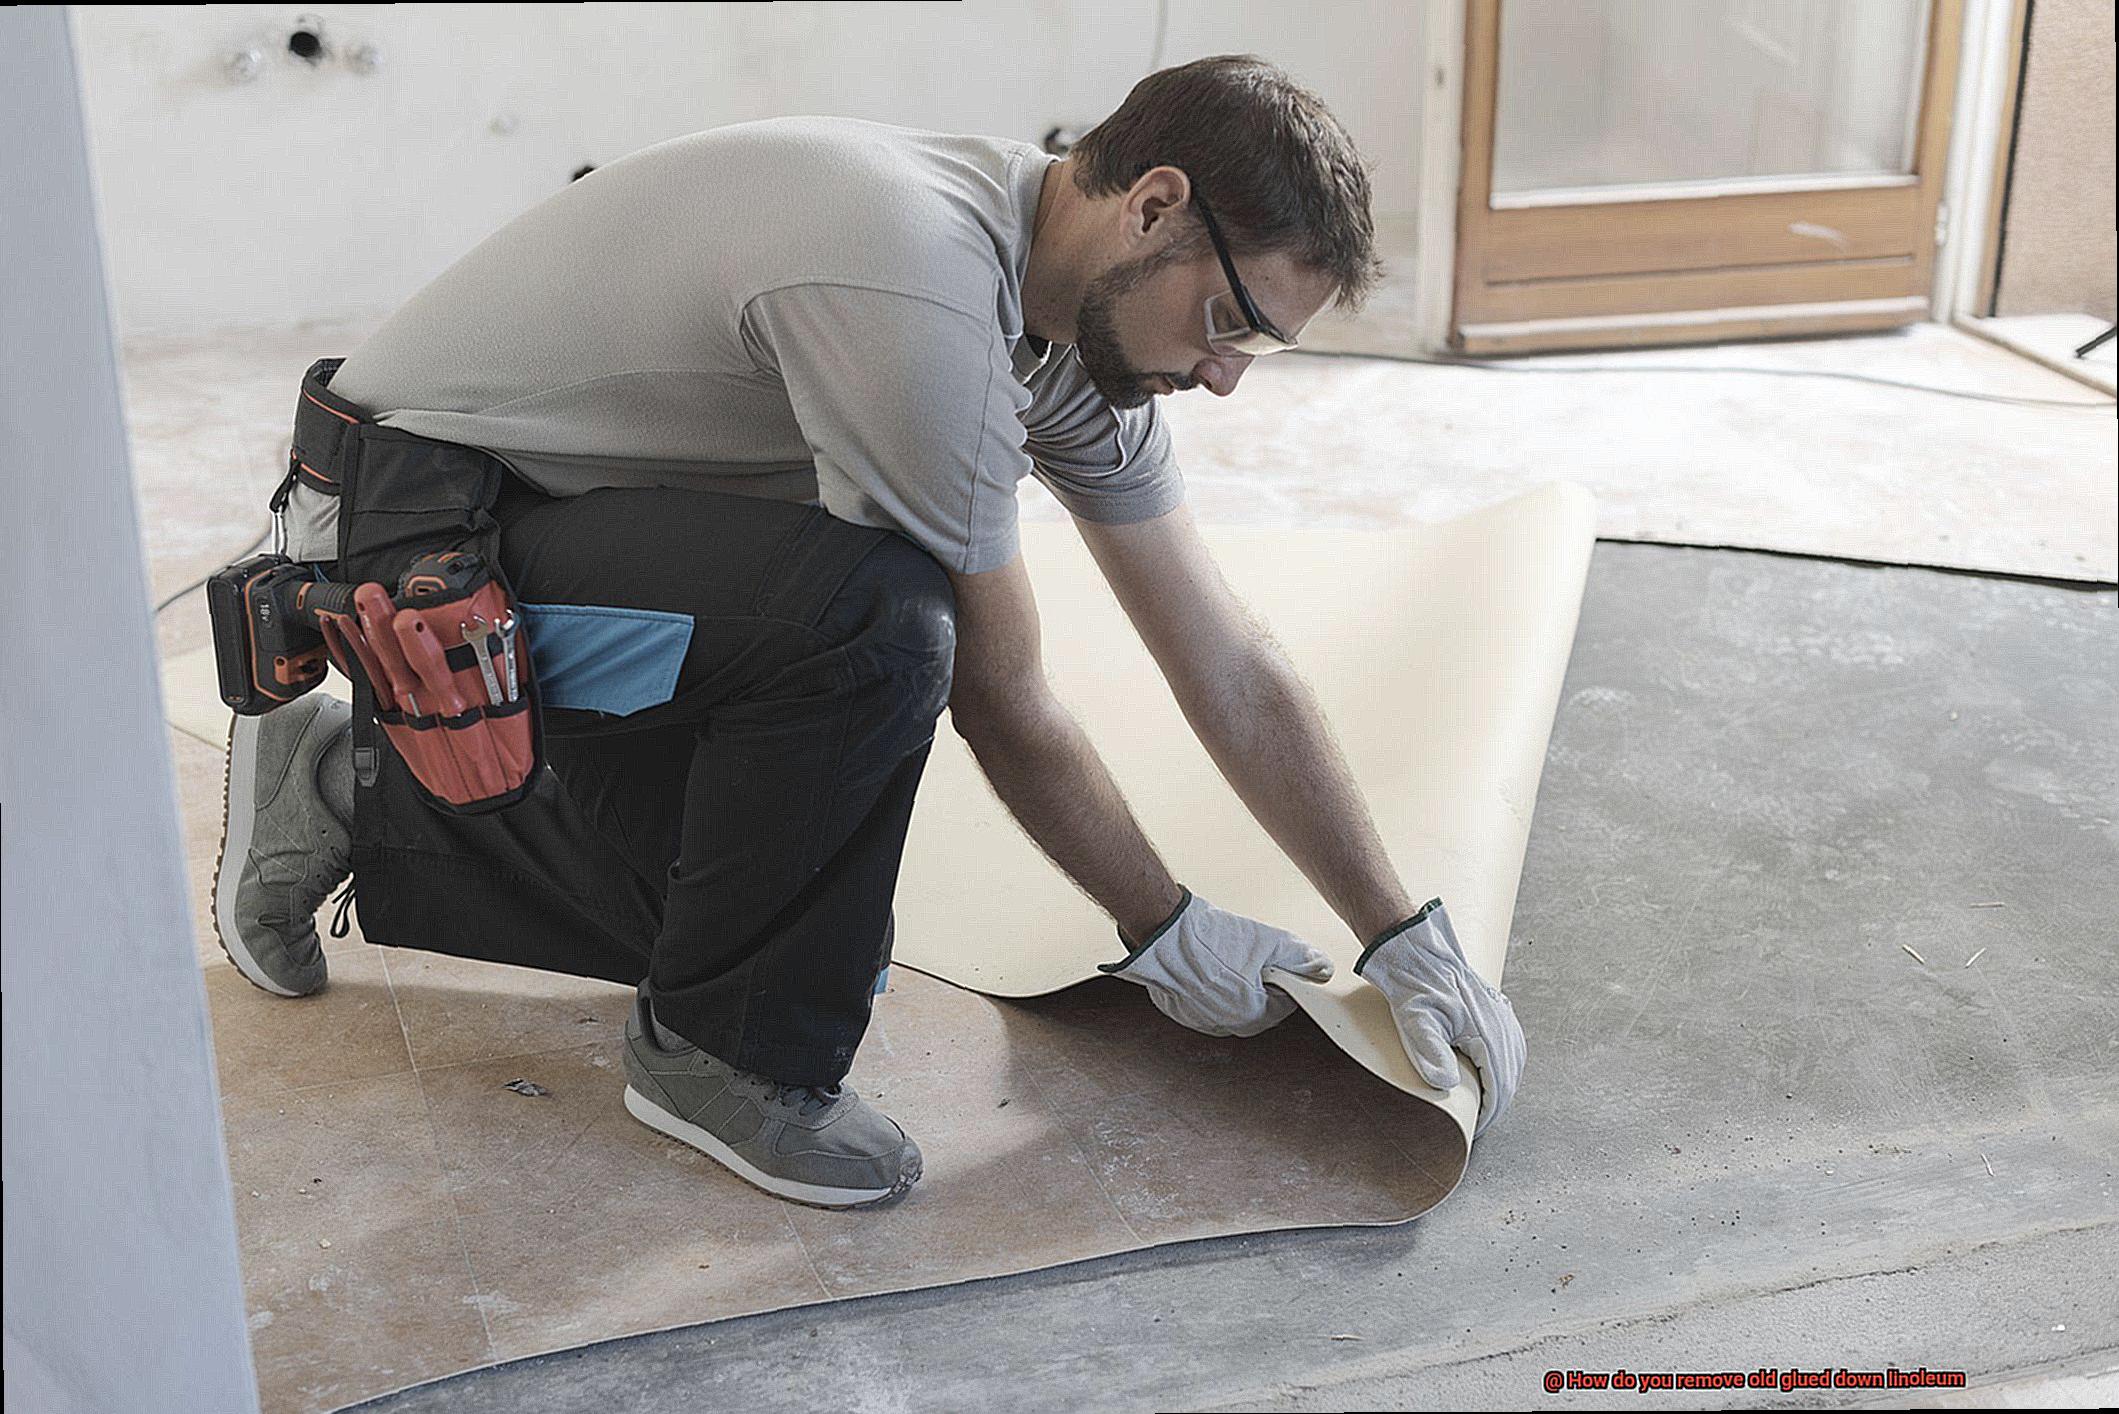
Cut the Linoleum into Manageable Sections
Today, we embark on the next crucial step in conquering that stubborn old glued-down linoleum: cutting it into manageable sections. This technique will revolutionize your removal process. So, gear up, grab your trusty utility knife, and let’s dive into the exhilarating world of slicing and dicing.
Importance of Cutting Linoleum into Manageable Sections:
- Easier handling: Imagine a colossal expanse of linoleum stretching across multiple rooms. It’s a daunting sight, isn’t it? But fear not. By dividing it into smaller sections, you gain total control over the removal process. Tackling one section at a time makes this challenge a piece of cake.
- Efficient removal: Cutting the linoleum into manageable sections allows you to work in bite-sized chunks. This ensures that you won’t exhaust yourself or rush through the task at hand. Remember, slow and steady wins the race.
- Minimize damage: Your subfloor is a precious gem, and we don’t want any unnecessary scratches or dents. By cutting the linoleum into sections, you can carefully peel it away without risking any harm to the underlying surface. Let’s keep those repairs to a minimum, shall we?
Step-by-Step Guide to Cutting Linoleum:
- Gear up for battle: Safety first, brave warriors. Slip on your protective gloves, secure your safety goggles, and don’t forget your trusty dust mask. We’re in this together, so let’s keep ourselves injury-free.
- Locate the starting point: Seek out an edge or corner where the linoleum is loose or already lifting. This will be your doorway to victory.
- Score and cut with precision: Armed with a sharp utility knife or flooring knife, delicately score along the identified edge or corner. Apply firm but controlled pressure, ensuring not to penetrate too deeply into the sanctuary of your subfloor.
- Peel away like a pro: Take a deep breath and grip the scored edge firmly. Pull it away from the subfloor, savoring the glorious victory of progress. Make additional cuts along the score line to release any stubborn adhesive.
Apply Heat to Soften the Adhesive
So, don your gloves, equip your goggles, and prepare for a thrilling adventure into the captivating realm of heat-induced victory.
The Heat Gun: Your Indomitable Weapon
Behold the mighty heat gun, a formidable tool that emits a scorching stream of air directed at the linoleum’s surface. But heed this warning, brave warriors: caution is paramount. Set your heat gun to a low or medium setting and hold it 6-8 inches away from the surface. With deliberate motions, sweep it back and forth across one area at a time. As if under a spell, witness the adhesive relinquishing its grip and transforming into a pliable ally.
The Hairdryer: A Gentle Partner
For those seeking a more delicate approach, fear not. Enter the humble hairdryer, a trusty companion in this quest. Though less powerful than its heat gun counterpart, it still possesses enough warmth to soften the adhesive’s resolve. Crank your hairdryer to its highest heat setting and position it close to the linoleum surface. Patience becomes your ally as you gracefully sway the hairdryer back and forth, allowing the enchanting heat to work its magic.
Safety First: Arm Yourself.
Before embarking on this fiery expedition, fortify yourself with essential protective gear. Don sturdy gloves and don stylish eye goggles to shield yourself from any potential harm. Furthermore, ensure that your battlefield is well-ventilated, as heating adhesives may unleash fumes. Safety shall be your unwavering comrade in every skirmish.
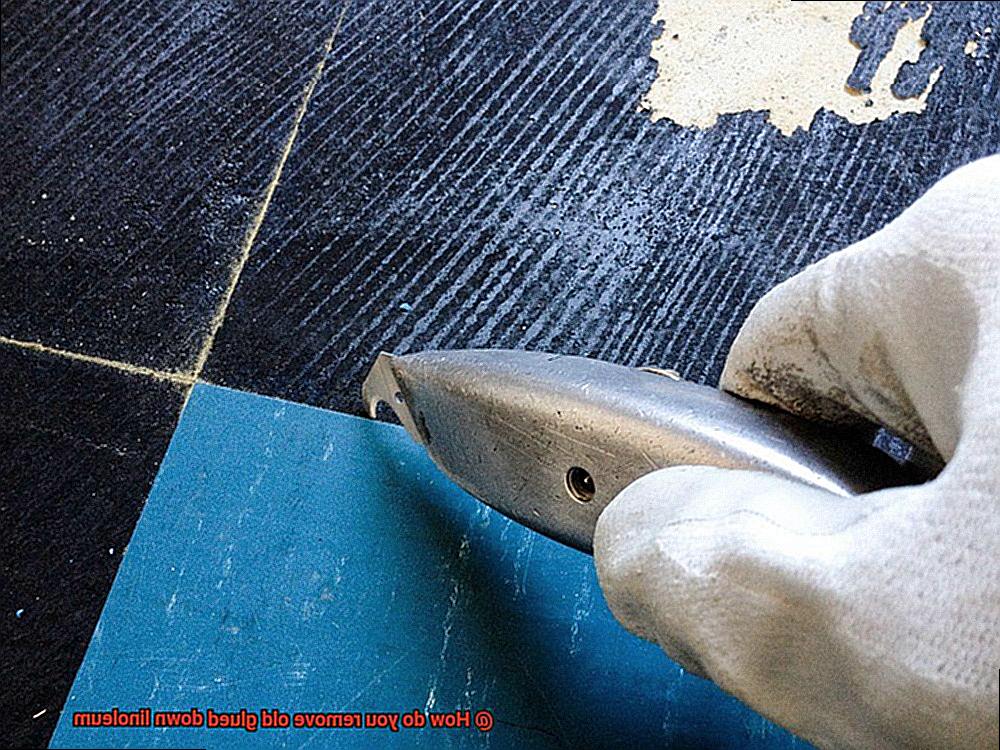
Liberation Through the Blade of Scraper and Putty Knife
Once the adhesive succumbs to the power of heat, it’s time to unleash your skilled hands armed with a putty knife or scraper. From one edge, gingerly lift and remove the softened linoleum, progressing towards the center. Exercise caution to avoid causing harm to the underlying floor. If necessary, continue applying heat to maintain the adhesive’s pliability. Victory lies within your grasp.
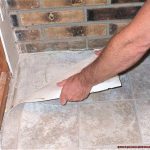
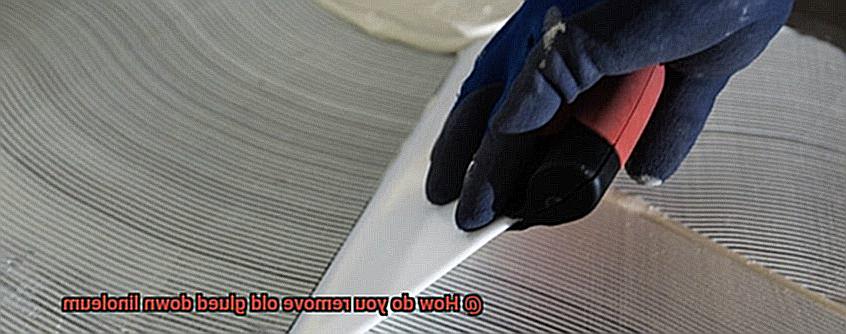
Use a Putty Knife or Scraper to Peel Away the Linoleum
In our previous battles, we armed ourselves with the heat guns and hairdryers to conquer the adhesive forces. But now, it’s time to wield a new weapon – the indomitable putty knife and scraper. In this guide, I’ll reveal the secrets of using these tools with finesse to peel away the linoleum and emerge triumphant in our quest for a fresh floor. So, don your gloves and goggles, and let us embark on this thrilling adventure of linoleum removal.
Prepare for Battle: Equipping for Success
Before diving into the battlefield of linoleum removal, ensure your safety by adorning yourself with sturdy gloves and stylish eye goggles. Shield yourself from any debris that may dare to disturb your victory march.
Locate Your Starting Point: The Gateway to Triumph
Seek out an edge or corner of the linoleum that will serve as your gateway to victory. With your trusty putty knife or scraper in hand, gently insert it underneath this chosen point of entry and begin prying it up. Remember, precision is key – we must safeguard the integrity of the subfloor beneath.
Unleash the Art of Gradual Peeling: Patience Leads to Glory
Once the edge has been lifted, it’s time to unleash your peeling prowess. Employ your putty knife or scraper to gradually peel away small sections of the linoleum. Maintain consistent pressure to separate the flooring from its adhesive captor below. Should you encounter stubborn resistance, fear not. Utilize the power of a heat gun or hairdryer to soften the adhesive’s grip.
As you progress in your valiant linoleum-removing quest, remain vigilant for hidden adversaries lying in wait. Nails and staples may lurk beneath the surface, ready to sabotage your mission and damage both tools and subfloor. Fear not – deftly employ your putty knife or scraper to skillfully remove any obstructions that dare to impede your path.
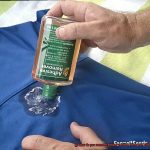
Apply Solvent or Adhesive Remover for Stubborn Areas
Our quest to conquer stubborn linoleum has led us to a pivotal moment. It’s time to unleash the power of solvents and adhesive removers to vanquish those last remnants of glued-down linoleum. So, don your gloves, goggles, and a sense of adventure as we dive into the exhilarating world of applying solvent or adhesive remover for those pesky stubborn areas.
Ventilation is Key:
To begin our battle, we must ensure proper ventilation. Throw open those windows and let fresh air flow in like a refreshing breeze. Use fans to circulate the air and prevent any unpleasant fumes from building up. Remember, safety first, my friends.
Scrape Away the Excess:
With our trusty plastic scraper or putty knife in hand, we embark on the delicate task of scraping away as much linoleum as possible. Finesse is key here – we don’t want to damage the underlying surface. This initial scraping prepares the battlefield for our solvent assault.
Choose Your Weapon:
Now, it’s time to select the right solvent or adhesive remover for this epic battle. With numerous options available, ensure you choose one specifically designed for linoleum removal. Read the manufacturer’s instructions carefully to understand how to apply it effectively.
Apply and Let It Work Its Magic:
Armed with the chosen solvent, it’s time to go on the offensive. Apply a generous amount to those stubborn areas and let it sit for a few minutes. Watch as the solvent penetrates deep into the adhesive, softening its grip on your precious floor.
Scrub Gently, But Firmly:
With the patience of a master craftsman, take up your scrub brush or sponge. Gently but firmly, scrub the area to further loosen the glue’s hold. Feel the satisfaction as the glue surrenders bit by bit, revealing the floor beneath.
Repeat and Conquer:
In some cases, one round of solvent application and scrubbing may not be enough to win this battle. Fear not, my fellow warriors. Persistence is key. Repeat the application and scrubbing process as necessary until every trace of glue has been banished.
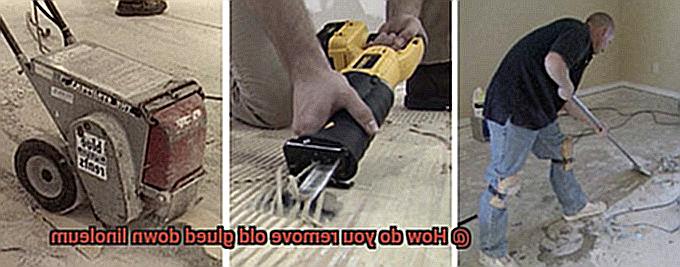
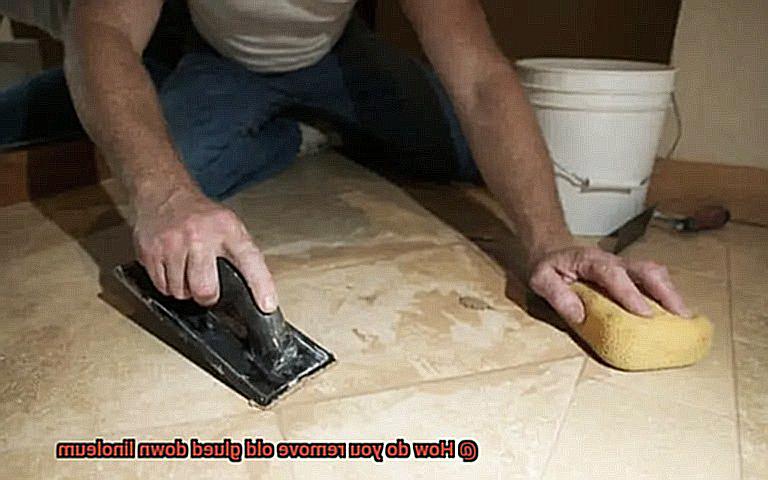
Clean the Subfloor Thoroughly
Before you embark on this exciting journey, it’s crucial to lay the foundation for success by thoroughly cleaning your subfloor. In this comprehensive guide, we’ll walk you through each step, ensuring that your new flooring installation starts on the right foot.
Clear the Debris:
To begin, let’s prepare the stage by eliminating any loose debris that may hinder the process. Grab your broom, vacuum cleaner, or trusty dust mop and diligently sweep away dirt, dust, and pesky particles. Leave no corner unattended and no edge untouched in your quest for a pristine subfloor.
Banish Stains and Spills:
Inspect your subfloor for any unsightly stains or spills that have marked its surface over time. For visible stains, create a gentle yet effective cleaning solution using warm water mixed with a mild detergent. Armed with a scrub brush, meticulously scrub away these blemishes, ensuring that you don’t harm the subfloor in the process.
Should you encounter more stubborn stains or spills, proceed with caution. Stronger cleaning solutions may be necessary but remember to follow the manufacturer’s instructions meticulously. Prioritize safety by testing the solution on a small, inconspicuous area before tackling the entire subfloor.
Rinse and Dry:
Having triumphed over those persistent stains, it’s now time to bid farewell to any remnants of cleaning solution. Thoroughly rinse the subfloor with clean water, ensuring that no trace of soap or detergent lingers behind. Once this step is complete, exercise patience as you allow the subfloor to air dry completely.
Remember, moisture is an unwelcome guest when it comes to subflooring. By ensuring the subfloor is entirely dry, you prevent the growth of mold or mildew, safeguarding the longevity of your new flooring.
Adhesive Residue Removal:
Ah, the formidable foe that is adhesive residue. Fear not, for there are specialized adhesive removers available to tackle this challenge head-on. Follow the manufacturer’s instructions meticulously as you apply the remover and allow it to work its magic.
Rinse and Dry Completely
Today, we embark on a journey into the world of removing old glued down linoleum, where the unsung heroes of the process take the spotlight: rinsing and drying. Prepare to be captivated as we unravel the significance of these steps and learn how to execute them flawlessly, paving the way for a flawless flooring installation. Let’s dive right in.
Bid Farewell to Residue:
As you bid adieu to your old linoleum, remnants of its past may cling stubbornly to your subfloor. These remnants can sabotage the adhesion of new flooring materials if not handled properly. Fear not, for rinsing comes to the rescue. By thoroughly rinsing the surface, you ensure that all residue and cleaning solutions used in previous steps are banished, leaving behind a pristine foundation.
Mastering the Rinse Game Plan:
Now that we understand the importance of rinsing, let’s uncover the secrets to executing it seamlessly. Begin by filling a bucket with warm water and adding a dash of mild dish soap or specialized linoleum cleaner for those tenacious stains. Armed with a trusty mop or sponge, dip it into the soapy water and embark on a gentle yet thorough scrubbing mission. Pay special attention to areas with adhesive residue or buildup, eradicating any trace that lingers.
Rinse Away and Reveal Brilliance:
Having conquered the scrubbing phase, it’s time to unveil the brilliance beneath. Refill your bucket with fresh water and wield a clean mop or sponge to wipe away any remnants lingering on the surface. This step is vital, as even the slightest hint of leftover soap or cleaning solution can create an unwelcome slippery surface or impede the adhesion of your new flooring. Let the rinse reveal the immaculate canvas that awaits.
epPJLQvHEaE” >
Conclusion
Removing old glued down linoleum can be a challenging task, but with the right techniques and tools, it can be done effectively.
One method is to start by softening the adhesive using a heat gun or a hairdryer on high heat. This will make the glue more pliable and easier to remove.
Next, use a putty knife or scraper to gently pry up the edges of the linoleum. Be careful not to damage the underlying floor surface.
If there are stubborn areas where the glue is still adhered, you can try applying a commercial adhesive remover or even vinegar to help dissolve it.