Introduction:
Contents
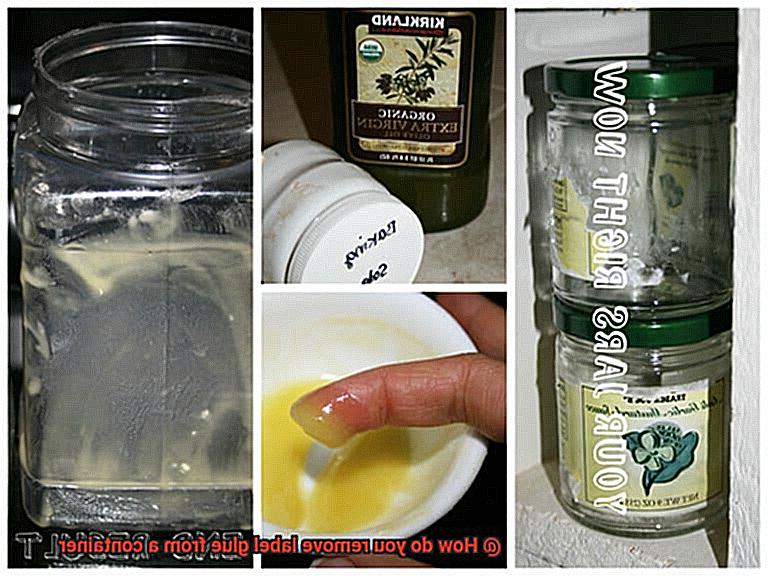
We’ve all been there – buying something new and getting stuck (literally) with that annoying label glue. It’s like a clingy ex that just won’t let go. But fear not, because in this blog post, we’re going to tackle that sticky situation head-on.
Label glue can be a real pain, but with a little know-how and some everyday items, you can say goodbye to the gunk for good. We’re diving deep into the world of label glue removal, exploring tried and tested techniques to clean up your containers.
From basic hacks to pro tips, we’ve got you covered. Whether you’re all about natural remedies or prefer store-bought solutions, there’s something here for everyone. Get ready to reclaim your containers’ sparkle as we spill our expert secrets on removing label glue like a pro.
So grab your cleaning supplies and get ready to banish that stubborn residue once and for all. Stick around (pun intended.) and let’s transform those sticky situations into pristine packaging together.
What is Label Glue?
Label glue may seem like a small detail, but it plays a crucial role in the packaging and branding of products. Whether it’s the label on your favorite sauce bottle or the tag on your new clothes, label glue ensures that the label stays securely in place. In this blog post, we will delve into the world of label glue, exploring its composition, purpose, and effective removal techniques.
The Composition of Label Glue:
Label glues consist of a carefully formulated blend of ingredients that provide both strong adhesion and easy removal when needed. These ingredients can include synthetic or natural polymers, solvents, resins, and other additives. The exact composition varies depending on the specific type and purpose of the glue.
The Purpose of Label Glue:
Label glue serves two primary purposes: strong adhesion and easy removal. On one hand, it needs to bond labels securely to various surfaces, including containers, while withstanding environmental factors such as moisture and temperature changes. On the other hand, it should allow for easy removal without leaving behind any residue or causing damage to the container surface.
Effective Removal Techniques:
Removing label glue can be a tedious task, but with the right techniques, it can be done efficiently. Here are some tried-and-tested methods:
- Warm Soapy Water: Soak the container in warm soapy water to loosen the adhesive. Scrub off the residue with a cloth or sponge.
- Oil or Cooking Spray: Apply oil or cooking spray onto the glue to dissolve it. After letting it sit for a few minutes, gently rub off the residue.
- Rubbing Alcohol: Dampen a cotton ball or cloth with rubbing alcohol and gently rub it over the residue until it dissolves.
- Vinegar: Soak a cloth or sponge in vinegar, apply it to the sticky residue, and let it sit for a few minutes before gently scrubbing it off.
- Commercial Adhesive Removers: Use commercial adhesive removers designed for removing glue. Follow the instructions on the product packaging and test it on a small area first.
Types of Label Glue
Label glue can be a stubborn adversary, but fear not. In this article, we will delve into the fascinating world of label glue types and provide you with valuable insights on how to conquer them. Get ready for a deep dive into the diverse characteristics of label glue.
Water-based glues: The Vanishing Act
Water-based glues are like elusive magicians – they disappear with a mere splash. These glues are commonly used on packaging materials such as cardboard or paper. Removing labels attached with water-based glues is a breeze. Simply soak the container in water or use a damp cloth to dissolve the glue, leaving no trace behind.
Solvent-based glues: The Superheroes of Adhesion
Solvent-based glues possess the strength of superheroes. They are perfect for labels on plastic or glass containers. To remove labels bonded with solvent-based glues, you’ll need the assistance of a solvent such as rubbing alcohol or nail polish remover. Apply the solvent to a cloth and gently rub until the glue dissolves away, revealing a clean surface.
Hot melt glues: The Industrial Titans
Hot melt glues mean serious business. These powerful adhesives find their home in industrial applications due to their exceptional strength. To remove labels secured with hot melt glue, you must first soften the glue by applying heat. Use a hairdryer or heat gun to warm up the label, then carefully peel it off, triumphantly conquering the sticky residue.
Pressure-sensitive adhesives (PSAs): The Friendly Stickers
PSAs are like friendly stickers that embrace surfaces with gentle pressure. They can be found on stickers or decals and are easily removable. Simply peel them off gently or employ adhesive removers specially formulated for PSAs to bid farewell to any lingering residue.
Acrylic-based glues: The Transparent Guardians
Acrylic-based glues are the chameleons of the label glue world – transparent and weather-resistant. They are ideal for labeling applications that require high transparency and durability. To remove labels featuring acrylic-based glue, reach for acetone or isopropyl alcohol to dissolve the adhesive, revealing a clean and pristine surface.
Common Materials Used for Containers
Well, my curious friends, let me take you on a journey through the world of common materials used for containers.
Let’s start with the versatile king of the packaging world – plastic. Plastic containers are as light as a feather, making them perfect for storing and shipping all sorts of goodies. From your favorite snacks to personal care products, plastic containers have got you covered. And the best part? They’re cost-effective and easy to clean, making them a popular choice for both commercial and domestic use.
Now, let’s talk about glass. If you’re all about preserving freshness and flavor, glass containers are your go-to. These bad boys are known for their durability and ability to keep your goodies in tip-top condition. Jams, sauces, juices – you name it, glass containers have got it covered. Oh, and did I mention they’re also recyclable? Mother Earth approves.
Next up, we have metal containers. Aluminum and tin cans are the superheroes of the packaging world. They offer excellent protection against light, air, and moisture – basically all the things that can mess with your precious contents. Plus, they’re super lightweight and stackable. Talk about convenience.
But wait, there’s more. Paperboard containers specialize in packaging dry goods like cereals and snacks. They’re lightweight, recyclable, and often come in eye-catching designs or branding that make them stand out on the shelves.
And let’s not forget about our specialized materials. Stainless steel keeps your drinks hot or cold for ages, while ceramic containers provide an airtight seal to keep your spices and coffee beans fresh and flavorful.
Warm Soapy Water Method
Fret no more. In this enlightening blog post, we will dive headfirst into the enchanting realm of the warm soapy water method. Prepare to be amazed as we uncover the secret behind this simple yet powerful technique that will save you time, frustration, and leave your containers gloriously clean for their next adventure.
The Process:
Picture this: you gather your supplies – a container, warm water, dish soap, and a trusty sponge or cloth. With anticipation in your eyes, you fill the container with warm water, ensuring that the clutches of glue are fully submerged. A few drops of dish soap are added to create a captivating soapy solution. Now comes the moment of magic – let the container soak for a mere 10-15 minutes, allowing the glue to surrender to the soothing warmth and tender caress of the water. As the adhesive weakens and softens, take your sponge or cloth and embark on a gentle yet determined crusade against the glue. With each circular stroke, the warm water and soap join forces, dissolving the stubborn residue and making it cower in defeat. Continue this mesmerizing dance until not a trace of glue remains. Finally, cleanse the container with an invigorating rinse of clean water, washing away any lingering soap residue. Behold. The container stands victorious, ready to embrace its new purpose.
Effectiveness and Drawbacks:
Prepare to be astounded by the sheer effectiveness of the warm soapy water method. It conquers most types of label glues, even those that have waged war on your containers with unwavering determination. This magnificent method is not only effective but also safe and gentle, sparing you from harsh chemicals or solvents. However, it is important to acknowledge that there may be instances where this method falls short. In such cases, fear not, for alternative methods like oil-based solvents or specialized adhesive removers await your command.
Tips and Tricks:
- Embrace the comforting warmth of warm water, avoiding the scorching heat that may harm delicate container materials.
- For glues that refuse to yield, extend the soaking time or employ a soft-bristled brush for a touch of extra persuasion.
- Should remnants of glue linger after your valiant efforts, do not despair. Repeat the process or consider tapping into the power of specialized adhesive removers.
- Always honor the cleansing ritual by thoroughly rinsing the container after employing the warm soapy water method, ensuring no trace of soap remains.
Oil or Cooking Spray Method
The oil or cooking spray method is a tried and true technique for banishing the bane of label glue from your containers. Whether you’re dealing with a newly purchased jar or an old one that needs a makeover, this method is your ticket to a label-free and pristine container.
To begin, gather your arsenal: vegetable oil, olive oil, or even a trusty can of cooking spray like Pam. These kitchen staples will be your secret weapons against that sticky mess.
Now, let’s dive into the step-by-step process. Take your container and liberally apply the oil or cooking spray directly onto the obstinate label and its adhesive residue. Don’t skimp on the oily goodness – coat every inch of that sticky situation with a uniform layer.
Once you’ve bestowed the container with its oily armor, it’s time to let the magic work its wonders. Give it a few minutes for the oil to seep into the adhesive and break it down, turning that stubborn glue into putty in your hands.
Now comes the satisfying part – removing that gooey mess. Armed with a cloth or paper towel, gently scrub away the remnants of glue. The oil should have done its job, making the adhesive easier to remove. However, for those stubborn spots that refuse to yield, reach for heavy artillery – a plastic scraper or an old credit card – and scrape away those last traces of glue.
With the sticky residue successfully vanquished, it’s time for a well-deserved cleansing bath. Submerge your container in warm soapy water, thoroughly washing away any lingering traces of oil residue. Rinse it diligently, ensuring not a single drop of soap remains. Finally, dry it completely before placing it back into duty.
One of the beauties of this method is its versatility. It works wonders on all types of containers – be they plastic, glass, or metal. No need to worry about compatibility; this method has got you covered.
And here’s the cherry on top – it won’t break the bank. Chances are, you already have some sort of cooking oil or spray lurking in your kitchen, waiting to be enlisted in the fight against label glue. So, save your hard-earned money and rely on these household heroes instead.
Rubbing Alcohol Method
That sticky residue can be infuriating, clinging to surfaces and refusing to let go. But fear not, my friends, for I have the perfect solution: the Rubbing Alcohol Method.
Rubbing alcohol, also known as isopropyl alcohol, is a household hero found in most medicine cabinets or first aid kits. Its magical powers lie in its alcohol content, which helps break down the adhesive properties of glue. This makes it much easier to remove.
Before we dive into the step-by-step process, let’s gather our supplies. You’ll need rubbing alcohol (or a high-proof substitute like vodka), cotton balls or a soft cloth, and warm water. With these tools at your disposal, you’ll be ready to tackle any sticky situation.
To begin, soak a cotton ball or cloth in rubbing alcohol. You want it to be damp but not dripping wet. Now, take that heroic cotton ball and gently rub it over the label glue on the container. Apply slight pressure and use circular motions to loosen the adhesive.
As you work your magic, watch as the glue breaks down and becomes less sticky. It’s like witnessing a superhero defeat their arch-nemesis. If the glue proves particularly stubborn, don’t give up. Simply apply more rubbing alcohol and keep at it with your heroic rubbing.
Once the glue has loosened its grip, grab a clean cloth or paper towel and wipe away the residue. If there are still traces of adhesive left behind, don’t worry – just repeat the process until your container is squeaky clean.
But wait, our superhero work isn’t quite done yet. After removing the label glue, it’s essential to give your container a thorough wash with warm soapy water. This will help remove any remaining residue or alcohol. Rinse it well and make sure it’s completely dry before using it again.
Now, it’s worth mentioning that not all containers are created equal. Some plastics or delicate materials may be sensitive to alcohol and can get damaged or discolored. So, before you unleash your superhero powers on your container, do a quick test on a small, inconspicuous area to ensure the rubbing alcohol won’t cause any harm.
Vinegar Method
Don’t fret. We have a secret weapon in our cleaning arsenal that will make quick work of that stubborn adhesive – vinegar. That’s right, the same ingredient that adds zing to your salad can also save the day when it comes to sticky situations. In this post, we will guide you through the simple yet powerful process of using vinegar to remove label glue from containers.
Step 1: Gather Your Supplies
Prepare yourself for this epic battle against label glue by gathering the necessary supplies. Arm yourself with a clean cloth or sponge, white vinegar, and warm water. These everyday household items will help you triumph over that pesky glue once and for all.
Step 2: Prepare the Vinegar Solution
Get ready to concoct a magical elixir. Pour a small amount of vinegar onto your cloth or sponge. If you prefer a gentler solution, dilute the vinegar with an equal amount of warm water. This will ensure that the vinegar’s power does not harm your container’s delicate surface.
Step 3: Apply the Vinegar Solution
It’s time to launch your attack on that stubborn label glue. Apply the vinegar solution directly onto the adhesive, ensuring full coverage. Let the vinegar sit on the glue for a few minutes, allowing it to work its enchantment and break down the adhesive’s fortress.
Step 4: Gently Scrub Away
With your vinegar-infused weapon in hand, it’s time to start scrubbing away at the weakened adhesive. Employ light pressure and circular motions to loosen the grip of the glue. If some areas put up a fierce resistance, don’t hesitate to replenish your vinegar solution and launch another assault.
Step 5: Rinse and Dry
Victory is yours. You have successfully banished the label glue from your container. Now, rinse the container with warm water to vanquish any remaining residue. Ensure thorough drying before returning the container to service.
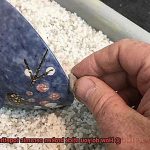
Commercial Adhesive Removers
Commercial adhesive removers are essential tools for anyone who has ever struggled with removing sticky labels from containers. These innovative products are specifically formulated to dissolve and break down adhesive bonds, making it a breeze to remove even the most stubborn glue residue. With a wide range of options available on the market, there is a commercial adhesive remover suitable for every type of material, whether it’s glass, plastic, or metal.
Using a commercial adhesive remover is a straightforward process that starts with choosing the right product for your specific needs. Once you have the remover in hand, it’s important to test it on a small, inconspicuous area of the container to ensure it won’t cause any damage or discoloration. Safety should always be a top priority.
Once you’ve confirmed that the remover is safe to use, apply a small amount onto a clean cloth or sponge. Then, gently rub the glue residue with the soaked cloth or sponge, using slight pressure. You’ll start to witness the magic as the adhesive begins to dissolve before your eyes. This process may need to be repeated multiple times, especially if dealing with particularly stubborn adhesives.
After the adhesive has loosened, use the cloth or sponge to wipe away the residue from the container surface. It’s crucial to be thorough in this step to ensure all traces of glue are removed. However, don’t worry if a little bit of residue remains – simply repeat the process until your container is completely adhesive-free.
Finally, it’s essential to clean and rinse the container thoroughly after using an adhesive remover. This step ensures that any remaining residue from the remover is removed, leaving your container clean and ready for its next use.
9BWLm6M5Kdk” >
Also Read: How do you remove dried glue from rubber?
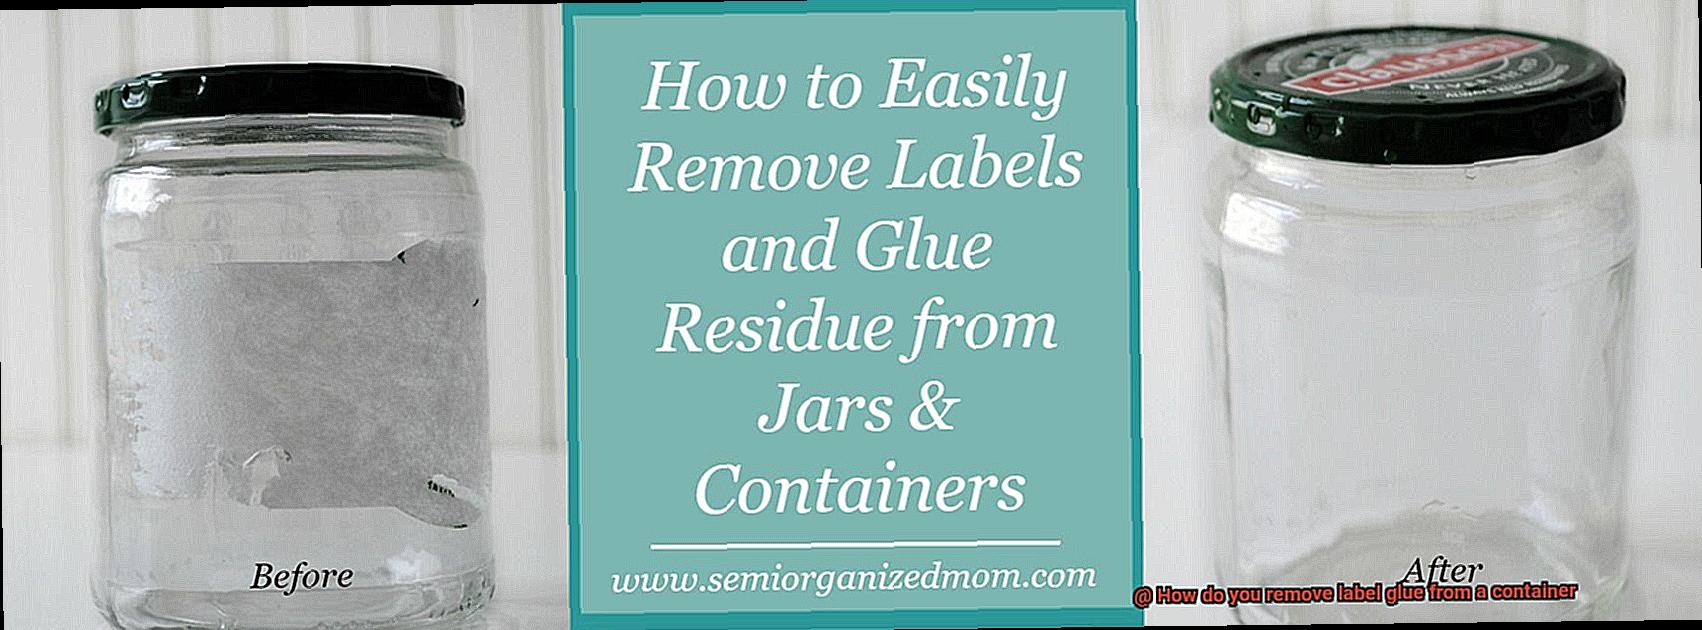
Conclusion
Removing label glue from a container can be a frustrating task.
Thankfully, there are several effective methods you can try. One option is to use heat.
Simply apply a hairdryer or heat gun to the glue, and gently peel it away as it softens. Another method is to use oil or lubricant.
Apply a generous amount onto the glue, let it sit for a few minutes, and then wipe it away with a cloth. For stubborn residue, try using rubbing alcohol or nail polish remover.
Remember to always test these methods on a small area first to ensure they don’t damage the container’s material.