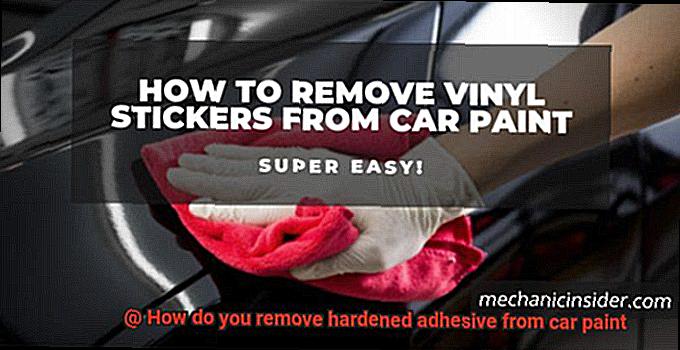
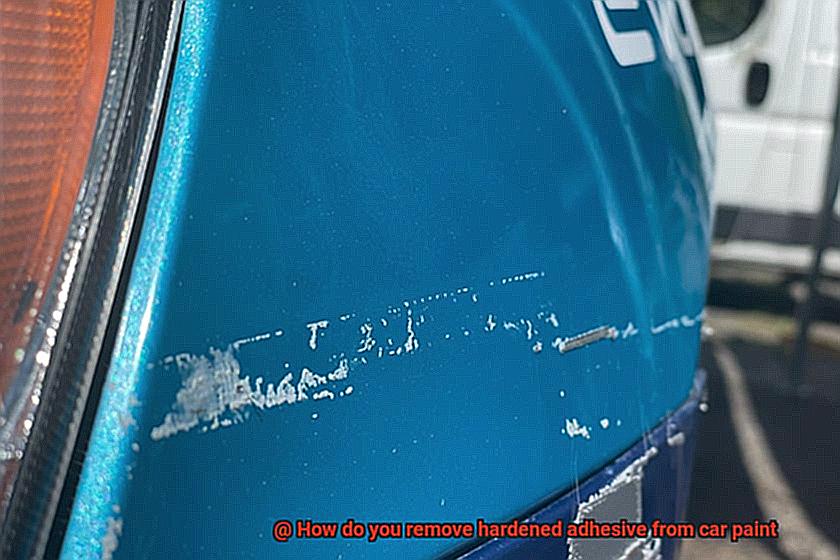
Imagine this scene: you pull into a bustling shopping mall, only to find an ugly patch of hardened adhesive tarnishing your car’s sleek, glossy exterior. Whether it’s the remnants of an old decal, a forgotten parking sticker, or the aftermath of a bumper sticker experiment gone wrong, one question lingers in your mind: how can you bring back your car’s flawless shine and bid farewell to that pesky adhesive?
Don’t fret, my fellow car enthusiasts. In this blog post, we’ll unravel the mystery of removing hardened adhesive from your car’s paintwork, allowing you to reclaim the brilliance and allure of your beloved ride.
With a multitude of methods and techniques at your disposal, we’ll guide you through the tried-and-tested solutions and spare you the potential pitfalls of DIY experimentation. But first, let’s address the heart of the matter.
While hardened adhesive may seem like an unbeatable adversary, fear not. We will discuss essential preparation steps and explore both traditional and innovative adhesive removal options that guarantee a safe restoration process without compromising your car’s paint integrity.
From everyday household remedies like rubbing alcohol and nail polish remover to specially formulated adhesive removers, we’ll outline their pros and cons so that you can confidently choose what suits your specific needs best.
So buckle up, fellow car aficionados. Join us on this enlightening journey as we unlock the secrets behind removing hardened adhesive and unveil the flawless, pristine appearance of your cherished vehicle. Get ready to witness its revival as its shine reignites your passion for hitting the open road once more.
Gather the Necessary Supplies
Contents
- 1 Gather the Necessary Supplies
- 2 Test the Adhesive Remover or Rubbing Alcohol
- 3 Scraping off the Hardened Adhesive
- 3.1 Step 1: Gather the necessary supplies
- 3.2 Step 2: Shield the surroundings
- 3.3 Step 3: Delicately scrape off the adhesive
- 3.4 Step 4: Conquer stubborn adhesive
- 3.5 Step 5: Triumphantly scrape off softened adhesive
- 3.6 Step 6: Eradicate any lingering residue
- 3.7 Step 7: Restore cleanliness and brilliance
- 4 Applying Heat to Soften the Adhesive
- 5 Rubbing the Remaining Adhesive with an Alcohol or Adhesive Remover
- 6 Washing Away Residue from the Adhesive Remover or Rubbing Alcohol
- 7 Applying Car Wax to Restore Shine
- 8 Conclusion
Removing hardened adhesive from your car’s paint requires careful preparation and the right supplies. In this comprehensive guide, we will explore the essential tools and materials you need to gather before embarking on this challenging task. By following these steps and using vivid language, you can confidently remove hardened adhesive from your car’s paint surface while preserving its pristine condition.
Adhesive remover:
The first item on your supply list is a specialized adhesive remover that is safe for use on car paint. Seek out products specifically designed for automotive use, as they possess the power to dissolve stubborn adhesive residue without causing any harm to your car’s precious paintwork. Say goodbye to harsh chemicals or solvents that may damage the paint surface.
Plastic scraper:
Armed with a plastic scraper, you’ll be able to delicately scrape off the hardened adhesive without leaving behind any scratches or blemishes on your car’s paint. Remember, metal scrapers are not your friend in this endeavor – they can easily cause irreversible damage that no car enthusiast wants to deal with.
Microfiber cloth:
A soft microfiber cloth is your secret weapon for wiping away any lingering adhesive residue after it has been loosened. These gentle cloths are specifically designed not only to prevent scratches but also to ensure no unsightly swirl marks mar your car’s beautiful finish.
Warm soapy water:
Before diving into the adhesive removal process, take a moment to cleanse the affected area with warm soapy water. This simple step effectively eliminates any dirt, dust, or loose debris that may hinder the effectiveness of the adhesive remover. Your car deserves a clean canvas for this restoration project.
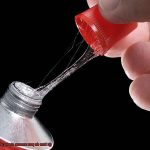
Isopropyl alcohol:
To achieve a truly spotless finish, employ isopropyl alcohol as the final touch in removing any remaining adhesive residue. With its dissolving power, this trusty agent effortlessly breaks down the adhesive, making it a breeze to wipe away. Say goodbye to any remnants of the past – your car will shine like never before.
Protective gloves:
As you embark on this adhesive removal journey, don’t forget to prioritize your safety. Equip yourself with protective gloves that shield your hands from any potential chemical irritation caused by adhesive removers and cleaning agents. After all, safeguarding your skin is just as important as maintaining your car’s flawless appearance.
Test the Adhesive Remover or Rubbing Alcohol
Embarking on the task of removing hardened adhesive from your car’s paintwork requires careful consideration. With adhesive remover or rubbing alcohol in hand, it’s essential to conduct a thorough test before proceeding. This crucial step ensures that the chosen solution won’t harm or discolor your vehicle. In this article, we will explore the significance of testing and provide a step-by-step guide to achieve flawless results.
Understanding Adhesive Remover and Rubbing Alcohol:
Adhesive remover, available as a liquid or spray, is a specialized commercial product designed to dissolve and eliminate adhesives effectively. Conversely, rubbing alcohol, also known as isopropyl alcohol, is a versatile solvent renowned for its ability to break down various types of adhesives.
The Importance of Testing:
To prevent any unintended damage or discoloration, it is vital to test adhesive remover or rubbing alcohol on a small, inconspicuous area of your car’s paint. By performing this simple test, you can ensure that your restoration efforts will enhance your vehicle’s appearance rather than diminish it.
How to Conduct the Test:
- Choose an inconspicuous area: Locate a small section on your car where any potential effects would be least noticeable.
- Apply the solution: Place a small amount of adhesive remover or rubbing alcohol onto a clean cloth or cotton ball.
- Gently rub the solution: Carefully rub the cloth or cotton ball onto the adhesive residue within the chosen test area. Observe any reactions or changes in the adhesive or car paint.
- Assess the results: Examine the test area closely for any adverse effects such as discoloration, paint damage, or other undesirable changes. If none are present, proceed confidently with the chosen solution.
Using the Chosen Solution:
Once you have successfully completed the test and ensured the safety of the adhesive remover or rubbing alcohol, you can move forward with removing the adhesive residue from your car’s paintwork. Follow these general steps to achieve optimal results:
- Apply the solution: Generously apply the tested solution onto a clean cloth or sponge.
- Allow penetration: Let the solution sit on the adhesive for a few minutes, allowing it to penetrate and soften the hardened residue.
Scraping off the Hardened Adhesive
Discovering a stubborn patch of hardened adhesive on your car’s flawless paintwork can be a frustrating experience. But worry not. With the right tools and techniques, you can expertly scrape off the adhesive without causing any damage. In this comprehensive guide, I will take you through each step of the process, providing valuable tips to ensure remarkable results.
Step 1: Gather the necessary supplies
Equip yourself with the essential tools before you embark on this mission. A plastic scraper or a plastic putty knife is your best ally, as metal tools may leave unsightly scratches on your car’s paint. Additionally, keep adhesive remover or rubbing alcohol at hand to soften the adhesive for effortless removal.
Step 2: Shield the surroundings
To safeguard adjacent surfaces from accidental damage, use masking tape or painter’s tape to cover them. This small precaution will grant you peace of mind throughout the adhesive removal process.
Step 3: Delicately scrape off the adhesive
Begin by gently scraping off as much of the hardened adhesive as possible using the plastic scraper or putty knife. Apply only light pressure to preserve the integrity of the paint. Work in small sections and employ short, controlled strokes for optimal outcomes.
Step 4: Conquer stubborn adhesive
If the adhesive proves resistant and refuses to let go, administer a small amount of adhesive remover or rubbing alcohol directly onto it. Allow these substances a few minutes to penetrate and soften the adhesive’s grip.
Step 5: Triumphantly scrape off softened adhesive
After giving the adhesive remover or rubbing alcohol time to work its magic, resume scraping with your chosen plastic tool. Employ gentle strokes to dislodge and remove the now softened adhesive. Repeat this process as necessary until every trace of hardened adhesive has been vanquished.
Step 6: Eradicate any lingering residue
Inspect the area meticulously for any lingering adhesive residue. Should you find any, take a clean cloth soaked in rubbing alcohol and gently wipe it away. Exercise caution to avoid vigorous rubbing, as this could potentially damage the paint.
Step 7: Restore cleanliness and brilliance
Once you have successfully bid farewell to all adhesive remnants, cleanse the area with a mild soap and water solution to eliminate any residual cleaning products. Rinse thoroughly and dry the area with a clean cloth, unveiling a pristine finish that will leave you in awe.
Applying Heat to Soften the Adhesive
In the never-ending battle against stubborn adhesive, heat emerges as the mighty weapon to soften its grip on your car’s pristine paintwork. With finesse and a touch of warmth, you can banish unsightly blobs of hardened adhesive and restore your vehicle’s flawless shine. In this comprehensive guide, we’ll unveil the secrets of applying heat to soften adhesive on car paint, equipping you with the skills to conquer even the most tenacious adhesives.
Harnessing the Magic of Heat:
Enter the realm of tried and tested methods for softening hardened adhesive – the power of heat. By breaking down the adhesive’s molecular structure, heat effortlessly renders it pliable for removal, leaving no trace behind. Let us delve into the arsenal of heat application techniques, each offering its own unique charm.
Heating Tools: Unleash the Warmth.
Step into the spotlight, heat guns and hairdryers. Emitting gentle warmth on a low heat setting, these trusty tools breathe life into hardened adhesive, transforming it into malleable goodness. But remember, keep that heat source in constant motion to dance around any potential damage to your car’s precious paintwork.
Hot Water Soak: A Soothing Bath for Stubbornness.
When the heat gun or hairdryer is nowhere in sight, fear not. A hot water soak comes to the rescue. Immerse a cloth in steaming hot water and let it caress the adhesive for a few precious moments. With each passing second, the soothing heat gently coaxes the adhesive to surrender its hold, making it a breeze to scrape away.
Safety First: Taming the Heat.
As we wield the power of heat, let us not forget caution’s guiding hand. Excessive heat can be treacherous, potentially damaging your car’s paintwork. Begin your conquest by setting the temperature to its lowest, gradually increasing only if necessary. Remember, we seek to soften the adhesive, not melt your car into a puddle of regret.
Patience is a Virtue: The Battle of Persistence.
In this war against adhesive, patience reigns supreme. Adhesives of varying strength demand different levels of heat. Embrace the virtue of patience and repeat the heating process if needed. A few extra moments spent now will spare you from potential paint damage later.
Rubbing the Remaining Adhesive with an Alcohol or Adhesive Remover
Worry not, for we have the ultimate guide to help you reclaim your vehicle’s flawless shine. Step into the world of alcohol and adhesive removers, and discover their unmatched power in banishing sticky remnants. Get ready to embark on a journey towards restoring your car’s beauty, armed with the knowledge you need.
Mastering the Techniques:
Alcohol – Your Trusted Ally:
Isopropyl alcohol, also known as rubbing alcohol, is a household hero when it comes to adhesive removal. With its potent ability to break down sticky residue, it’s no wonder it’s a popular choice. To use alcohol effectively, dampen a clean cloth or sponge and gently rub the affected area. Remember, patience is key here – avoid excessive force or aggressive scrubbing to protect your car’s delicate paint finish.
Adhesive Remover – The Specialist Solution:
If precision is what you seek, turn to adhesive removers specially formulated to tackle stubborn residues. These gems can be found in hardware stores or online, providing a targeted approach without harming your car’s paint. Follow the manufacturer’s instructions carefully. Typically, you’ll apply the remover to a clean cloth or sponge and gently rub the adhesive until it dissolves.
The Power of Thorough Cleaning:
After using alcohol or an adhesive remover, give the treated area a final cleanse with soap and water. This crucial step ensures any lingering residue is washed away, leaving your car’s paint looking pristine once more.
Patch Test – A Wise Precaution:
Before treating the entire affected area, perform a patch test in a small, inconspicuous spot. This simple measure guarantees that the alcohol or adhesive remover won’t cause any unwanted damage or discoloration to your car’s paint surface. Remember, prevention is always better than a cure.
Handle With Care – Mind the Surroundings:
When working with alcohol or adhesive removers, exercise caution to avoid contact with other parts of your vehicle, such as plastic trim or rubber seals. These chemicals can be detrimental to these materials, so it’s best to focus solely on the adhesive residue.
Washing Away Residue from the Adhesive Remover or Rubbing Alcohol
Say goodbye to pesky adhesive residue that has been clinging to your car’s pristine paint. Allow me to guide you through the exhilarating process of washing away the stubborn remnants left behind by adhesive remover or rubbing alcohol. Prepare yourself to witness the restoration of your vehicle’s flawless shine with these masterful techniques.
It is vital to comprehend that adhesive removers and rubbing alcohol possess superhuman abilities in the realm of car cleaning. They possess unparalleled powers that can eliminate even the most hardened adhesive from your car’s paint. However, these powerhouses require a little time to work their magic. So, before you embark on this epic washing journey, grant the adhesive remover or rubbing alcohol a few minutes to settle on the surface. This will allow it to penetrate deeply into the adhesive, loosening its grip like a true hero.
Once the miracle solution has had ample time to work its wonders, it is time to summon your inner scrubbing prowess. But heed my caution, dear friend, do not unleash your inner Hulk upon your car just yet. Remember, gentle circular motions are key as you scrub away. Applying excessive force or scrubbing with wild abandon can result in irreversible damage to the precious paint job that you have painstakingly maintained.
While you fervently scrub away, ensure that you rinse the cloth or sponge frequently in clean water. This simple act will rid it of any residue that may have accumulated and prevent it from spreading like an unwelcome intruder to other areas of your beloved vehicle. After all, surprises in the form of unexpected stickiness are unwelcome guests where they don’t belong.
Once you have achieved a state of scrubbing nirvana, it is time for a thorough cleansing rinse. Let the clean water flow over the area, ensuring that every last trace of adhesive remover or rubbing alcohol is banished from existence. In some cases, you may need to repeat this purging ritual multiple times until every iota of stubborn residue has been vanquished. Remember, my friend, patience is the key ingredient here.
Ah, but we must not forget the grand finale of this transformative journey – the art of drying. After all your arduous efforts, the last thing you desire are unsightly water spots or streaks tarnishing your car’s flawless finish. So, seize a clean towel and embark on a mission to thoroughly dry the area. Pay special attention to every nook and cranny, ensuring that not a single drop of moisture remains.
Applying Car Wax to Restore Shine
Get ready for a fascinating journey as we delve into the exhilarating process of applying car wax to restore that jaw-dropping shine you’ve been missing. Trust me, this is a game-changer for your vehicle’s appearance.
But before we dive into the nitty-gritty, let’s quickly recap the importance of preparing the surface. A clean canvas is essential for a flawless finish. Bid farewell to any stubborn adhesive residue by following my previous section on washing away remnants left behind by adhesive remover or rubbing alcohol. Trust me, it’s worth the extra effort.
Now, let’s get down to business. Here are the steps you need to follow to apply car wax and restore that head-turning shine:
Step 1: Choose the Right Type of Car Wax
Are you ready to unleash the power of car wax? There are three main types to choose from: paste wax, liquid wax, and spray wax. Paste wax, the heavyweight champion, offers durability and long-lasting protection. Liquid wax, an easy-to-apply option, still delivers impressive results. And if you’re short on time or need a quick touch-up, spray wax is your convenient buddy. Choose the one that suits your needs and preferences.
Step 2: Prepare the Surface
A masterpiece requires a clean canvas. Thoroughly wash and dry your car to bid farewell to any dirt or debris that could potentially mar your paint job. Trust me; this step is crucial for achieving a flawless finish that will make heads turn.
Step 3: Apply the Wax
Now it’s time to unleash your inner artist. Grab a soft sponge or an applicator pad, and let the magic begin. Dip your chosen tool into the wax and gently apply it to a small section of your car’s paint using mesmerizing circular motions. Work in small sections to ensure even coverage and avoid letting the wax dry on the surface.
Step 4: Let It Bond
Patience is a virtue, my friend. Once you’ve applied the wax to a section, let it sit for a few minutes. This allows the wax to bond with the paint and work its transformative magic. Take a moment to appreciate the anticipation of the stunning result that’s about to emerge.
t6zgyeeeawU” >
Conclusion
When it comes to removing hardened adhesive from car paint, there are a few effective methods you can try.
One option is to use a commercial adhesive remover specifically designed for automotive use. These products are formulated to break down tough adhesives without damaging the paint.
Another approach is to use household items like rubbing alcohol or vinegar. These substances have properties that can help dissolve the adhesive and make it easier to remove.
It’s important to be patient and take your time during this process, as rushing could lead to scratches on the paint surface.