We’ve all been there. You’re in the middle of a DIY project, armed with trusty Gorilla Glue, ready to conquer any bonding challenge that comes your way. But what happens when this super-strong adhesive ends up where it shouldn’t, hardening into an unyielding mess? Cue frustration and panic. But fret not, my friend, for we’re here to save the day.
In this captivating blog post, we’ll dive into the world of Gorilla Glue mishaps and explore foolproof methods to remove hardened Gorilla Glue from various surfaces. Whether it’s on your hands, furniture, or even fabric – we’ve got you covered.
Get ready to unlock the secrets of bidding farewell to those stubborn blobs that seem impossible to remove. But before we jump into the solutions, let’s understand the formidable nature of this adhesive.
Gorilla Glue is a mighty polyurethane adhesive that forms an incredibly tight bond. It boasts unparalleled strength, making it a go-to choice for intense projects. However, this unwavering tenacity can become a curse when it dries in unwanted places.
Throughout this enlightening journey, we’ll explore techniques, tools, and products that can aid in removing hardened Gorilla Glue. From solvents to mechanical action – we’ll uncover the most effective strategies while considering the specific surfaces you’re dealing with.
So whether you accidentally glued your fingers together or discovered a stubborn glue stain on your beloved wooden table – get ready to bid farewell to hardened Gorilla Glue as we equip you with the knowledge and tools needed to break free from its clutches once and for all.
What is Gorilla Glue?
Contents
- 1 What is Gorilla Glue?
- 2 How Does Gorilla Glue Harden?
- 3 Heat Method for Removing Hardened Gorilla Glue
- 4 Acetone Method for Removing Hardened Gorilla Glue
- 5 Isopropyl Alcohol Method for Removing Hardened Gorilla Glue
- 6 Soaking in Warm Soapy Water Method for Removing Hardened Gorilla Glue
- 7 Mechanical Means for Removing Hardened Gorilla Glue
- 8 Tips and Tricks to Follow When Removing Hardened Gorilla Glue
- 9 Conclusion
This polyurethane-based adhesive forms an unyielding bond between various materials, including wood, metal, ceramics, stone, and glass.
One of the most distinctive features of Gorilla Glue is its ability to expand during the curing process. When exposed to moisture, this glue reacts and expands, effortlessly filling in any gaps or cracks in the bonded surfaces. The result? A tight and secure bond that makes it suitable for all kinds of projects, whether indoors or outdoors.
But wait, there’s more. Gorilla Glue offers a range of specialized variants tailored to specific needs and materials. The original Gorilla Glue is perfect for porous surfaces like wood, while Gorilla Super Glue provides instant repairs on plastic, metal, and rubber. Need a strong bond on wooden surfaces? Look no further than Gorilla Wood Glue. And for a durable and waterproof bond on multiple materials, Gorilla Epoxy is the go-to option.
Strength isn’t the only thing that sets Gorilla Glue apart. It also boasts resistance to water and extreme temperatures. Once cured, it can withstand both scorching heat and freezing cold without compromising its adhesive properties. This makes it an excellent choice for outdoor projects where exposure to moisture and temperature fluctuations is inevitable.
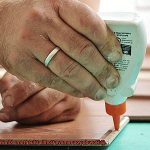
When working with Gorilla Glue, it’s crucial to adhere to the manufacturer’s instructions. Apply the glue sparingly since it expands during curing. Additionally, firmly clamp or hold the bonded surfaces together until the glue sets completely to ensure a secure bond.
Now, let’s talk about removing hardened Gorilla Glue—a task that can be quite challenging due to its tenacious bond. However, fear not. There are several methods you can try:
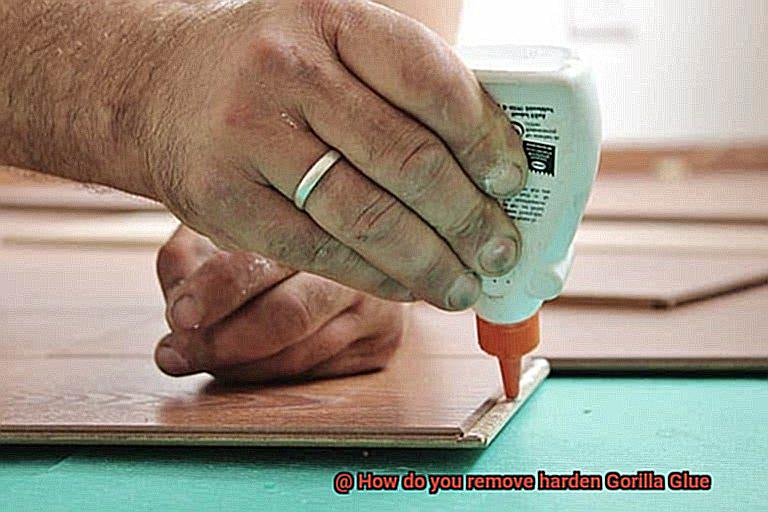
- Mechanical means: Arm yourself with a scraper like a putty knife or plastic card, and gently scrape off the glue from surfaces like wood or metal. Be cautious to avoid causing damage with sharp tools.
- Heat: Apply some heat to the hardened glue to soften it, making it easier to scrape off. A hairdryer or heat gun can do the trick. Just remember not to overheat the surface to prevent any unwanted damage.
How Does Gorilla Glue Harden?
Gorilla Glue is renowned for its unrivaled adhesive power and versatility in a multitude of applications. But what makes this glue transform from a liquid to an unyielding bond? In this captivating exploration, we’ll delve into the scientific marvel behind Gorilla Glue’s hardening process, shedding light on why it becomes a formidable challenge to remove once it sets.
The Polyurethane Powerhouse:
At the heart of Gorilla Glue lies its polyurethane-based composition, setting it apart from other adhesives. This formulation incorporates polyurethane polymers that react with moisture, forging an indomitable bond.
The Curing Process:
When Gorilla Glue encounters moisture, a mesmerizing chemical reaction called curing takes place. This reaction triggers expansion, giving rise to a foamy texture that fills gaps and creates an exceptionally strong bond.
Moisture as the Catalyst:
Moisture plays a pivotal role during the curing process of Gorilla Glue. It becomes the catalyst that ignites a chemical reaction between the polyurethane polymers and water molecules present. This reaction weaves a cross-linked network structure, culminating in the hardening of the adhesive.
Moisture Matters:
The proper curing of Gorilla Glue necessitates adequate moisture. In arid environments or when bonding non-porous materials, moisture may be scarce, leading to incomplete curing or prolonged hardening times. Thus, one must consider the moisture factor when working with Gorilla Glue.
Temperature and Humidity:
Temperature and humidity levels exert influence over the curing process of Gorilla Glue. Higher temperatures and increased humidity accelerate curing, while lower temperatures and drier conditions delay it. Therefore, the environment in which you work can significantly impact the speed at which the glue hardens.
The Unbreakable Bond:
Once Gorilla Glue solidifies, it forms an unyielding and durable bond. Its rigid and solid texture renders it arduous to remove without employing appropriate techniques and tools.
Heat Method for Removing Hardened Gorilla Glue
We’ve all experienced the frustration of battling hardened Gorilla Glue that seems unyielding. But fear not. Today, we’re unveiling the secrets of the heat method, a formidable technique that will help you conquer even the toughest glue bonds. So grab your trusty hairdryer or heat gun and prepare to witness the magic unfold.
Step 1: Prepare for Success
Before embarking on your glue removal journey, it’s essential to determine if the heat method is suitable for your surface. While this technique works wonders on most materials, it’s wise to test a small, inconspicuous area first to ensure no unwanted effects.
Step 2: Assemble Your Arsenal
To execute this method flawlessly, gather your weapons of choice: a hairdryer or heat gun set to low or medium heat, a plastic scraper or credit card for gentle yet effective scraping, and optionally, a mild solvent like rubbing alcohol or acetone. Remember to work in a well-ventilated area or don a mask for added protection.
Step 3: Unleash the Heat
Position your hairdryer or heat gun approximately 6 inches away from the hardened Gorilla Glue. Begin at a low heat setting to safeguard the integrity of the underlying surface. Then, with a sweeping motion back and forth, apply the gentle warmth that will gradually soften the glue’s grip, rendering it more pliable.
Step 4: Scrape Away with Precision
As the glue succumbs to the power of heat, arm yourself with a plastic scraper or credit card. Employing finesse and caution, scrape away the softened adhesive, avoiding sharp or abrasive tools that may harm the surface. For stubborn patches, reapply heat until they yield and become easily removable.
Step 5: Bid Farewell to Residue
Congratulations on banishing most of the hardened glue. Now it’s time for the cleanup phase. If any residue remains, take a clean cloth and apply a mild solvent like rubbing alcohol or acetone. With gentle yet determined strokes, dissolve the lingering glue until it fades away.
Acetone Method for Removing Hardened Gorilla Glue
Embarking on a DIY project can be exhilarating, but dealing with hardened Gorilla Glue aftermath can be a nightmare. Don’t fret. In this captivating guide, we’ll unlock the power of the acetone method – a tried-and-true technique that will help you conquer even the most stubborn Gorilla Glue bonds. Get ready to unleash your inner DIY hero as we walk you through the steps to successfully remove hardened Gorilla Glue using acetone.
Step 1: Gather your mighty arsenal
Prepare yourself for battle by gathering your materials. Venture to your local hardware store or home improvement center and arm yourself with pure acetone, for diluted versions may falter in the face of hardened Gorilla Glue. Equip yourself with cotton balls or swabs for precise application, and don’t forget a trusty plastic scraper or an old credit card to aid in the removal process.
Step 2: Fortify your defenses
Safety reigns supreme. Before engaging in the acetone method, it’s imperative to protect yourself and your surroundings. Seek refuge in a well-ventilated area, don gloves and protective eyewear, and ensure your workspace is shielded from harm. Now, you’re prepared to confront that unyielding Gorilla Glue.
Step 3: Unleash the power of acetone
Take hold of a cotton ball or swab saturated with acetone and gently apply it to the hardened glue. Allow the acetone to weave its magic for a few minutes as it dissolves the adhesive properties of the Gorilla Glue. Exercise caution, avoiding excessive pressure that could exacerbate the situation.
Step 4: Vanquish the softened glue
With the glue now softened, seize your plastic scraper or old credit card and let the removal commence. Starting at one edge, unleash a deliberate yet gentle assault, applying pressure to eradicate the glue. Should stubborn patches emerge, simply reapply acetone and persist in your scraping until not a trace of Gorilla Glue remains.
Isopropyl Alcohol Method for Removing Hardened Gorilla Glue
Have you ever found yourself in a sticky situation, desperately seeking a solution to remove hardened Gorilla Glue? Fear no more. In this comprehensive guide, we will delve into the remarkable capabilities of isopropyl alcohol and unveil its secret weapon status as the ultimate glue remover for non-porous surfaces. So, put on your gloves and prepare to be amazed by the magic of isopropyl alcohol.
Isopropyl Alcohol: The Hero for Non-Porous Surfaces:
Isopropyl alcohol, also known as rubbing alcohol, possesses an extraordinary versatility that makes it a formidable opponent against hardened Gorilla Glue. However, remember that this technique works most effectively on non-porous surfaces such as glass or metal. Now, let’s break down the steps involved in utilizing isopropyl alcohol to conquer that stubborn adhesive:
Test, Test, Test:
Before embarking on your battle against the glue, it is crucial to exercise caution by testing the isopropyl alcohol on a small, inconspicuous area of the surface. This preliminary step ensures that the alcohol won’t inflict any damage or unsightly discoloration.
Apply and Allow:
Once you have confirmed the safety of your surface, apply a small amount of isopropyl alcohol directly onto the hardened Gorilla Glue. Grant it a few minutes to work its magic, as the alcohol softens and weakens the grip of the adhesive.
Gentle Scrape:
Prepare yourself for a gratifying experience. Employ either a plastic scraper or a soft cloth to delicately scrape off the softened glue. Exercise patience and gentleness to avoid causing harm to the underlying surface.
Repeat for Triumph:
For more obstinate or extensive areas of glue, it may necessitate multiple rounds of isopropyl alcohol treatment. Don’t be disheartened. Simply repeat steps 2 and 3 until you have successfully bid adieu to every last trace of Gorilla Glue.
Restore Brilliance:
Once the glue has been vanquished, it is time to restore your surface to its former glory. Cleanse the area with soap and water to eliminate any residue left behind by the alcohol, leaving you with a pristine, glue-free surface that will astound even the most discerning eye.
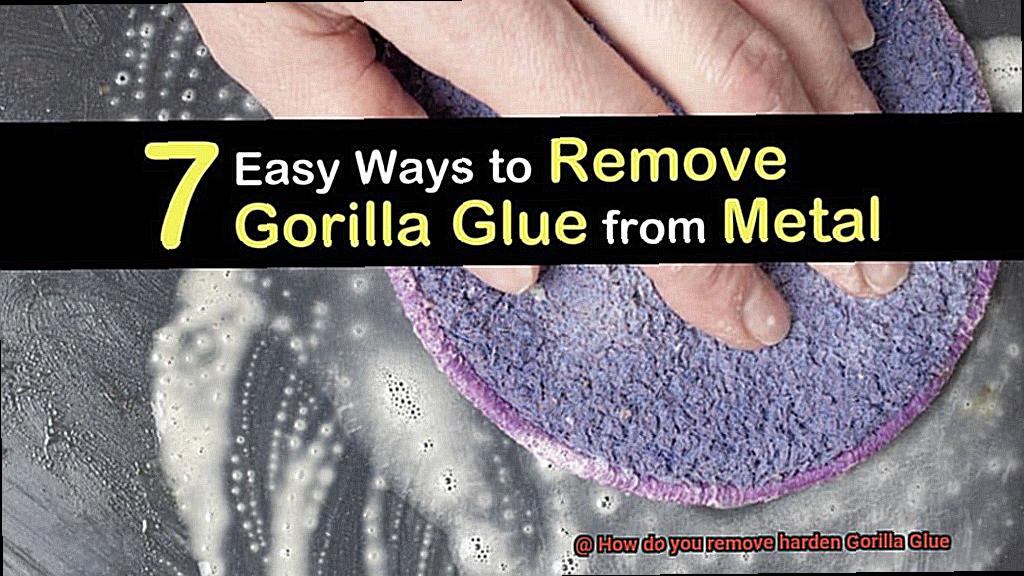
Soaking in Warm Soapy Water Method for Removing Hardened Gorilla Glue
This magical technique works wonders on non-porous surfaces like glass, metal, and certain plastics. So let’s dive in and restore your surface to its former brilliance.
To begin, gather your supplies. You’ll need a container or basin that can hold enough warm water to fully submerge your glued object. Remember, the water should be comfortably warm to the touch, not scalding hot. Safety first, my friends. Now add a few drops of mild dish soap or liquid detergent to the warm water and give it a gentle stir. We’re creating a soapy solution that will break down that stubborn Gorilla Glue.
Now comes the exciting part – time to soak. Submerge your glued object into the warm soapy water, ensuring complete coverage of the hardened glue. If your object is too big to fully submerge, no worries. Just apply the warm soapy water directly onto the glue using a sponge or cloth. The key here is to make sure that the glue gets a good soaking.
Patience is indeed a virtue. Let your object soak in the warm soapy water for at least 30 minutes. This allows the glue to soften, making it easier to remove. While you wait, take some time to catch up on your favorite DIY blog or plan your next project. Time flies when you’re immersed in creativity.
Once the soaking time is up, it’s time to get scrubbing. Gently scrub the softened glue with a sponge or soft cloth, applying slight pressure to loosen and remove it from the surface. If you still notice traces of Gorilla Glue lingering around, don’t panic. You can use a plastic scraper or blunt knife to carefully scrape away any remaining residue. Just be cautious not to scratch or damage the surface of your object. We want it to shine like new.
After all that scrubbing and scraping, it’s time for a rinse. Thoroughly rinse your object with clean water to remove any soap residue. We want it squeaky clean, my friends. If you still spot traces of hardened Gorilla Glue, don’t lose hope. Simply repeat the soaking and scrubbing process until the glue is completely gone. Remember, persistence pays off.
Mechanical Means for Removing Hardened Gorilla Glue
Prepare to embark on a captivating journey, my friends, as we delve into the realm of mechanical means for banishing the unyielding grip of hardened Gorilla Glue. Embrace the wonders of physical force and tools, and witness the transformation of your cherished items as they are liberated from the clutches of this tenacious adhesive.
Sandpaper: The Erosion Artist
Imagine wielding sandpaper, a weapon of gradual erosion, in your quest to remove hardened Gorilla Glue. Begin with a coarse-grit sandpaper, its abrasive nature chipping away at the glue’s stronghold. Then, like an artist refining their masterpiece, progress to finer grits, gently unveiling the beauty beneath.
Scraper or Putty Knife: The Art of Gentle Scraping
For delicate surfaces yearning for liberation, embrace the scraper or putty knife as your trusted allies. With precision and care, employ these tools to delicately scrape away the stubborn adhesive, ensuring not even a whisper of harm befalls the surface beneath. Remember, patience is your greatest virtue in this delicate dance.
Heat: The Enchanting Softening Spell
Prepare to witness the enchantment of heat as a mechanical means for removing Gorilla Glue. Unleash the power of a hairdryer or heat gun upon the hardened glue, as it succumbs to its softened state. But tread carefully, my friends, for excessive heat may unleash havoc upon your beloved objects or release toxic fumes into the air.
Razor Blade: The Non-Porous Savior
When faced with Gorilla Glue’s grip on non-porous surfaces like glass or metal, a trusty razor blade becomes your savior. With unwavering precision and a steady hand, glide the blade across the hardened glue, rejoicing as it effortlessly scrapes away the remnants. But beware, for even the most skilled warriors must exercise caution to avoid unintended mishaps.
Slow and Steady Triumphs
In this battle against hardened Gorilla Glue, remember that victory lies in patience and gentleness. Embrace the art of slowness, working methodically and gently to prevent any harm from befalling your treasured possessions. Let the mantra of flawless restoration guide your every move.
Tips and Tricks to Follow When Removing Hardened Gorilla Glue
Fear not. We have assembled a collection of expert tips and tricks to help you conquer this sticky situation. Known for its formidable bonding properties, Gorilla Glue can be a tough adversary. However, armed with our guidance, you’ll be equipped to tackle this task like a seasoned pro. In this comprehensive guide, we will explore various methods for removing hardened Gorilla Glue, including scraping, applying heat, using solvents like acetone and isopropyl alcohol, and even soaking. Let’s dive in and bid farewell to unwanted adhesive.
Unleash the Power of Precision Scaping:
When it comes to combating hardened Gorilla Glue, the first line of defense is precision scraping. Utilize a scraping tool or putty knife to delicately remove as much glue as possible. Exercise caution to avoid causing any damage to the underlying surface. This meticulous approach will help loosen the adhesive and prepare it for subsequent removal techniques.
Heat: The Secret Weapon for Softening Glue:
Harnessing the power of heat can work wonders in softening hardened Gorilla Glue. Grab your trusty hairdryer or heat gun and set it to a low heat setting. Position it a few inches away from the glued area and systematically move it around to evenly distribute the heat. As the glue begins to soften, employ your scraping tool or putty knife to gently liberate it from its grip. Remember, moderation is key here – excessive heat may lead to unintended surface damage.
Acetone: Your Formidable Foe Against Adhesive Bonds:
Acetone stands as a formidable solvent capable of breaking down the tenacious adhesive bonds of Gorilla Glue. Before proceeding with acetone, exercise caution by testing it on a small, inconspicuous area to ensure compatibility with your surface. Soak a cotton ball or cloth in acetone and place it directly on the hardened glue. Allow it to rest for a few minutes, allowing the acetone to penetrate the adhesive. With gentle pressure, begin rubbing the area using the soaked cloth or cotton ball. Gradually, you will witness the glue dissolving, facilitating its gradual removal.
Isopropyl Alcohol: Your Trusty Sidekick for Dissolving Glue:
In instances where acetone is unavailable, isopropyl alcohol can prove to be an exceptional alternative. Soak a cloth or sponge in isopropyl alcohol and apply it directly to the hardened Gorilla Glue. Allow the alcohol to work its magic for a few minutes, effectively dissolving the adhesive. Employ your scraping tool or fingernail to gently remove the softened glue. Repeat this process as necessary until all traces of Gorilla Glue are eradicated.
Conclusion
Removing hardened Gorilla Glue can be quite a challenge, but fear not, for I am here to guide you through the process. With the right tools and techniques, you’ll be able to bid farewell to that stubborn adhesive in no time.
One method you can try is using heat. Grab a hairdryer or a heat gun and apply gentle heat to the affected area. This will help soften the glue, making it easier to scrape off. Be cautious though, as excessive heat can damage certain surfaces, so always test on a small inconspicuous area first.
If heat doesn’t do the trick, it’s time to bring out the big guns – acetone. Acetone is a powerful solvent that can break down Gorilla Glue. However, it’s important to note that acetone can also damage certain materials like plastics or painted surfaces. So proceed with caution and always test in an inconspicuous area before applying it liberally.
To use acetone, dampen a cloth or sponge with the solvent and gently dab it onto the hardened glue. Let it sit for a few minutes to allow the acetone to penetrate and dissolve the adhesive. Then, using a plastic scraper or your fingernail (protected with gloves), carefully scrape away the softened glue.
For those who prefer natural alternatives, you can try using vinegar or lemon juice. These acidic substances can help break down Gorilla Glue over time. Simply soak a cloth or sponge in vinegar or lemon juice and place it over the hardened glue. Leave it overnight and then gently scrape away the softened adhesive in the morning.
Remember, patience is key when dealing with hardened Gorilla Glue. It may take multiple attempts and some elbow grease to completely remove it. But with perseverance and these tried-and-true methods at your disposal, you’ll soon have your surfaces looking clean and glue-free once again.
So don’t let stubborn adhesive get the best of you.