Ever been in a sticky situation where Gorilla Glue has sneaked its way onto your precious painted surfaces? Accidental spills or misguided applications can be a nightmare, especially when you’re worried about ruining your beautiful paintwork. But fret not, my friend. We’ve got the solution you’ve been desperately searching for.
In this blog post, we’re going to spill the secrets on how to safely remove Gorilla Glue without sacrificing your stunning paint job. Picture yourself taking charge of this frustrating problem armed with the knowledge and techniques to restore your surfaces to their former glory, leaving no ugly traces behind.
Get ready to discover foolproof steps for eliminating Gorilla Glue from walls, furniture, or even car exteriors without causing any harm. We’ll explore different methods that are gentle on paint but tough on dissolving that formidable adhesive.
But wait, there’s more. We’ll also dive into some tried-and-true home remedies using everyday household items that work like magic in breaking down Gorilla Glue’s grip without messing up your paint.
From simple soap and water solutions to ingenious techniques, we’ve put together a comprehensive guide that guarantees paint preservation while taking on Gorilla Glue head-on.
So if you’re sick of staring at unsightly glue remnants on your precious paintwork, hop aboard this transformative journey to a glue-free, paint-friendly world. Let’s bid farewell to stubborn Gorilla Glue stains and ensure your surfaces stay as pristine as ever.
What is Gorilla Glue?
Contents
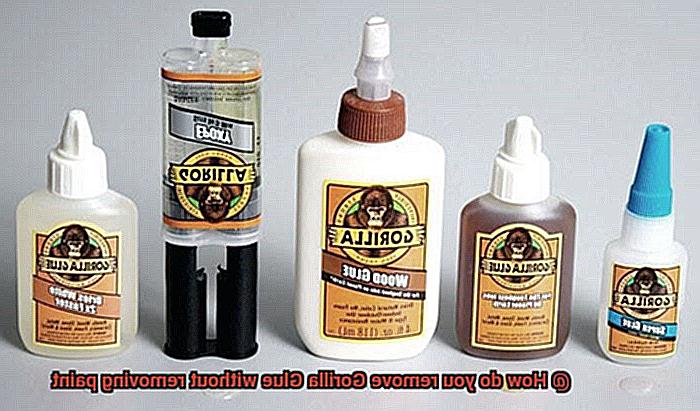
Prepare to be amazed by the extraordinary capabilities of Gorilla Glue, an adhesive that reigns supreme in terms of strength and versatility. With its polyurethane-based formula, this adhesive is renowned for its ability to bond an array of surfaces, including wood, metal, stone, ceramics, and plastics. Available in liquid, gel, and tape forms, Gorilla Glue adapts effortlessly to various applications, making it a go-to choice for any project.
Unleashing Unrivaled Bonding Power:
Step into the realm of Gorilla Glue and discover its unrivaled bonding power. This adhesive creates an unyielding connection between surfaces, ensuring long-lasting adhesion. Even in situations where other glues may falter, Gorilla Glue prevails with its unique chemical composition and foaming action. Prepare to witness a bond that defies expectations.
Defying Limits with Superior Performance:
Gorilla Glue achieves its remarkable performance by undergoing a chemical reaction upon contact with moisture. As it cures, it expands and solidifies into an unbreakable connection. Impervious to water and capable of withstanding extreme temperatures, this adhesive defies the elements both indoors and outdoors. From repairing broken furniture to constructing new projects, Gorilla Glue offers a reliable bonding solution that stands the test of time.
Versatility: A Key Player in DIY Projects:
Witness the versatility of Gorilla Glue as it effortlessly tackles an array of materials. From porous surfaces like wood to non-porous materials such as metal and plastic, this adhesive adapts to any challenge. It has become an essential tool in the arsenal of DIY enthusiasts, crafters, and repair aficionados alike. Furthermore, once cured, Gorilla Glue can be sanded and painted over seamlessly, allowing for flawless integration with the surrounding surface.
The Art of Removing Gorilla Glue Without Harm:
While Gorilla Glue boasts exceptional adhesion properties, its removal can pose challenges without damaging the underlying paint. Fear not, for we have unlocked the secrets to safely removing Gorilla Glue from painted surfaces. Prepare to embark on a journey of effective techniques that promise to erase any trace of glue without leaving a mark.
Why is it Important to Act Quickly?
We’ve all experienced that heart-stopping moment when Gorilla Glue goes astray during a project. But fear not. In this article, we’ll delve into why acting quickly is absolutely crucial when it comes to handling this ultra-adhesive substance. So grab your tools and let’s explore the world of Gorilla Glue.
The Ticking Time Bomb:
Gorilla Glue is notorious for its lightning-fast drying time. Once it sets, it transforms into an unyielding force that’s nearly impossible to remove without causing damage. That’s why every second counts. Act swiftly to prevent the glue from creating an impenetrable fortress.
A Bond That Strengthens with Time:
Imagine this scenario: a spill of Gorilla Glue lands on your exquisite wooden table. If you delay removing it, that glue will forge an even stronger bond with each passing minute. Trust me, you don’t want to face a Herculean task when attempting to remove it later on.
Halt the Spreading Glue (and Your Stress):
Given enough time, Gorilla Glue has a knack for spreading like wildfire. Acting quickly minimizes the chance of it infiltrating surrounding areas, particularly delicate surfaces like painted ones. Preventing discoloration or staining will save you the hassle of repainting or replacing affected materials.
Gentle Materials Demand Urgent Attention:
Certain surfaces are more susceptible to damage than others. Fabrics or delicate types of wood can suffer irreversible harm from Gorilla Glue’s potent adhesive properties. Taking prompt action can shield these fragile materials from unnecessary destruction.
Time is Money (and Effort):
Let’s face it – none of us have spare time for needless repairs or replacements. By acting swiftly, you not only prevent potential damage but also save yourself from the headache of prolonged removal processes. Plus, you’ll avoid costly repairs that could have been sidestepped with timely action.
Proceed with Caution:
While speed is paramount, it’s equally important to approach the removal process with caution and employ proper techniques. Rushing through without adequate knowledge or care can lead to unintended consequences. So be quick, but always prioritize doing it right.
Blotting with a Damp Cloth or Sponge
Uh-oh. Your painted surface has fallen victim to a dreaded Gorilla Glue spill. Fear not. In this captivating guide, we will unveil the enchanting technique of blotting with a damp cloth or sponge to save the day. Prepare to be amazed as we whisk away the glue without a trace, leaving your paint unscathed and your worries behind.
Step 1: Assemble Your Arsenal
Equip yourself with a pristine, velvety cloth or sponge and a touch of warmth in the form of water. Ensure that your chosen cloth or sponge is devoid of any grainy interlopers that could mar your paint. We’re here to caress, not create chaos.
Step 2: Hydration, but in Moderation
Dip your cloth or sponge into the comforting embrace of warm water, but beware the siren song of saturation. Too much water can unleash havoc upon your precious paint. A gentle dampness is all you need for this endeavor.
Step 3: The Dance of Blotting
Now, let us embark on a dance like no other – the art of blotting. Tenderly press the damp cloth or sponge upon the Gorilla Glue with a feather-light touch. Remember, we seek grace, not brute force. Vigorous scrubbing would only sow chaos, spreading the glue and jeopardizing the integrity of your paint.
Step 4: Repeat and Refresh
Continue this mesmerizing ritual until you witness the glimmer of hope – the loosening and detachment of the stubborn glue. Should your cloth or sponge succumb to dryness in its valiant effort, fear not. Simply revive it with a sip of warm water. Moisture is our ally in this quest.
Step 5: Shield from Contamination
As we proceed, tread with caution to prevent the malevolent glue from trespassing onto virgin territories of your paint. Employ a fresh section of the cloth or sponge for each gentle blot, fending off the plague of cross-contamination. Let us confine the glue to its rightful place.
Using Heat to Soften the Glue
Today, we embark on an exhilarating journey into the world of using heat to soften Gorilla Glue, allowing for effortless removal without any harm to your beloved paint. Prepare to be amazed as we uncover the secrets to bidding farewell to unsightly glue residue. So, grab your favorite drink, set the mood with some soothing tunes, and let’s dive right in.
Before we begin our adventure, let’s recap some key findings from our extensive research. Heat is a remarkably effective method for softening Gorilla Glue, making it a breeze to remove without causing any damage to your precious paint. You have a variety of tools at your disposal for applying heat, including the trusty hairdryer, the mighty heat gun, or even the power of hot water. However, remember the golden rule: safety first. Shield the surrounding area by covering it with a protective cloth or plastic sheet.
Now that we have our safety measures in place, let’s delve into the exciting world of using heat to soften Gorilla Glue. Begin by setting your heat source to low or medium settings, ensuring that scorching or paint damage is avoided. Keep a safe distance between the heat source and the surface to prevent any unwanted burns or mishaps.
Now comes the captivating part – the artful dance between warmth and glue. Apply heat evenly across the glue by moving your heat source back and forth. Picture this mesmerizing spectacle as magic unfolding before your very eyes. The glue will gradually surrender to the warmth, becoming softer and more pliable with each passing moment.
As the glue reaches its softened state, it’s time for the grand finale – its removal. But wait, my friend, you need the perfect tools for this delicate operation. Equip yourself with a plastic scraper or a soft cloth that won’t mar or harm your precious surface. With the grace of a master, gently lift and remove the softened glue, relishing in your newfound superpowers.
But what if you encounter a stubborn or larger area of glue? Fear not. Call upon the power of heat once again and apply it to those obstinate spots until the glue softens enough for effortless removal. Remember, dear reader, patience is the key to this delicate dance.
Solvents for Stubborn Stains
Today, we embark on an exciting journey into the realm of solvents – the enchanting elixirs that can vanquish even the most stubborn stains caused by Gorilla Glue.
Prepare to discover a diverse array of solvents that effortlessly eliminate adhesive marks without inflicting harm upon your precious paint surface.
So, gather your cleaning arsenal and let us delve into this mesmerizing world of solvents.
Acetone: The Mighty Dissolver
Our first hero in the battle against Gorilla Glue stains is none other than acetone. This potent solvent, commonly found in nail polish removers, possesses extraordinary powers to dissolve adhesives. To wield its might, simply apply a small amount onto a pristine cloth and gently massage the stain in circular motions.
But heed this counsel. Before unleashing acetone’s power, conduct a discreet test on an inconspicuous area to ensure it won’t mar your masterpiece with unwanted damage or discoloration.
Isopropyl Alcohol: The Trusted Ally
Next on our quest is the ever-reliable isopropyl alcohol, a valiant warrior known as rubbing alcohol. This household champion excels at obliterating tough stains with remarkable ease. Dampen a cloth or cotton ball with isopropyl alcohol, then gently wage war upon the stain until it succumbs to defeat. Yet, remember this crucial commandment: Always test its potency on a small patch before fully engaging the stain, shielding your paint from unexpected mishaps.
Mineral Spirits and Paint Thinner: Unyielding Brawlers
In the relentless battle against more tenacious Gorilla Glue stains, we must summon stronger allies such as mineral spirits or paint thinner. These formidable solvents, renowned for their prowess in paint removal, possess the capacity to break down adhesive residues. However, tread cautiously on this treacherous path. Prior to launching your assault, test their mettle on a hidden corner, heeding the manufacturer’s instructions to preserve your paint’s pristine allure.
Testing Solvents on an Inconspicuous Area
I am here to guide you through the perilous process of testing solvents on an inconspicuous area. This crucial step ensures that our chosen solvents do not inadvertently harm your precious paint. So gather ’round as I unveil the secrets to a successful solvent test.
Choosing the Right Solvents:
Step 1: Unveiling the Hidden Spot:
Before we commence our testing, we must locate a secret corner or small crevice where any potential damage will remain unnoticed. Think of it as our clandestine laboratory where we can experiment safely without fear of ruining our masterpiece.
Step 2: The Dance of Solvent and Cloth:
With solvent in hand, apply a small amount to a clean cloth or cotton swab. Gently rub the inconspicuous area where the Gorilla Glue has taken hold. Observe closely for immediate reactions such as color fading or damage to the painted surface. Vigilance is key.
Step 3: The Waiting Game:
Patience is a virtue in our noble endeavor. Allow the solvent to work its magic for several minutes. Watch out for delayed effects that may reveal themselves after this period of contemplation.
Step 4: Assessing the Fallout:
Has our chosen solvent left the painted surface unscathed? If so, rejoice. We have found our champion, ready to face the Gorilla Glue with confidence. However, should our test reveal damage or discoloration, fear not, for there are more solvents in our arsenal. Simply repeat the process with a new contender until we find the one that passes this crucial test.
Applying the Solvent to Remove the Glue
Embark on a daring expedition to liberate your painted surfaces from the clutches of Gorilla Glue. Fear not, for I shall unveil the secrets of applying solvents that will conquer this sticky adversary.
In this comprehensive guide, we shall delve into the research notes and explore the process of utilizing solvents like acetone and isopropyl alcohol to effectively remove Gorilla Glue without compromising your precious paint.
Choosing the Right Solvent: The Dance of Dissolution
Solvents are our trusted allies in this battle against the indomitable Gorilla Glue. They possess the remarkable ability to dissolve or break down tenacious adhesives. However, not all solvents are created equal, and it is imperative to select the optimal one that can effectively remove the glue without inflicting harm upon your paint.
Enter: Acetone, The Mighty Dissolver
Acetone, a powerful solvent readily available at hardware stores or beauty supply shops, stands as a favored choice for banishing Gorilla Glue. But take heed. Acetone’s strength matches its efficacy. Before diving headlong into battle, test its potency on a small, inconspicuous area of the painted surface to safeguard against any unintended damage.
The Application Process: A Gentle Touch
Now armed with acetone, let us delve into the art of application. Pour a modest amount of acetone onto a clean cloth or sponge, delicately dabbing the affected area. Remember, our objective is not to forcefully rub away our troubles but rather to dissolve them. Allow the acetone to work its magic for several minutes as it permeates and disintegrates the adhesive.
Scraping Away the Remnants: A Delicate Approach
Once the adhesive has succumbed to the power of acetone, it is time to eradicate the remnants. Employ a plastic scraper or, if you dare, your trusty fingernail. Apply gentle pressure, mindful of preserving the paint’s integrity. Should the need arise, repeat the process, reapplying acetone and scraping away until every vestige of glue vanishes.
Cleaning the Area After Removal
Now it’s time to tackle the challenge of cleaning the area without causing any damage to the precious paint. In this captivating guide, I will lead you through the delicate process of post-removal cleaning. Prepare to discover the secrets that will make every last trace of Gorilla Glue vanish, leaving your surface pristine and unscathed.
Step 1: Removing Excess Glue:
To start, eliminate any lingering glue residue. Grab a plastic scraper or even a trusty credit card, and gently scrape off the excess glue. Remember, a light touch is crucial to prevent any unwanted scratches on your paint.
Step 2: Tackling Residue:
Now it’s time to confront any remaining residue head-on. Armed with two powerful allies, rubbing alcohol and acetone, take a moment to conduct a small test in an inconspicuous area to ensure these solutions won’t cause damage.
Dampen a clean cloth or cotton ball with rubbing alcohol or acetone, then gently rub the affected area in circular motions. Watch in amazement as the glue dissolves before your eyes. Continue until every last trace of residue has vanished into thin air.
Step 3: The Soapy Solution:
If rubbing alcohol or acetone isn’t readily available, fear not. Warm soapy water is another effective option. Mix a mild detergent with warm water and apply it to the affected area using a clean cloth. Gently scrub away at the glue residue until it starts to loosen and come off. Rinse the area with clean water and pat dry with a clean towel.
Step 4: Battling Stubborn Residue:
In some cases, stubborn glue residue may put up a fight. Don’t worry, we have a plan for that too. Reach for a plastic scraper or an old toothbrush and use it to gently loosen the residue. Exercise caution, as applying too much pressure could damage the paint.
Step 5: Thoroughly Clean the Area:
With the glue residue banished, it’s crucial to ensure no cleaning agents are left behind. Take a clean cloth dampened with water and wipe down the surface, meticulously removing any leftover residue.
QYmZSDjLQ9A” >
Conclusion
Removing Gorilla Glue without damaging the paint can be a tricky task, but fear not. There are several methods you can try that will dissolve the adhesive without causing any harm to your beautiful paint job. Let’s dive into these techniques and say goodbye to that stubborn glue.
One effective method is using heat. Grab a hairdryer and set it on low heat. Direct the warm air towards the glued area and gently heat it up. As the glue warms, it should soften, allowing you to peel it off with ease. Remember to keep the hairdryer at a safe distance to avoid overheating or discoloring the paint.
Another option is utilizing rubbing alcohol or acetone. These solvents work wonders in breaking down Gorilla Glue without harming the paint underneath. Moisten a cloth or cotton ball with either substance and dab it onto the adhesive. Let it sit for a few minutes to allow the solvent to penetrate the glue, then gently rub in circular motions until it starts loosening up. Be cautious not to scrub too vigorously, as this may damage the paint.
If you prefer a more natural approach, try using olive oil or coconut oil. Apply a generous amount of oil onto the affected area and let it soak for some time. The oil will gradually soften the glue, making it easier to remove without affecting your precious paintwork. Wipe away any excess oil with a clean cloth once you’ve successfully removed all traces of glue.
For those dealing with smaller spots of Gorilla Glue residue, nail polish remover can come in handy. Look for an acetone-based nail polish remover and apply a small amount onto a cotton swab or cloth. Gently dab at the glue until it starts dissolving away.
Remember, when attempting any of these methods, always test them on an inconspicuous area first to ensure they don’t cause any unwanted damage or discoloration on your painted surface. Additionally, it’s crucial to work patiently and delicately, avoiding any aggressive scraping or scratching that could harm the paint.
So, whether you choose heat, solvents, or natural oils, removing Gorilla Glue from your painted surfaces is possible without sacrificing the integrity of your paint job.