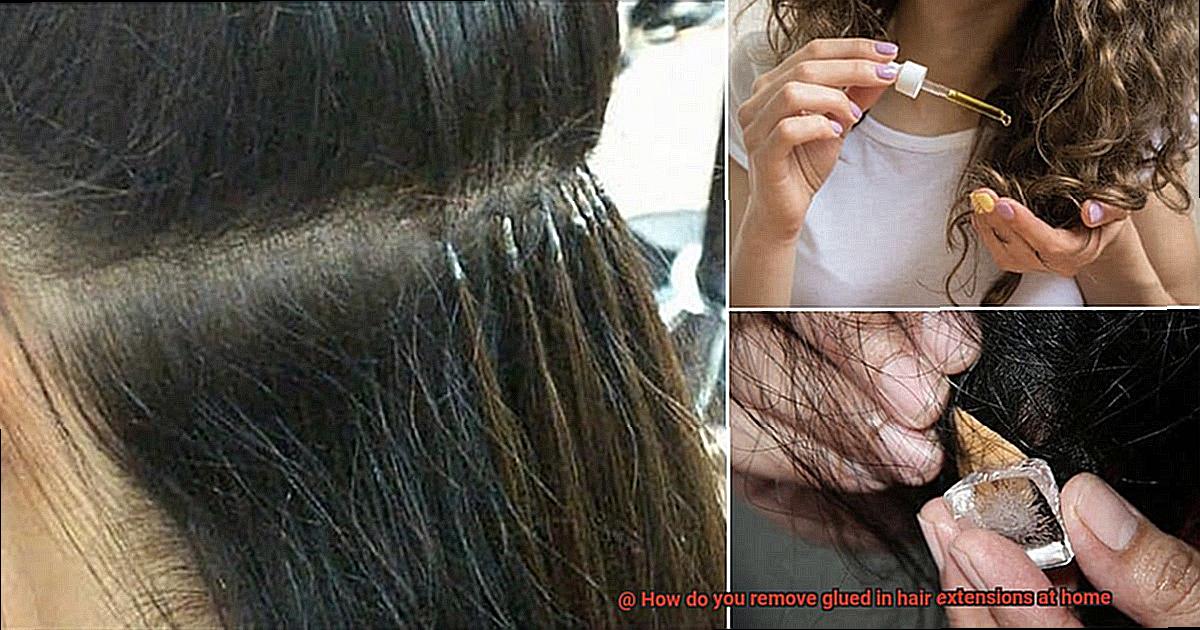
Long, thick, luscious hair has always been the epitome of beauty. While some are blessed with Rapunzel-like growth, others turn to hair extensions for that magical transformation. Glued-in hair extensions have become a popular choice due to their natural look and easy application. But what happens when it’s time to bid them farewell and reclaim your original locks?
Welcome to a journey through the enchanting world of removing glued-in hair extensions at home. Yes, you read that right. No more worrying about expensive salon visits or damaging your precious strands.
Are you ready to unleash your inner hair stylist? Grab your brushes and get ready to learn the secrets of successfully removing glued-in hair extensions in the comfort of your own home.
Main Points:
- Understanding the Glue: Let’s explore the different types of adhesives used for hair extensions, shedding light on their pros and cons.
- Prepping for Removal: Preparation is key. Discover the essential tools and products needed for a smooth removal process without causing any damage.
- The Removal Process: Follow our step-by-step guide to safely remove your glued-in extensions, taking into account your unique hair characteristics.
- Nurturing Your Natural Hair: After freeing yourself from the extensions, we’ll guide you in restoring and nourishing your hair to ensure its health and vitality.
- Preventative Measures: Learn how to avoid mishaps while wearing glued-in hair extensions in the future, keeping your mane in optimal condition.
Say goodbye to fretting over removing glued-in hair extensions. With our comprehensive guide, you’ll have the knowledge and confidence to bid adieu to your beloved extensions all by yourself. Remember, proper removal and aftercare are crucial for maintaining the health of your natural hair.
So whether you’re ready to embrace your natural look or try out a new style, get ready to embark on a journey filled with tips, tricks, and know-how. Let’s reclaim our freedom and let our hair flow freely once again. Are you ready to unleash your inner hair wizard? Stay tuned as we dive into the world of at-home hair extension removal.
Gather the Necessary Tools
Contents
When it’s time to bid farewell to your fabulous glued-in hair extensions, it’s crucial to gather all the necessary tools beforehand. This strategic preparation will ensure a smooth and successful removal process without any damage to your natural hair. Let’s delve into the essential tools you’ll need for this task.
- Wide-Toothed Comb: Begin by gently detangling your hair with a wide-toothed comb. This step is crucial in preventing any unnecessary pulling or tugging that could lead to breakage or damage.
- Hair Sectioning Clips: Make the removal process more manageable by dividing your hair into smaller, workable sections using hair sectioning clips. This technique keeps the rest of your hair out of the way, allowing you to focus on one section at a time.
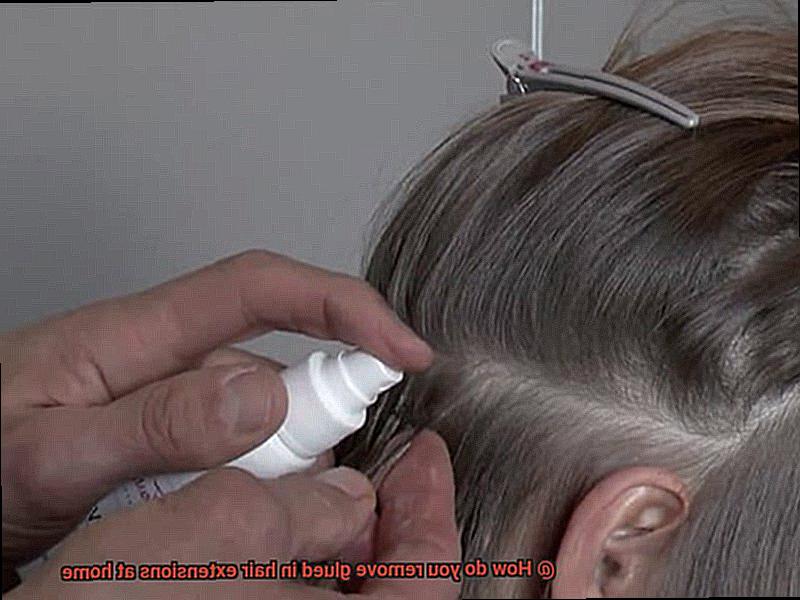
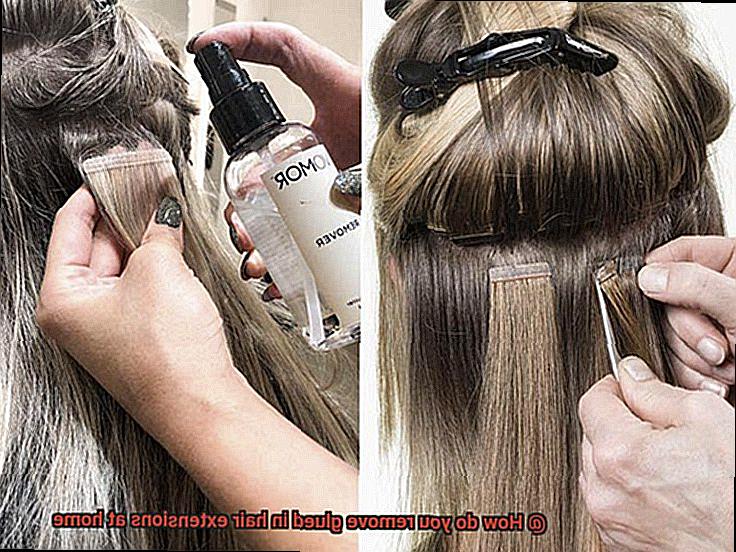
- Hair Extension Glue Remover: Invest in a top-notch hair extension glue remover that guarantees the safety of both your natural hair and the extensions themselves. This specialized product effectively dissolves the glue used to attach the extensions, making removal a breeze.
- Cotton Balls or Swabs: Apply the glue remover onto the glued areas precisely using cotton balls or swabs. These tools allow for accurate application while minimizing the risk of getting the remover on other parts of your hair.
- Disposable Gloves: Shield your hands throughout the removal process by wearing disposable gloves. This precautionary measure prevents potential irritation caused by the glue remover or other products used.
- Towel or Protective Cape: Safeguard your clothing from accidental spills or drips by draping a towel over your shoulders or wearing a protective cape. This simple step ensures that you won’t have to worry about staining your favorite outfit.
- Mirror: Keep a mirror handy during the removal process for optimal visibility and precision. This tool allows you to see exactly what you’re doing, ensuring accuracy and efficiency.
Now that you have gathered all these necessary tools, you are well-prepared to safely remove your glued-in hair extensions at home. Remember, patience and taking your time are key to avoiding any discomfort or damage. If you feel uncertain or uncomfortable performing the removal yourself, it’s always best to seek professional assistance from a hairstylist or extension specialist.
Detangle the Hair Extensions
Indulging in the luxury of hair extensions can elevate your look to new heights. However, the tangled mess that often accompanies them can be a frustrating challenge. Fear not. With our expert techniques and tools, you can effortlessly detangle your glued-in hair extensions at home, while keeping them in pristine condition. In this comprehensive guide, we will take you through the step-by-step process to unlock smooth, tangle-free hair that will leave you feeling like a goddess.
Step 1: Begin with Tender Brushing
Embark on your detangling journey by treating your hair extensions with utmost care. Start by gently brushing them using a wide-toothed comb or a brush adorned with soft bristles. Begin at the ends of your extensions and gradually work your way up towards the roots. Employ short, deliberate strokes to avoid any unnecessary tugging on the extensions. This initial step will bid farewell to initial knots and tangles.
Step 2: Embrace the Magic of Detangling Spray
For those stubborn tangles that seem insurmountable, allow a detangling spray to come to your rescue. Seek out a product specifically formulated for hair extensions, as it possesses unique properties that soften tangles and make them more manageable. Generously apply the detangling spray to the tangled areas, giving it a few minutes to work its magic before proceeding.
Step 3: Unleash the Power of the Detangling Brush
Introducing your ultimate ally in detangling warfare – the detangling brush. Engineered with flexible bristles that caress your hair as they glide through it, this brush will be your secret weapon. Begin brushing from the ends of your extensions and gradually move towards the roots. Employing short strokes, let the brush work its wonders while you bask in its gentle touch.
Step 4: Divide and Conquer with Precision
To successfully conquer the task of detangling your glued-in hair extensions, it is crucial to work in small, manageable sections. This strategic approach prevents further tangling and allows you to focus on each individual strand. Employ hair sectioning clips or ties to divide your hair into precise sections. By tackling one section at a time, you will transform the detangling process into a manageable and efficient endeavor.
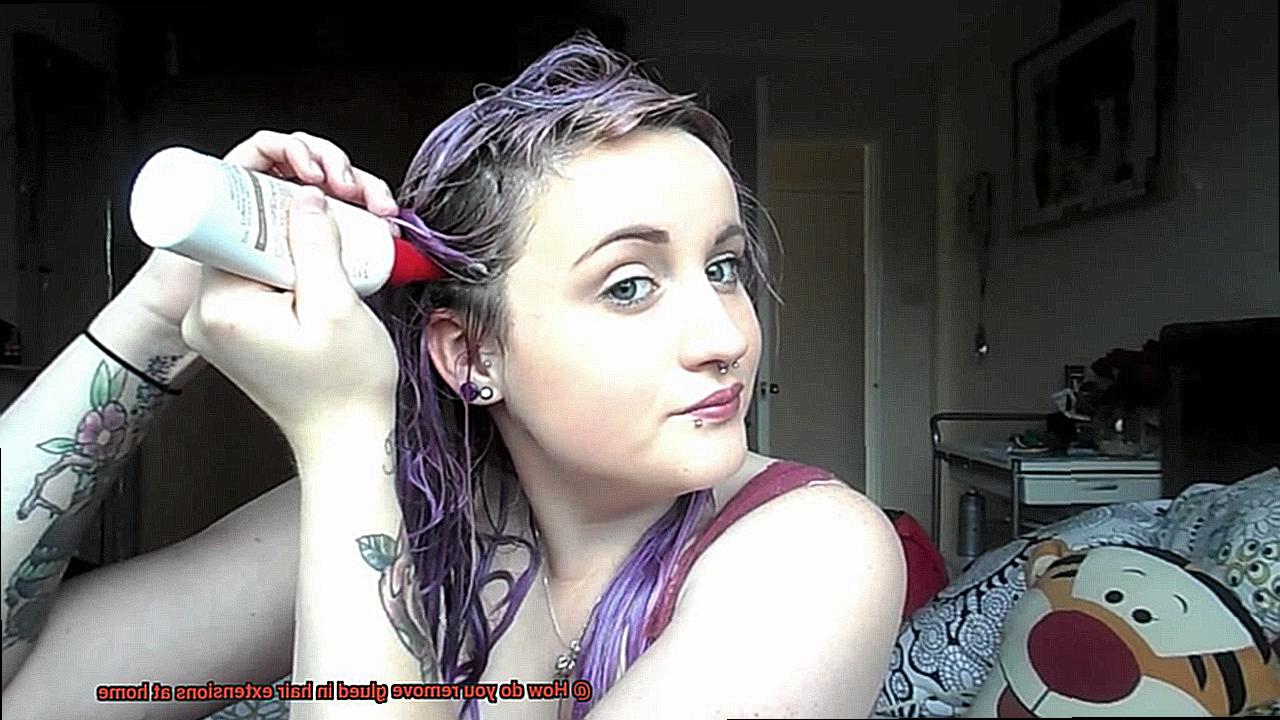
Apply Heat Protectant Spray
So, you’ve taken the bold step of removing your glued-in hair extensions at home. Bravo. But before you dive into styling with hot tools, let’s talk about a crucial step: applying heat protectant spray.
Now, you might be wondering if this extra step is really necessary. Well, my dear, let me assure you that it is absolutely essential. Heat protectant spray is like a magical shield for your hair, safeguarding it from the damaging effects of high temperatures. And when it comes to removing glued-in hair extensions, this superhero product becomes even more vital.
Why is heat protectant spray so important, you ask? Picture those styling tools reaching scorching temperatures that can wreak havoc on both your natural hair and extensions. The adhesive used to attach the extensions becomes weak, leading to premature loosening or worse, complete detachment. And let’s not forget about the dreaded dryness, split ends, and breakage. It’s a nightmare.
But fear not, my friend, because heat protectant spray is here to save the day. This fabulous product creates a protective barrier around each strand of hair, minimizing heat damage and ensuring the longevity of your natural locks and those glorious extensions.
Now that we understand why heat protectant spray is a must-have, let’s delve into how to apply it correctly. Here’s a step-by-step guide to help you out:
- Step 1: Start with clean, dry hair. Before applying the heat protectant spray, make sure your locks are squeaky clean and completely dry. This sets the stage for optimal adhesion and effectiveness.
- Step 2: Section your hair. Divide your mane into manageable sections using clips or hair ties. This strategic move makes it a breeze to apply the heat protectant spray evenly throughout your tresses.
- Step 3: Shake that bottle. Give the heat protectant spray bottle a vigorous shake to ensure all the goodness is thoroughly mixed and ready to work its magic.
- Step 4: Spray away. Holding the bottle about 6-8 inches away from your hair, mist the heat protectant spray evenly over each section. Don’t hold back. Cover every single strand from root to tip, because they all deserve that superhero protection.
Use a Hairdryer to Soften the Glue
Removing glued-in extensions may seem like a daunting task, but fear not. We have a secret weapon up our sleeves – the mighty hairdryer. In this comprehensive guide, we will unravel the art of using a hairdryer to soften the glue, ensuring a smooth and damage-free removal process. Get ready to embrace your natural locks with confidence.
Prepare for Success:
Before we embark on this transformative journey, let’s lay the groundwork for success. Adjust your hairdryer to a low heat setting – remember, high heat is off-limits. This precaution will safeguard both your extensions and your precious natural hair during the removal process.
Directing the Heat:
Now it’s time to unleash the power of your hairdryer. Direct the airflow onto the area where the extensions are attached. Hold the hairdryer approximately 6 inches away from your head, moving it back and forth gently over the glued section. Feel the heat gradually work its magic, softening the adhesive bond.
Patience is Key:
In this fast-paced world, patience is often underrated. But trust us, it’s essential in this process. Allow each section to bask in the warmth for approximately 30 seconds before attempting to remove the extensions. This generous timeframe ensures that the heat seeps into every crevice, making that glue more pliable.
The Tug Test:
Prepare yourself for the moment of truth – the tug test. Once you sense the glue’s softening, apply gentle pressure to see if the extension loosens. If it resists your efforts, don’t be disheartened. Apply additional heat with the hairdryer for another 10-15 seconds before trying again. Remember, Rome wasn’t built in a day.
Start from the End:
To avoid any hair-raising mishaps, start removing the extensions from one end, gradually working your way towards the other. This method minimizes the risk of tangling or causing unnecessary strain on your natural hair.
Insert a Tail Comb and Slide Through
Today, we embark on a journey to unlock the secrets of removing glued-in hair extensions with finesse and precision. Armed with your trusty tail comb, you will delve into the art of sliding through hair, liberating those extensions without causing any harm. Get ready to embrace your natural beauty and bid farewell to those extensions gracefully. Let’s unveil the magical technique that will leave you in awe.
Preparation: Dry and Tangle-Free Hair
Before we immerse ourselves in this extraordinary quest, it is paramount to prepare our locks for the ultimate liberation. Ensure that your hair is dry and devoid of any troublesome tangles that could hinder our magical journey. We wouldn’t want any unexpected battles with stubborn knots along the way.
Sectioning Off and Taking Command
To commence our adventure, let us divide and conquer. Divide your hair into manageable sections, allowing us to maintain control and ensure a seamless removal process. By focusing on small sections at a time, we can devote our attention to each extension individually and grant it the freedom it deserves.
Insertion of the Tail Comb: The Grand Entrance
Now, let us witness the grand entrance of our esteemed tail comb. With grace and precision, insert the comb at the base of the extension, right where it merges with your natural hair. Our aim is to delicately separate the two entities without inflicting any discomfort or pain.
The Slide: A Dance of Elegance
As you begin your mesmerizing slide, remember that this is a dance of elegance between your tail comb and the adhesive bond. Apply gentle pressure, avoiding abrupt movements or forceful tugs. Our mission is to loosen the bond without causing any harm or distress to your precious strands.
Overcoming Resistance: The Elixir of Magic
Occasionally, even magic encounters resistance. Fear not, for we possess the elixir of magic to aid us. Should you encounter stubborn adhesive, a small amount of extension remover or oil-based product shall come to your rescue. But be cautious, as a surplus of product may transform your hair into a slippery slope.
Repeat Steps for Each Glued Section
Fear not, for we have the secret to safely and effectively removing these extensions at home. In this enchanting guide, we will take you through the step-by-step process of repeating the magic for each glued section. So, gather your tools and prepare to embark on a mesmerizing journey of transformation.
Step 1: Prepare Your Wand, I Mean, Tools
Before we begin our magical quest, make sure you have all the necessary tools at your disposal. Arm yourself with a fine-tooth comb, a tail comb, a pair of pliers (just in case), adhesive remover or an oil-based solvent, and a trusty mirror. With these tools in hand, you’ll be ready to cast spells of freedom on your extensions.
Step 2: Section, Conquer, and Set Yourself Free
Divide and conquer the tangled web of extensions. Securely clip or tie sections of your hair to ensure a smooth and manageable process. By focusing on one glued section at a time, you’ll avoid any entanglements and create a harmonious flow in your journey towards liberation.
Step 3: Untangle the Threads That Bind You
Like a skilled magician, gently wield your fine-tooth comb to untangle any knots or tangles surrounding the glued section. This act of grace will prevent any unnecessary pulling or breakage, ensuring that your natural hair remains unharmed throughout the removal process.
Step 4: Unleash the Magic Potion
Prepare to break the spell. Apply a few drops of adhesive remover or an oil-based solvent directly onto the bonded area of the extension. Allow this enchanted elixir to saturate the glue thoroughly, weakening its grip on your precious locks.
Step 5: Let the Magic Brew
Patience is the key ingredient in our bewitching potion. Give the adhesive remover a few moments to work its magic. As time passes, the solvent will dissolve the glue and free your natural hair from its mystical entanglement. Embrace this moment of anticipation and let the magic unfold.
Cleanse and Condition Natural Hair
Get ready to embark on a mesmerizing journey as we reveal the secrets to cleanse and condition your natural hair, unlocking its true potential. Say farewell to dryness and breakage, and embrace the magic of nourished and hydrated strands. Are you ready to dive into this captivating adventure? Let’s begin.
Topic 1: Choosing the Right Products
- Ordinary shampoos and conditioners can harm natural hair, stripping it of its natural oils.
- Opt for sulfate-free shampoos and moisturizing conditioners specially designed for natural hair.
- Look for products formulated with luscious natural oils like shea butter, coconut oil, or argan oil for ultimate nourishment.
Topic 2: The Cleansing Ritual
- Start by immersing your hair in warm water, opening up the cuticles and inviting the shampoo to work its magic.
- Gently massage a small amount of sulfate-free shampoo into your scalp using your fingertips, focusing on where dirt, oil, and product buildup accumulate.
- Avoid harsh rubbing along the lengths of your hair to prevent tangling and breakage.
Topic 3: The Conditioning Magic
- Awaken your hair’s senses with a moisturizing conditioner enriched with nature’s finest oils.
- Generously apply the conditioner to the lengths of your hair, paying extra attention to the drier ends.
- Unleash the power of detangling by using a wide-toothed comb or your fingers while the conditioner works its wonders.
- Allow the conditioner to deeply penetrate your strands by leaving it in for a few blissful minutes.
Topic 4: The Finishing Touch
- Seal in the enchantment by rinsing out the conditioner with cool water, leaving your hair smooth and radiant.
- Complete the spell by applying a lightweight leave-in conditioner or moisturizer for all-day hydration.
- With a touch of your fingertips or the gentle caress of a wide-toothed comb, work the product through the ends of your hair to ensure every strand is bathed in moisture.
Seek Professional Help if Needed
In our previous chapter, we uncovered the secrets of nurturing and hydrating your strands for ultimate radiance. Today, let’s embark on a crucial quest: the removal of glued-in extensions. But hold your scissors and halt those tugs – we must first understand why professional assistance is an absolute necessity in this magical endeavor.
A Delicate Dance, A Dazzling Transformation:
Removing glued-in hair extensions demands a gentle touch to safeguard your natural hair’s magnificence. Professionals have honed their expertise in this intricate dance, ensuring that your crown remains unscathed throughout the removal process.
The Profound Power of Knowledge and Experience:
Professional hair stylists possess an abundance of wisdom and experience in handling diverse extension types. They have mastered the art of removing glued-in extensions, effortlessly preserving the glory of your mane. Entrusting them is a guarantee for a safe and seamless removal experience.
Equipped with the Right Enchantments:
Picture this – attempting to pry off glued-in extensions with ordinary scissors. It’s a frightful sight. Professionals wield specialized tools crafted exclusively for extension removal, treating your natural hair with tenderness and diminishing the risk of breakage or scalp damage.
Shield Yourself from Hair Disasters:
Venturing into the treacherous territory of DIY removal without proper guidance can lead to cataclysmic consequences. Imagine the horror of hair breakage, scalp damage, or even worse, hair loss. Seeking professional help is your shield against these potential hair emergencies, ensuring the safety of your luxurious locks.
First-Timers and Novices, Beware:
Are you taking your maiden voyage into the world of glued-in extensions? Never experienced their removal before? Professional assistance is an absolute must. Hair stylists will guide you through the process, ensuring no crucial steps are missed and preventing harm to your natural hair. Remember, it’s always better to be safe than sorry.
KRwWcPUU5GE” >
Conclusion
Removing glued in hair extensions at home can be a daunting task, but with the right technique and tools, it can be done effectively.
To begin, gather all the necessary supplies, including adhesive remover, a fine-toothed comb, and a mirror. Start by applying the adhesive remover to the base of the extensions, allowing it to penetrate and loosen the glue.
Gently comb through the extensions, working from the ends towards the roots to avoid causing any damage or discomfort. As you progress, you’ll notice the extensions starting to come loose.
Take your time and be patient during this process to prevent any breakage or pulling on your natural hair. Once all the extensions are removed, cleanse your scalp thoroughly to remove any remaining residue.
Finally, give your hair some extra care and nourishment by deep conditioning and treating it with hydrating products.