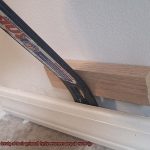
Tired of staring at that unsightly, glued down plank flooring in your new home or space? Don’t fret. Removing it may seem like a daunting task, but armed with the right knowledge and tools, you’ll be able to transform your space into a blank canvas ready for your creative touch.
Picture the sheer satisfaction of peeling away those stubborn planks, revealing a fresh, clean surface just waiting for a brand-new flooring masterpiece. But before we jump into the details, let me introduce myself. I’m here to be your go-to guide on this transformative journey, equipping you with all the know-how needed to effectively remove glued down plank flooring.
In this blog post, we’ll explore tried and tested techniques that professionals use to conquer this task. We’ll cover essential tools like a floor scraper, heat gun, solvent, and protective gear – everything you need in your DIY arsenal. Plus, we’ll share invaluable tips on preparing the area by dismantling baseboards and ensuring proper ventilation.
But that’s not all. We’ll dive into a step-by-step process of removing glued down plank flooring. From loosening the adhesive to manipulating those pesky planks and safely disposing of debris – we’ve got you covered. And don’t worry; we’ll even discuss potential challenges and how to overcome them like a seasoned flooring aficionado.
So if you’re ready to bid farewell to those clingy planks and embrace a fresh start, join us on this exhilarating journey of removing glued down plank flooring. Get ready to unleash your inner DIY warrior as we transform your space one plank at a time.
Necessary Tools and Materials
Contents
Before you dive in, make sure you have all the necessary tools and materials to guarantee a successful and hassle-free process. In this article, we will explore the essential items you’ll need for the job.
First and foremost, safety should be your top priority. Put on a sturdy pair of gloves to protect your hands from sharp edges and potential injuries. Shield your eyes from flying debris with a reliable pair of safety goggles. And don’t forget to wear a dust mask to keep harmful fumes and dust particles at bay.
Now that you’re properly geared up, let’s delve into the tools that will make removing the glued down plank flooring a breeze. An indispensable tool for this task is a pry bar or crowbar. Opt for one with a flat, wide end that provides better leverage while minimizing damage to the subfloor.
A trusty hammer is another must-have tool that will help dislodge stubborn planks securely glued down. Gently tap on the pry bar or crowbar to apply controlled force, loosening the planks without causing significant damage.
To make the removal process easier, consider using either a heat gun or a hair dryer. Direct the hot air onto the glued area, making it more pliable and allowing for effortless separation of the planks from the subfloor.
Once the planks are loosened, a floor scraper with a sharp blade becomes your best friend. Use it to scrape off any leftover adhesive residue, ensuring a clean and smooth surface for future flooring installation.
Depending on the type of adhesive used during installation, you may require an adhesive remover. It’s crucial to identify the adhesive used and choose an appropriate remover accordingly. Apply it directly to the glued areas, allowing it to penetrate and soften the adhesive before scraping.
For intricate areas or corners where the pry bar may not fit, a utility knife with a sharp blade will come in handy. Use it to cut through excess adhesive or make precise incisions in the flooring, making removal easier and more efficient.
Lastly, take precautions to protect surrounding areas from dust, debris, and potential damage. Cover adjacent furniture, fixtures, or walls with plastic sheeting or drop cloths. This simple step will ensure that no unwanted residue or debris spreads throughout the space, keeping it clean and intact.
Steps for Preparing the Area
Before you jump right into the task, it’s crucial to properly prepare the area. This often overlooked step can make a world of difference in ensuring a smooth and successful removal process. So, let’s dive into the steps for preparing the area before you unleash your inner DIY warrior.
Step 1: Clear the Space
First things first, clear the room of any furniture, appliances, or miscellaneous items that may obstruct your path. By creating a clean and clutter-free workspace, you’ll have ample room to maneuver and work with ease.
Step 2: Protect Adjacent Surfaces
Next up, safeguard adjacent surfaces like walls, baseboards, and countertops from any potential damage. Shield these surfaces with plastic sheets or drop cloths, securely fastening them with tape or painter’s tape. This simple precaution will save you from regrettable scratches or unwanted paint mishaps.
Step 3: Gather Your Arsenal
Now it’s time to gather your tools. To prepare the area for removing glued down plank flooring, arm yourself with a trusty utility knife, pry bar, hammer, scraper, knee pads (for comfort during those long hours), safety goggles, gloves, and a dust mask. Having all these tools readily available will transform you into a prepared and efficient removal pro.
Step 4: Disconnect Utilities
Prioritize safety by disconnecting any electrical outlets or wires near the work area. It’s crucial to turn off the power and ensure no electrical connections are active. This preventive measure will safeguard against accidents or potential damage during the removal process.
Step 5: Let the Air Flow
Ventilation is key when it comes to removing glued down plank flooring. Dust and fumes from adhesives can fill the air, so it’s important to improve the room’s air quality. Open windows and doors to promote fresh air circulation, or consider employing fans or air purifiers for an added boost. Breathing in clean air will enhance both your health and your motivation.
Step 6: Prioritize Safety First
Last but certainly not least, remember to prioritize your safety. Before you embark on any physical work, suit up with protective gear including safety goggles, gloves, and a dust mask. Shield yourself from potential hazards or irritants that may arise during the removal process.
Softening the Adhesive
You’ve conquered the initial challenges of preparing your space, safeguarding surrounding surfaces, and assembling your arsenal of tools to take on the formidable task of removing glued down plank flooring.
But before you charge into the battle, it’s crucial to understand the art of softening adhesive like a seasoned pro. Fear not, for I am here to unveil the secrets that will make adhesive surrender at your feet. So grab your reading glasses and prepare to embark on a journey of adhesive domination.
Method 1: The Fiery Fury of Heat
Our first weapon in this epic battle is none other than heat, a force that can soften even the most stubborn adhesive. Arm yourself with a heat gun or a trusty hairdryer set on high heat. Direct the scorching air onto the glued areas with precision, causing the adhesive to melt and become pliable.
Remember, my fellow warriors, moderation is key. Overheating the area could result in collateral damage or even unleash a fire hazard. Safety should always reign supreme.
Method 2: Unleashing Commercial Adhesive Removers
In our arsenal lies an array of commercial adhesive removers, specifically crafted to break down and dissolve adhesives effortlessly. These magical elixirs transform removing glued down plank flooring into child’s play. However, heed the instructions bestowed upon you by their creators and work in well-ventilated realms. We wouldn’t want noxious fumes dampening our conquest against adhesive tyranny.
Method 3: Everyday Household Heroes Join the Fray
Do not underestimate the power that lies within ordinary household items when it comes to softening adhesive. Enter white vinegar, a hero among heroes that can be applied to glued areas, left to marinate in its acidic wonder. The vinegar’s potency breaks down the adhesive, rendering it vulnerable to your scraping prowess.
But wait, there’s more. Rubbing alcohol and nail polish remover enriched with acetone stand ready to join the battle. Apply these household champions to the adhesive-ridden battlegrounds, and witness their miraculous powers at work. Remember, my comrades, always test these methods in a small, inconspicuous area first to ensure they don’t unleash unintended harm upon our beloved planks.
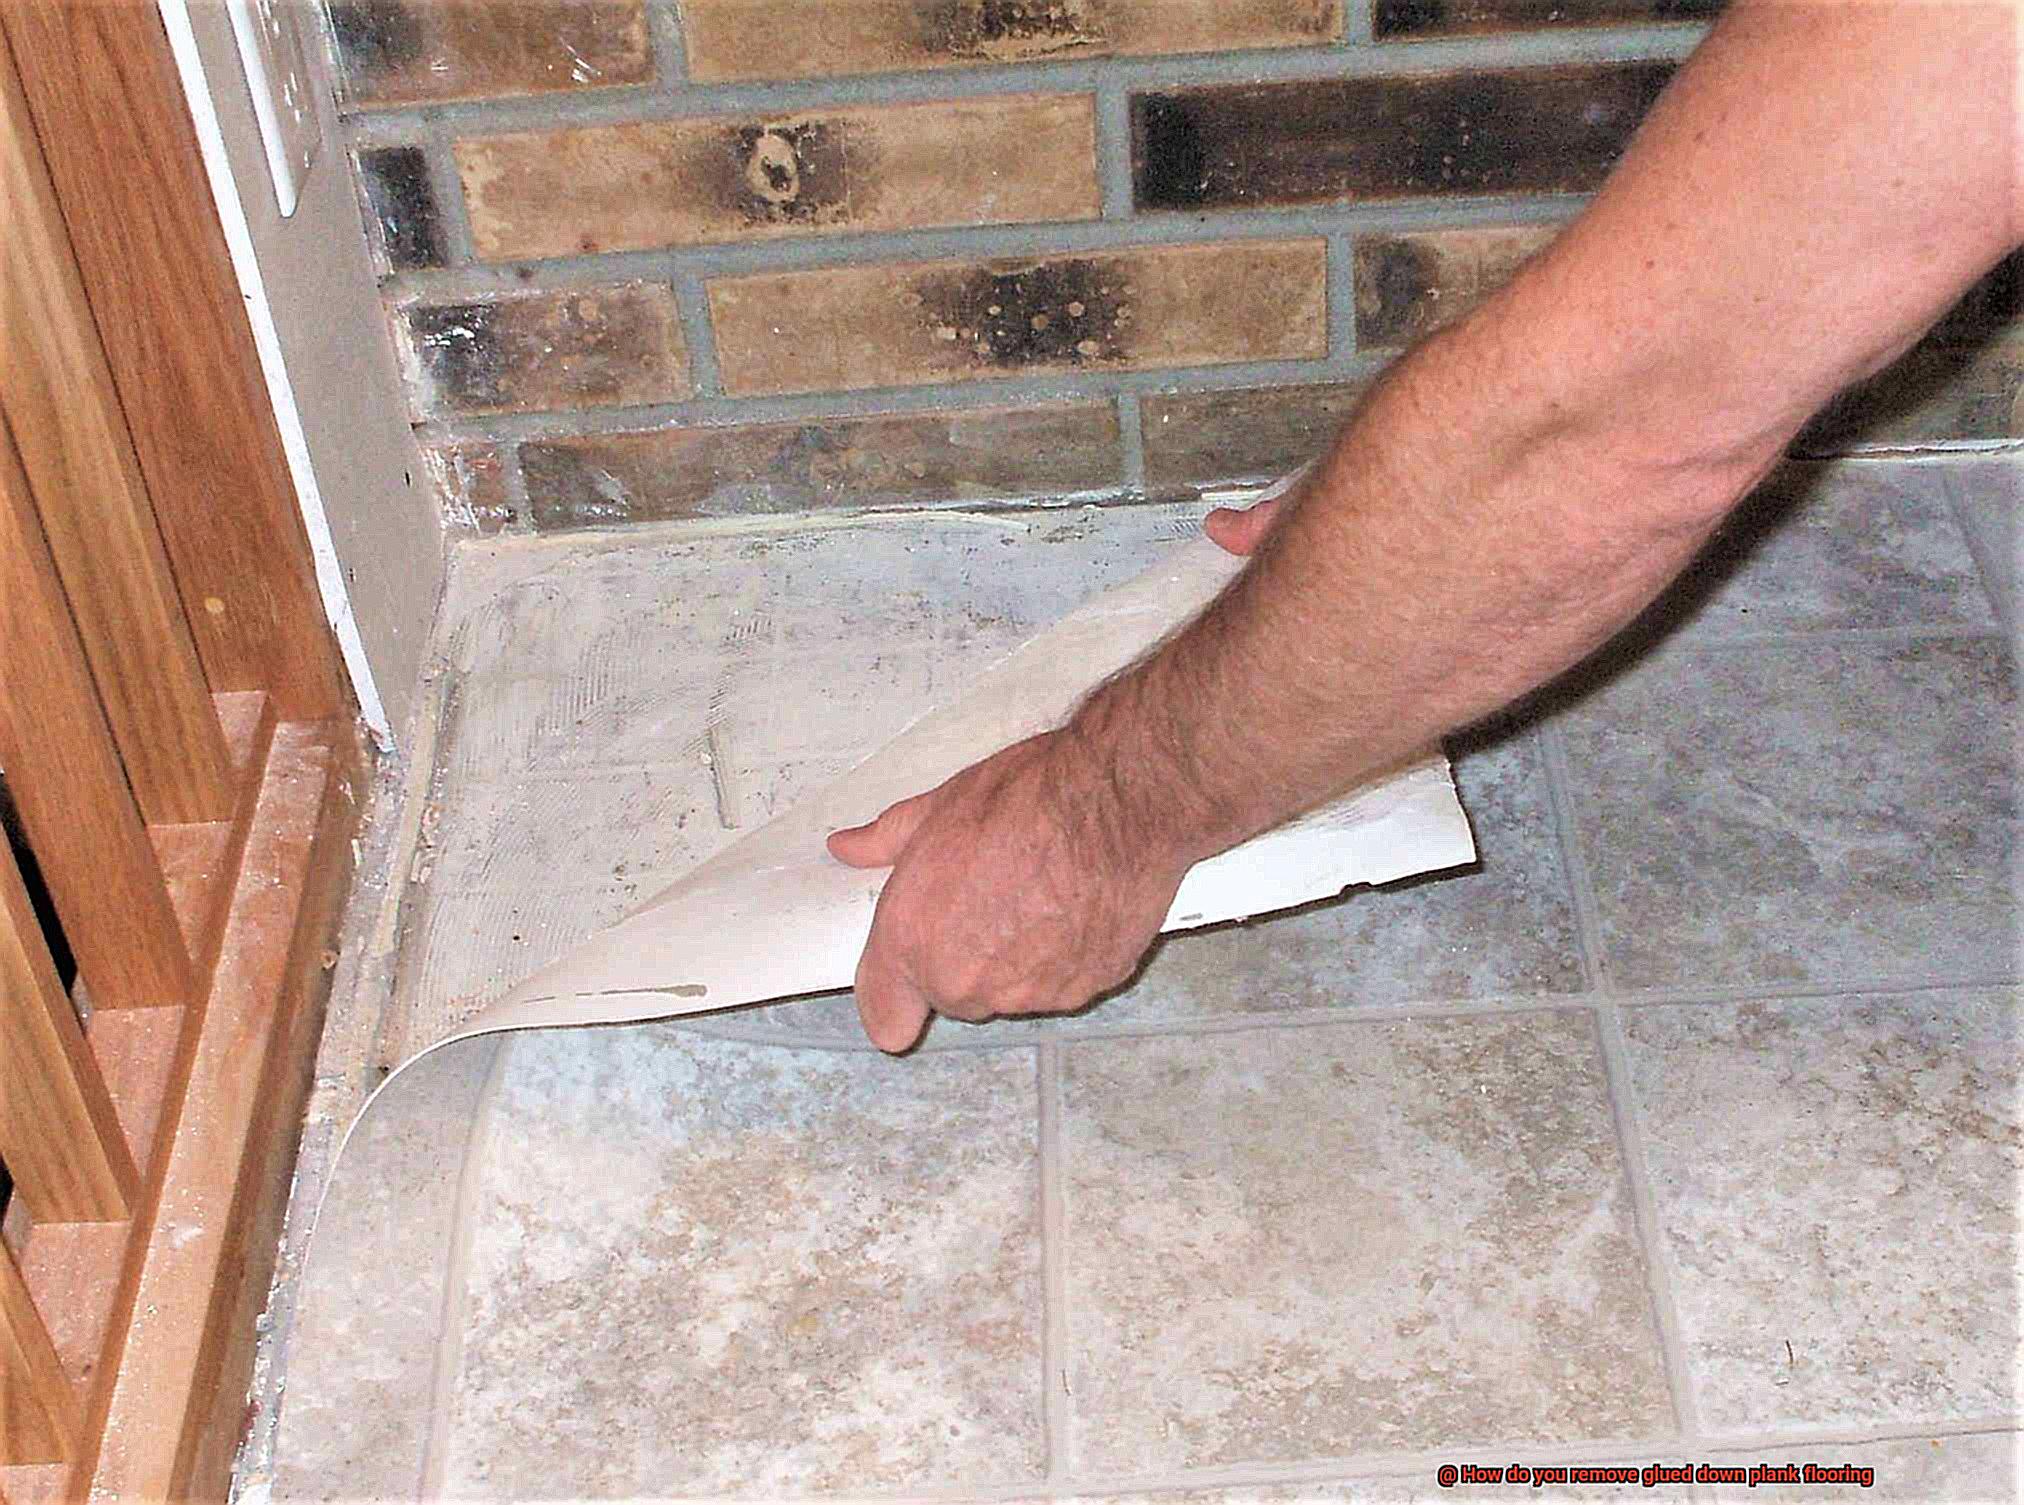
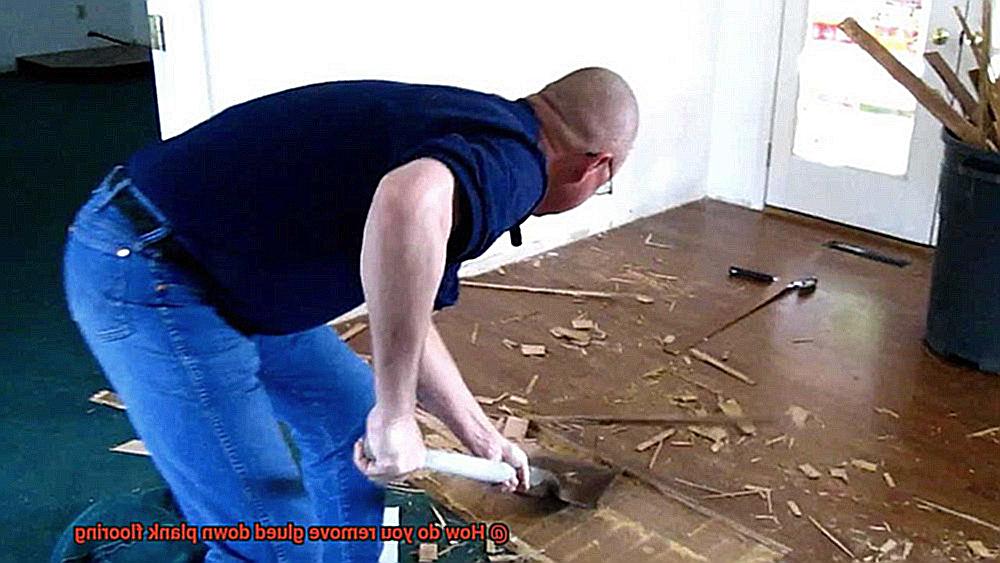
Scraping Up the Planks
Prepare to embark on a courageous journey, my fellow flooring conquerors, as we delve into the perilous task of scraping up the planks. With the right techniques and tools at your disposal, you will emerge victorious, leaving no damage in your wake. So arm yourself with determination, grab your trusty floor scraper, and let’s unleash our inner flooring warriors.
Techniques for Effective Scraping:
- Conquer systematically: Begin your noble quest by starting at one end of the room and fearlessly progressing across. This strategic approach ensures that no plank escapes your grasp.
- Mighty floor scraper and putty knife: Equip yourself with these formidable weapons, forged with sharp edges that effortlessly slide beneath the planks. Insert the blade with precision and lift gently, coaxing the adhesive to surrender its hold.
- The power of even pressure: Remember, dear warriors, excessive force is unnecessary. Apply steady and balanced pressure to safeguard both the planks and subfloor from harm.
- Tapping into victory: Should you encounter stubborn planks that defy your advances, fear not. A gentle tap with a hammer against your scraper or putty knife will weaken their resolve, freeing them from the adhesive’s clutches.
Tools for Unyielding Victory:
- Floor scraper: This stalwart companion shall be your primary weapon in this battle. Its sharp edge and sturdy construction make it an unrivaled adversary against the planks.
- Putty knife: A versatile ally standing beside you, the flexible putty knife allows for deft maneuvering under those unyielding planks, leaving no corner unscraped.
- Harnessing the heat (for stubborn adhesive): When faced with adhesive that mocks your efforts, it is time to unleash the power of heat. Directly apply the scorching flames from a heat gun or hairdryer to soften the adhesive, rendering it defenseless against your scraping prowess.
Dealing with Stubborn Adhesive
Today, we embark on a journey to defeat the stubborn adhesive that stands between us and pristine floors. Armed with research and expertise, we shall explore the various methods of dealing with this formidable foe. So, gather your tools and brace yourselves for an engaging battle against stubborn adhesive.
Method 1: Harness the Power of Heat
To soften the adhesive’s grip, we unleash the fiery power of heat. With a heat gun or hairdryer set on high, we direct intense heat onto the adhesive. Like a skilled warrior, we hold the heat source a few inches away from the surface, moving it back and forth to ensure even distribution. Careful not to overheat or harm the flooring material as we proceed.
Once warmed, the adhesive becomes more pliable, making it susceptible to our scraping prowess. Armed with a trusty putty knife or floor scraper, we begin at one edge of the flooring and apply firm but controlled pressure. Our goal is to scrape away the softened adhesive without leaving any scratches or gouges in our wake. For stubborn areas, we persistently reapply heat until victory is achieved.
Method 2: Unleash the Power of Solvents
When heat alone fails to conquer stubborn adhesive, we turn to our arsenal of chemical solvents. These specialized adhesive removers dissolve the tenacious glue without damaging or discoloring our precious floors.
Before engaging in battle with solvents, we diligently read and follow the manufacturer’s instructions. To ensure compatibility with our flooring material, we test a small, inconspicuous area first. Once approved, we boldly apply the solvent directly onto the adhesive and let it work its magic for a few minutes. Equipped with a scraper or brush with stiff bristles, we vigorously remove the softened adhesive. Persistence may be required as we repeat the process until the adhesive retreats in defeat.
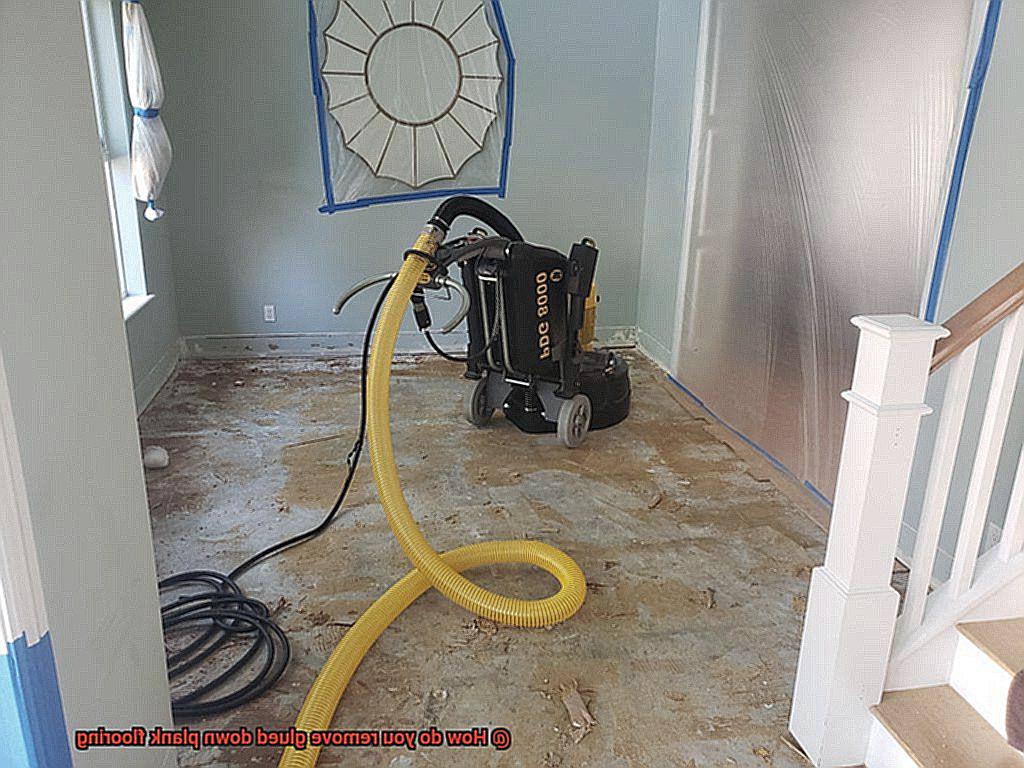
Method 3: Conquer with Mechanical Force (Caution Required)
For the bravest among us, the third method involves employing mechanical force. This advanced technique requires a floor buffer or sander armed with coarse-grit sandpaper. However, heed this warning: proceed with utmost caution to avoid collateral damage to the subfloor or flooring material.
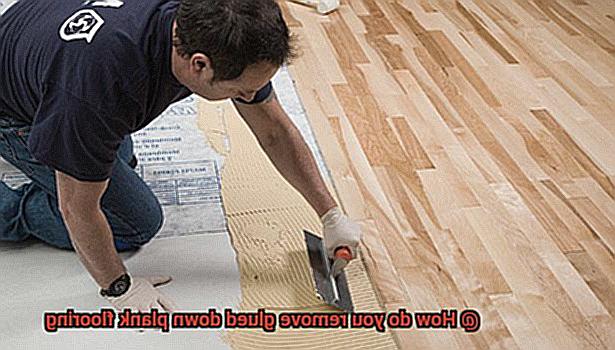
Cleaning the Subfloor
Cleaning the subfloor is a critical undertaking in the quest to remove glued down plank flooring. Before we can achieve victory and unveil our stunning new floors, we must ensure that the subfloor is free from any debris, dust, or dirt. Let us explore the battlefield of subfloor cleaning, armed with our knowledge and determination.
- Clear the Battlefield: Prepare for the battle by removing all furniture and obstacles from the room. This will grant us unobstructed access to the subfloor, allowing us to execute our cleaning maneuvers with precision. A clutter-free space is essential for our success.
- Conquer Loose Dirt and Dust: With the path cleared, it is time to eliminate loose dirt and dust that may have taken refuge on the subfloor. Sweep or vacuum the floor diligently, ensuring that not a speck of dirt remains. Our canvas must be pristine.
- Fight Sticky Substances: Beware of lurking adhesive residues or sticky substances that may impede our progress. Fear not, for we possess a powerful weapon – a commercial adhesive remover tailored specifically for flooring challenges. Follow the manufacturer’s instructions meticulously and apply this potent elixir to the affected areas. Allow it to work its magic for a few minutes, loosening the adhesive’s tenacious grip.
- Unleash Your Scrape Attack: Armed with a scraper or putty knife, gently scrape away the softened adhesive residue. Precision is paramount here; we must be cautious not to inflict harm upon the subfloor as we wage this battle against filth. For stubborn adhesive, do not falter – repeat the process or increase the concentration of adhesive remover.
- Harness the Power of Heat: Should formidable chunks of adhesive refuse to yield, fear not. We have an additional weapon at our disposal – heat. Employ a heat gun or hairdryer to unleash scorching temperatures upon the adhesive. As it succumbs to the intense heat, scrape it away with your trusty putty knife. Victory is within reach.
- Thoroughly Cleanse the Battlefield: With the adhesive vanquished, it is time for a thorough cleaning. Prepare a solution of mild detergent and warm water, ready to wage war against any remaining dirt or residue. Equip yourself with a mop or sponge and scrub the subfloor vigorously. Rinse the floor with clean water, ensuring not a trace of soap lingers.
Final Preparations Before Installing New Flooring
Before you can revel in the beauty of your new space, there are a few crucial steps you must take. In this article, we will guide you through the final countdown before installing your new flooring. So sit back, relax, and let’s dive into the preparations that will ensure a flawless installation.
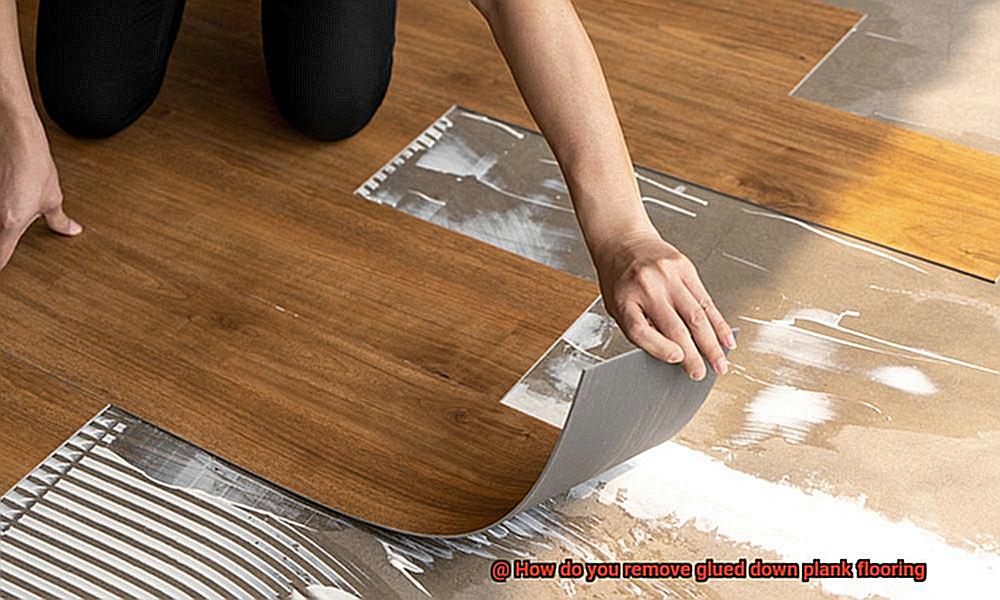
Step 1: Bid Farewell to the Old Flooring
To make room for your stunning new flooring, it’s time to bid farewell to the old. Removing glued-down plank flooring can feel like a battle, but armed with a floor scraper, pry bar, and adhesive remover, victory is within reach. Cut those stubborn planks into manageable sections, carefully lift them using a pry bar, and scrape away any lingering adhesive. Don’t forget to dissolve stubborn residue with an adhesive remover and meticulously clean the surface. It’s time to say goodbye to the past and welcome the future.
Step 2: Inspect the Subfloor – The Foundation Matters
Now that the old flooring is out of sight, it’s time to focus on the foundation – your subfloor. A smooth and level surface is vital for a flawless installation and long-lasting results. Take a close look at your subfloor for cracks, holes, or signs of rot, addressing them promptly. Fill in any gaps or depressions with a suitable filler and sand down any pesky high spots until you achieve an even surface. Remember, a solid foundation sets the stage for greatness.
Step 3: Cleanliness is Next to Floorliness
Before your new flooring takes center stage, ensure that your subfloor is spotless. Sweep away debris, dust, and dirt with precision using a trusty broom or vacuum cleaner. Leave no loose nails or staples behind that could disrupt your installation masterpiece. And watch out for moisture issues. Employ the help of a moisture meter to detect any lurking problems. If there are high moisture levels, tackle them head-on before proceeding. With a clean and dry subfloor, it’s time to level the playing field. Use a leveling compound to conquer any low areas or unevenness, creating a stable and flat surface worthy of your new flooring.
Conclusion
Removing glued down plank flooring can feel like an uphill battle, but fear not. Armed with the right tools and techniques, you can conquer this challenge with finesse. Begin by clearing away any pesky furniture or obstructions that might impede your progress – creating a clear path for victory. Now comes the exciting part: softening that stubborn adhesive.
Grab your trusty heat gun or hairdryer set on high heat and let the magic unfold as you apply gentle warmth to loosen its grip. Remember though, moderation is key – too much heat could spell disaster for your precious floors. As the adhesive begins to surrender under your strategic assault of warmth, arm yourself with a putty knife or floor scraper – these will become your loyal comrades in prying up those defiant planks.
Starting at one corner of your battleground, summon all your strength and determination as you wage war against each individual plank.
Apply unwavering pressure, inching forward with each triumphant victory until all planks lie defeated before you.