Are you tired of staring at your once-gorgeous laminate flooring, plagued by the stubborn glue that seems impossible to remove without causing damage? Well, fret no more. Welcome to our comprehensive guide on how to successfully remove glued down laminate wood.
We understand the frustration and confusion that can arise when faced with the challenge of tackling glued-down flooring. But fear not, dear reader, for we are here to rescue you from this sticky situation. With our expert advice and handy tips, you’ll soon be well-equipped to restore your floors to their former glory.
Imagine stepping onto flawlessly sleek laminate floors, free from any unsightly adhesive residue. The journey towards achieving this dream begins with a deep understanding of the process and the array of tools and techniques that can assist you in this endeavor.
In this blog post, we will delve into the intricacies of removing glued down laminate wood, showcasing foolproof methods that will leave your floors unscathed. We’ll cover essential topics such as:
- Preparation: Gather all the necessary tools and materials for a successful operation.
- Softening the Glue: Discover the secret behind loosening the adhesive bond effortlessly.
- Strategic Scraping: Master techniques that prevent damage while effectively removing glued laminate.
- Final Cleanup: Achieve a flawless finish by eradicating any lingering glue and restoring your floor’s shine.
Get ready to embark on a transformative journey that unveils the hidden potential of your laminate flooring. Bid farewell to those persistent glue marks and rediscover the radiant beauty of your beloved floors.
So, buckle up, put on your cleaning cap, and join us as we explore the art of removing glued down laminate wood. Let’s make your floors sparkle like never before.
Gather the Necessary Tools and Materials
Contents
- 1 Gather the Necessary Tools and Materials
- 2 Disconnect Electrical Appliances and Ensure Proper Ventilation
- 3 Heating the Glued Down Laminate Wood
- 4 Scraping the Edges of the Laminate Wood
- 5 Applying Adhesive Remover to Stubborn Areas
- 6 Cleaning the Area Thoroughly with Soapy Water
- 7 Removing Excess Glue with Adhesive Remover and a Scraper/Putty Knife
- 8 Caution and Patience are Key When Removing Glued Down Laminate Wood
- 9 Conclusion
Embarking on the journey of removing glued down laminate wood requires careful preparation and the right arsenal of tools and materials. In this captivating guide, we will uncover the essential equipment you need to gather before diving into this transformative process. From safeguarding gear to adhesive dissolvers, we have curated a comprehensive list to empower you in achieving a flawless removal.
Prioritize Safety with Protective Gear:
Before immersing yourself in any home improvement endeavor, placing safety at the forefront is paramount. Shield your eyes from potential hazards with safety goggles, protect your hands with gloves, and guard your respiratory system with a reliable dust mask. These guardians of protection will ensure your well-being as you tackle the removal process head-on.
Embrace the Power of Precision with a Utility Knife:
A trusty utility knife is your steadfast companion when it comes to cutting through the adhesive and separating the laminate from its underlying surface. Remember to have extra blades readily available, as their sharpness may wane over time. With this tool at your disposal, you’ll wield precision and control throughout the removal process.
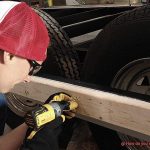
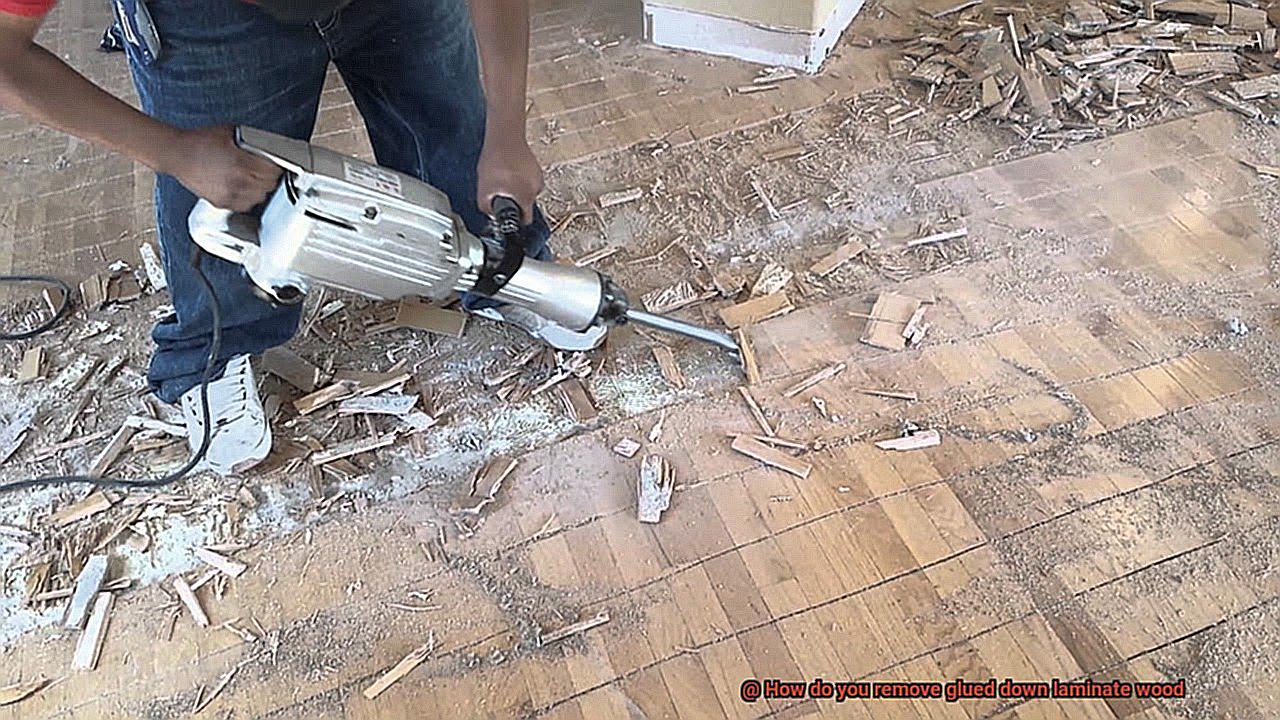
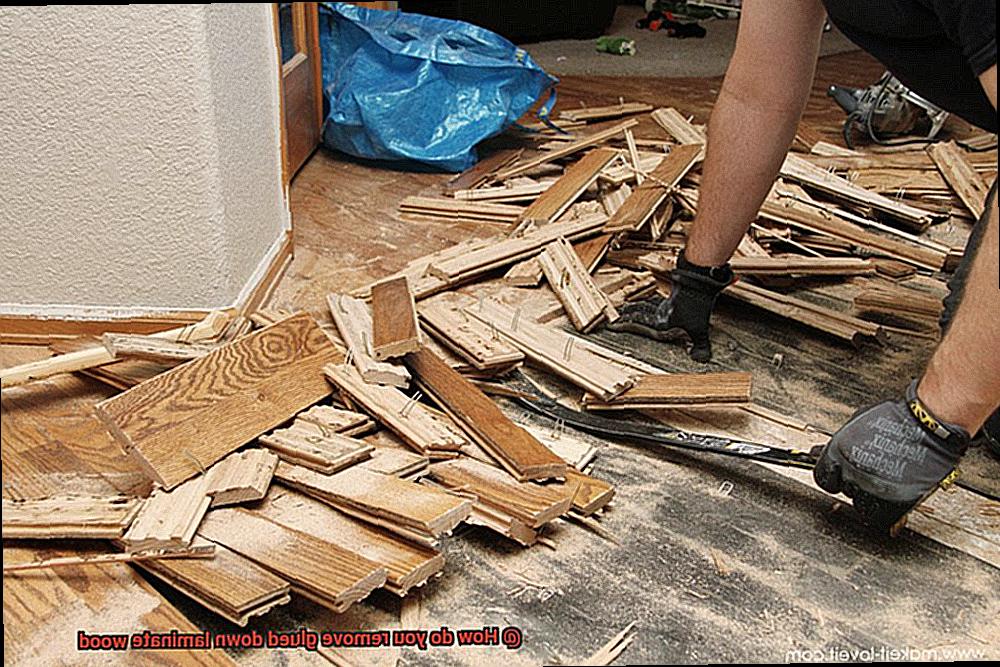
Gentle Elevation with a Pry Bar or Chisel:
To liberate the glued laminate wood from its adhesive stronghold, enlist the assistance of a pry bar or chisel. Employ these tools gently, delicately prying up the edges of the laminate and gradually working towards the heart of the flooring. Exercise caution to avoid causing any harm to the subfloor or its surroundings during this delicate operation.
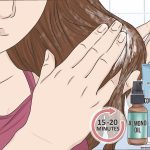
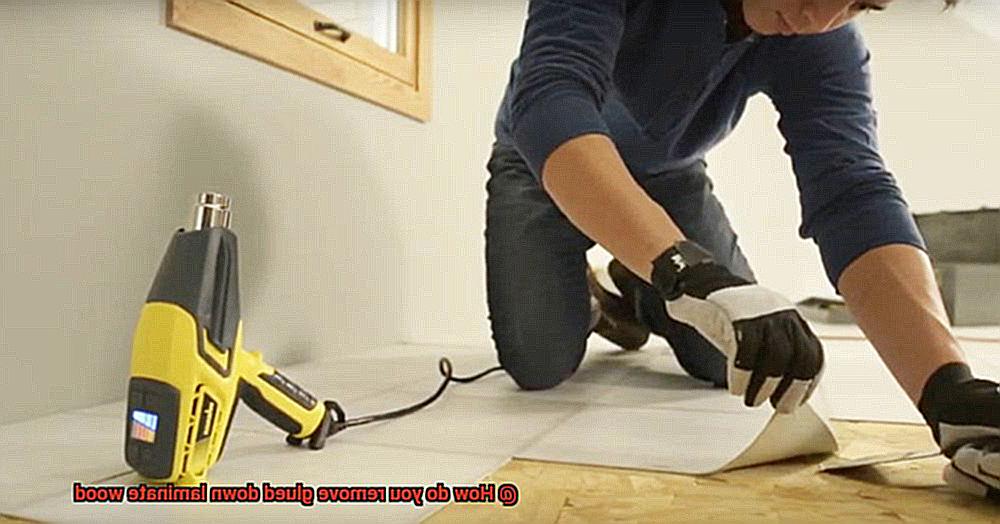
Harness the Power of Heat with a Heat Gun or Hairdryer:
The secret weapon for softening adhesive lies in harnessing the power of heat. Engage a heat gun or hairdryer set on high temperature to warm up the glue, rendering it more pliable for effortless removal. Maintain vigilance, as excessive temperatures can inflict damage upon both the flooring and your well-being.
Effortless Removal with a Floor Scraper:
Once the adhesive has succumbed to the gentle persuasion of heat, equip yourself with a floor scraper to expedite the removal process. Opt for a scraper adorned with a wide, flat blade, capable of covering a larger surface area and rendering the process swift and efficient.
Disconnect Electrical Appliances and Ensure Proper Ventilation
When it comes to removing glued down laminate wood, safety should always be a top priority. In addition to gathering the necessary tools and materials, it is crucial to take steps to ensure proper ventilation and disconnect electrical appliances. In this article, we will explore the importance of these precautions and how they contribute to a safer and more efficient removal process.
Disconnecting Electrical Appliances:
Imagine the thrill of transforming your space by removing glued down laminate wood, only to be shocked – literally – by an electrical accident. To eliminate this risk entirely, take the time to disconnect all electrical appliances in the area where the removal process will take place.
- Before you begin, unplug and turn off devices like lamps, radios, or televisions.
- This simple step not only prevents accidents but also safeguards your appliances from potential damage during the removal process.
Ensuring Proper Ventilation:
- Breathe easy while tackling the task of removing glued down laminate wood by prioritizing proper ventilation.
- Adequate airflow helps minimize the release of fumes from any chemicals that may be used during the process.
- It also prevents the accumulation of dust and debris, which can cause respiratory issues and hamper the efficiency of the removal process.
Opening Windows and Doors:
- Let fresh air invigorate your space by opening windows and doors in the room where the removal will occur.
- This allows a refreshing breeze to circulate, reducing the concentration of fumes and improving air quality.
- Furthermore, fresh air acts as a natural combatant against any odors that may arise during the removal process.
Enhancing Ventilation:
- Take your ventilation game to new heights by utilizing additional tools to maximize airflow.
- Fans or portable air purifiers become your allies in moving air around the room, expelling any odors or harmful particles.
- Especially in areas with limited natural airflow, these devices prove invaluable in maintaining a safe and comfortable environment.
Heating the Glued Down Laminate Wood
The solution lies in the power of heat. By harnessing the intense warmth of a heat gun or hairdryer, you can easily remove that stubbornly glued down laminate wood. Allow me, your esteemed laminate wood removal expert, to guide you through this transformative process. So grab your heat tool of choice and get ready to embrace a world of effortless removal.
Preparing for Success:

Before we embark on our heat-filled journey, let us prioritize safety above all else. Disconnect all electrical appliances and throw open those windows and doors, inviting the crisp breath of fresh air into your space. Elevate the ventilation game to new heights by strategically placing fans or air purifiers, ensuring a revitalizing environment that will make this removal process a joyous undertaking.
The Heat Unleashed: Tools and Techniques
Now that we’ve fortified our safety measures, it’s time to unleash the full force of heat upon that adhesive foe. Arm yourself with either a trusty heat gun or a hairdryer – these invaluable companions will be your allies in this endeavor. Emitting streams of scorching air, they soften the glue, rendering it pliable and effortlessly removable.
But wait. Before we turn up the heat, let us ensure that our surroundings are well-ventilated. We mustn’t allow any fumes to accumulate and dampen our spirits. Swing those windows wide open or set up an orchestra of fans to create a steady flow of invigorating air.
As we prepare to apply heat, set your chosen tool to a low to medium setting. Hold it at a safe distance from the glued area, allowing the hot air to caress its surface. Remember, a dance of gentle back and forth movements is key – avoid lingering in one spot for too long, for we wish to preserve the pristine condition of both the laminate and subfloor.
Scraping the Edges of the Laminate Wood
Prepare to embark on an exhilarating journey into the world of laminate wood removal mastery. In this chapter, we will unveil the secrets and techniques to scrape the edges of glued down laminate wood with finesse and precision. Get ready to liberate your floors as we dive into this thrilling adventure, armed with our trusty tools and unwavering determination.
Gathering Your Arsenal:
Before we commence our scraping adventure, let us first equip ourselves with the essential tools. The putty knife or scraper with a flat edge shall be our faithful companions in this battle against adhesive forces. Don’t forget to don your protective gloves, ensuring that your hands remain unscathed throughout this daring endeavor.
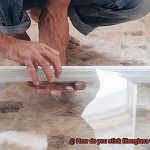
The Dance Begins:
With tools in hand and gloves securely fastened, let us embark on the delicate dance of scraping the laminate wood edges. Carefully insert your chosen tool between the laminate’s edge and the surface it clings to, exerting gentle yet persistent pressure. This is not a reckless frenzy but a controlled, meticulous approach that will conquer even the most stubborn adversaries.
Harnessing the Power of Heat:
Just as in our previous exploits, heat shall be our ally in softening the adhesive’s grip. Grab your heat gun or hairdryer and set it to a low setting – we must tread lightly to avoid scorching our precious laminate floors. With graceful movements, glide the heat source back and forth over the area, enchanting the glue into submission.
Striking a Delicate Balance:
As you scrape, you may encounter pockets of resistance where the adhesive refuses to yield. Fear not. Apply a touch more heat to these tenacious areas, allowing it to work its magic and soften their resolve. But remember, my dear readers, balance is paramount – avoid overheating or lingering in one spot for too long, lest you risk compromising the integrity of the laminate or your own sanity.
Persistence Pays Off:
With each scrape, witness the edges of the laminate wood gradually surrender to your unwavering determination. Embrace the power of patience, for rushing this process may result in incomplete removal or unintended damage. Take your time, ensuring that every edge receives the attention it deserves before progressing to the next phase of our grand laminate liberation plan.
Applying Adhesive Remover to Stubborn Areas
In our previous section, we embarked on an exhilarating journey into the world of liberating floors from glued down laminate wood. Now, let’s dive deeper into the exciting realm of applying adhesive remover to those stubborn areas. Get ready to unleash your finesse and precision as we conquer these tough spots together.
Choosing the Right Adhesive Remover:
Before we embark on our mission, it’s crucial to arm ourselves with the right tools. Look for a product specifically designed for laminate wood and adhesive removal. Choose a remover that announces its compatibility with your flooring, ensuring a successful battle against stubborn spots.
The Importance of Testing:
As with any adventurous undertaking, a little preparation goes a long way. Test the adhesive remover on a small, inconspicuous area of your laminate wood. This mini-experiment will provide peace of mind and safeguard against potential damage or discoloration.
Applying the Remover:
Now that you’ve found the perfect adhesive remover and tested it like a pro, it’s time to get down to business. Pour a small amount onto a clean cloth or sponge, then gently rub it over the stubborn area, covering every nook and cranny. Allow the remover to work its magic by penetrating the adhesive for the recommended time specified on the product label.
Tackling Stubborn Areas:
Ah, those pesky stubborn areas. Fear not, my fellow removal warriors; we have weapons in our arsenal. For particularly resistant spots, bring out your trusty scraper or putty knife. Remember, gentle strokes and controlled pressure are key to avoid damaging the laminate wood surface.
Persistence is Key:
Sometimes, one round of adhesive remover and scraping won’t be enough to conquer the stubbornness. Don’t lose heart. Be patient, my friend, and repeat the application and scraping process as needed. With each attempt, you’re one step closer to victory over the tenacious adhesive residue.
The Final Touch:
Congratulations, you’ve successfully removed the adhesive. But before you declare victory and do a happy dance, there’s one more crucial step. Thoroughly clean the area with warm water and mild detergent to eliminate any remaining residue from both the adhesive remover and glue. Leave no trace behind.
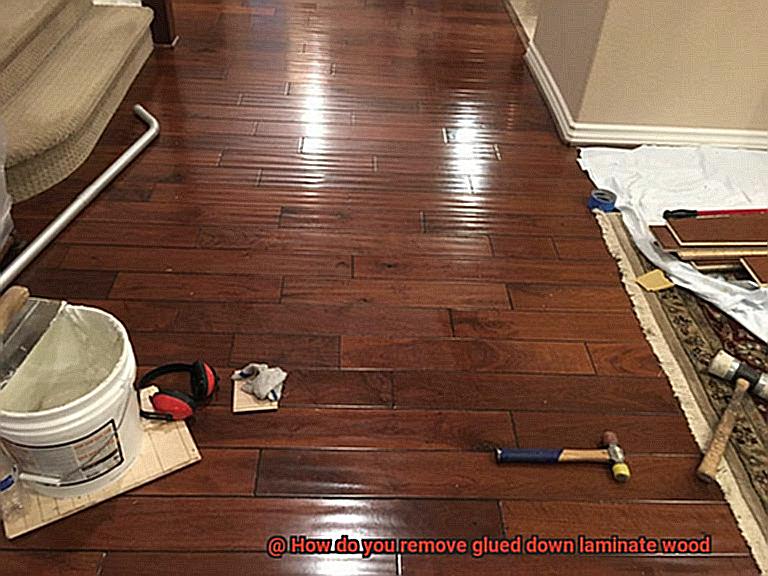
Cleaning the Area Thoroughly with Soapy Water
Today, we’re diving deep into the enchanting realm of cleaning the area thoroughly with soapy water. Brace yourselves, because this step is the magical key to achieving a flawlessly clean surface before bidding adieu to that stubborn glued down laminate wood. So, grab your trusty bucket and sponge, and let’s embark on a sparkling cleaning adventure.
Step 1: Assembling Your Cleaning Arsenal
Before we embark on this sudsy quest, let’s ensure we have all our cleaning supplies at our fingertips. Gather warm water (not too hot, not too cold), a dash of mild dish soap or detergent, a soft sponge or cloth for gentle caressing, and a loyal scrub brush for battling those tenacious spots.
Step 2: Brewing the Potion of Wonders
Now that you’ve gathered your cleaning comrades, it’s time to conjure up some magic in that bucket. Fill it to the brim with warm water and infuse it with a few drops of your chosen dish soap or detergent. Give it a gentle swirl until the soap dissolves, and ta-da. Behold the birth of your almighty soapy solution, ready to wage war against any grime.
Step 3: Banishing Grime with Tender Strokes
Armed with your sponge or cloth, immerse it in the soapy water and release any lingering liquid. Begin your cleaning ritual by tenderly wiping the surface of the glued down laminate wood, lavishing extra attention on those grimy and adhesive-infested areas. Remember to dance in circular motions and exert just enough pressure to cleanse without harming the laminate wood’s delicate soul.
Step 4: Conquering Stubborn Stains
For those audacious stains or adamant adhesive residues that dare challenge your cleaning prowess, it’s time to unleash the power of your trusted scrub brush. Approach them with a gentle touch, scrubbing away their stubborn defiance. But beware, my friend—temper your strength, for we seek to vanquish the residue, not harm the noble laminate wood. If needed, replenish your arsenal with more soapy water to aid in breaking down these relentless foes.
Removing Excess Glue with Adhesive Remover and a Scraper/Putty Knife
Prepare to bid farewell to those sticky situations that plague your laminate wood surfaces. When excess glue threatens to tarnish your masterpiece, fear not. Armed with the right arsenal of tools and techniques, you can conquer these stubborn glue spots and restore your laminate wood to its pristine condition. Join us as we delve into the enchanting world of adhesive removers and the mighty scraper/putty knife, and discover how they can help you in your quest for an adhesive-free paradise.
Step 1: Seek Out the Perfect Adhesive Remover
Embark on your journey to conquer glue by acquiring a trusty ally: the adhesive remover. Venture to hardware stores or explore online options to find a specifically designed product for use on laminate wood surfaces. Immerse yourself in the manufacturer’s instructions, absorbing their wisdom to ensure proper usage and avoid potential damage.
Step 2: Prepare for Battle
With your chosen adhesive remover in hand, it’s time to prepare for the epic confrontation ahead. Apply a small amount of the remover directly onto the offending glue, allowing it a few minutes to work its magic and penetrate the adhesive’s fortress.
Step 3: Unleash Your Scraper/Putty Knife
As the adhesive remover weakens the glue’s grip, equip yourself with a trusty scraper or putty knife boasting a flat edge. With steady determination, gently wield this mighty tool, carefully scraping away the softened glue. Remember, finesse is key here—avoid applying excessive pressure or employing sharp-edged implements that could mar or harm the precious laminate wood.
Step 4: Divide and Conquer
Confronting an entire expanse of glue may seem overwhelming. Fear not, valiant warrior. Dividing and conquering is your strategy. Tackle small sections at a time, replenishing the adhesive remover as necessary. This process may require repetition until victory is achieved and all traces of excess glue are vanquished.
Step 5: Cleanse and Dry
With the battlefield cleared of glue remnants, it’s time to cleanse and restore your laminate wood to its former glory. Engage a clean cloth moistened with warm water, diligently wiping away any lingering residue from the adhesive remover. Ensure thorough drying of the surface, preventing moisture from infiltrating the laminate wood’s sacred domain.
Caution and Patience are Key When Removing Glued Down Laminate Wood
Step into the world of laminate wood flooring restoration, where caution and patience reign supreme. Like a delicate dance, navigating the process of removing glued down laminate wood requires finesse and a steady hand.
With the right tools and techniques at your disposal, you can gracefully free your flooring from its adhesive shackles without leaving a trace.
So, let us embark on this enchanting journey together, where caution and patience will be our guiding stars.
Caution – Treading Lightly
Shielding the Subfloor’s Sanctuary:
In this delicate endeavor, the subfloor beneath is our sacred ground. Rushing or employing excessive force can leave lasting scars on this sanctuary. Therefore, dear reader, we must proceed with utmost care and reverence, ensuring that no damage befalls our noble foundation.
A Prelude of Testing:
Before we unleash the full force of our removal prowess, a gentle prelude is in order. Test the adhesive’s response to heat in a discreet corner, allowing us to gauge its temperament. By listening attentively to these subtle cues, we can adapt our approach and avoid any unwelcome bubbling or warping.
The Symphony of Gentle Extraction:
As we delve deeper into the removal process, remember that patience is the conductor of this symphony. With a putty knife or scraper as our instrument, we harmoniously lift the laminate’s edge, applying heat judiciously. Let us savor each careful movement, for it is through this gentle touch that we preserve both laminate and subfloor in perfect harmony.
Patience – A Virtuous Endeavor
Unraveling Stubborn Adhesive Knots:
In this dance of removal, stubborn adhesive spots may test our resolve. But fear not. We wield the power of patience. By anointing these resistant areas with adhesive remover and granting them time to succumb, we unravel their grip, making way for effortless scraping. Patience is the key that unlocks their tenacious hold.
RRRZqU4-azs” >
Conclusion
Removing glued down laminate wood can be a challenging task, but with the right tools and techniques, it is possible to accomplish.
One method involves using heat to soften the adhesive and then prying up the planks with a putty knife or pry bar. Another option is to use a solvent specifically designed for removing glue, applying it to the edges of the laminate and allowing it to penetrate before gently lifting the planks.
Whichever method you choose, it’s essential to proceed with caution and take your time to avoid damaging the underlying surface.