Imagine this: You’ve just finished a thrilling DIY project or snagged a jaw-dropping piece of furniture. But hold on. There’s an annoying sticky situation standing between you and perfection. Glue residue. Fear not, my curious comrades, because today we’re about to unravel the art of removing glue without causing any harm to those precious surfaces we adore.
In this captivating blog post, we’ll explore top-secret methods that bid farewell to stubborn glue while keeping your beloved possessions intact. Whether it’s delicate glassware or tough-as-nails wooden surfaces, we’ve got an arsenal of techniques that’ll ensure your surfaces remain unscathed throughout the entire process.
So, what’s the key to solving this intricate puzzle? Step one is understanding the nature of glue itself. We’ll uncover different types and their sneaky characteristics, empowering you to combat each one like a pro. From everyday household adhesives to industrial-strength wonders, consider us your glue-busting superheroes.
Prepare for amazement as we dive headfirst into the world of natural ingredients with magical abilities to dissolve even the most formidable glue. Lemon juice, nail polish remover, and olive oil are just a few unexpected allies we’ll introduce along the way. These natural wonders not only save your surfaces but also provide an eco-friendly alternative to harsh chemicals.
But wait, there’s more. We’ll equip you with knowledge on how to approach each surface correctly – whether it’s glass, plastic, metal, wood, or fabric. Our expert tips on temperature, timing, and techniques will guarantee that your beloved possessions emerge unblemished.
Get ready for an exhilarating journey that will forever revolutionize how you tackle those pesky adhesive remnants. With our guidance, you’ll gain the skills and confidence needed to flawlessly remove glue from any surface without sacrificing its beauty. The glue will be defeated, and your surfaces will triumph.
So, buckle up, dear readers, for an adventure overflowing with mind-blowing tips and tricks that’ll unlock the secrets to preserving your cherished belongings. Say goodbye to glue-related woes and hello to a world where everything shines with pristine glory.
What is Glue?
Contents
Glue is not just a sticky substance; it’s an enchanting adhesive that brings objects together effortlessly. But what is glue exactly, and how does it work its magic? In this captivating exploration, we will uncover the secret ingredients of glue and unravel its mesmerizing bonding properties. This knowledge will empower you to choose the perfect glue for your projects and master the art of removing glue residue without leaving a trace.
Composition of Glue:
Glue is a fascinating concoction composed of natural or synthetic polymers, solvents, additives, and fillers. These ingredients work in harmony to create the ideal adhesive potion. Polymers, such as polyvinyl acetate (PVA), cyanoacrylate, epoxy, and polyurethane, form long chains of molecules that give glue its extraordinary sticking power.
Different Types of Glue:
Prepare to be amazed by the variety of glues available in the market, each designed to perform magical feats on specific materials. Let’s embark on a journey through the realms of some commonly used glues:
- Wood Glue: Crafted exclusively for wood surfaces, this mystical formula creates an unbreakable bond capable of withstanding the trials and tribulations faced by wooden joints.
- Super Glue: Known for its lightning-fast drying and Herculean bonding capabilities, super glue emerges as a superhero when it comes to uniting plastic, metal, rubber, and ceramics.
- Fabric Glue: A wizard in the world of textiles, fabric glue seamlessly weaves fabrics together for sewing and crafting projects.
- Epoxy Glue: This enchanting elixir consists of two components – resin and hardener – that combine to form an unyielding bond. It possesses extraordinary strength and is often used to unite metals, plastics, and composites.
Bonding Mechanism:
Unlock the secrets of glue’s bonding prowess as we delve into its mystical mechanism. When applied to a surface, the adhesive components of the glue delve into the material’s pores and irregularities. As the glue dries and hardens, it forges physical connections with the molecules on the surface, creating an unbreakable bond that defies gravity.
Removing Glue Residue:
Mastering the art of removing glue residue is crucial to preserving the beauty of your creations. Unveil these secret techniques:
Types of Glues and Their Removal Methods
Whether it’s a crafts project mishap or an accidental spill, removing glue without causing damage can be achieved. In this article, we’ll dive into the various types of glues and their safe removal methods, empowering you to tackle any sticky situation with confidence.
Water-based Glue – Gentle and Easy:
Water-based glue, also known as white glue, is a versatile adhesive commonly used in crafting and household projects. To remove water-based glue, dampen a cloth or sponge with warm water and gently rub the glue until it loosens. Repeat if needed. Remember, employing excessive force or abrasive materials may harm the surface, so proceed with caution.
Super Glue – A Powerful Bond:
Super glue, or cyanoacrylate adhesive, forms an incredibly strong bond between surfaces. Removing super glue requires a different approach. Try using acetone, found in nail polish remover. Apply a small amount of acetone to a cotton ball or cloth and gently dab it onto the super glue. Allow the acetone to sit for a few minutes to soften the glue before gently rubbing it away. Exercise care on delicate surfaces to prevent discoloration or damage.
Epoxy Glue – Tackling Tough Bonds:
Epoxy glue consists of a resin and hardener, creating a robust adhesive often used for metals, plastics, and wood bonding. Removing cured epoxy glue can be challenging but not impossible.
Soften the epoxy by applying gentle heat using a hairdryer or heat gun. Once softened, use a plastic scraper or putty knife to carefully scrape off the glue. Alternatively, specialized epoxy solvents can dissolve the glue without harming the surface; consult the manufacturer’s instructions for proper usage.
Hot Glue – Melting Away the Sticky Situation:
Hot glue is a versatile adhesive widely used in crafts and DIY projects. Removing hot glue can be a bit tricky, but heat is your ally once again. Apply gentle heat to the glued area with a hairdryer or heat gun to soften the glue. Once softened, carefully peel off the glue using your fingers or a plastic scraper. Stubborn spots can be dissolved with rubbing alcohol or an adhesive remover.
Construction Adhesive – Tackling Heavy-duty Glue:
Construction adhesive, designed for large surfaces in construction projects, requires a combination of heat and mechanical force for removal. Begin by applying heat to the adhesive using a hairdryer or heat gun to soften it. Then, gently chip away as much glue as possible without damaging the surface using a plastic scraper or putty knife. To remove any remaining residue, employ a solvent or adhesive remover specifically designed for construction adhesives.
Applying Heat to Remove Glue
Glue mishaps are a universally frustrating experience, leaving us grappling with stubborn residues and sticky messes. But fret not, my friend. In this captivating guide, we will delve into the secrets of applying heat to remove glue. Armed with a hairdryer, iron, or even a heat gun for the daredevils among us, you’ll soon be equipped to conquer any adhesive predicament effortlessly. So, let’s embark on an exciting journey through the realm of glue removal.
Harnessing the Power of Heat:
Applying heat has proven to be a time-tested technique for liberating surfaces from the clutches of stubborn glue. By softening the adhesive, heat allows for easy peeling without causing harm. Now, let’s uncover the intricacies of applying heat like a seasoned pro.
Hairdryer Magic:
Enter the humble hairdryer, your trusty ally in the battle against adhesive tyranny. Begin by directing its scorching breath onto the glued area, gently oscillating back and forth to distribute the heat evenly. However, exercise caution by maintaining a safe distance of 6-8 inches from the surface, as overheating could spell disaster. Watch as the glue surrenders its grip under the relentless warmth, becoming pliable and ready for removal.
Gentle Peeling:
Once your conquest has been sufficiently heated, it’s time to execute a strategic retreat. Armed with a plastic scraper or shielded fingers (if necessary), gently peel away the softened glue from its captive surface. Patience is key; remember that perfection takes time. Should any remnants persist, repeat the heating process or employ a cotton swab dipped in rubbing alcohol to banish them forever.
Iron Magic:
For those seeking an adventurous approach, an iron can become your ultimate glue-removing accomplice. Lay a cloth or parchment paper over the affected area, setting your iron to a low or medium heat setting. Gracefully press the iron onto the protective fabric, allowing the heat to seep through and work its magic on the adhesive. Maintain a delicate touch, lest you bruise delicate surfaces. Always undergo a preliminary test on an inconspicuous area, adjusting your technique accordingly.
Using Solvents to Remove Glue
In our last adventure, we learned how heat can melt away adhesive tyranny. But today, we’re diving into the enchanting world of solvents, those mystical substances that break down glue and set surfaces free. So grab your lab coats and join me as we explore the process of using solvents to remove glue from any stubborn surface.
Chapter 1: Solvents – The Heroes of the Glue-Removal Saga
Solvents, my friends, are the trusty sidekicks in our quest to banish glue. These magical liquids work by breaking down the chemical bonds in the adhesive, making it easier to bid farewell to sticky messes. But beware, not all solvents are created equal.
Chapter 2: The Solvent Squad – Acetone, Isopropyl Alcohol, and Citrus-Based Solvents
Our solvent squad is a diverse bunch, each with their own unique powers and specialties. Acetone, the mighty one, is a powerful solvent that can tackle most adhesives. But be warned – its strength can also damage delicate surfaces like plastic. Isopropyl alcohol joins the team as the milder yet effective member who specializes in adhesive residue removal.
And let’s not forget our natural hero – citrus-based solvents derived from citrus fruits. They’re safe to use on most surfaces and offer a fresh twist to our glue-removing adventure.
Chapter 3: The Dance of Diligence – Applying Solvents with Care
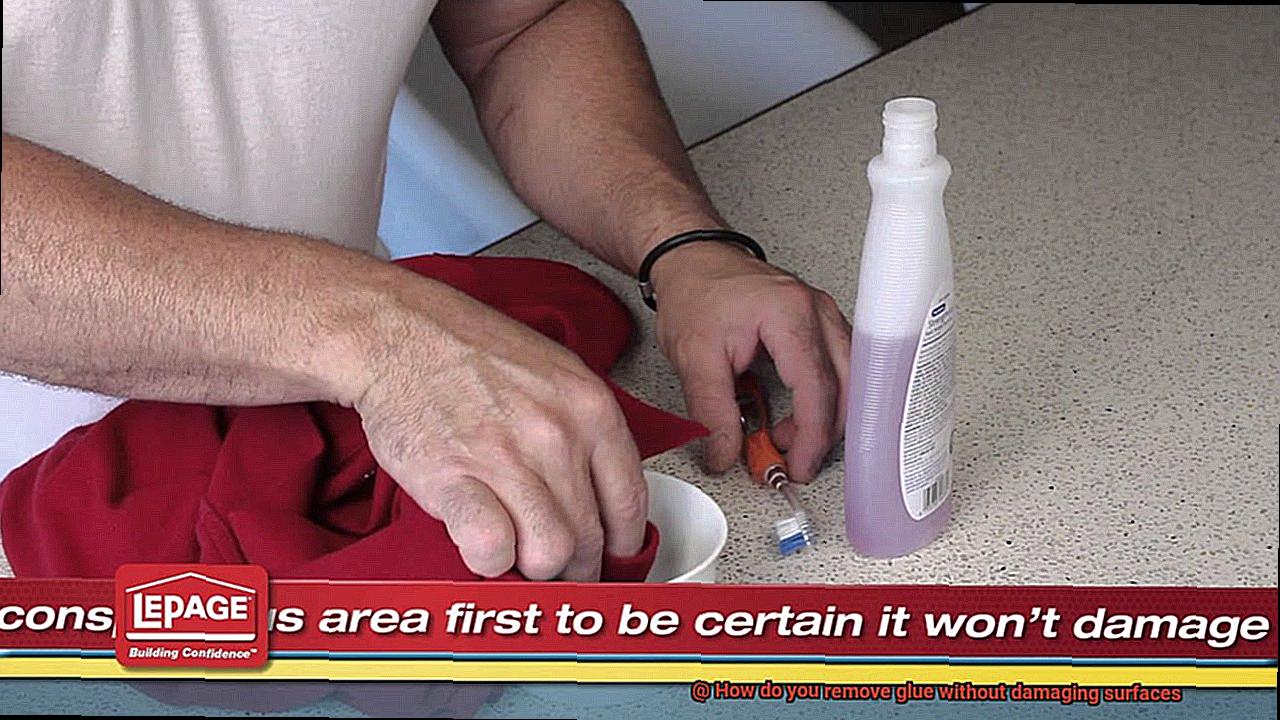
Now that we have our solvents ready, it’s time to apply them with precision and finesse. Remember, my dear comrades, less is more. Apply the solvent sparingly and avoid excessive rubbing or scrubbing, as this might cause unwanted surface damage. Before you embark on your grand mission, always test the solvent on a small, inconspicuous area to ensure compatibility. Safety first, my friends.
Chapter 4: The Battle Plan – Scrapping and Peeling
As the solvents work their magic, you might notice the glue softening and surrendering its grip. It’s time to bring out your plastic scraper or even your trusty fingernail to gently scrape or peel away the softened glue. Take it slow and steady, my comrades, ensuring you don’t harm the surface beneath.
Removing Glue with Rubbing Alcohol or Acetone
Today, we embark on an exhilarating adventure into the world of solvents. Join me as we discover the mesmerizing abilities of rubbing alcohol and acetone, our trusty allies in the fight against stubborn glue. Together, we will liberate our surfaces from the clutches of sticky tyranny. So grab your cloth and prepare for an epic battle.
Meet the Solvent Heroes:
In this corner, we have rubbing alcohol, also known as isopropyl alcohol. It may be mild-mannered, but don’t let that fool you – it’s a force to be reckoned with when it comes to removing glue. And in the other corner, we have acetone, the heavyweight champion of solvents. It can dissolve glue like nobody’s business, but be warned – it can be a bit rough on delicate surfaces. Caution is our secret weapon.
Test the Waters:
Before diving headfirst into battle, we must exercise caution. Test these solvents on a small, inconspicuous area to ensure they won’t cause any damage or discoloration. We must tread carefully to avoid unintended consequences.
Application Techniques:
Now that we’ve passed the test, it’s time to unleash the power of our solvents. Take a clean cloth or cotton ball and apply a small amount of rubbing alcohol or acetone.
Gentle Circular Motion:
With solvent-soaked cloth in hand, let us begin our assault on the glue. Gently rub the affected area in circular motions. This strategic movement breaks down the glue’s defenses and weakens its hold on the surface. Remember, patience is our ally – victory takes time.
Persistence Pays Off:
Some glues are more stubborn than others. They may have been sitting there, mocking us for far too long. But fear not. With determination and repeated applications, we will conquer even the most formidable foes. The battle may be fierce, but we will emerge victorious.
Watch Your Strength:
As we engage in this epic struggle, we must remember to temper our strength. Avoid excessive force or aggressive scrubbing, as it could lead to collateral damage. We must be precise and calculated in our actions, sparing the surface from harm.
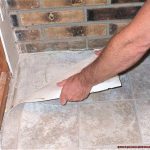
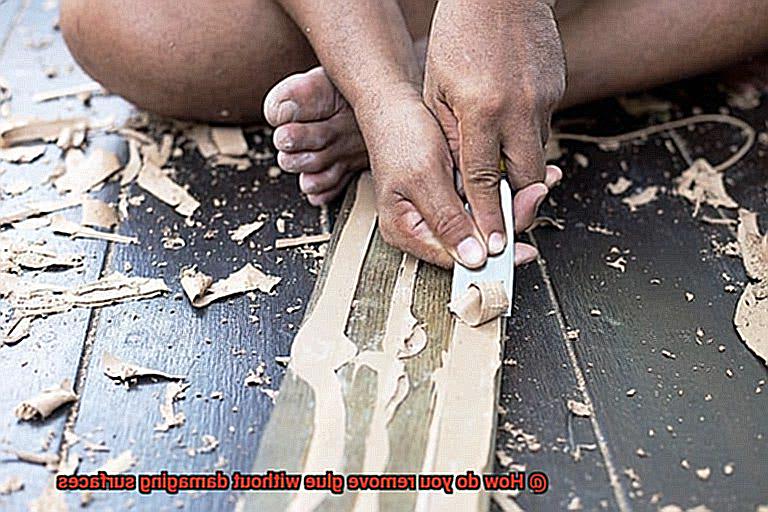
Using Mechanical Means to Remove Stubborn Glue Residues
Prepare yourselves for a thrilling expedition into the enchanting world of mechanical means. In this quest, we shall equip ourselves with scrapers, sandpaper, and the fiery embrace of heat to conquer those tenacious glue residues that cling stubbornly to our surfaces.
The Mighty Scraper:
Behold the indomitable scraper, a handheld marvel armed with a sharp edge, poised to slice through glue residues with surgical precision. But ah, heed this cautionary tale. Choose your scraper wisely, for delicate surfaces demand the gentle caress of a plastic or rubber blade to avert unsightly scratches or harm.
Sandpaper: Abrasion to the Rescue.
When glue residues have dug their heels into surfaces that can withstand some rough treatment, sandpaper emerges as our valiant hero. With its gritty texture, it unfurls like a superhero’s majestic cape, ready to vanquish even the most stubborn adversaries.
Start with a fine-grit sandpaper and let the grit size escalate triumphantly as needed. Watch in awe as those once-mighty glue residues crumble before your eyes.
Heat: Softening the Enemy:
Sweet heat – an unexpected ally in our sacred mission. By directing its fiery embrace towards glue residues, we invoke their softening powers, rendering them vulnerable to our scraping prowess.
Arm yourself with a heat gun or set your hairdryer ablaze on high temperature, and witness the miraculous transformation as those once-unyielding foes melt away.
Yet, let caution guide your every move. Excessive heat can unleash havoc upon certain surfaces, so tread lightly.
Solvents and Mechanical Might:
Behold the marriage of solvents and mechanical means – an unstoppable force that conquers all. Our trusted allies, acetone and rubbing alcohol, join forces to break down the glue, rendering it defenseless against our scraping and sanding prowess.
But heed this crucial counsel, my friends: test the solvent on a small, concealed area first to avert the wrath of unintended damage or unsightly discoloration.
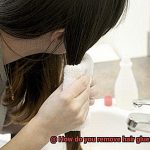
Removing Glue from Fabrics or Clothing
Fabrics and clothing are like blank canvases waiting to be adorned with our personal style. But sometimes, pesky glue stains can tarnish their beauty. Fear not. I, your trusty expert in the art of glue removal, have gathered all the knowledge you need to safely and effectively banish those sticky foes. So grab your protective gear and let’s embark on this epic journey together.
Method 1: Solvents, the Unsung Heroes:
In the quest to remove glue stains, solvents like rubbing alcohol and acetone are the unsung heroes. These powerful substances have the ability to dissolve even the toughest glues. However, before unleashing their power, it is crucial to perform a small-scale test on an inconspicuous area of the fabric to avoid any unintended damage.
Once confirmed safe, apply a small amount of the solvent on a clean cloth and gently rub it onto the glue stain. Witness as the glue surrenders to your skilled touch. Then, with a clean cloth or paper towel, blot away the remnants, leaving your fabric pristine once again.
Method 2: The Fiery Embrace of Heat:
For those bold enough to challenge stubborn glue stains head-on, heat is your ally. Envelop the stained area with a clean cloth and apply gentle warmth using a warm iron. The heat will soften the glue, making it pliable enough to scrape off with a plastic or wooden tool. But tread lightly in this fiery dance, for excessive heat can inflict irreversible damage upon certain fabrics. Embrace moderation and conquer those adhesive adversaries with finesse.
Method 3: Frozen Glory for Delicate Fabrics:
Delicate fabrics require a more gentle approach in their liberation from glue’s clutches. Behold the power of freezing. Envelop your fabric or clothing item in a protective plastic bag and grant it a few hours of icy sanctuary within the freezer. As the glue becomes frozen and brittle, carefully scrape it off with a plastic tool. Repeat this process as needed until victory is achieved and your delicate fabric regains its former glory.
Conclusion
Removing glue without causing damage to surfaces can be a tricky task, but it is not impossible.
There are several effective methods that can help you tackle this sticky situation. One option is to use heat, such as a hairdryer or a heat gun, to soften the glue and make it easier to remove.
Another approach is to apply a solvent or adhesive remover specifically designed for removing glue. These products are readily available in most hardware stores and can effectively dissolve the adhesive without harming the surface underneath.
It’s important to test any method on a small inconspicuous area first to ensure it doesn’t cause any damage.