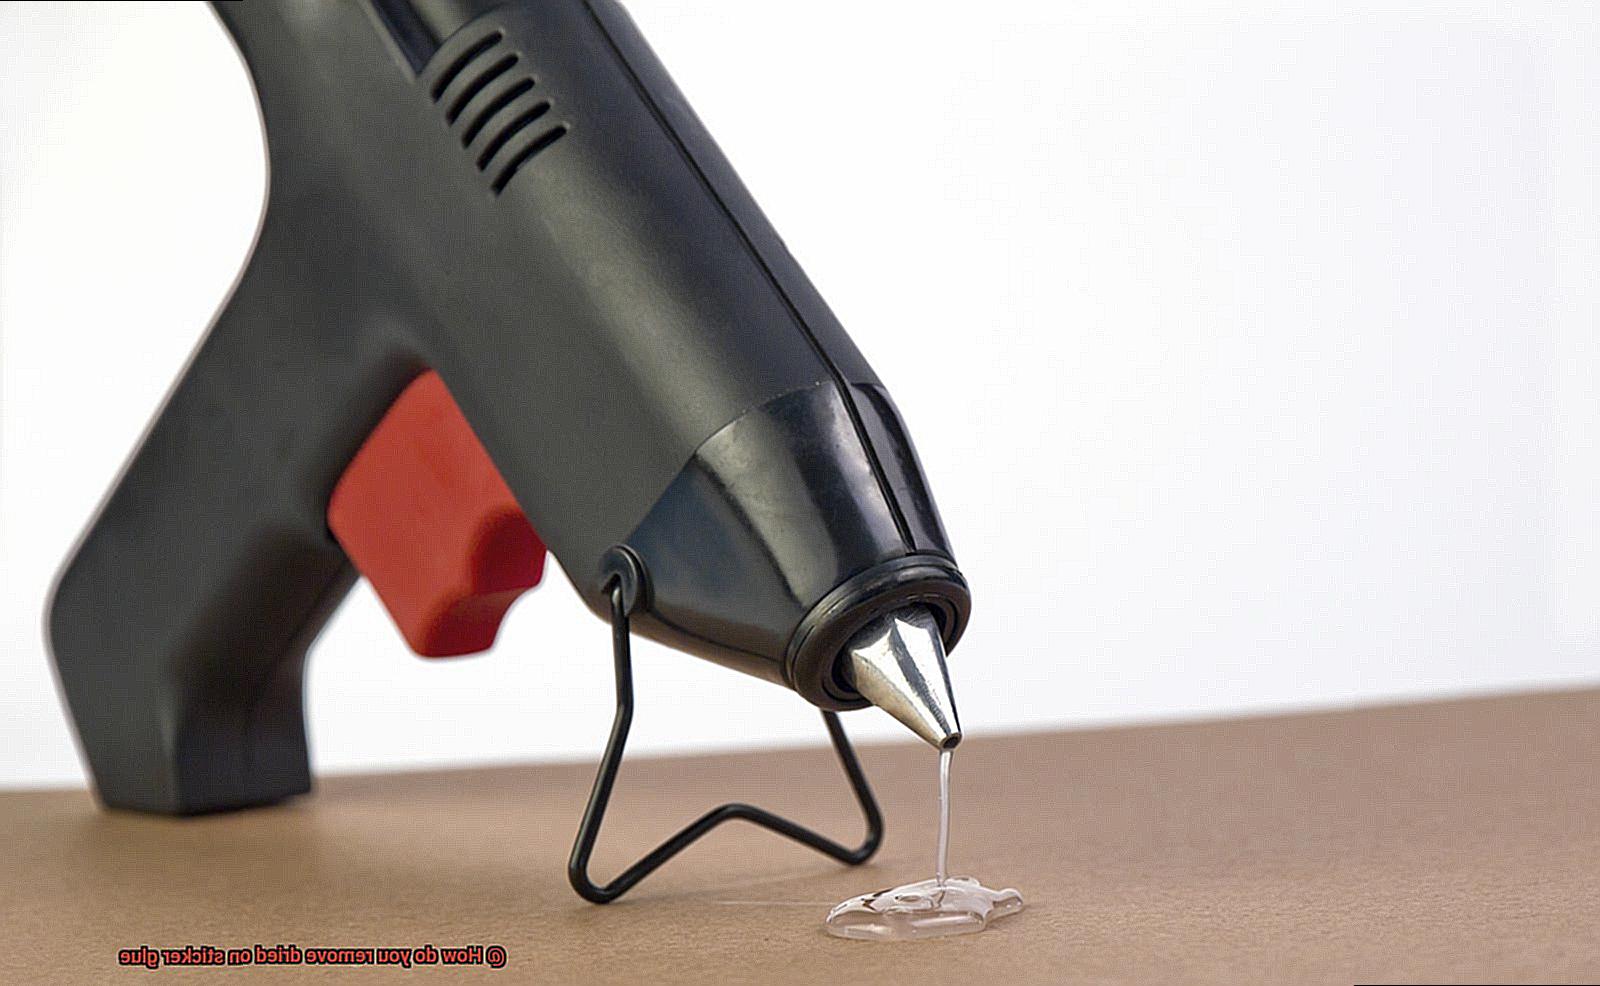
Imagine this: You finally wrestle that pesky price tag off your beloved book, only to be left with a stubborn sticker glue residue mocking you. Or perhaps your coffee table is adorned with your child’s artwork, complete with an impossible-to-remove sticker. We’ve all been there, battling the frustration of dried-on sticker glue. But fear not, because today we’re unveiling the secrets to tackling this adhesive annoyance.
In this handy guide, we’ll embark on a quest to banish those stubborn remnants from our lives. We’ll dive into the captivating world of sticker removal techniques, exploring tried-and-true methods that will leave your surfaces gleaming and your sanity intact.
From natural remedies to household heroes, we’ll uncover a treasure trove of solutions for even the most tenacious sticker glue. Prepare to witness the gentle yet powerful magic of everyday pantry items like vinegar and baking soda as they transform into superhero stain removers. And hold on tight as we explore specialized tools and products designed to make light work of these sticky situations.
But wait, there’s more. We’ll unlock the secrets to selecting the perfect solvent for each job, considering different surfaces such as glass, plastic, or wood. No more endless scrubbing or risking damage to delicate surfaces; armed with our knowledge, you’ll tackle any challenge with ease and finesse.
So come along on this sticky adventure as we equip you with expert know-how to confront dried-on sticker glues head-on. Bid farewell to unsightly residues and say hello to a clean, sticker-free world. Get ready because you’re about to become a guru in removing sticker glue.
Using Heat to Soften the Glue
Contents
- 1 Using Heat to Soften the Glue
- 2 Dissolving the Adhesive with Oil or Lubricants
- 3 Removing Sticker Glue with Rubbing Alcohol or Nail Polish Remover
- 4 A Gentler Approach for Delicate Surfaces
- 5 Commercial Adhesive Removers
- 6 Combination Methods for Stubborn Glue
- 7 Patience and Gentle Techniques are Key
- 8 Avoid Damaging the Surface
- 9 Conclusion
Imagine finding yourself in a sticky situation, struggling to remove dried-on sticker glue from a surface. Fear not, for there is a simple and effective solution – the power of heat. In this guide, we will delve into the world of using heat to soften glue, equipping you with the knowledge and techniques needed for a hassle-free removal process.
Using a Hairdryer or Heat Gun:
Harnessing the power of a hairdryer or heat gun is one of the easiest and most accessible methods for softening dried-on sticker glue. Begin by setting your hairdryer to a low or medium heat setting.
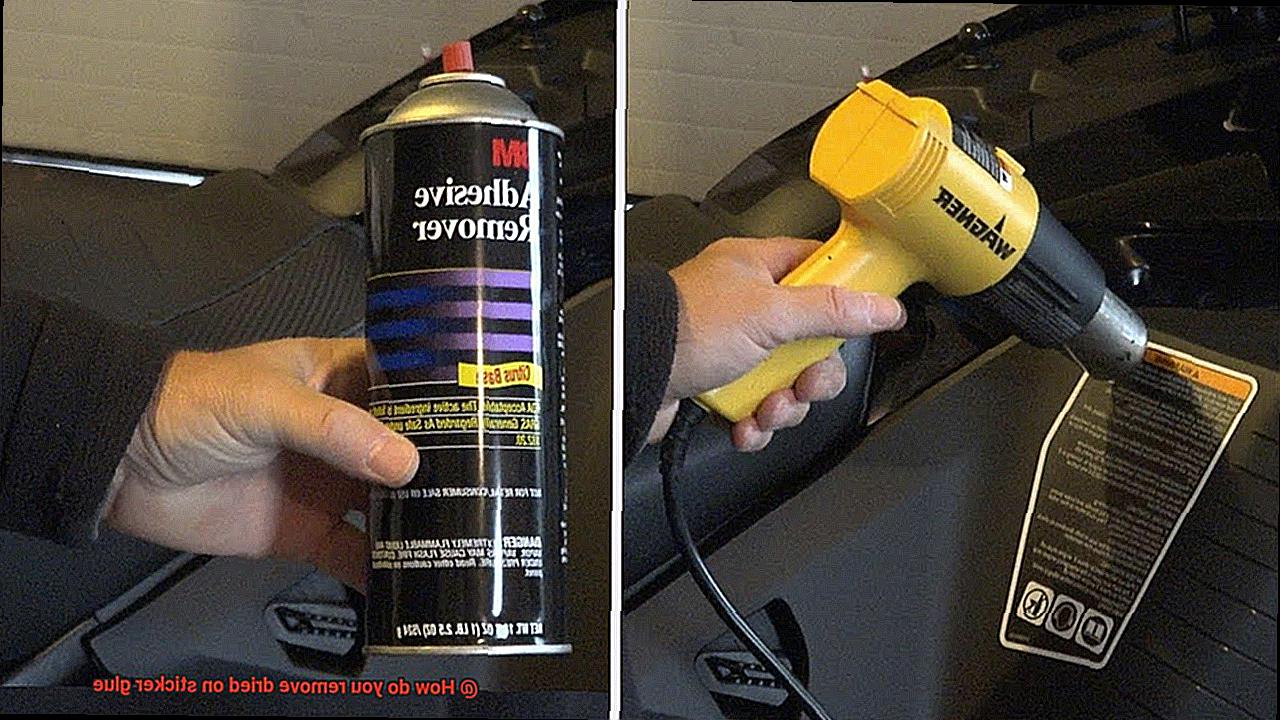
Hold it about 6 inches away from the affected area and direct the hot air straight at the glue. Employ a gentle back-and-forth motion with the hairdryer to ensure even distribution of heat. Remember, caution should be exercised to avoid overheating or holding the hairdryer too close, as this could lead to surface damage or burns. After a few minutes of applying heat, marvel as the glue transforms into a more pliable and easily removable state.
Should further softening be required, continue applying heat until the glue reaches its maximum malleability.
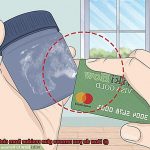
Armed with a plastic scraper or an old credit card, gently scrape away the softened glue, bidding adieu to its sticky grip.
Important Tips:
To become an expert in using heat to soften glue, keep the following tips in mind:
- Different types of glues may necessitate varying levels of heat and exposure duration. Test a small, inconspicuous area before embarking on heating the entire glued surface.
- Flat surfaces are ideal candidates for heat-induced softening. Curved or irregular surfaces may require alternative methods such as solvents or adhesive removers.
- Post-glue removal, cleanse the area with warm soapy water to eradicate any lingering residue. For an extra dose of cleanliness and disinfection, consider employing the power of rubbing alcohol or vinegar.
- Patience is key. Ensure the area is thoroughly dried before introducing any new stickers or adhesive materials to avoid re-stickiness.
Alternative Methods:
While heat is a formidable ally in the battle against stubborn glue, there exist alternative techniques for combating its tenacious grip. Explore these alternative methods:
Dissolving the Adhesive with Oil or Lubricants
We’ve all experienced the frustration of trying to remove stubborn sticker glue. But fear not. In this comprehensive guide, I will reveal the secret to effortlessly dissolving adhesive using the power of oil and lubricants. Prepare to be amazed as we delve into the various options available and learn how to conquer even the stickiest situations with ease.
The Magic of Oil and Lubricants:
Unlocking the power of oil and lubricants is a game-changer when it comes to adhesive removal. These remarkable substances possess a unique ability to break down pesky glues, making them a force to be reckoned with. Let’s explore the different options at your disposal and uncover the tips and tricks for mastering this art like a pro.
Gentle Yet Effective: Vegetable Oil and Baby Oil
When it comes to preserving the integrity of delicate surfaces, vegetable oil and baby oil take center stage. Apply a liberal amount directly onto the adhesive, allowing it to permeate for a few minutes. Then, armed with a cloth or sponge, effortlessly wipe away the dissolved glue. It’s simplicity meets effectiveness.
Cooking Spray: A Surprising Solution
Prepare to be amazed by the versatility of your beloved cooking spray. Reach for your trusty Pam or any other cooking spray in your pantry. Directly spray it onto the adhesive, granting it a few minutes to work its magic. Then, like an artist wielding their brush, wipe away the remnants of glue with grace and precision.
WD-40: The Versatile Superhero
Enter WD-40, the unsung hero of home maintenance. Its myriad of applications includes conquering sticker glue. Spritz WD-40 onto the adhesive, allowing its powers to activate for a few short minutes. With a swift motion, erase the glue residue from existence, reveling in the versatility of this mighty lubricant.
Rubbing Alcohol: The Strong Solvent
For those tougher adhesive foes, rubbing alcohol enters the scene as your trusty sidekick. Apply a generous amount onto a cloth or sponge, firmly rubbing it onto the adhesive until the glue begins to dissolve. Witness the magic unfold before your eyes as you wipe away any lingering residue. Remember, tread carefully with this potent solvent, avoiding its use on delicate surfaces.
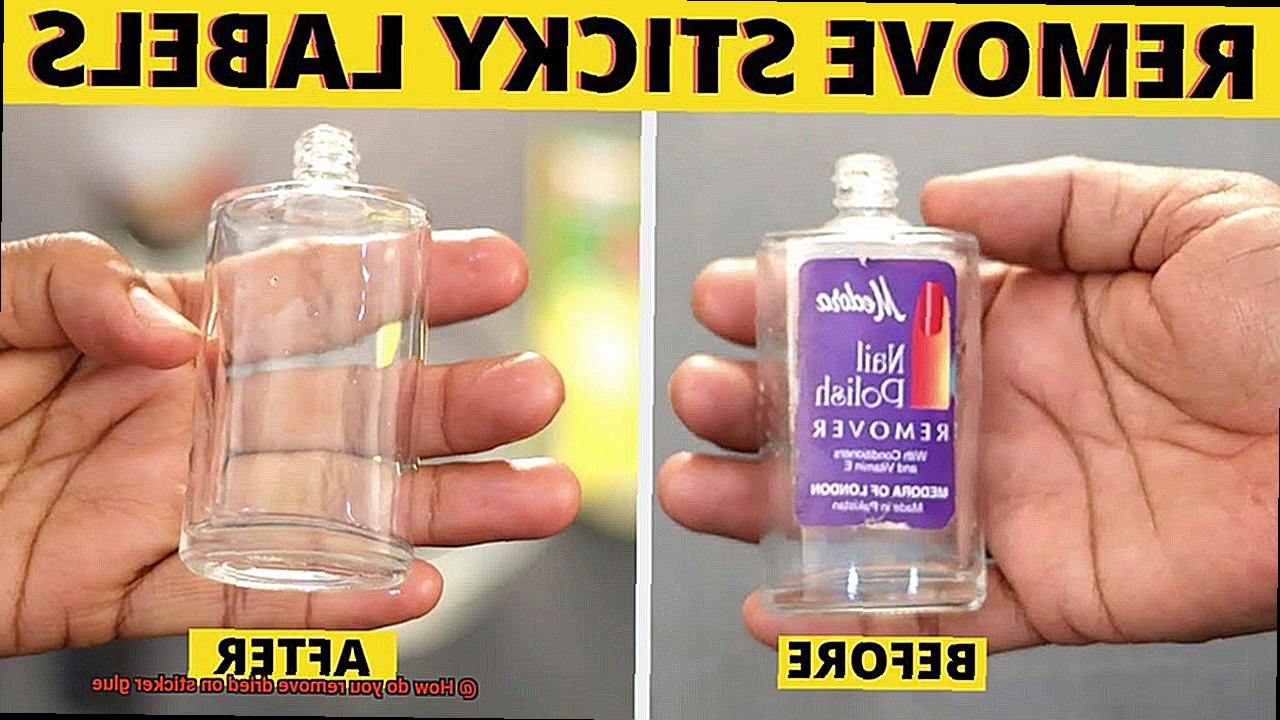
Removing Sticker Glue with Rubbing Alcohol or Nail Polish Remover
Well, fret no more. In this article, we’re going to dive into the world of adhesive removal using two household heroes: rubbing alcohol and nail polish remover. Get ready to say goodbye to sticky situations like a pro.
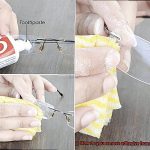
Let’s start by introducing our dynamic duo: rubbing alcohol and nail polish remover. These two common household items are known for their adhesive-busting capabilities. Rubbing alcohol, also known as isopropyl alcohol, is a versatile solvent that can dissolve many types of adhesives. On the other hand, nail polish remover contains acetone, a strong solvent that breaks down adhesives and removes sticker glue residue effectively.
But before we embark on this journey of adhesive eradication, let’s take a moment to ensure that we proceed with caution. Always test rubbing alcohol or nail polish remover on a small, inconspicuous area of the surface you’re working on. This step ensures that these solvents won’t cause any damage or discoloration.
Now that we’ve got the safety precautions out of the way, let’s get down to business. Grab a clean cloth or cotton ball and apply a small amount of rubbing alcohol or nail polish remover onto it. Gently rub the affected area with the cloth or cotton ball, applying slight pressure to loosen the adhesive. Watch in awe as the sticker glue starts to dissolve and come off.
If needed, don’t hesitate to reapply more rubbing alcohol or nail polish remover during the process. Persistence is key when dealing with stubborn sticker residues. And once you’ve successfully removed the glue, wipe the surface with a clean cloth dampened with water to remove any residue left behind by the alcohol or acetone.
Now, let’s address some safety precautions. Both rubbing alcohol and nail polish remover have strong odors and can be flammable, so make sure to work in a well-ventilated area away from open flames or sparks. It’s also advisable to wear gloves to protect your skin while handling these chemicals.
But what if rubbing alcohol or nail polish remover fails to work its magic? Fear not. We’ve got some alternative methods up our sleeves. For instance, using heat from a hairdryer can soften the adhesive and make it easier to remove. Another option is applying a commercial adhesive remover specifically designed for this purpose.
A Gentler Approach for Delicate Surfaces
We’ve all faced the frustration of dealing with stubborn sticker glue residue. But when it comes to delicate surfaces like glass, plastic, or painted surfaces, removing that adhesive requires a gentle touch. In this captivating exploration, we’ll uncover the secrets of safely and effectively removing dried-on sticker glue from delicate surfaces. So, make yourself comfortable, and let’s embark on this journey of care and precision.
Why Taking a Gentler Approach Matters:
Delicate Surfaces Demand Special Attention:
- Glass, plastic, and painted surfaces require delicate handling to prevent scratches or discoloration.
- Mishandling can result in irreversible damage, making a gentler approach essential.
Safety First:
- Harsh solvents or abrasive materials pose health risks.
- Proper ventilation and precautions ensure your safety during the adhesive removal process.
The Gentle Approach: Step-by-Step Guide
Find the Perfect Adhesive Remover:
- Seek out a mild adhesive remover specifically created for delicate surfaces.
- Thoroughly review the instructions provided by the manufacturer before use.
Test Before Applying:
Apply and Allow Time:
- Apply a small amount of the adhesive remover to a clean cloth or sponge.
- Gently rub the affected area, allowing the remover to sit for a few minutes and soften the glue.
Lift with Care:
- Use a plastic scraper or cover your fingernail with a cloth to delicately lift off the softened glue.
- Avoid using metal scrapers or abrasive materials that could scratch or harm the surface.
Repeat if Needed:
- Stubborn glue may require multiple attempts.
- Exercise patience and repeat the process until the surface is flawlessly clean.
- Forceful scrubbing or scraping should be avoided to prevent further damage.
Cleanse and Dry:
- After removing the glue, cleanse the surface with mild soap and water to eliminate any residue from the adhesive remover.
- Thoroughly dry the surface with a clean cloth to ensure no moisture remains.
Commercial Adhesive Removers
In our quest to conquer those pesky sticker glues and adhesive residues, we’ve dived into the pool of care and precision. Now, it’s time to explore the realm of commercial adhesive removers – those magical elixirs that promise to banish sticky remnants with ease. So, grab your cloth and sponge, put on your expert hat, and let’s unveil the secrets of using commercial adhesive removers safely and effectively.
Choosing the Right Remover:
In the vast world of commercial adhesive removers, it’s crucial to find the perfect match for your sticky situation. Different products excel at tackling specific surfaces or types of glue. So, take a moment to consider your needs and read product labels to ensure compatibility with your materials. Whether it’s acetone, isopropyl alcohol, citrus oil, or petroleum distillates that does the trick, make sure your remover is up to the challenge.
Safety First:
As we embark on our sticky adventure, safety should be our guiding principle. Before diving in, carefully read the instructions and warnings on the product label. Some adhesive removers may harbor toxic or flammable ingredients, demanding extra caution during their application. To protect yourself from any potential harm, use these removers in well-ventilated areas or consider wearing a mask if necessary.
Preparation is Key:
Just like a seasoned warrior prepares for battle, we must ready ourselves for our adhesive-removing mission. Begin by testing a small, inconspicuous area with the adhesive remover to ensure it won’t cause any damage or discoloration. Once you’ve given it the green light, grab your trusty cloth or sponge and get ready to unleash your expertise.
Applying the Remover:
Liquid or spray? The choice is yours, my adhesive-slaying comrade. Pour or spray a small amount of the remover onto your cloth or sponge, ensuring it’s thoroughly saturated. With gentle determination, massage the affected area in circular motions, allowing the solvents within the remover to break down the adhesive’s stubborn grip.
Combination Methods for Stubborn Glue
In the battle against the indomitable force of dried-on sticker glue, sometimes a single method just won’t cut it. That’s where the power of combination methods comes into play, delivering a knockout blow to even the most stubborn adhesive. Prepare to be amazed as we explore the world of combination methods and their ability to conquer glue on delicate surfaces.
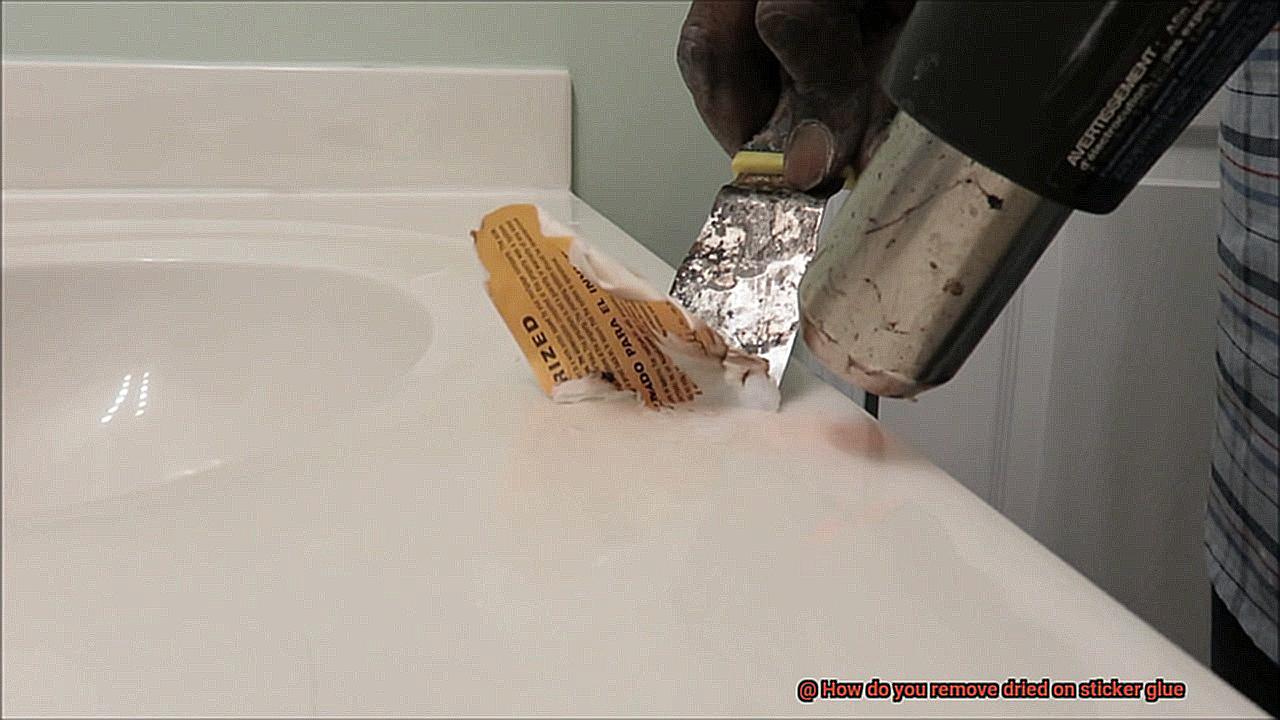
Picture this: heat and solvent, working together in perfect harmony to dismantle the sticky grip. Heat, like a warm embrace, gently softens the glue, rendering it pliable and more susceptible to removal. Harness this power by wielding a hairdryer or heat gun, positioning it inches away from the surface and moving it around to evenly distribute its warmth. Watch as the glue succumbs to the heat’s enchantment, its hold weakening before your very eyes.
But our mission is not complete yet. Introduce a solvent onto the scene – rubbing alcohol, acetone, or nail polish remover, your trusted allies in this battle. Immerse a clean cloth or sponge in your chosen solvent and delicately dab it onto the softened glue. Allow the solvent to infiltrate and penetrate the adhesive, silently unraveling its grip.
Now comes the moment of truth – bring forth your plastic scraper or old credit card, the heroes of this tale. Begin delicately scraping away the softened glue, commencing at one edge and methodically working your way towards the center. Apply gentle pressure, avoiding any sharp or abrasive tools that could cause harm to the underlying surface. Should the need arise, reapply more solvent, continuing your valiant scraping until triumph is achieved and every trace of sticker glue is vanquished.
But hold on tight – there’s another combination method waiting in the wings, ready to rescue delicate surfaces from their sticky predicament. Embrace the dynamic duo of oil or lubricant and a trusty scraping tool. Drop a few beads of cooking oil, baby oil, or even WD-40 onto the dried glue, granting it a few minutes to work its magic. The oil acts as a lubricant, allowing for the gentle removal of the glue without inflicting harm upon the delicate surface.
Patience and Gentle Techniques are Key
Today, we embark on a captivating journey into the realm of removing dried-on sticker glue. Prepare yourself for an adventure filled with patience and gentle techniques, as we navigate the path to a pristine, adhesive-free surface. Together, armed with the right tools and a dash of determination, we shall emerge victorious.
Embrace Softness, Avoid Harshness:
Imagine this: you, in a rush, armed with sharp objects or abrasive materials, ready to combat that stubborn sticker glue. Halt. These aggressive methods can cause irreversible damage. Instead, choose the path of gentleness by employing plastic scrapers or trusty credit cards. These soft warriors delicately lift off the glue without leaving a trace.
The Solvent Selection Saga:
In the tapestry of surfaces, each material has its own unique needs. Thus, it is crucial to select the right solvent or adhesive remover for your specific task. Venture forth and read labels and instructions carefully. Options like rubbing alcohol, vinegar, nail polish remover, or commercial adhesive removers await your wise choice.
Test Thy Might:
Before engaging in full-scale sticker glue removal warfare, a small test is in order. Choose an inconspicuous area to ensure your chosen solvent won’t cause any unsightly discoloration or harm. This precautionary step safeguards your beloved surface from potential mishaps.
Dab and Loosen with Grace:
Now that you possess the perfect solvent and have conducted your test patch, it’s time to unleash your gentle prowess. Apply a modest amount of solvent onto a clean cloth or cotton ball and delicately dab or rub the glue. Allow the solvent to perform its alchemy, penetrating and loosening the adhesive’s grip. Avoid aggressive scrubbing, for it only spreads the glue’s influence, prolonging the battle.
Patience, the Unsung Hero:
Ah, patience – the secret weapon in the arsenal of sticker glue removal. This endeavor demands time, my comrades. Embrace your inner Zen master and grant the solvent ample opportunity to dissolve the tenacious glue. Repeat the gentle dabbing and loosening process as required until you witness the glue’s surrender.
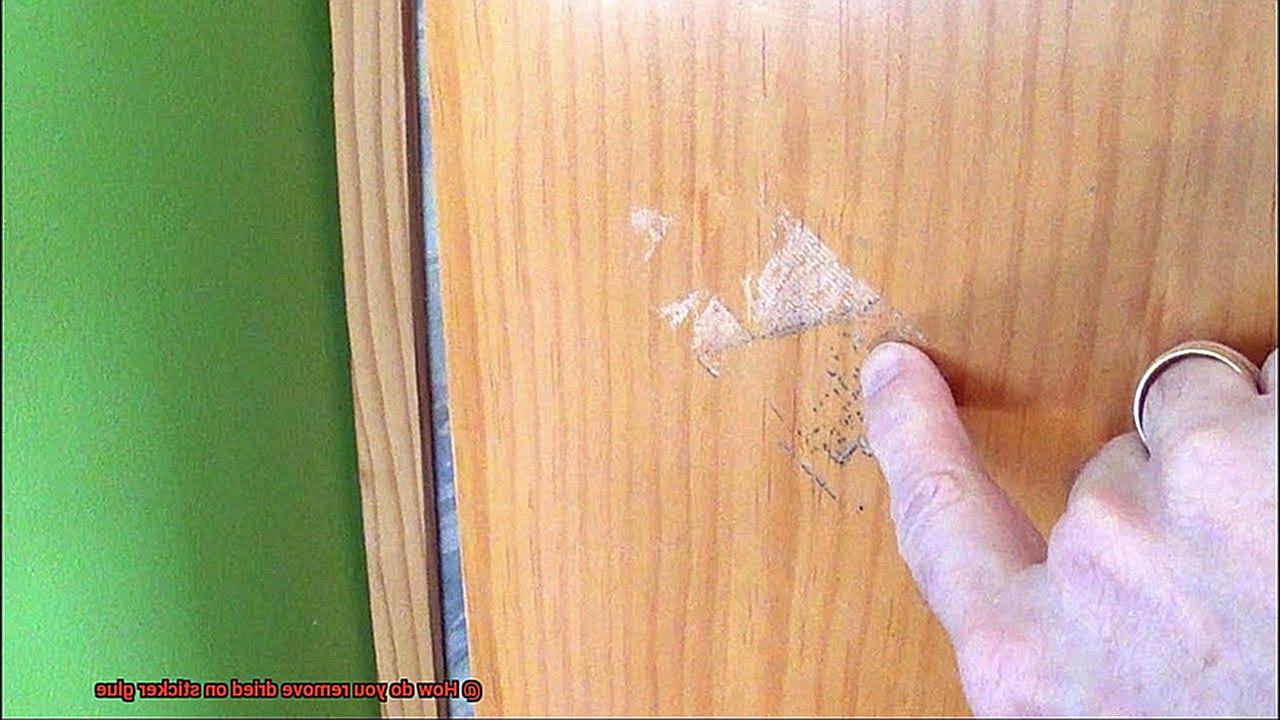
Avoid Damaging the Surface
Fear not. In this guide, we will embark on a journey to explore the art of adhesive residue removal while safeguarding the integrity of your precious materials. By taking precautions, understanding your surfaces, conducting tests, working patiently, using gentle tools, and selecting suitable solvents, you can achieve a flawless removal process. Let’s dive in and preserve the beauty of your surfaces.
Identify Your Surface:
Each surface requires a tailored approach when it comes to removing sticker glue. Glass, wood, plastic – they all demand careful consideration. By understanding the unique characteristics of your material, you can select the most appropriate method and tools for safe and effective removal.
Test, Test, Test:
Before embarking on the glue-removal journey, it is crucial to conduct a small test in an inconspicuous area. This test will reveal any potential adverse effects such as discoloration or damage caused by your chosen method. If the test area remains unharmed, you can proceed confidently, knowing that you have found a safe technique.
Embrace Patience:
In our fast-paced world, patience is a virtue often overlooked. Removing dried-on sticker glue demands a calm and deliberate approach. Resist the urge to rush or apply excessive force, as that can lead to scratches or gouges on delicate surfaces like plastic or painted finishes. Take a deep breath, find your inner zen, and gently coax the adhesive away.
Gentle Tools for Gentle Surfaces:
When it comes to selecting tools for sticker glue removal, opt for soft and non-abrasive materials such as microfiber cloths or plastic scrapers. These tools are designed to effectively remove residue without leaving behind scratches or marring the surface. Avoid sharp objects or abrasive materials like metal scrapers or scouring pads, as they can cause irreparable damage.
Solvent Selection Made Easy:
Choosing the right solvent or adhesive remover is paramount for a successful and damage-free removal process. Different solvents work best on specific materials, so ensure you select one that is compatible with your surface. Follow the manufacturer’s instructions meticulously and use the solvent in a well-ventilated area to mitigate any potential health risks.
Conclusion
Removing dried on sticker glue can be a frustrating task, but fear not.
There are several effective methods you can try to tackle this sticky situation. One option is to use a common household item like rubbing alcohol.
Simply soak a cloth or cotton ball in the alcohol and gently rub it over the glue until it starts to dissolve. Another approach is to use an adhesive remover specifically designed for this purpose.
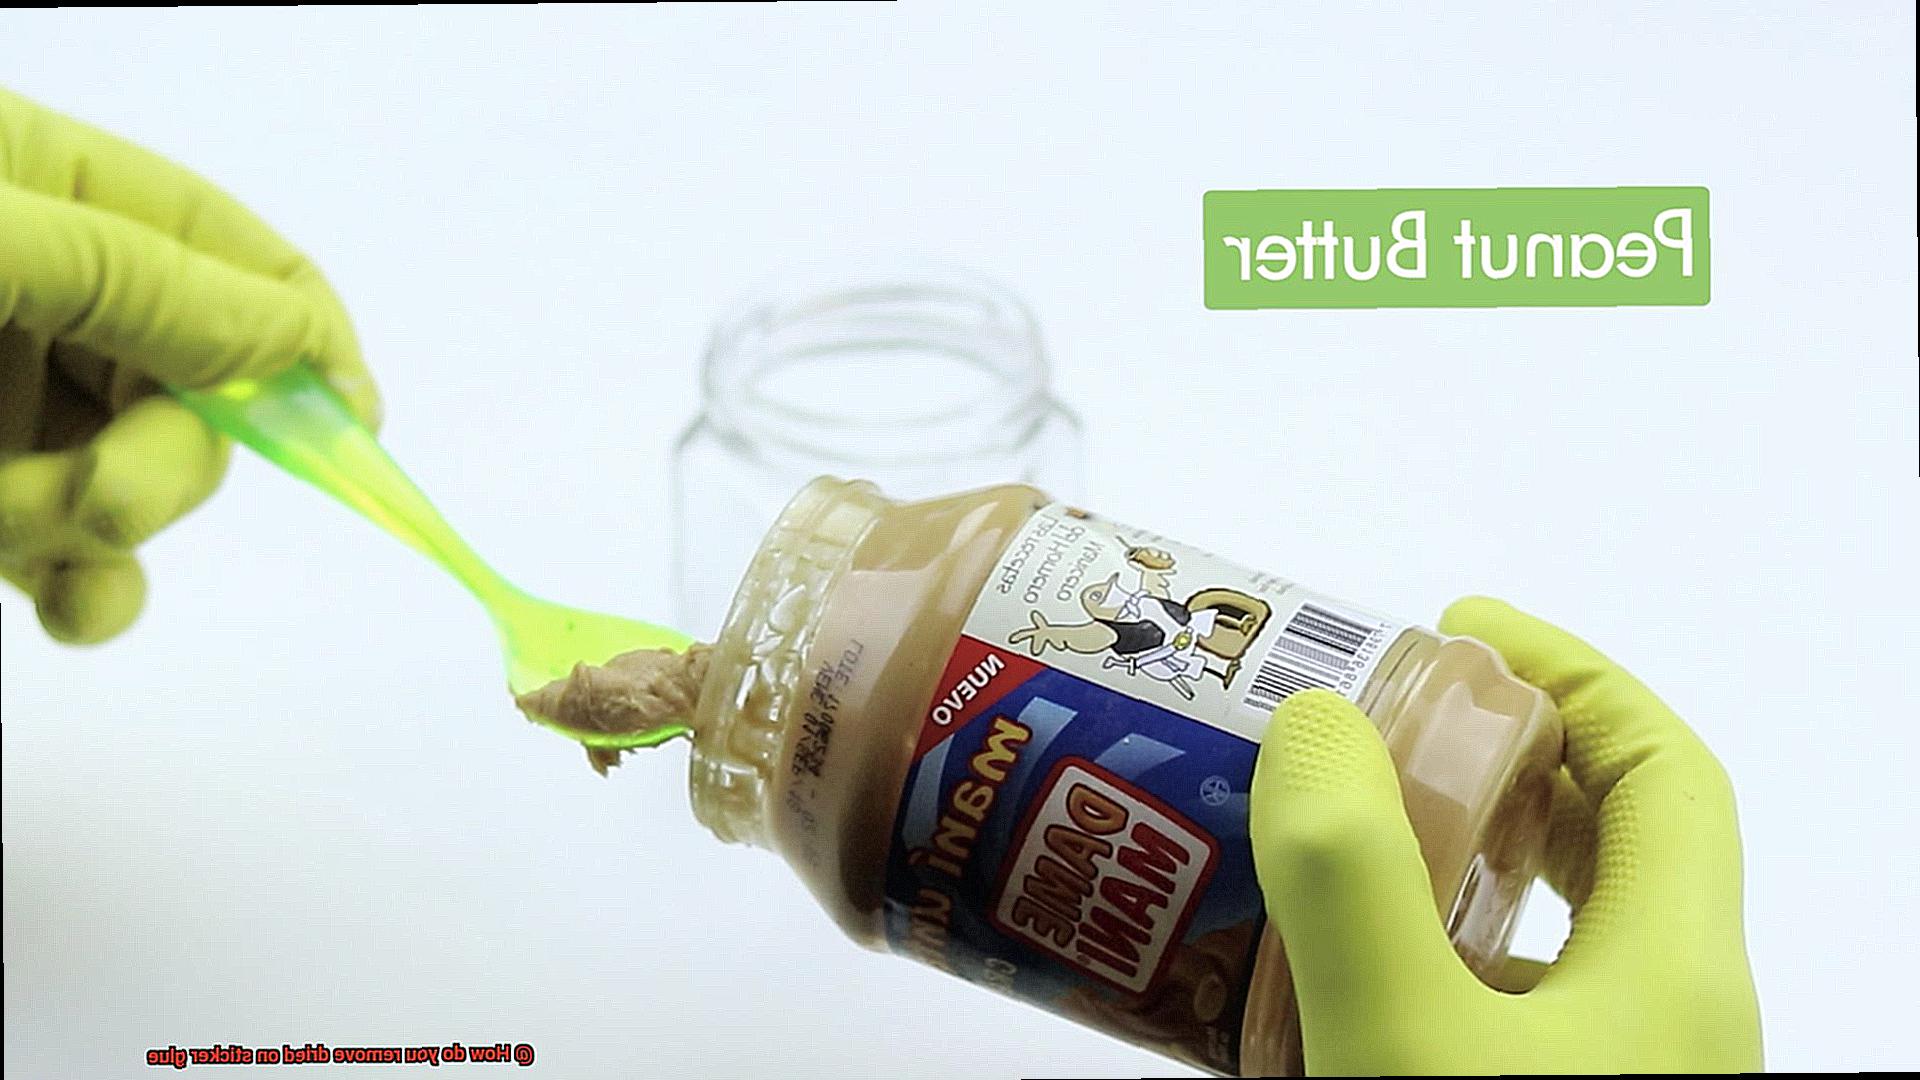
These products contain powerful chemicals that break down the glue, making it easier to remove. If you prefer a more natural solution, you can try using oils such as coconut oil or olive oil.
Apply a small amount onto the glue and let it sit for a few minutes before wiping it away with a cloth. For tougher cases, you might need to employ some elbow grease by using a scraper or your fingernail to carefully scrape off the dried glue.
Remember to be patient and take your time to avoid damaging the surface underneath.