Imagine this: You’ve just finished a DIY project, fusing two plastic pieces with the unbeatable might of Gorilla Glue. But as the glue sets, you notice an unsightly residue splattered across the plastic surface, seemingly invincible against your efforts to remove it. Panic starts creeping in as you wonder if you’re forever stuck with this glaring reminder of your crafting blunder.
Fear not, my fellow DIY enthusiast. In this guide, we’re here to arm you with the knowledge and techniques to conquer dried Gorilla Glue from plastic surfaces once and for all. Whether it’s a beloved toy, a household item, or a treasured possession, we’ve got your back—because everyone deserves a shot at flawlessness.
So grab yourself a cup of joe, slip into your metaphorical lab coat, and prepare to dive headfirst into the world of removing Gorilla Glue from plastic. Together, we’ll restore the shine and allure of your cherished items, one stubborn glue stain at a time.
What is Gorilla Glue?
Contents
- 1 What is Gorilla Glue?
- 2 How to Remove Dried Gorilla Glue from Plastic:
- 3 Precautions and Tips for Removing Dried Gorilla Glue from Plastic
- 4 Pros and Cons of Different Methods for Removing Dried Gorilla Glue from Plastic
- 5 Alternatives to Consider When Removing Dried Gorilla Glue from Plastic
- 6 Common Mistakes to Avoid When Removing Dried Gorilla Glue from Plastic
- 7 Conclusion
Gorilla Glue is not your average adhesive. It’s a powerhouse in the world of bonding, known for its exceptional strength and durability. This polyurethane-based adhesive is made from a potent combination of chemicals that react to form a bond that won’t let go. Whether you’re working with wood, metal, ceramics, or plastic, Gorilla Glue has got you covered.
What sets Gorilla Glue apart is its ability to expand and foam when it comes into contact with moisture. This expansion fills in gaps and uneven surfaces, creating a tight and secure bond that can withstand the toughest challenges. And with options like liquid, gel, and tape forms, Gorilla Glue offers versatility for any project. The liquid form is perfect for general bonding needs, while the gel form gives you more control on vertical surfaces. And if you need a quick fix or temporary bond, the tape form has got your back.
But it doesn’t stop there. Gorilla Glue also boasts water resistance once it’s fully cured. That means it can brave the elements both indoors and outdoors without losing its grip. So whether you’re tackling a project exposed to moisture or one that demands long-term durability, Gorilla Glue is your go-to.
You can easily spot Gorilla Glue by its distinctive dark brown color and strong odor. But don’t let that deter you. Just remember to follow safety precautions like wearing gloves and working in a well-ventilated area to make the most of this adhesive powerhouse.
In addition to the original Gorilla Glue, the brand also offers a range of other products like Gorilla Tape, Gorilla Super Glue, and Gorilla Wood Glue. Each one is tailored for specific applications, but they all share the same strength and reliability that have made Gorilla Glue a household name.
How to Remove Dried Gorilla Glue from Plastic:
Removing dried Gorilla Glue from plastic surfaces can be a daunting task, but with the right techniques and tools, it is possible to restore the plastic to its original condition. In this guide, we will explore different methods for removing dried Gorilla Glue from plastic, including using acetone, isopropyl alcohol, hot soapy water, scraping, and sanding. Each method has its own advantages and considerations, so it’s important to choose the approach that best suits your specific situation.
Hot Soapy Water Method:
For less severe cases, hot soapy water can be effective in removing dried Gorilla Glue from plastic. Fill a bowl or sink with warm water and add a few drops of dish soap. Submerge the affected plastic item in the soapy water and let it soak for about 20-30 minutes. After soaking, use a soft cloth or sponge to gently scrub away the glue. Rinse the plastic thoroughly with clean water to remove any soap residue.
Scraping Method:
If the glue has hardened over time or is particularly stubborn, mechanical methods such as scraping can be employed. Use a plastic scraper or an old credit card to scrape away as much of the dried glue as possible. Apply gentle pressure and work in small, controlled motions to avoid scratching the plastic. If needed, fine-grit sandpaper can be used to sand away any remaining residue. Take care not to apply too much pressure or sand too aggressively, as this can cause damage.
Precautions and Final Thoughts:
When removing dried Gorilla Glue from plastic, it is important to conduct a patch test in an inconspicuous area first to ensure that the chosen method does not cause any damage or discoloration. Additionally, wearing protective gloves and working in a well-ventilated area is advised when using chemicals such as acetone or isopropyl alcohol. Patience and caution are key throughout the removal process, and if unsure or dealing with stubborn glue, seeking professional help or consulting the manufacturer’s recommendations is recommended.
Using Acetone
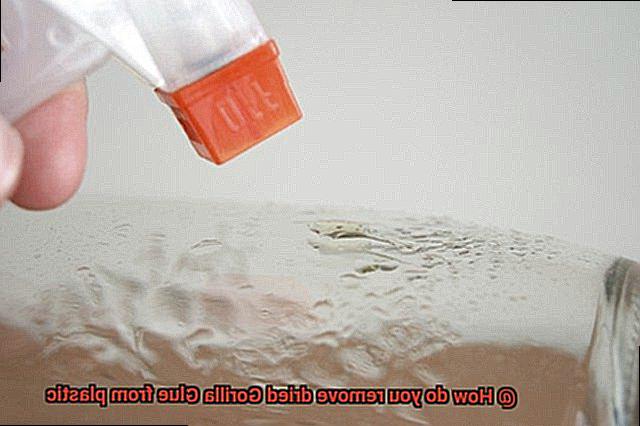
Using acetone to remove dried Gorilla Glue from plastic surfaces is a popular and effective method. Acetone, a strong solvent, breaks down the adhesive properties of the glue, allowing it to be easily removed. However, it is important to handle acetone with care due to its flammable nature and potential skin irritation.
To begin the glue removal process, gather the necessary materials: a clean cloth or sponge, acetone, and possibly a scraper or toothbrush for assistance.
- Protect yourself: Put on protective gloves and work in a well-ventilated area to ensure safety.
- Apply acetone: Start by applying a small amount of acetone directly onto the dried glue. Allow it to sit for a few minutes to soften the adhesive. The acetone will penetrate the glue and break down its bond with the plastic surface.
- Rub gently: Using a clean cloth or sponge, gently rub the affected area in circular motions. Apply slight pressure to help dissolve the glue and aid in its removal. The acetone will continue to break down the adhesive properties of the glue, making it easier to remove.
- Use a scraper or toothbrush (if needed): If the glue is not coming off easily, you can use a scraper or toothbrush to gently scrape away the softened adhesive. Take care not to scratch or damage the plastic surface while doing so.
- Repeat as necessary: Depending on the thickness or stubbornness of the dried Gorilla Glue, you may need to repeat the process several times. Apply more acetone, rub gently, and scrape if needed until all traces of the glue have been removed.
- Clean the surface: Once all the glue has been removed, wash the plastic surface with mild soap and water to remove any residue or lingering smell of acetone. Rinse thoroughly and dry the surface completely before using it again.
Using Isopropyl Alcohol
Isopropyl alcohol, also known as rubbing alcohol, is a mighty hero when it comes to tackling tough tasks around the house. From removing dried Gorilla Glue from plastic surfaces to wiping away stubborn adhesive residue, this versatile solvent is a must-have in every household toolkit.
Affordable and easily accessible, isopropyl alcohol offers a convenient solution for those sticky situations. However, before embarking on your adhesive adventure, it’s crucial to ensure that the plastic surface is compatible with this solvent. Some plastics may react negatively to alcohol, leading to potential damage or discoloration. To avoid any unwanted mishaps, always test the alcohol in an inconspicuous area first.
Now, let’s dive into the steps of using isopropyl alcohol to bid farewell to dried Gorilla Glue. First, gather your materials: isopropyl alcohol (preferably 70% concentration or higher), a clean cloth or cotton ball, and if needed, a trusty scraper or toothbrush.
With your tools at the ready, apply a small amount of isopropyl alcohol to your cloth or cotton ball – no need to drench it, just enough to get the job done. Gently rub the affected area, focusing on the glue residue. Picture yourself as a skilled artisan delicately crafting a masterpiece, using circular motions and applying gentle pressure as needed.
Patience is key here. It may take some time and repeated rubbing to completely banish that pesky dried Gorilla Glue. But fear not, for with each stroke of your cloth or cotton ball, the alcohol will work its magic, dissolving the adhesive and making it easier to remove.
For those stubborn or hardened spots of glue, try letting the isopropyl alcohol sit on the surface for a few minutes. Allow it to work its enchantment and loosen the adhesive’s grip before continuing your heroic rubbing endeavors.
Once you’ve successfully vanquished the Gorilla Glue, don’t forget the finishing touch – wipe down the plastic surface with a clean damp cloth. This will ensure any residue from the alcohol is whisked away, leaving your plastic looking pristine and free from any sticky remnants.
Before we conclude our journey through the realm of isopropyl alcohol, it’s important to note that while it reigns supreme when it comes to removing dried Gorilla Glue from plastic, its powers may not be as potent on other materials like fabric or wood. Always check compatibility and test in an inconspicuous area before introducing any solvent to a surface.
Lastly, let us not forget the importance of safety. When wielding isopropyl alcohol, do so in a well-ventilated area or don your trusty protective gloves. We must shield ourselves from potential skin irritation or inhalation of fumes, for the quest for a glue-free surface should never come at the expense of our well-being.
Using Heat
When it comes to freeing your plastic surfaces from the clutches of dried Gorilla Glue, there’s one technique that stands out as a game-changer: heat. By harnessing the power of heat, you can soften the glue, making it a breeze to scrape or peel off without causing any damage. If you find yourself in this sticky situation, fear not. Here’s a step-by-step guide that will help you conquer the glue using the mesmerizing force of heat.
Step 1: Gather Your Arsenal
Before you embark on your mission, make sure you have all the necessary tools at your disposal. Arm yourself with a trusty hairdryer or heat gun, a plastic scraper (or even your own fingernail), and a dash of patience.
Step 2: Set the Stage
Prepare yourself for battle by setting your hairdryer or heat gun to its highest setting. Remember, though, that certain plastics may not be able to withstand excessive heat, so it’s wise to conduct a test run on a small, inconspicuous area first. Once you’re ready, position yourself comfortably near the affected area.
Step 3: Unleash the Heat
Direct the fiery stream of hot air from your hairdryer or heat gun towards the dried glue. But beware. Maintain a safe distance of about 6 inches from the plastic surface to ensure that you don’t unleash too much heat and risk melting or warping your precious plastic. Now, with measured movements, glide your chosen tool back and forth across the glue with grace and precision.
Step 4: The Great Escape
As the glue feels the scorching heat, it will start to yield. Its once rigid grip will loosen, allowing you to gently scrape it away with your plastic scraper or nimble fingernail. Remember, my friend, to exercise caution and not apply excessive pressure, for we must safeguard the integrity of the plastic surface.
Step 5: Repeat and Conquer
In some cases, the glue may prove to be a formidable foe, refusing to relinquish its hold easily. Fear not. Continue applying heat and scraping until every last trace of glue is vanquished. For those particularly stubborn encounters, consider increasing the duration or cranking up the heat setting on your trusty hairdryer.
Safety Tips:
- Wield your heat tools with care to avoid burns or other injuries.
- Test the heat method on a small, hidden area first to ensure it doesn’t wreak havoc on the plastic.
- Keep a safe distance between the hairdryer or heat gun and the plastic surface to prevent any unwelcome melting or warping.
Using White Vinegar
Using white vinegar as a cleaning agent is an effective and economical way to make surfaces sparkle. White vinegar, also known as distilled vinegar, is a versatile and natural cleaning solution that can be used in a variety of household tasks. Here are some of the ways in which white vinegar can be used:
- Cleaning glass and mirrors: Mix equal parts of white vinegar and water in a spray bottle. Spray the solution onto the glass or mirror and wipe it clean with a lint-free cloth or newspaper. The acetic acid in vinegar helps to dissolve dirt and grime, leaving behind a streak-free shine.
- Removing stains: White vinegar can be used to remove various types of stains, such as coffee, tea, and red wine stains. For fabric stains, mix one part white vinegar with two parts water and apply it to the stain. Blot the stain with a clean cloth until it disappears. For carpet stains, blot the stain with a cloth soaked in white vinegar and water solution, then rinse with water.
- Deodorizing carpets: Mix equal parts of white vinegar and water in a spray bottle. Spray the solution onto the carpet and let it sit for a few minutes before blotting it dry with a clean cloth. The vinegar will neutralize odors and freshen up the carpet.
- Cleaning kitchen appliances: White vinegar can be used to clean kitchen appliances such as microwaves, refrigerators, and dishwashers. For microwaves, fill a microwave-safe bowl with equal parts of white vinegar and water and heat it on high for a few minutes. The steam from the solution will loosen food particles and make it easier to wipe clean. For refrigerators and dishwashers, wipe down the surfaces with a cloth soaked in white vinegar.
When using white vinegar as a cleaning agent, it is important to keep in mind the concentration of vinegar that should be used for each task. For general cleaning, a solution of equal parts white vinegar and water is usually sufficient. However, for tougher stains or grease buildup, undiluted vinegar can be used.
It is also important to note that white vinegar should not be used on certain surfaces, such as marble or granite, as it can cause damage. It is always a good idea to test the vinegar on a small, inconspicuous area first before using it on a larger surface.
In addition to its effectiveness as a cleaning agent, there are several benefits to using white vinegar over other cleaning agents. First and foremost, white vinegar is a natural and non-toxic solution, which makes it safe to use around children and pets. It is also an economical option, as it is readily available and inexpensive compared to commercial cleaning products. Lastly, white vinegar is an environmentally friendly choice, as it does not contain harsh chemicals that can harm the environment.
Precautions and Tips for Removing Dried Gorilla Glue from Plastic
When tackling the task of removing dried Gorilla Glue from plastic, prioritize safety by working in a well-ventilated area. Fumes may be emitted during the removal process, so open windows or use fans to circulate fresh air and minimize exposure. Additionally, safeguard your skin and eyes by wearing protective gloves and goggles. Gorilla Glue is renowned for its strong adhesive properties, making these precautions essential.
Test a Small Area:
Before applying any solvents or cleaners to the plastic surface, it is prudent to test a small, inconspicuous area first. This preliminary test will determine whether the chosen method causes any damage or discoloration. By doing so, you can assess the effectiveness of the chosen method without risking further harm to the plastic.
Avoid Sharp Tools and Excessive Force:
Steer clear of using sharp tools or applying excessive force when attempting to scrape off dried Gorilla Glue from plastic surfaces. These actions can easily scratch or damage the plastic, compromising its appearance or functionality. Instead, opt for gentle techniques that gradually loosen and remove the glue without causing any harm.
Exercise Patience:
Removing dried Gorilla Glue from plastic can be a time-consuming task, especially if the glue has been left untouched for an extended period. Rushing through the removal process or applying excessive force can lead to unsatisfactory results or further damage to the plastic. Take your time and follow the recommended steps to increase your chances of successful removal without causing harm.
Select Suitable Glue Remover:
Choose a glue remover or solvent that is compatible with the specific type of plastic being treated. Different plastics may react differently to certain solvents, making it crucial to select a suitable product that will not damage the plastic.
Pros and Cons of Different Methods for Removing Dried Gorilla Glue from Plastic
Removing dried Gorilla Glue from plastic surfaces can be challenging, but there are different methods available to tackle this task. Each method has its own pros and cons, and it is important to consider factors such as the type of plastic and the severity of the glue residue before choosing a removal method.
One effective method is the application of heat. Using a hairdryer or a heat gun, warm air is directed onto the dried glue, softening it for easy removal. The advantages of using heat include its safety, as it does not require the use of harsh chemicals. Additionally, this method is effective in quickly softening the glue. However, excessive heat can potentially damage the plastic surface, so caution must be exercised.
Another method involves using solvents or chemicals such as acetone. This solvent can be applied to the glue using a cotton ball or cloth and rubbed until it dissolves. The advantages of using solvents include their quick action in breaking down the glue and their availability and affordability. However, acetone can be harsh on certain types of plastic, causing them to warp or discolor. It is crucial to test a small area before applying acetone to the entire surface.
Rubbing alcohol is another solvent that can be used to remove dried Gorilla Glue from plastic. It breaks down the glue, making it easier to scrape off. The advantages of using rubbing alcohol include its availability and affordability compared to other solvents. It is generally less harsh on plastic surfaces, but like acetone, it can still damage certain types of plastic. Testing on a small area is recommended.
Mechanical methods can also be employed, such as using sandpaper or a nail file to gently scrape off the glue. The advantages of using mechanical methods include their safety, as they do not involve chemicals or solvents, and the ability to control the pressure applied. However, this method may take longer and require more effort compared to using solvents or heat.
Alternatives to Consider When Removing Dried Gorilla Glue from Plastic
When it comes to removing dried Gorilla Glue from plastic, there are several alternatives to consider. While commercial products are available, exploring alternative options can be more cost-effective and readily available. In this section, we will discuss various methods that can help you conquer the challenge of removing dried Gorilla Glue from plastic surfaces.
Acetone:
One alternative method is using acetone, commonly found in nail polish remover. Acetone can break down the Gorilla Glue and make it easier to remove. However, it’s important to test it on a small area first, as acetone can damage certain types of plastic.
Isopropyl Alcohol:
Another alternative is using isopropyl alcohol (rubbing alcohol). This substance can help break down the dried glue and make it easier to scrape off. It is generally safe for most types of plastic but should still be tested on a small area before applying it to the entire surface.
White Vinegar:
White vinegar, with its acidic properties, is also an alternative solution. Soak a cloth or sponge in white vinegar and apply it to the affected area for several minutes. Then, gently scrub the glue away with a soft brush or sponge.
Lemon Juice:
Lemon juice is a natural alternative that can effectively remove dried Gorilla Glue from plastic. Apply fresh lemon juice directly onto the glue and let it sit for a few minutes. Then, scrub the area with a soft brush or sponge and rinse with water.
Olive Oil or Vegetable Oil:
Olive oil or vegetable oil can be used as an alternative method for removing dried Gorilla Glue from plastic. Apply a generous amount of oil onto the glue and let it sit for some time. The oil helps soften the adhesive, making it easier to scrape off.
Heat Source:
If the glue is particularly stubborn, using a heat source like a hairdryer or heat gun can be helpful. Apply heat to the dried glue for a few minutes, being cautious not to overheat or damage the plastic. Once the glue becomes soft and pliable, gently scrape it off with a plastic scraper or your fingernail.
Commercial Adhesive Remover:
If none of the above alternatives work, consider trying a commercial adhesive remover specifically designed for removing strong adhesives like Gorilla Glue. These products are widely available and can be effective in breaking down and removing dried glue from plastic surfaces. Always follow the instructions on the product carefully and use it in a well-ventilated area.
Common Mistakes to Avoid When Removing Dried Gorilla Glue from Plastic
When it comes to removing dried Gorilla Glue from plastic, there are several common mistakes that should be avoided in order to achieve the best results. First and foremost, using excessive force or scraping too aggressively can cause damage to the plastic surface. This can leave unsightly scratches or marks that are difficult, if not impossible, to repair. Gentle handling is key when dealing with this strong adhesive.
Another mistake to steer clear of is using harsh chemicals or solvents without taking proper precautions. Certain chemicals can react with the glue and the plastic, resulting in discoloration or even melting of the plastic. It is essential to carefully read the manufacturer’s instructions and select an adhesive remover that is safe for use on plastic surfaces. Additionally, wearing gloves and working in a well-ventilated area can help protect against any potential harm.
Timing is also crucial when removing dried Gorilla Glue from plastic. Waiting too long before attempting to remove the glue can make the task more challenging. As Gorilla Glue cures over time, it becomes harder to remove as it dries. Acting promptly after the glue has dried will yield better results.
Neglecting to test the adhesive remover on a small, inconspicuous area of the plastic surface is another mistake to avoid. Different types of plastics may react differently to various adhesive removers, so it is crucial to ensure that the chosen product does not cause any damage or discoloration before applying it to a larger area.
Lastly, rushing through the removal process can lead to unsatisfactory results. Removing dried Gorilla Glue from plastic requires patience and persistence. It may take several attempts and some soaking time for the adhesive remover to fully penetrate and loosen the glue. Taking the time to properly remove the glue will prevent any residue or patches from being left behind on the plastic surface.
yppnhrvqcd8″ >
Also Read: How do you remove dried Gorilla Glue?
Conclusion
Removing dried Gorilla Glue from plastic can be a challenging task, but with the right approach, it is possible to restore your plastic items to their original condition. The first step in tackling this sticky situation is to gather the necessary materials: acetone or nail polish remover, cotton balls or swabs, a plastic scraper or credit card, and some warm soapy water.
To begin the process, dip a cotton ball or swab into the acetone or nail polish remover. Gently dab the affected area with the soaked cotton ball, being careful not to rub too vigorously as this may damage the plastic surface. Allow the acetone to sit on the glue for a few minutes to soften it.
Once the glue has softened, take your plastic scraper or credit card and carefully scrape away as much of the dried Gorilla Glue as possible. Be gentle yet firm in your scraping motion, ensuring not to scratch or gouge the plastic underneath.
After removing as much of the glue as you can with scraping, dip another cotton ball or swab into warm soapy water and gently wipe away any residue left behind. Rinse off the soap with clean water and pat dry with a soft cloth.
If there are still traces of Gorilla Glue remaining on your plastic item, repeat these steps until all of it is gone. Remember to always test any cleaning solution on an inconspicuous area of the plastic beforehand to ensure it does not cause any damage.
In conclusion, removing dried Gorilla Glue from plastic requires patience and careful attention. By following these steps and using appropriate materials, you can successfully restore your plastic items back to their original state.

