We’ve all been there, whether it’s a craft project gone wrong, a DIY disaster, or a sticky situation with your beloved mug. But fret not.
In this guide, we’ll uncover the secrets of removing dried glue residue like a pro. From household ingredients that work like magic to clever techniques you never even knew existed, get ready to embark on an unexpectedly fascinating journey into the realm of glue removal.
So grab your gloves and let’s dive in headfirst into the stickiness to get unstuck.
Understanding the Type of Glue and Surface
Contents
- 1 Understanding the Type of Glue and Surface
- 2 Soaking in Warm Water
- 3 Using Vinegar
- 4 Applying Heat
- 5 Using Rubbing Alcohol
- 6 Trying Commercial Adhesive Removers
- 7 Tips for Safe Removal of Dried Glue Residue
- 8 Alternatives to Chemical Solvents
- 8.1 Heat it up: Soften the Glue with Heat
- 8.2 Natural Oils and Solvents: Harness Nature’s Power
- 8.3 The Power of White Vinegar: Say Goodbye to Stubborn Glue
- 8.4 Lemon Juice Magic: Citrusy Scent for Easy Removal
- 8.5 Rubbing Alcohol or Nail Polish Remover: The Heavy Hitters
- 8.6 Hot Soapy Water: Simple Solution for Many Surfaces
- 9 Conclusion
Glue is a versatile adhesive that has a wide range of uses, from crafting to home repairs. However, dealing with dried glue residue can be a frustrating task, especially if you’re unsure of the best removal techniques. In this blog post, we will explore different methods for removing dried glue residue on various surfaces, providing you with the knowledge to tackle this sticky situation with ease.
Water-Based Glue:
Water-based glues, such as white glue or school glue, can be removed by soaking the affected area in warm soapy water. Gently scrub the residue with a soft cloth or sponge to loosen it before rinsing.
Solvent-Based Glue:
Solvent-based glues like super glue or epoxy adhesive require a different approach. Acetone or nail polish remover containing acetone can dissolve and loosen dried super glue. However, be cautious when using acetone on certain surfaces as it may cause damage or discoloration. Test on a small area first.
Delicate Surfaces:
For delicate surfaces like fabrics or carpets, it’s best to use a commercial adhesive remover designed specifically for these materials. These products are formulated to safely dissolve and remove glue without harming the fabric or leaving residue behind.
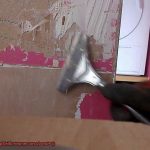
Heat Application:
Heat can be an effective tool for removing stubborn glue residue. Use a hairdryer or heat gun on low heat to soften the glue, making it easier to scrape off with a plastic scraper or credit card. Be cautious not to damage sensitive surfaces or cause burns.
Scraping Tools:
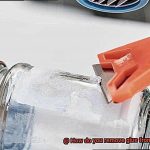
When dealing with glass or smooth surfaces, such as windows or countertops, a razor blade or scraper can be used to carefully scrape off dried glue residue. Hold the blade at a shallow angle to avoid scratching the surface. For any remaining traces, use a mixture of vinegar and water or a glass cleaner.
Soaking in Warm Water
Soaking in warm water offers a multitude of benefits that go beyond just removing dried glue residue. It’s like a soothing, rejuvenating spa treatment for your mind and body. Let’s dive deeper into the wonders of soaking in warm water and explore its many benefits.
- Relaxation: Soaking in warm water can instantly melt away stress and tension. The warmth envelops your body, soothing your muscles and joints. It’s like being cradled in a cozy cocoon, allowing your worries to dissolve away.
- Improved Blood Circulation: The warmth of the water causes blood vessels to dilate, promoting better blood flow throughout your body. This increased circulation helps deliver oxygen and nutrients to your cells, enhancing overall health and vitality.
- Pain Relief: Warm water has long been used as a natural remedy for pain relief. Whether you’re dealing with sore muscles, arthritis, or menstrual cramps, soaking in warm water can provide much-needed relief. The heat helps relax tense muscles and reduces inflammation, offering temporary respite from discomfort.
- Skin Rejuvenation: Warm water can work wonders for your skin. It opens up pores, allowing for deep cleansing and detoxification. It also improves the absorption of skincare products, maximizing their effectiveness. Say goodbye to dull, lackluster skin and hello to a radiant complexion.
- Better Sleep: A warm soak before bedtime can do wonders for your sleep quality. The relaxation it induces helps calm the mind and prepare the body for restful slumber. Soaking in warm water can be a fantastic addition to your nighttime routine, promoting a more peaceful and rejuvenating sleep.
- Stress Relief: In our fast-paced world, stress has become an unwelcome companion in our daily lives. Soaking in warm water provides a much-needed escape from the chaos. It gives you time to unwind, disconnect from technology, and focus on self-care. It’s a simple yet powerful way to recharge and find inner peace.
Remember, when soaking in warm water, it’s essential to find the right temperature that suits your comfort level. Aim for water that is warm enough to provide therapeutic benefits but not so hot that it could cause discomfort or skin irritation. It’s all about finding that perfect balance, just like Goldilocks and her porridge.
Using Vinegar
Imagine this scenario: you’re in the midst of a fun DIY project or trying to fix something around the house when disaster strikes. Dried glue residue has stubbornly attached itself to your favorite table or countertop, creating a sticky situation that seems impossible to resolve. But fear not, my friends, because I have the secret weapon that will make that glue disappear like magic – vinegar.
Yes, you heard me right. Vinegar, that humble kitchen staple, is actually a superhero when it comes to removing dried glue residue from various surfaces. And the best part? It’s cheap, eco-friendly, and safe to use on most materials. So let’s dive right into the incredible benefits of using vinegar for cleaning.
- Versatility: Vinegar is a versatile solution that can tackle a wide range of cleaning tasks. From removing dried glue residue to cleaning windows and disinfecting countertops, vinegar can do it all.
- Powerful Properties: Vinegar contains acetic acid, which helps to break down the adhesive properties of glue. This makes it easier to remove without causing any damage to the surface underneath.
- Easy-to-use: Using vinegar for cleaning is a breeze. All you need are a few simple supplies – vinegar (white vinegar works best), a cloth or sponge, a scraper or plastic putty knife, and a little bit of patience.
- Step-by-step Process: To remove dried glue residue, start by dampening your cloth or sponge with vinegar and thoroughly saturating the affected area. Then, let the vinegar sit on the glue residue for a few minutes, allowing it to work its magic and loosen up the adhesive. Afterward, gently scrape away the softened glue residue using a scraper or plastic putty knife. Repeat this process if necessary until all traces of glue are gone.
- Safe and Eco-friendly: Unlike harsh chemical cleaners, vinegar is safe to use around children and pets. It’s also an environmentally friendly cleaning option, as it doesn’t release harmful toxins into the air or water.
- Cost-effective: Vinegar is a budget-friendly cleaning solution. It’s readily available at most grocery stores and costs significantly less than commercial cleaning products.
Applying Heat
Fear not, for I have discovered a superhero solution: heat. Applying heat is a simple yet highly effective method for banishing that stubborn glue residue once and for all. So grab your hairdryer, heat gun, or iron, and let’s dive into the world of heat-powered glue removal.
Let’s start with the trusty hairdryer. This common household item is perfect for small areas or delicate surfaces. Simply aim the hot air at the dried glue, and watch as it softens and becomes easier to scrape or wipe away. Just remember to keep the hairdryer at a safe distance to avoid any unwanted damage or discoloration.
But what if you’re dealing with a larger area or an exceptionally stubborn glue residue? It’s time to bring out the big guns – the heat gun. However, be warned, this powerful tool requires caution. The intense heat it emits can cause burns or damage delicate surfaces, so use it with care.
Now, let’s talk about removing glue from fabric. For all you crafty folks out there, a clothing iron set to a low heat setting can work wonders. Place a piece of cloth over the glue and gently press the iron onto it. The heat will transfer through the cloth and soften the glue, making it easier to remove. Remember to keep an eye on the temperature and check for any signs of damage.
But wait, there’s more. Sometimes a hot water bath is all you need. Simply soak the affected area in hot water for a while and let the heat do its magic. However, be sure to check if your material can handle the heat without getting damaged.
Remember, safety always comes first. Start with the lowest possible temperature when applying heat to avoid unintended damage. And after heating, you may need to use additional methods such as scraping with a plastic scraper or using a specialized adhesive remover.
Using Rubbing Alcohol
Rubbing alcohol is here to save the day. This versatile household product is a superhero when it comes to removing glue residue from various surfaces. In this guide, we’ll walk you through the professional steps of using rubbing alcohol. But remember, safety always comes first, so let’s suit up and get started.
Step 1: Compatibility Check:
Before diving into action, it’s crucial to ensure that your surface is compatible with rubbing alcohol. Materials like glass, metal, and plastic are perfect candidates, while wood or fabric may not fare as well. Always perform a small patch test on an inconspicuous area to avoid any damage or discoloration mishaps.
Step 2: Prep Your Tools:
Now that you’ve confirmed compatibility, it’s time to gather your supplies. Grab a clean cloth or cotton ball and pour a small amount of rubbing alcohol onto it. Be prepared for the next step in our mission.
Step 3: Dab and Soak:
Dab the affected area gently with your cloth or cotton ball, allowing the rubbing alcohol to soak into the dried glue residue. This superhero solution will begin dissolving the glue, making it easier to remove.
Step 4: The Circular Motion Technique:
After a few minutes of soaking, put your superpowers to use. Begin gently rubbing the area in circular motions. The rubbing alcohol will work its magic, breaking down the glue and loosening its grip.
Step 5: Battle Stubborn Residue:
For those stronger villains of dried glue residue, you may need to repeat the process several times or bring out your trusty scraping tool. Plastic scrapers or old credit cards can be used carefully to lift off the softened glue. Remember, patience is key as you save the day.
Step 6: Wipe and Dry:
Once victorious in removing all the residue, wipe down the surface with a clean cloth dampened with water. This will remove any traces of rubbing alcohol. Finally, make sure to thoroughly dry the surface, especially if electronic devices or sensitive materials were involved.
Step 7: Safety First:
As superheroes, we always take precautions. Read and follow the instructions on your rubbing alcohol bottle. Don’t forget to wear gloves and work in a well-ventilated area to keep yourself safe while saving the world from dried glue residue.
Step 8: Alternatives in Times of Need:
In case you don’t have rubbing alcohol at hand, fear not. Other heroes like nail polish remover containing acetone or vinegar can also come to your aid when battling stubborn glue residue.
Trying Commercial Adhesive Removers
Have you ever found yourself in a sticky situation, trying to remove dried glue residue from a surface? Fear not. We have a secret weapon that will help you conquer even the most stubborn adhesive remnants. In this guide, we will walk you through the benefits and risks of trying commercial adhesive removers. Get ready to unleash the superhero powers of these magical products.
Step 1: Read the Instructions:
Before diving into battle, take a moment to equip yourself with knowledge. Reading and understanding the instructions provided by the manufacturer is crucial. Each adhesive remover may have specific techniques or safety precautions you need to be aware of. Being prepared is always better than risking any mishaps.
Step 2: Compatibility Check:
To ensure that your surface remains unharmed, perform a compatibility check. Apply a small amount of the adhesive remover on an inconspicuous area and observe for any adverse reactions. If everything looks good, you’re ready to proceed.
Step 3: Application:
Now it’s time to unleash the power of the adhesive remover. Choose the form that suits your needs – whether it’s a spray, gel, liquid, or wipe – and apply a generous amount directly onto the dried glue residue. Make sure to cover every inch of it.
Step 4: Dabbing and Soaking:
Allow the adhesive remover to work its magic by letting it sit on the residue for a few minutes. This gives it time to penetrate and dissolve the stubborn glue. For particularly tenacious adhesives, gently dab more remover onto the area and let it soak for a bit longer.
Step 5: Circular Motion Technique:
Prepare for battle by grabbing a soft cloth or sponge. Engage in a circular motion technique as you gently rub the area. This motion helps loosen and lift the dissolved glue from the surface. Remember, patience is key – avoid using excessive force that may cause damage.
Step 6: Battling Stubborn Residue:
If traces of glue still remain, don’t give up just yet. Apply another round of adhesive remover and let it sit for a bit longer. Then, repeat the circular motion technique until the residue is completely vanquished. For those persistent adhesives, consider specialized removers or seek professional advice.
Step 7: Wiping and Drying:
Victory is near. After successfully removing the glue residue, it’s time to clean the surface thoroughly. Use a damp cloth or sponge to wipe away any remaining adhesive remover. Follow up with a dry cloth to ensure the surface is left clean and dry.
Tips for Safe Removal of Dried Glue Residue
We’ve all experienced the frustration of dried glue residue on surfaces. However, with the right techniques and precautions, you can safely remove it without causing any damage.
In this guide, we’ll provide you with tips on how to effectively and safely remove dried glue residue from various surfaces.
Identify the Type of Glue:
Before you begin the removal process, it’s essential to identify the type of glue you’re dealing with. Different glues require different removal methods. Popular types include white glue, super glue, epoxy, and hot glue. By knowing what type of glue you’re dealing with, you can choose the most effective approach for its removal.
Test in an Inconspicuous Area:
Always test any cleaning solution or method in an inconspicuous area before applying it to the affected area. This precaution ensures that your chosen method won’t cause any damage or discoloration to the surface.
Scrape off Excess Glue:
To start the removal process, gently scrape off as much dried glue residue as possible using a plastic scraper or an old credit card. Be careful not to scratch or damage the surface while doing so.
Apply Heat:
For certain types of glues like hot glue or adhesive tapes, applying heat can make removal easier. Use a hairdryer on low heat or a heat gun at a safe distance from the surface to warm up the glue. Once softened, gently scrape off the residue.
Use Rubbing Alcohol:
Rubbing alcohol is an effective solvent for many types of glue. Dampen a cloth or cotton ball with rubbing alcohol and gently rub the dried glue residue until it starts to dissolve. Continue wiping until all the residue is removed.
Try Vinegar:
Vinegar is another household item that can help remove dried glue residue. Soak a cloth or sponge in vinegar and place it over the affected area. Let it sit for a few minutes to allow the vinegar to penetrate and soften the glue. Then, gently scrub with a soft brush or cloth to remove the residue.
Alternatives to Chemical Solvents
It can be a real headache. But fear not, because we have some eco-friendly alternatives to chemical solvents that are safe for your health and gentle on the environment. In this blog post, we’ll explore these alternatives and help you bid farewell to glue residue for good.
Heat it up: Soften the Glue with Heat
One fantastic alternative is using heat to soften the dried glue. Grab your hairdryer or heat gun and set it to a low temperature. Direct the heat towards the glue residue, allowing it to become pliable and easy to remove. Simply peel or scrape it off—easy peasy.
Natural Oils and Solvents: Harness Nature’s Power
Nature provides us with amazing options for removing glue residue. Try vegetable oil, olive oil, coconut oil, or even baby oil. These oils break down the adhesive properties of the glue, making it easier to wipe away with a soft cloth or sponge. For stubborn residue, multiple applications may be needed, but the results are worth it.
The Power of White Vinegar: Say Goodbye to Stubborn Glue
White vinegar is a household staple that works wonders on dried glue residue. Soak a cloth or sponge in white vinegar and apply it to the affected area. Let it sit for a few minutes, allowing the vinegar’s acidity to dissolve the glue. Then, gently scrub away the residue.
Lemon Juice Magic: Citrusy Scent for Easy Removal
Squeeze fresh lemon juice onto the dried glue residue and let it sit for a few minutes before wiping it away with a cloth or sponge. The acidic nature of lemon juice breaks down the adhesive properties of the glue, making removal a breeze.
Rubbing Alcohol or Nail Polish Remover: The Heavy Hitters
For more stubborn cases, rubbing alcohol or nail polish remover can come to the rescue. These substances contain chemicals that effectively dissolve adhesive properties. However, use them with caution and ensure proper ventilation to avoid any health risks.
Hot Soapy Water: Simple Solution for Many Surfaces
Sometimes, a simple solution is all you need. Mix a few drops of dish soap with warm water and apply it to the glue residue. Let it sit for a few minutes to soften the glue before gently scrubbing or wiping it away with a cloth or sponge. This method is particularly suitable for surfaces that can withstand moisture.
t6zgyeeeawU” >
Also Read: How do you remove dried glue from rubber?
Conclusion
Removing dried glue residue can be a pesky task, but fear not, for there are effective methods to conquer this sticky situation.
One approach is to gently scrape off the dried glue with a plastic scraper or an old credit card. Be cautious not to damage the surface underneath.
Another option is to apply a solvent such as rubbing alcohol or acetone onto a cloth and dab it onto the glue residue. Let it sit for a few minutes before wiping it away.
For tougher cases, you can try using warm soapy water and scrubbing the area with a soft-bristled brush. Remember to rinse thoroughly and dry afterwards.
Lastly, if all else fails, there are specialized adhesive removers available in stores that can tackle even the most stubborn glue remnants.