We’ve all been there, haven’t we? One minute you’re crafting or doing some DIY, and the next minute you realize you’ve got dried glue stuck to your skin.
Ugh, talk about a sticky situation. But fear not my friend, because I’m here to help you out.
Removing dried glue from your skin is actually way easier than you might think. In this blog post, I’ll walk you through all the steps to get rid of that pesky adhesive.
So if you’re ready to bid farewell to that unwanted glue, keep on reading.
Method 1: Warm Water and Soap
Contents
- 1 Method 1: Warm Water and Soap
- 1.1 Gather the necessary supplies:
- 1.2 Wet the affected area with warm water:
- 1.3 Apply a small amount of mild soap:
- 1.4 Massage the area in circular motions:
- 1.5 Rinse thoroughly with warm water:
- 1.6 Pat dry with a clean towel:
- 1.7 Repeat if necessary:
- 1.8 Avoid picking or pulling at dried glue:
- 1.9 Discontinue if discomfort occurs:
- 2 Method 2: Oil-Based Products (Baby Oil, Coconut Oil)
- 3 Method 3: Rubbing Alcohol or Acetone
- 4 Method 4: Vinegar as an Alternative Solution
- 5 Method 5: Abrasive Tools (Pumice Stone, Emery Board)
- 6 Aftercare: Moisturizing the Skin Post-Glue Removal
- 7 Precautions and Tips for Glue Removal from Skin
- 7.1 Stay Calm and Avoid Rush:
- 7.2 Identify the Type of Glue:
- 7.3 Protect Surrounding Skin:
- 7.4 Gentle Methods, No Sharp Objects:
- 7.5 Try Natural Remedies First:
- 7.6 Follow Instructions for Adhesive Removers:
- 7.7 Seek Professional Medical Advice if Needed:
- 7.8 Clean and Moisturize After Removal:
- 7.9 Monitor for Adverse Reactions:
- 8 Additional Tips for Specific Types of Glue
- 9 Conclusion
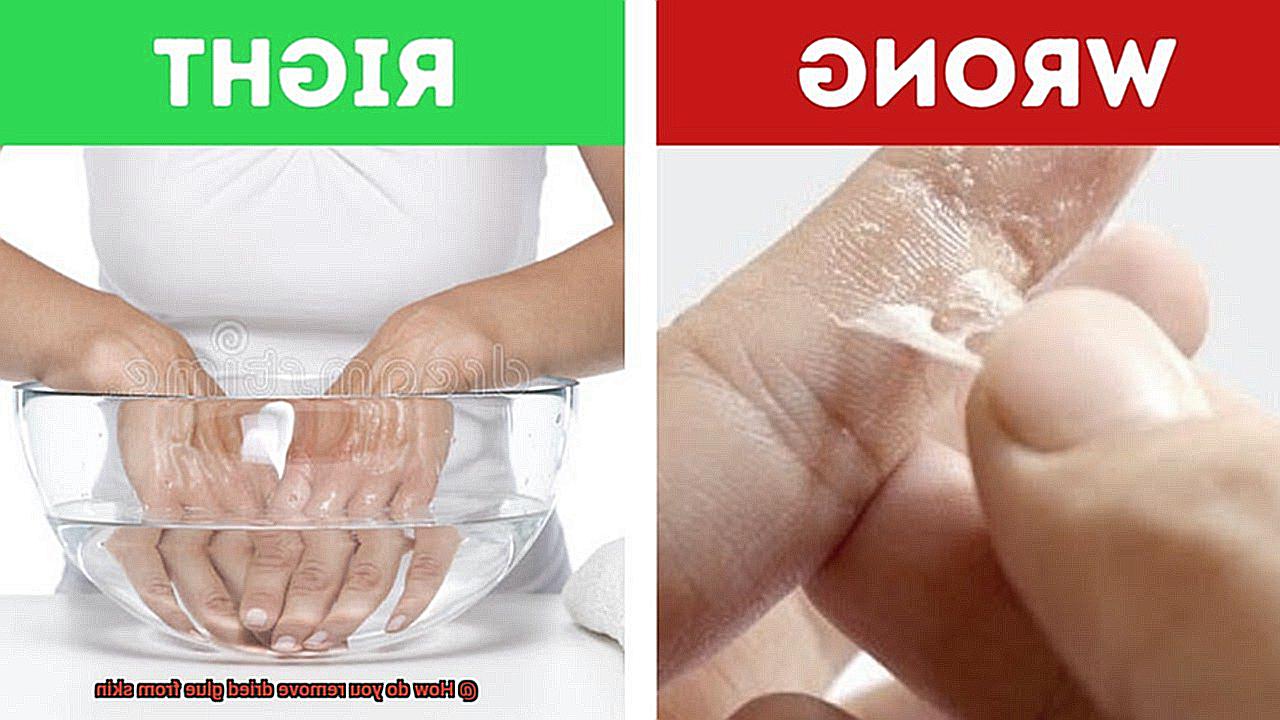
Accidentally getting glue on your skin can feel like a sticky situation, but fear not. In this article, we will discover one of the most effective and gentle methods for removing dried glue from your skin: warm water and soap. This method is suitable for most skin types and can easily be done at home. So let’s dive in and learn how to bid farewell to that stubborn glue.
Gather the necessary supplies:
Before embarking on the glue removal process, make sure you have warm water and a mild soap within reach. The warm water will work its magic by softening the glue, while the soap aids in breaking down its adhesive properties.
Wet the affected area with warm water:
The first step is to wet the area with warm water. The warmth helps to loosen the grip of the glue, preparing it for easy removal.
Apply a small amount of mild soap:
Take a small amount of mild soap in your hands and gently massage it onto the glue-covered skin. Ensure that you cover the entire affected area.
Massage the area in circular motions:
Using circular motions, massage the soapy mixture into the glue-covered skin. Allow the soap to penetrate deeply, breaking down the adhesive properties of the glue.
Rinse thoroughly with warm water:
Once you have adequately massaged the area, rinse it thoroughly with warm water. Make sure to remove all traces of soap residue from your skin.
Pat dry with a clean towel:
After rinsing, gently pat your skin dry with a clean towel. Avoid vigorous rubbing to prevent any potential irritation or damage.
Repeat if necessary:
If there are still stubborn remnants of glue remaining, don’t fret. Simply repeat steps 2 to 6 until all traces of glue are completely removed.
Avoid picking or pulling at dried glue:
It’s essential to resist the temptation to pick or pull at the dried glue. Doing so may cause skin irritation or damage. Instead, trust in the power of warm water and soap to do their magic.
Discontinue if discomfort occurs:
If you experience any discomfort or notice redness during the removal process, it’s best to discontinue and consult a healthcare professional. They can provide further guidance to ensure your skin remains healthy.
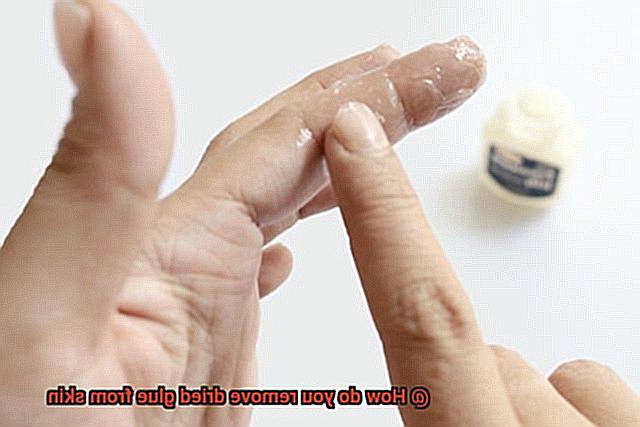
Method 2: Oil-Based Products (Baby Oil, Coconut Oil)
Getting glue on your skin can be quite a sticky situation. But fear not. In this article, we’ll embark on a magical journey of glue removal using the wonders of oil-based products. Whether it’s baby oil or coconut oil, these elixirs will effectively dissolve dried glue and leave your skin feeling clean and smooth. So grab your favorite oil and get ready for a glue-free adventure.
The Science behind Oil-Based Products:
Oil-based products work their magic by disrupting the adhesive properties of glue, making it easier to remove from your skin. As these oils penetrate the dried glue, they gradually loosen its grip, allowing you to bid farewell to that stubborn residue.
Applying the Oil:
To start the enchanting process of glue removal, generously apply baby oil or coconut oil directly onto the affected area. Embrace the moment as you gently massage the oil into your skin, ensuring every bit of dried glue is thoroughly coated. Allow the oil to work its charm by letting it sit for a few minutes, allowing it to penetrate and loosen the glue’s hold.
The Moment of Liberation:
After patiently waiting, it’s time for the grand reveal. Take a soft cloth or paper towel and gently wipe away the dissolved glue along with the oil. For more stubborn or larger areas, you may need to repeat this mesmerizing process a few times until every last trace of glue is vanquished.
Residue and Skin Care:
You might find traces of residue left behind, but fear not, for it is a small price to pay for freedom from glue. Simply cleanse your skin with soap and water to wash away any remnants and reveal a pristine canvas beneath. Rest assured, both baby oil and coconut oil are gentle on the skin and should not cause any irritation or discomfort.
Post-Glue Moisturizing Ritual:
To ensure your skin remains as blissful as ever, indulge in a moisturizing ritual after using an oil-based product to remove dried glue. This will help prevent any dryness or irritation that may arise from the adhesive properties of the glue. Treat your skin to a nourishing lotion or natural moisturizer, allowing it to bask in the glory of a glue-free existence.
Method 3: Rubbing Alcohol or Acetone
We’ve all faced the sticky situation of accidentally getting glue on our skin while immersed in a craft project or tackling repairs. The frustration is real. But, fret not, my friend, because I’m about to reveal a game-changing solution – rubbing alcohol or acetone. These powerful solvents are easily accessible and have the magical ability to remove dried glue from your skin. So, let’s dive into the nitty-gritty details and wave goodbye to those pesky glue mishaps.
Testing and Precautions:
Before diving headfirst into using rubbing alcohol or acetone, it’s crucial to perform a patch test on a small area of your skin. This precautionary step ensures that you won’t encounter any unexpected reactions or irritations. Remember, prevention is always better than cure.
Application Process:
Arm yourself with a cotton ball or swab and soak it in rubbing alcohol or acetone.
Gently dab the potent-soaked cotton ball onto the affected area where the dried glue has taken residence.
Allow the solvent to work its magic by letting it sit on the stubborn glue for a few minutes. This will soften the adhesive properties, making it easier to bid farewell to the unwanted visitor.
Embrace your inner magician and use a clean cloth or tissue to gently rub the area in circular motions. Watch as the softened glue surrenders and lifts away, leaving you with gloriously glue-free skin.
Repeat if Necessary:
Depending on the amount of glue or its level of hardened stubbornness, you may need to repeat this enchanting process several times. Don’t be disheartened if the glue doesn’t vanish immediately; remember that persistence holds the key to success.
Post-Treatment Care:
Once every trace of glue has been successfully banished, cleanse the treated area with mild soap and water. This ensures the removal of any lingering residue from the solvent. It’s important to note that rubbing alcohol and acetone can have a drying effect on the skin, so it’s essential to follow up with a moisturizer. Treat your skin to a hydration boost and revel in its happy, well-nourished state.
Important Considerations:
- Avoid using rubbing alcohol or acetone on broken or irritated skin, as it can cause further discomfort or stinging.
- Embrace a well-ventilated area when handling these solvents to prevent inhaling their potent fumes.
- Handle rubbing alcohol and acetone with care, as they are flammable substances. Keep them far away from open flames or sources of heat.
Method 4: Vinegar as an Alternative Solution
Why Vinegar Works:
Prepare to be amazed by the power of vinegar. This humble kitchen staple contains acetic acid, which is the secret behind its effectiveness in removing dried glue. The acetic acid breaks down the adhesive properties of the glue, making it a breeze to remove. So, if you’re looking for a natural and affordable alternative solution, vinegar is your superhero.
Step-by-Step Guide:
Let’s dive into the step-by-step process of using vinegar to remove dried glue from your skin:
- Gather your supplies: You will need white vinegar, warm water, a clean cloth or cotton ball, and a moisturizer or natural oil.
- Dilute the vinegar: If you have sensitive skin, dilute the vinegar with an equal amount of warm water to avoid any potential irritation.
- Soak the affected area: Dip the cloth or cotton ball into the vinegar solution and gently press it onto the dried glue. Let it soak for a few minutes to soften the glue.
- Gently rub the area: After soaking, start gently rubbing the affected area in circular motions using the cloth or cotton ball. Watch in awe as the vinegar works its magic, breaking down the glue.
- Remove all traces: Repeat the rubbing motion until all traces of dried glue vanish. Take your time and be gentle to avoid any skin irritation.
- Rinse with warm water: Once the glue is completely gone, rinse the area with warm water to remove any vinegar residue.
- Moisturize for healthy skin: After rinsing, apply a moisturizer or natural oil to soothe and hydrate your skin. This step is crucial as vinegar can be drying.
Method 5: Abrasive Tools (Pumice Stone, Emery Board)
I have the secrets to using abrasive tools like pumice stones and emery boards to save the day.
Let’s start with the mighty pumice stone. This natural volcanic rock is like a superhero in the world of exfoliation and smoothening rough skin. With its rough texture, it gently scrubs away dried glue without causing irritation. To unleash its powers, wet the affected area with warm water and get ready to work your magic. Gently rub the pumice stone in circular motions over the glue residue, being careful not to apply too much pressure. We don’t want any damaged skin. Keep going until the glue is banished, then rinse and pat dry.
Now, meet another hero: the emery board. You may know this tool for filing nails, but it’s also great for eradicating dried glue. Its gritty surface helps loosen and lift stubborn glue from your skin. Simply rub it back and forth over the affected area, using your superhero strength. Remember, gentle is the name of the game here – we don’t want any casualties in the form of skin damage.
Before you rush off to save the day with these magical tools, a word of caution: use clean pumice stones or emery boards without debris or residue. And if you have sensitive skin, take it easy and consider alternative methods if needed. We want you to be a hero without unwanted side effects.
Aftercare: Moisturizing the Skin Post-Glue Removal
Now it’s time to give your skin the tender loving care it deserves. In this article, we will delve into the importance of moisturizing your skin after glue removal and provide you with expert recommendations for the best moisturizers and aftercare practices.
The Significance of Moisturizing:
After glue removal, your skin may be left feeling dry, irritated, or even slightly damaged. This is where moisturizing comes to the rescue. By replenishing your skin’s moisture levels, moisturizers aid in healing and restore its natural balance. Pampering your skin with proper hydration not only promotes its health but also enhances its appearance and texture.
Top Moisturizers for Aftercare:
When selecting a moisturizer for aftercare, opt for products specifically designed for sensitive or damaged skin. Look for ingredients like soothing aloe vera, calming chamomile, or nourishing shea butter. A few popular options include CeraVe Moisturizing Cream, Aveeno Daily Moisturizing Lotion, and Eucerin Intensive Repair Lotion.
Techniques for Application:
Once you’ve found the perfect moisturizer, it’s time to apply it with finesse. Begin by cleansing your skin gently using lukewarm water and a mild soap or cleanser to eliminate any residual glue. Then, delicately pat your skin dry with a soft towel before generously applying your chosen moisturizer to the affected area. Massage it in using gentle circular motions, ensuring deep absorption.
Harnessing the Power of Occlusive Ointments:
For an extra layer of protection and hydration, consider applying a thin coat of petroleum jelly or a similar occlusive ointment on top of your moisturizer. This creates a barrier that prevents moisture loss and seals in essential hydration. Remember not to overdo it, as excessive ointment can lead to greasiness or clogged pores.
Frequency and Additional Aftercare Practices:
Moisturizing should become a regular ritual, ideally twice a day, especially during the initial days following glue removal. This consistent hydration routine aids in the skin’s healing process and prevents dryness. Additionally, avoid using harsh or irritating products such as exfoliating scrubs or alcohol-based solutions during aftercare. Shielding the treated area from excessive sun exposure is also crucial, so don’t forget to apply sunscreen with an SPF of 30 or higher if venturing outdoors.
Precautions and Tips for Glue Removal from Skin
Accidentally getting glue on your skin can be a sticky situation. However, it’s important to approach glue removal with caution to prevent harm or complications. In this article, we’ll discuss nine precautions and tips for safely removing glue from your skin.
Stay Calm and Avoid Rush:
When faced with glue on your skin, it’s crucial to stay calm and avoid panic or rushing. This will help you make rational decisions and prevent accidents during the removal process.
Identify the Type of Glue:
Different glues require different removal techniques. Before attempting to remove the glue, identify the specific type of glue used. This will help you choose the most effective removal method.
Protect Surrounding Skin:
To prevent the glue from spreading or causing irritation, apply a barrier around the glued area. Petroleum jelly or a thick moisturizer can create a protective layer that safeguards the surrounding skin.
Gentle Methods, No Sharp Objects:
Avoid using sharp objects or abrasive materials to remove the glue. Scratching or scraping can cause injury or damage to the skin. Opt for gentle methods that gradually dissolve or soften the glue for easier removal.
Try Natural Remedies First:
Before resorting to harsh chemicals, try natural methods like vegetable oil, olive oil, vinegar, or warm soapy water. These household items can effectively break down certain types of glue without causing irritation.
Follow Instructions for Adhesive Removers:
If natural methods don’t work, consider using over-the-counter adhesive removers specifically designed for glue removal from the skin. Carefully read and follow the instructions on these products for safe and effective use.
Seek Professional Medical Advice if Needed:
If the glued area is sensitive or home removal attempts have been unsuccessful, consult a medical professional. They have access to specialized tools and techniques to safely remove stubborn glue without harming the skin.
Clean and Moisturize After Removal:
After successfully removing the glue, clean the area with mild soap and warm water to remove any residue. Follow up by applying a moisturizer to soothe and hydrate the skin.
Monitor for Adverse Reactions:
Keep an eye on the treated area for any signs of irritation, redness, or discomfort. If you experience any adverse reactions, seek medical attention promptly.
Additional Tips for Specific Types of Glue
When it comes to removing dried glue from your skin, different types of glue may require specific methods for effective removal. In this article, we will provide additional tips for removing specific types of glue, including super glue, craft glue, Gorilla Glue, and hot glue. By understanding the properties of each adhesive, you can confidently tackle any sticky situation. Let’s dive in.
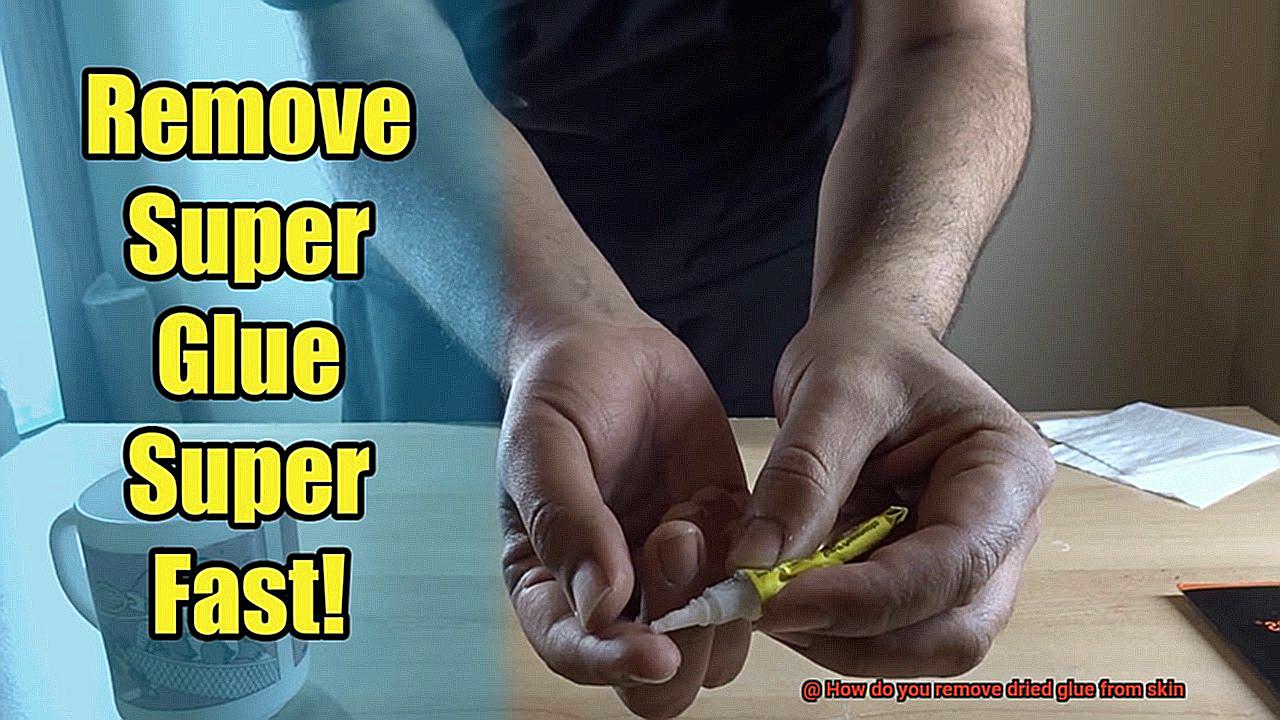
Super Glue – The Strong Bond Buster:
Super glue, known for its strong bond, can be difficult to remove from the skin once it has dried. To remove super glue, start by soaking the affected area in warm soapy water for a few minutes. This will help soften the glue. Gently try to peel off any loose glue without pulling too hard. If the glue doesn’t come off easily, apply a small amount of acetone-based nail polish remover or rubbing alcohol to a cotton ball and dab it onto the glue. Let it sit for a minute or two before attempting to remove the glue again.
Craft Glue – Water-Based Wonders:
Craft glues like white school glue or clear craft glue are water-based and easier to remove from the skin. Simply wash your hands with warm soapy water to remove the glue. If the glue has hardened, soak the affected area in warm water to soften it, then gently rub it off with your fingers or a soft cloth.
Gorilla Glue – The Mighty Adhesive:
Gorilla Glue is a strong adhesive that can be more challenging to remove. Start by soaking the affected area in warm soapy water for several minutes. Gently peel off any loose glue with your fingers or a soft cloth. If the glue is stubborn, mix equal parts vegetable oil and baking soda together and apply it to the glue. Rub the area in a circular motion to break down the adhesive and make it easier to remove.
Hot Glue – Handle with Care:
Hot glue can cause burns, so be cautious when removing it from your skin. If the glue is still hot, run the affected area under cold water to cool and harden the glue. Once cooled, carefully peel or roll off the glue. If there’s any residue left, apply ice to further harden it before gently scraping it off with a plastic scraper.
Also Read: How To Remove Glue From Hands?
Conclusion
Removing dried glue from skin can be a sticky situation, but fear not, there are effective methods to come to your rescue. One option is to use warm soapy water and gently scrub the affected area with a soft cloth or sponge. This can help loosen the glue and make it easier to remove.
Another technique involves using an oil-based substance such as baby oil, coconut oil, or even olive oil. Simply apply a small amount onto the glue and let it sit for a few minutes. Then, using a gentle rubbing motion, work the oil into the glue until it starts to dissolve. Finally, wash off any residue with soap and water.
If you’re in a hurry and need quick results, acetone or nail polish remover can do the trick. However, be cautious when using these products as they can cause skin irritation if left on for too long. Apply a small amount onto a cotton ball or pad and gently dab at the glue until it starts to lift off.
For those with sensitive skin or who prefer natural remedies, vinegar can be an excellent alternative. Soak a cloth in vinegar and place it over the affected area for several minutes. The acidity of the vinegar will help break down the glue, allowing you to easily wipe it away.
In conclusion, removing dried glue from skin may require some patience and experimentation with different methods. Whether you choose warm soapy water, oils like baby oil or coconut oil, acetone/nail polish remover, or vinegar, always remember to be gentle and avoid harsh scrubbing that could damage your skin.