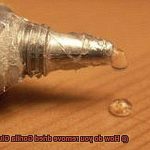
Imagine this: you’ve just completed a project that required a super strong adhesive bond on your metal surface. You take a step back, admire your handiwork, and begin the cleanup process. But hold up. What’s that stubborn residue left behind by the Gorilla Glue on your precious metal? Before panic sets in, take a deep breath because I’m here to help you tackle this pesky problem.
In this blog post, we’re going to explore the depths of removing cured Gorilla Glue from metal. Whether it’s an accidental spill or glue that oozed out during the drying process, fear not. I’ll guide you through an array of effective methods so you can bid farewell to that irritating residue on your metal surfaces.
We’ll dive into the realm of household items that can come to your rescue – think acetone, rubbing alcohol, and even everyday cooking ingredients. Not only will I provide you with clear step-by-step instructions, but I’ll also share some pro-tips to ensure a successful removal process without causing any damage to your beloved metal. Safety first. We’ll discuss essential protective measures you need to keep in mind.
No more wasting hours scraping and struggling to remove dried Gorilla Glue from your metal surfaces. It’s time to transform your DIY experience into one that’s stress-free and enjoyable. So grab your trusty tools, prepare yourself for some valuable knowledge, and let’s dive headfirst into the exciting world of removing cured Gorilla Glue from metal.
What is Gorilla Glue?
Contents
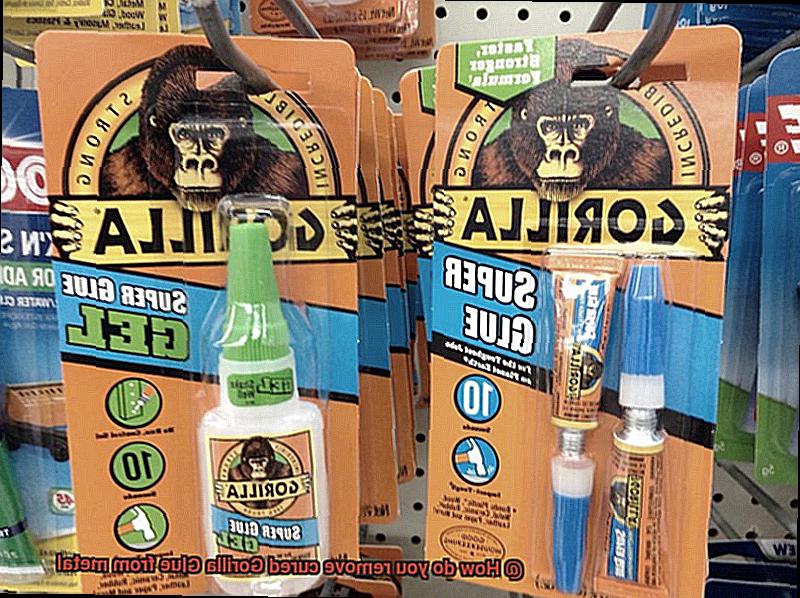
In the realm of adhesives, one name reigns supreme for its unrivaled strength and versatility – Gorilla Glue. This extraordinary polyurethane adhesive has become a beloved companion in the world of DIY projects, crafts, and repairs, thanks to its remarkable ability to bond an array of materials together. In this captivating exploration, we will uncover the features and applications of Gorilla Glue, while also providing invaluable tips for safely removing it from metal surfaces.
Unleashing the Power:
Gorilla Glue owes its moniker to the formidable strength and resilience of gorillas. Just as these majestic creatures defy nature’s challenges, this adhesive is meticulously formulated to create bonds capable of withstanding even the harshest conditions. Be it metal, wood, ceramics, stone, or glass, Gorilla Glue forges an unbreakable union that stands the test of time.
Forms and Applications:
The versatility of Gorilla Glue can be witnessed through its diverse range of forms catered to suit various bonding needs. The liquid form is the go-to choice for most, providing effortless application through brushes or nozzles. For those seeking enhanced control during application, the gel form offers a thicker consistency that ensures precision. Meanwhile, the tape form presents a hassle-free bonding experience without the need for clamps or tools.
A Mighty Foam:
One extraordinary trait that sets Gorilla Glue apart is its enchanting foaming action. Like a magical elixir, this adhesive expands upon application to fill gaps and irregularities in the surfaces being joined. This exceptional characteristic makes it an ideal choice for filling voids and reinforcing bonds with unparalleled strength. Regardless of how rough or uneven the surfaces may be, Gorilla Glue guarantees an unwavering and durable connection.
Curing Time and Unyielding Durability:
The curing time of Gorilla Glue varies depending on the specific product and environmental conditions. Typically, it takes approximately 24 hours for the adhesive to achieve full strength and solidity. However, in colder or humid environments, a little more patience may be required. Once fully cured, Gorilla Glue not only becomes impervious to water but also demonstrates unwavering resistance to temperature changes, moisture, and even the relentless onslaught of UV radiation. These exceptional qualities make it a reliable choice for both indoor and outdoor applications.
Necessary Precautions
So, you’ve experienced the incredible bonding power of Gorilla Glue and successfully completed your DIY project or repair. But now, you’re faced with the challenge of removing the cured glue from a metal surface. Fear not. In this article, we’ll explore why it’s crucial to take certain precautions when attempting this task. By following these necessary steps, you can ensure a safe and effective removal process without causing any harm to the metal surface.
Protect Yourself:
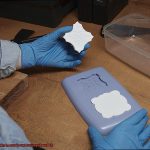
To start off, prioritize safety by donning protective gloves and safety goggles. These essential items will shield your skin and eyes from potential harm or irritation during the glue removal process.
Ventilation is Key:
Work in a well-ventilated area to prevent inhaling any fumes that may be emitted during the removal process. By opening windows or using fans, you can ensure fresh air flow and minimize any risks associated with chemical exposure.
Test on a Small Spot:
Before applying any chemical or solvent to the glued area, conduct a test on a small, inconspicuous spot of the metal surface. This precautionary step allows you to check for adverse reactions and determine if the solvent is safe to use without causing damage or discoloration.
Follow Instructions:
Different solvents or chemicals may come with specific recommendations or precautions from their manufacturers. Take the time to carefully read and follow these instructions to ensure safe and effective glue removal. Each product has its own unique properties and usage guidelines that should be adhered to for successful outcomes.
Keep Away from Flames:
Take extra caution with solvents or chemicals that may be flammable. It’s vital to keep them away from any open flames or sources of ignition to prevent accidents or fires. Make sure your work area is free from any potential hazards that could compromise your safety.
Seek Professional Guidance:
If you’re unsure about the best solvent or method to use for removing cured Gorilla Glue from metal, it’s always wise to seek professional guidance. Consult with an expert or contact the manufacturer of the glue itself for expert advice tailored to your specific situation. Their knowledge and expertise can help you choose the safest and most effective approach.
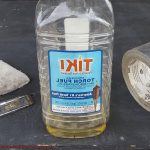
Acetone Method
Enter the Acetone Method, a tried-and-true technique that works wonders in removing Gorilla Glue from metal surfaces. In this article, we will guide you through each step of this adhesive battle, ensuring both your safety and success. Prepare to witness the magic of acetone as it becomes your mighty ally in conquering this sticky challenge.
Unveiling the Powerhouse: Acetone and its Secrets:
Acetone, a colorless liquid renowned for its unrivaled solvent properties, is more than just a nail polish remover. This volatile substance evaporates in a flash, making it an ideal choice for dissolving even the most tenacious adhesives, like Gorilla Glue.
Safety First: Guarding Against Potential Hazards:
Before embarking on our grand quest to remove the glue, let us prioritize safety. Ventilation is key to prevent inhaling any fumes. Don your trusty gloves to shield your skin and ensure acetone stays far away from your eyes and mouth.
Unleashing the Magic: Applying Acetone with Finesse:
Now that we are fully equipped, it’s time to put acetone to work. Take hold of a clean cloth or cotton ball and immerse it in acetone. With gentle strokes, caress the cloth over the cured glue, ensuring every inch receives its share of this miraculous elixir. Allow acetone to seep into the glue’s core, granting it time to work its enchantment.
A Battle Worth Fighting: Taming the Glue Beast:
Once acetone has sufficiently penetrated the glue’s defenses, it is time to bid farewell to this stubborn adversary. Armed with a plastic scraper or even your own nimble fingernail, delicately lift off the softened glue from the metal surface. Beware of causing harm to the precious metal as you embark on this triumphant removal.
Isopropyl Alcohol Method
Prepare yourselves, brave warriors in the battle against cured Gorilla Glue on metal surfaces. Today, we shall reveal the secret weapon that will conquer even the most stubborn adhesives – the mighty isopropyl alcohol method. Brace yourselves as we embark on an extraordinary journey to liberate your metal surfaces from the clutches of unyielding glue.
So, equip your safety gloves and let us plunge into the realm of isopropyl alcohol.
Step 1: Prioritize Safety
Before engaging in combat with the adhesive beast, don your trusty safety gloves. These stalwart protectors will shield your hands during the formidable encounter with potent isopropyl alcohol.
Step 2: Assemble Your Arsenal
To wage this war against Gorilla Glue, arm yourself with a high concentration isopropyl alcohol (at least 90%), cotton swabs or a soft cloth, and a resolute spirit.
Step 3: Swift Dabbing Maneuvers
Summon your courage and pour a small amount of isopropyl alcohol onto a cotton swab or saturate a soft cloth with this potent solvent. Employ gentle dabbing motions to administer it onto the cured Gorilla Glue, ensuring every inch of the adhesive-coated area is thoroughly covered.
Step 4: Patience, Young Warrior
In this battle, patience reigns supreme. Allow the isopropyl alcohol to bide its time on the glue for a few minutes, penetrating deep within to dissolve its adhesive properties.
Step 5: Wipe Out.
Once the waiting game has reached its climax, seize a clean cotton swab or cloth and delicately wipe away the dissolved glue. Remember, finesse is key to avoid any inadvertent scratches on the resilient metal surface.
Step 6: Persistence Prevails
Sometimes, even the mighty Gorilla Glue resists vanquishment. Should any stubborn residues persist, repeat steps 3-5 until every last vestige of glue is eradicated.
Step 7: Purify and Revive
Rejoice in your triumph. But before reveling in your victory, cleanse the metal surface with mild soap and water to efface any lingering residue from the isopropyl alcohol. This final act of purification will restore your metal surface to its former glory.
Heat Method
Prepare yourselves, warriors of the adhesive realm, for today we embark on a daring quest into the secrets of the heat method. Our mission? To liberate metal surfaces from the clutches of stubborn Gorilla Glue.
We have already explored the mighty isopropyl alcohol method, but now, it’s time to unleash the full power of heat and witness its prowess in softening and conquering cured glue. Join me, brave soldiers, as we unveil the heat method—a battle-tested technique that guarantees victory over Gorilla Glue.
Harnessing the Power of Heat:
In our relentless battle against hardened Gorilla Glue, we turn to an ally that is both formidable and effective—the power of heat. This technique allows us to soften the unyielding grip of cured glue, rendering it pliable for easier removal.
Assembling Your Arsenal:
Prepare for battle by equipping yourself with a heat gun or a trusty hairdryer. These heat sources will become your weapons of choice in this epic struggle against Gorilla Glue. Set them to a medium heat setting, primed and ready to unleash their thermal might upon the stubborn adhesive.
Proceed with Caution:
Before we charge into battle, it is vital to heed this warning: excessive heat can be a double-edged sword, potentially damaging the very surface we seek to protect. Exercise caution and avoid using extremely high temperatures that could compromise the integrity of your precious metal.
The Dance of Heat:
Position your chosen heat source approximately 2-3 inches away from the cured glue, as you prepare to engage in a mesmerizing dance between heat and adhesive. Begin by gently moving the heat source back and forth over the affected area, feeling the raw power of the heat as it works its magic on the stubborn glue.
Signs of Surrender:
As the battlefield heats up, keep a vigilant eye for signs of surrender from the glue. Watch closely as it begins to bubble or become more pliable, acknowledging its submission to the relentless heat. This is your signal to advance and claim victory in the next phase of our assault.
Vinegar or Lemon Juice Method
Today, I will unveil a tried and tested method that involves the magical powers of vinegar or lemon juice to bid a final farewell to that relentless adhesive. So, grab a cup of tea and get ready for an exhilarating battle against the glue.
The Vinegar or Lemon Juice Method:
- Gather your supplies: Prepare yourself with white vinegar or fresh lemon juice, a soft cloth or sponge, warm water, and a dollop of patience (optional, but highly recommended).
- Unleash the acidic power: Pour a small amount of vinegar or lemon juice onto the affected area of the metal surface. Allow a few minutes for the acid to penetrate and work its magic, breaking down the glue.
- Scrub away with finesse: Take your soft cloth or sponge and elegantly scrub the area using gentle circular motions. Apply some pressure, but be cautious not to leave any scratches on the metal surface. The acidity of vinegar or lemon juice will effectively dissolve the glue, making it easier to remove.
- Heat things up (optional): Should the glue prove to be exceptionally stubborn, consider heating up the vinegar or lemon juice before applying it to the metal surface. The added warmth will boost its effectiveness in disintegrating Gorilla Glue’s adhesive properties.
- Rinse and dry with precision: After emerging victorious against the glue, rinse the area with warm water to eliminate any residue. Then, meticulously dry the metal surface using a clean cloth.
Cautionary Notes:
- Not all metals are created equal: Bear in mind that while vinegar and lemon juice work wonders on most metals, some may exhibit greater resistance to acids or react unfavorably to acidity. It is always wise to conduct a small test on an inconspicuous area before treating the entire surface.
- Patience is your secret weapon: Removing cured Gorilla Glue from metal may require multiple applications and a touch of patience, especially if the glue has stubbornly adhered for an extended period. Don’t lose heart. Persistence will ultimately lead to triumph.
Other Tips and Considerations
When it comes to removing cured Gorilla Glue from metal surfaces, there are several tips and considerations that can make the process more successful. It’s important to approach the task with caution and take necessary safety measures to protect yourself and the metal surface. Patience is key, as rushing or using excessive force can lead to unintended damage. By following these tips and considering the unique characteristics of the metal you’re working with, you can effectively remove the glue without harming the surface.
Test a small, inconspicuous area:
Before diving into glue removal on a visible part of the metal surface, always test your chosen method on a small, hidden area. This preliminary test will give you valuable insight into the method’s effectiveness and whether it causes any damage or discoloration. It’s better to be safe than sorry.
Exercise patience throughout the process:
Removing cured Gorilla Glue from metal surfaces requires time and effort. Rushing or applying excessive force can result in irreversible damage. Embrace patience as your ally and proceed with caution, taking the necessary time to safely remove the glue without compromising the metal surface.
Apply heat selectively:
Heat is often effective in softening cured glue, making it easier to remove. However, when using heat on metal surfaces, exercise caution to prevent potential discoloration or warping. Opt for low heat settings on a heat gun or hairdryer, maintaining a safe distance between the heat source and the metal.
Soak in warm water for added assistance:
If feasible, consider submerging the metal object in warm water for an extended period to help loosen the glue. The warmth aids in breaking down the adhesive bonds. For enhanced efficacy, add a few drops of mild dish soap to the water before soaking.
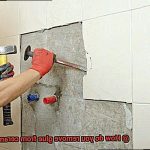
Employ gentle scraping and peeling techniques:
Once the Gorilla Glue has softened or loosened, employ gentle scraping with a plastic scraper or your fingernail. Avoid using sharp objects that could scratch or damage the metal surface. Exercise patience and take your time to ensure a safe and thorough removal.
QYmZSDjLQ9A” >
Conclusion
In conclusion, banishing cured Gorilla Glue from metal surfaces may feel like an uphill battle, but fear not. With the right techniques and safety measures in place, victory is within reach. Whether you opt for acetone, isopropyl alcohol, heat, or the zesty power of vinegar/lemon juice, each method boasts its own advantages and considerations.
The Acetone Method unleashes the solvent’s mighty power to dissolve the glue with ease. Meanwhile, the Isopropyl Alcohol Method harnesses high concentration isopropyl alcohol to mercilessly break down those adhesive properties. For those who prefer a fiery approach, the Heat Method heats things up to soften the glue for effortless removal. And let’s not forget about the Vinegar or Lemon Juice Method – these acidic wonders dissolve that stubborn glue like magic.
Throughout this undertaking, your safety should reign supreme. Don your protective gloves and goggles like a seasoned warrior and work in a well-ventilated area to ensure smooth sailing. Following instructions diligently and conducting a small test spot before diving in headfirst are essential precautions to prevent any unwanted damage or discoloration.
Remember: patience is your secret weapon when battling cured Gorilla Glue on metal surfaces. Rushing or employing excessive force will only lead to unintended harm. Approach this task with caution, taking every necessary measure to safeguard yourself and your precious metal surface.
By embracing these methods and tips with unwavering determination, you shall emerge triumphant in removing cured Gorilla Glue from metal surfaces without inflicting any harm.