We’ve all been there – that moment of excitement when you find the perfect piece of bling, only to realize it’s stuck together with Aleene’s jewelry and metal glue. But fear not.
In this blog post, we’re going to spill the beans on how to remove this pesky adhesive, so your jewelry can shine like new again. Whether you accidentally glued two pieces together or need to redo a design, we’ve got your back.
Trust us, it’s going to be a wild ride.
What is Aleene’s Jewelry and Metal Glue?
Contents
- 1 What is Aleene’s Jewelry and Metal Glue?
- 2 Why Would You Need to Remove the Glue?
- 3 How to Remove Aleene’s Jewelry and Metal Glue with Acetone
- 4 Tools and Materials Needed for Acetone Removal
- 5 Step-by-Step Guide for Removing Aleene’s Jewelry and Metal Glue with Acetone
- 6 Alternative Method: Removing Aleene’s Jewelry and Metal Glue with Heat
- 7 Tools and Materials Needed for Heat Removal
- 8 Step-by-Step Guide for Removing Aleene’s Jewelry and Metal Glue with Heat
- 9 Conclusion
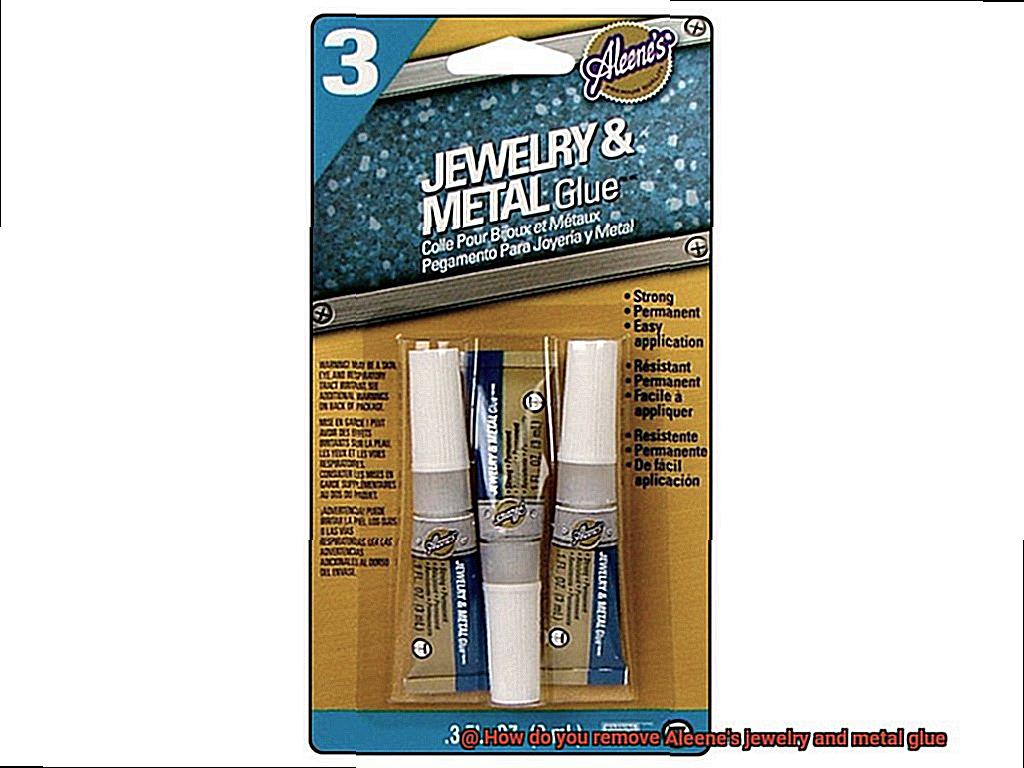
Aleene’s Jewelry and Metal Glue has solidified its position as a trusted choice within the crafting community. This exceptional glue boasts unparalleled bond strength, a quick drying time, versatility, and user-friendly application. In this article, we will explore the remarkable features and benefits of Aleene’s Jewelry and Metal Glue, while also providing tips on removal if needed.
Strong Bond for Unyielding Perfection:
Aleene’s Jewelry and Metal Glue is specially formulated to create an unbreakable union between various materials such as metal, glass, ceramics, plastic, and more. Whether you’re fashioning delicate necklaces or robust metal bracelets, this glue ensures your jewelry pieces stay intact during the rigors of everyday wear and tear.
Quick Drying Time for Swift Progress:
Crafters appreciate Aleene’s Jewelry and Metal Glue for its rapid drying time. With its fast-drying formula, you can seamlessly transition to the next steps of your project without having to wait for hours. This feature proves invaluable when faced with tight deadlines or multiple pieces to complete.
User-Friendly Application for Flawless Precision:
The precision applicator that accompanies Aleene’s Jewelry and Metal Glue allows for controlled dispensing of the adhesive. Bid farewell to messy projects caused by excessive glue. The convenient tube or bottle design provides an effortless means to apply the glue precisely where you need it. This guarantees a clean and professional finish every time.
Versatility for Boundless Creativity:
While Aleene’s Jewelry and Metal Glue excels in jewelry making, its applications extend far beyond that realm. From DIY home decor projects to mixed media art creations, even small metal object repairs can benefit from the formidable bond provided by this versatile adhesive. It is an indispensable tool for any crafter, augmenting their creative arsenal.
Tips for Removing Aleene’s Jewelry and Metal Glue:
Occasionally, mistakes occur, or you may need to alter or repair your jewelry. If you find yourself needing to remove Aleene’s Jewelry and Metal Glue, several methods can be attempted.
One effective option is using acetone-based nail polish remover. Apply the remover to a cotton swab or ball and gently dab the glue until it starts to loosen. Wipe away the dissolved adhesive with a clean cloth or paper towel. Alternatively, you can utilize heat from a hairdryer or heat gun to soften the glue, allowing for gentle removal.
Why Would You Need to Remove the Glue?
The need to remove glue can arise for a variety of reasons, and understanding these reasons is essential to maintaining the integrity and versatility of your jewelry. Here are several key factors that may necessitate the removal of Aleene’s jewelry and metal glue:
- Repair and alteration: When jewelry requires repair or alteration, the existing glue must be removed to facilitate the necessary changes. Whether a gemstone has fallen out or a clasp needs replacing, starting fresh with clean surfaces is critical for successful repairs.
- Design updates: Fashion trends evolve, and personal preferences change. If you’re feeling creative and want to update the design of your jewelry, removing the old glue allows you to detach specific elements and create a whole new arrangement that reflects your style.
- Fixing mistakes: Mistakes happen, even when working with glue. Accidentally gluing a component in the wrong place or realizing that a different adhesive would work better necessitates removing the Aleene’s glue before proceeding with your project.
- Repurposing and reselling: Many individuals enjoy repurposing old pieces or selling components separately. To effectively repurpose jewelry or sell individual elements, removing the old glue is essential so that components can be reused in new designs or sold independently.
- Cleaning and restoration: Over time, jewelry accumulates dirt, grime, or tarnish. To give your treasured pieces a thorough cleaning or restoration, removing any glued components ensures that each part can be properly cleaned and restored to its original splendor.
- Reattaching loose components: Wear and tear can cause glued components to become loose or detach. To fix this issue, removing the old glue is necessary before reattaching the loose pieces securely, ensuring the longevity of your jewelry.
- Allergies and sensitivities: Some individuals may develop allergies or sensitivities to certain adhesives over time. If you discover that you’re allergic to Aleene’s jewelry and metal glue after wearing a piece for some time, removing the glue becomes vital to avoid any adverse reactions.
How to Remove Aleene’s Jewelry and Metal Glue with Acetone
Accidents happen, and sometimes we find ourselves in a sticky situation where we need to remove Aleene’s Jewelry and Metal Glue. But fear not. With the help of acetone, a powerful solvent, you can easily dissolve the glue and restore your jewelry or metal surface to its original state.
In this step-by-step guide, we will show you how to effectively remove Aleene’s Jewelry and Metal Glue using acetone. So let’s dive in and say goodbye to unwanted glue.
Step 1: Gather Your Materials
Before you begin, it’s essential to gather all the necessary materials. You’ll need acetone-based nail polish remover, cotton balls or swabs, a clean cloth or paper towel, and protective gloves to keep your hands safe.
Step 2: Test for Compatibility
To ensure that acetone won’t cause any damage or discoloration on your jewelry or metal surface, it’s crucial to perform a compatibility test. Apply a small amount of acetone on an inconspicuous area and observe for any adverse reactions.
Step 3: Apply Acetone
Once the compatibility test is successful, soak a cotton ball or swab with acetone. Gently dab the glued area with the acetone-soaked cotton ball or swab. Apply enough pressure to loosen the glue without harming the underlying surface.
Step 4: Let It Sit
Allow the acetone to sit on the glue for a few minutes. This waiting period allows the solvent to penetrate and soften the adhesive, making it easier to remove.
Step 5: Scrape Away the Glue
After the glue has softened, use a soft-bristled brush or a plastic scraper to gently scrape away the loosened glue. Exercise caution to avoid applying excessive pressure that could result in damage.
Step 6: Repeat if Necessary
If there are still traces of glue remaining, repeat the process of applying acetone and scraping until all of the glue has been successfully removed. Patience is key, as stubborn glue may require multiple attempts.
Step 7: Clean and Dry
Once you have removed the glue, clean the surface with mild soap and water to eliminate any residue or leftover acetone. Thoroughly rinse the area and dry it with a soft cloth to ensure a clean and polished finish.
Tools and Materials Needed for Acetone Removal
When it comes to removing Aleene’s jewelry and metal glue, one of the most effective methods involves the use of acetone. Acetone is a powerful solvent that can break down the adhesive bond created by the glue. However, before you start the removal process, it is important to gather the necessary tools and materials to ensure a successful outcome.
The first tool in your arsenal is acetone – the ultimate superhero when it comes to dissolving glue. You can find acetone in nail polish removers, so head to your local drugstore or beauty supply store to grab a bottle. Make sure to choose pure acetone without any added fragrances or oils, as these can interfere with its effectiveness.
To apply the acetone to the glued area, you’ll need some trusty cotton balls or swabs. These will help you deliver the solvent directly onto the adhesive, ensuring maximum effectiveness. Make sure you have enough cotton balls or swabs to cover the entire glued surface – we don’t want any missed spots.
Now, here’s a pro tip to enhance the power of acetone: cover the treated area with plastic wrap or aluminum foil. This will help retain moisture and prevent the acetone from evaporating too quickly. Plus, it allows for a more thorough penetration of the solvent into the glue – talk about a double whammy.
Once the acetone has done its magic and loosened the adhesive bond, it’s time for some strategic scraping. Grab a plastic scraper or even a trusty old credit card and gently scrape away the softened glue. Avoid using metal tools, as they can scratch or damage delicate surfaces – we want a clean victory here.
After successfully removing the glue, it’s important to clean the surface thoroughly using mild soap and water. This will help remove any residue left behind by the adhesive and leave your jewelry or metal object looking clean and polished.
And don’t forget the final touch – drying off the cleaned surface. Grab a soft cloth or towel and gently pat it dry to prevent any water spots or streaks from forming. This will give you that pristine finish you’ve been fighting for.
Step-by-Step Guide for Removing Aleene’s Jewelry and Metal Glue with Acetone
I have the ultimate solution for you – acetone. This powerful solvent is known for its ability to break down adhesives and make your life a whole lot easier. So, get ready to say goodbye to that pesky glue and hello to a pristine surface.
Introduction:
Knowing how to effectively remove Aleene’s jewelry and metal glue is important for preserving the quality and appearance of your accessories. While Aleene’s glue is known for its strong bond, it can be removed with the right technique. Acetone, a widely used solvent, is highly effective in dissolving adhesives like Aleene’s jewelry and metal glue. It can be easily obtained from hardware stores or beauty supply shops.
Step 1: Gather the necessary materials
Before starting the removal process, gather all the materials you will need. This includes acetone (without any fragrances or oils), cotton swabs or balls for precise application, a plastic scraper or old toothbrush for scraping away the softened glue, and a clean cloth for wiping down the area.
Step 2: Prepare the area
To protect your work surface, place a clean cloth or paper towel under the glued surface. This will catch any drips or spills that may occur during the removal process.
Step 3: Apply acetone to the glued area
Soak a cotton swab or ball with acetone and gently dab it onto the glue. Allow the acetone to penetrate and soften the adhesive for a few minutes. Ensure that you are working in a well-ventilated area and wear gloves to protect your skin from the strong fumes.
Step 4: Begin removing the glue
Using a plastic scraper or an old toothbrush, gently scrape away the softened glue. Be careful not to scratch or damage the surface beneath. If there are any stubborn spots, reapply acetone and let it sit for a few more minutes before scraping again.
Step 5: Continue applying acetone and scraping
Repeat the process of applying acetone and scraping until all the adhesive is gone. Take your time and be patient to avoid damaging the surface. If necessary, reapply acetone and let it sit for a few more minutes before scraping again.
Step 6: Clean the surface
Once all the glue is removed, use a clean cloth soaked in acetone to wipe down the area and remove any residue. It’s important to thoroughly rinse the surface with water afterward to ensure that all traces of acetone are removed.
Alternative Method: Removing Aleene’s Jewelry and Metal Glue with Heat
Well, fret no more. I have an alternative method that will make the process a breeze – heat. By applying heat to the glue, you can soften it and easily remove it from surfaces. Let me guide you through the steps to ensure your success.
- Gather your tools: You will need a hairdryer or heat gun, a plastic scraper or credit card, and a mild detergent or adhesive remover for cleaning.
- Select your heat source: If you have a hairdryer, set it to a low heat setting. If you’re feeling more adventurous and have a heat gun, use it with caution as it produces hotter air.
- Apply the heat: Direct the hot air onto the glued area, moving the heat source back and forth. Be careful not to hold it too close or for too long to prevent damage.
- Soften and scrape: As the glue heats up, it will soften. Use a plastic scraper or credit card to gently scrape away the softened glue. If necessary, reapply heat and continue scraping until the glue is gone.
- Test on delicate materials: Remember that excessive heat can damage delicate surfaces like plastic or fabric. Test your chosen method on a small, inconspicuous area before proceeding to ensure it won’t cause any harm.
- Clean the surface: Once the glue is removed, clean the surface with a mild detergent or adhesive remover to eliminate any residue.
Tools and Materials Needed for Heat Removal
When it comes to removing Aleene’s jewelry and metal glue with heat, having the right tools and materials is crucial. Here’s a breakdown of what you’ll need to make the process smooth and successful.
First and foremost, you’ll need a reliable heat source. A hairdryer or a heat gun with adjustable temperature settings is ideal. This allows you to control the heat and apply it precisely without risking damage to your jewelry or metal. Remember, different materials have different melting points, so using the appropriate temperature is key.
Safety should always be a priority, so don’t forget to wear heat-resistant gloves while using the heat source. These gloves not only protect your hands from potential burns but also provide better grip when handling heated objects.
In terms of tools, a pair of tweezers or pliers with a fine tip is essential for precise manipulation of the softened glue. You’ll also need a scraping tool, such as a plastic scraper or an old credit card, with a flat edge that can easily slide under the glue without scratching or damaging your precious items.
To protect any delicate parts of your jewelry or metal from the heat, use aluminum foil. Simply wrap the area with foil before applying heat to prevent any damage.
Having a clean cloth or paper towel on hand is also important for wiping away any residue or excess glue left behind after the heat removal process.
Lastly, proper ventilation is crucial when using heat for glue removal. Open windows or turn on a fan to ensure any fumes released during the process are dissipated.
Step-by-Step Guide for Removing Aleene’s Jewelry and Metal Glue with Heat
Glue mishaps happen to the best of us, but fear not. We’ve got you covered with a step-by-step guide on how to remove Aleene’s Jewelry and Metal Glue with heat. Whether you accidentally glued your favorite necklace or found yourself in a sticky situation with metal decor, this guide will help you reclaim your treasures without a trace of that pesky adhesive. So, grab your heat source and let’s get started.
Step 1: Gather the Necessary Materials
Before diving into the glue removal process, make sure you have all the required materials on hand. This includes a heat source (hairdryer or heat gun), heat-resistant gloves, cotton swabs or a soft cloth, and a solvent like acetone or rubbing alcohol.
Step 2: Prepare the Area
Find a well-ventilated area to work in and lay down some protective covering. You don’t want any drips or spills ruining your workspace. Remember to wear protective eyewear and gloves for added safety.
Step 3: Apply Heat to the Glue
Turn on your heat source to a medium setting and hold it about 6 inches away from the glued area. Start applying heat by moving the nozzle back and forth in a sweeping motion, evenly distributing heat across the glue.
Step 4: Monitor the Glue
Keep a close eye on the glue as you apply heat. The goal is to soften it enough so that it becomes pliable and easy to remove. Be cautious not to overheat the glue, as it may cause damage to the surface underneath.
Step 5: Test Removal
After heating the glue for about 30 seconds, gently try to lift it with a cotton swab or soft cloth. If it doesn’t easily come off, continue applying heat for another 10-15 seconds and test again. Be patient and repeat this process until the glue is soft enough to remove.
Step 6: Remove Softened Glue
Once the glue has softened, use your heat-resistant gloves to carefully peel or scrape it off. Be gentle to avoid scratching the surface. If any residue remains, you can use a cotton swab dipped in acetone or rubbing alcohol to gently rub it away.
Step 7: Clean the Area
After removing the glue, clean the area with a mild soap and water solution to remove any remaining adhesive residue or solvent. Rinse thoroughly and dry with a clean cloth.
Step 8: Final Touches
Inspect the area to ensure all traces of glue have been removed. If necessary, repeat the process or consider alternative methods if the glue is stubborn.
lEmwMmF1O2U” >
Conclusion
Removing Aleene’s jewelry and metal glue can be a challenging task, but fear not.
With the right techniques and a little patience, you can bid farewell to that stubborn adhesive. There are several methods you can try, such as using acetone or nail polish remover.
These solvents work by breaking down the glue’s bond, allowing you to gently scrape it off with a plastic scraper or your fingernail. Another option is to use rubbing alcohol or isopropyl alcohol, which can dissolve the glue and make it easier to remove.
Simply apply the alcohol to a cotton ball or cloth and gently rub the affected area until the glue starts to loosen. For those concerned about potential damage to their precious jewelry or metals, worry not.
These methods are generally safe for most materials, but it’s always wise to test them on a small, inconspicuous area first.