Title: Bye-bye, Sticky Mess. The Ultimate Guide to Removing 3M Hi-Strength 90 Spray Adhesive
Introduction:
Contents
- 1 Heat and Scrape Method for Removal
- 2 Solvent Method for Removal
- 3 Oil-Based Method for Removal
- 4 Commercial Adhesive Removers
- 5 Safety Precautions to Consider When Removing Adhesives
- 6 Tips for Effective Removal of 3M Hi-Strength 90 Spray Adhesive
- 7 Common Mistakes to Avoid When Removing Adhesives
- 8 Conclusion
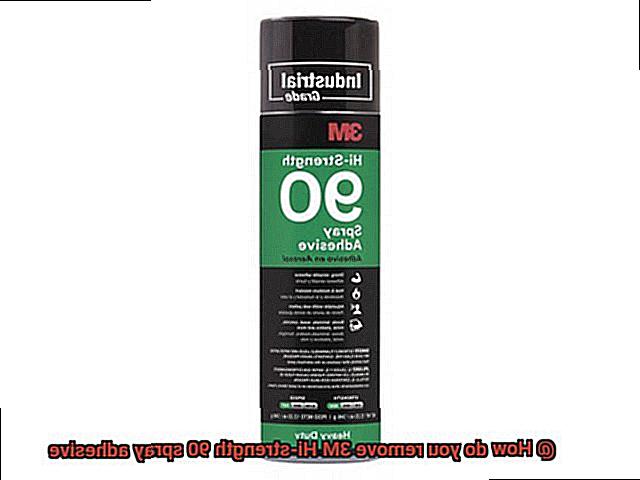
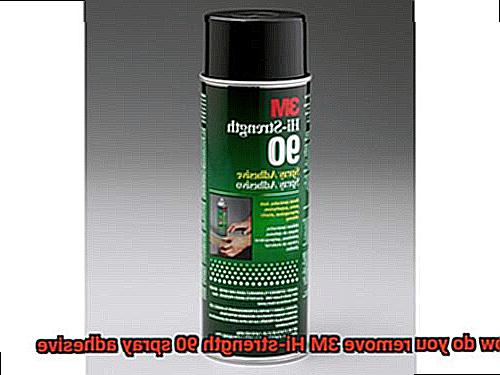
Ever been stuck with a stubborn adhesive that just won’t let go? We feel your pain. But fear not, because we’ve got your back. If you’re battling the sticky residue left behind by the notorious 3M Hi-Strength 90 spray adhesive, we’ve got some pro tips that will save the day.
In this no-nonsense guide, we’ll show you how to banish 3M Hi-Strength 90 spray adhesive from any surface without causing any damage. Whether it’s metal, wood, plastic, or fabric, we’ve got all the tricks up our sleeves. Say goodbye to those frustrating sticky situations as we dive into the best methods to tackle this adhesive nightmare with confidence and finesse.
So keep reading and get ready to wave goodbye to that pesky adhesive once and for all. We’ve gathered all the tested solutions you need to successfully remove 3M Hi-Strength 90 spray adhesive like a true pro. Let’s get started.
Heat and Scrape Method for Removal
In this comprehensive guide, we will delve into the effective heat and scrape method, which will empower you to effortlessly remove stubborn adhesive residue from various surfaces. Whether you are dealing with metal, glass, or fabric, this method can be applied safely and efficiently.
Tools You Will Need:
- Heat gun or hairdryer: To gently soften the adhesive.
- Putty knife or scraper: For carefully scraping off the adhesive.
- Protective gloves: To shield your hands from heat and chemicals.
Step-by-Step Process:
Step 1: Preparing the Surface
Before embarking on the removal process, it is crucial to ensure that the surface can tolerate heat. Some materials may be sensitive to high temperatures and could sustain damage if exposed for too long.
Step 2: Gather Your Tools
Make sure all the necessary tools are within reach, including a heat gun or hairdryer, a putty knife or scraper, and protective gloves.
Step 3: Apply Gentle Heat
Using a heat gun or hairdryer on a low to medium setting, direct the heat about 6-8 inches away from the surface. Employ a back-and-forth motion to evenly distribute the heat. Be cautious not to overheat the area, as it may result in damage.
Step 4: Scrape Off the Adhesive
As the adhesive begins to soften under the gentle warmth, utilize a putty knife or scraper to delicately scrape it off. Apply moderate pressure and exercise caution not to harm or scratch the surface. If necessary, reapply heat while scraping off the adhesive.
Step 5: Clean Up
Once all the adhesive has been scraped off, employ a clean cloth or sponge dampened with warm soapy water to wipe away any residue that lingers on the surface. Rinse the area with clean water and gently pat it dry with a clean cloth.
Step 6: Final Touches
Thoroughly inspect the surface to ensure that all adhesive has been successfully removed. If any stubborn remnants persist, repeat the heating and scraping process until they are entirely eradicated. For delicate surfaces like fabrics, it is prudent to test the heat and scrape method on an inconspicuous area beforehand to avoid any potential damage or discoloration.
Solvent Method for Removal
The solvent method for removing adhesive is a tried and true technique that can effectively banish stubborn residue from any surface. Whether you’re dealing with 3M Hi-strength 90 spray adhesive or another adhesive, this method will come to your rescue. So gather your chosen solvent, a clean cloth or sponge, and let’s dive into the world of adhesive removal.
Before we get started, it’s crucial to choose a solvent that is compatible with the surface you’re working on. There are various options available, including acetone, isopropyl alcohol, mineral spirits, and citrus-based cleaners. However, always make sure to read and follow the manufacturer’s instructions and safety precautions before proceeding.
Once you have your solvent of choice in hand, it’s time to work some magic. Apply a small amount of the solvent to a clean cloth or sponge and gently dab or rub the adhesive. Avoid scrubbing too hard, as this could potentially damage the surface. Instead, let the solvent do its work by penetrating and softening the adhesive for a few minutes.
Now comes the exciting part – tackling the softened adhesive head-on. Use a plastic scraper or even your fingers to gently scrape or peel off the loosened adhesive. Take your time and be patient, as Rome wasn’t built in a day.
If there are still remnants of adhesive left behind after your initial efforts, fear not. Simply repeat the process of applying solvent and scraping until every last bit of adhesive is vanquished. Persistence pays off in this battle against sticky residue.
Once you’ve successfully defeated the adhesive army, give yourself a well-deserved pat on the back. But hold on – there’s one more step to complete. Clean the surface with soap and water or a mild cleaner to remove any residue from the solvent.
Remember, it’s always important to test the solvent on a small, inconspicuous area before applying it to a larger surface. This will ensure compatibility and prevent any unwanted damage.
Oil-Based Method for Removal
The oil-based method for removal is a tried and true technique for banishing stubborn adhesive residue. It’s like having a secret weapon in your arsenal, ready to tackle even the most challenging sticky situations. Whether you’re dealing with the formidable 3M Hi-strength 90 spray adhesive or any other sticky foe, this method will save the day and restore your surfaces to their former glory.
So how does it work? It’s as simple as raiding your kitchen pantry for some trusty household oils. Vegetable oil, baby oil, or even olive oil can all be enlisted to help break down that stubborn adhesive. Just apply a generous amount of oil directly onto the affected area, ensuring that every inch of the adhesive is covered.
Now comes the fun part – let the oil work its magic by allowing it to sit on the adhesive for about 10-15 minutes. During this time, the oil penetrates and loosens up that sticky mess, preparing it for removal. Picture the oil swooping in like a superhero, ready to rescue your surfaces from the clutches of glue.
After the waiting period, it’s time to take action. Grab a soft cloth or sponge and start gently scrubbing the adhesive in a circular motion. You’ll be amazed at how easily it starts to come off. The oil acts as a lubricant, making it easier to remove the adhesive without causing damage to your surfaces. But don’t worry if there are still some stubborn traces left – simply reapply more oil and continue scrubbing until every last bit of adhesive surrenders.
Once you’ve successfully defeated the adhesive army, it’s time to clean up. Wipe down the surface with a clean cloth or sponge dampened with warm water. This will remove any oily residue and leave your surface looking clean and shiny, free from any remnants of the sticky battle.
Now, it’s important to note that not all surfaces are suitable for this method. It’s always a good idea to test a small, inconspicuous area first to ensure that the oil doesn’t cause any damage or discoloration. And if you’re dealing with delicate fabrics or porous wood, it’s best to consult a professional or refer to manufacturer guidelines for the safest removal method.
Commercial Adhesive Removers
Fear not. In this article, we will explore the world of commercial adhesive removers and how they effectively tackle even the most formidable 3M Hi-strength 90 spray adhesive. Get ready to bid farewell to sticky residues and restore your surfaces to their former glory.
The Power of Commercial Adhesive Removers:
Commercial adhesive removers are formulated specifically to dissolve and remove strong adhesives. These versatile products come in various forms, such as liquids, gels, and aerosols. When it comes to effectiveness and pleasant scents, citrus-based removers take the lead. However, do exercise caution when using acetone-based removers as they can be powerful solvents that require careful handling on certain surfaces.
Specialized Solutions for Specific Applications:
No adhesive challenge is too great for commercial adhesive removers. There are specialized solutions available for specific tasks, such as removing carpet or vinyl flooring adhesives. These removers are formulated to tackle the unique challenges posed by different types of adhesives, ensuring you have the right tool at your disposal.
Proper Usage Tips:
To achieve optimal results when using commercial adhesive removers, it’s crucial to follow some key tips. Firstly, always carefully read and adhere to the manufacturer’s instructions. This includes wearing gloves and ensuring proper ventilation in your work area. Secondly, test the remover on a small, inconspicuous area before applying it to the entire surface to avoid any potential damage. Lastly, exercise patience and avoid excessive force or aggressive scraping to prevent surface damage.
Step-by-Step Removal Process:
Let’s break down the process of removing stubborn adhesives with commercial adhesive removers:
- Apply a generous amount of the remover to the affected area.
- Allow the remover to penetrate the adhesive for a few minutes, breaking down the bond.
- Gently scrape off or wipe away the softened adhesive using a scraper or soft cloth.
- Repeat the process if necessary until all traces of the adhesive are removed.
- Start by protecting yourself: Before you begin, make sure to wear protective gloves and eyewear to avoid any potential skin or eye irritation.
- Test an inconspicuous area: Before applying any removal method, test it on a small, hidden area of the surface to ensure that it doesn’t cause any damage or discoloration.
- Heat it up: One way to loosen the adhesive is by using heat. You can try using a hairdryer on its highest setting to warm up the adhesive. Once it softens, gently scrape it off with a plastic scraper or putty knife.
- Use rubbing alcohol: Another effective method is using rubbing alcohol or isopropyl alcohol. Soak a clean cloth in the alcohol and dab it onto the adhesive until it becomes saturated. Let it sit for a few minutes to allow the alcohol to penetrate the adhesive, then gently rub in circular motions until the adhesive starts to dissolve. Wipe away any residue with a clean cloth.
- Try citrus-based solvents: Citrus-based solvents like orange oil or citrus degreasers can also be effective in removing adhesives. Apply the solvent directly onto the adhesive and let it sit for a few minutes to break down the bond. Then, use a plastic scraper or putty knife to scrape off the softened adhesive.
- Use acetone as a last resort: If all else fails, you can try using acetone as a last resort option for removing stubborn adhesive residue. However, exercise caution as acetone is a strong chemical and may cause damage or discoloration on certain surfaces. Apply a small amount of acetone onto a clean cloth and gently rub the adhesive until it dissolves. Rinse the area thoroughly with water afterward.
Post-Removal Cleaning:
After successfully removing the adhesive, it’s essential to clean the surface with soap and water to eliminate any residue from the adhesive remover. This final step ensures a clean and smooth surface for further use or application.
Safety Precautions to Consider When Removing Adhesives
When it comes to removing adhesives, safety should always take center stage. Whether you’re embarking on a DIY project or battling stubborn sticker residue, taking the necessary precautions can help prevent accidents and safeguard your well-being. Let’s dive into the world of adhesive removal safety, exploring measures that will keep you protected and ensure a successful outcome.
First and foremost, gear up for the task at hand. Donning gloves is a crucial step to shield your hands from any potential chemicals lurking in the adhesive remover. Your trusty goggles should be part of your ensemble too, guarding your eyes against splashes or fumes that may arise during the removal process. And if you find yourself in a poorly ventilated area, don’t forget to slip on a mask to avoid inhaling any harmful vapors that may waft through the air.
Speaking of ventilation, let fresh air swoop in and whisk away any unwanted fumes by flinging open windows or turning on fans. Adequate ventilation not only protects your respiratory system but also eradicates any lingering odors that may accompany adhesive removers. After all, who wants to be surrounded by unpleasant smells?
Before plunging into adhesive removal, pause for a moment to consult the manufacturer’s instructions. Each product boasts its own set of safety guidelines and usage instructions—pearls of wisdom that must be handled with care. By familiarizing yourself with these instructions, you can ensure that you’re wielding the product correctly and safely.
To minimize potential damage or discoloration, consider conducting a patch test before unleashing the full force of the adhesive remover on a larger area. Apply a small amount of the remover to an inconspicuous section of the surface and observe for a few minutes. This trial run will grant you insight into how the adhesive remover interacts with the material you’re working on—equipping you with knowledge for a smoother removal process.
Keep those adhesive removers out of reach from the curious hands and paws of children and pets. These products pack a toxic punch if ingested or mishandled, making secure storage a non-negotiable requirement. Ensure these potent potions are stowed away in a location inaccessible to little explorers.
Lastly, proper disposal of adhesive removers is a critical step. Don’t let them wreak havoc on the environment by pouring them down drains or tossing them in regular trash bins. Instead, consult your local regulations or waste management facilities for precise instructions on how to bid adieu to these products safely. By taking these disposal precautions, you can prevent contamination and protect our precious planet.
Tips for Effective Removal of 3M Hi-Strength 90 Spray Adhesive
With the right techniques and a little bit of know-how, you can safely and effectively remove this sticky substance from various surfaces. In this guide, we will share expert tips to help you tackle the removal process like a pro. So, let’s dive in and say goodbye to that pesky residue.
Gather Your Supplies:
Before you begin, gather all the necessary supplies. You’ll need a clean cloth or sponge, a mild detergent or adhesive remover, warm water, and a plastic scraper or putty knife. Having these tools at hand will make the removal process much smoother.
Test, Test, Test:
To avoid any unwanted surprises, always test the adhesive remover on a small, inconspicuous area of the surface first. Wait a few minutes and check for any adverse reactions before proceeding. This step ensures that the remover does not damage or discolor the material.
Scrub Away:
Now that you’ve tested the adhesive remover and found no negative effects, it’s time to get scrubbing. Dampen your cloth or sponge with warm water and apply a small amount of mild detergent or adhesive remover to it. Gently scrub the affected area in circular motions, working from the outer edges toward the center. This helps break down the adhesive and make it easier to remove.
Give It Some Time:
Patience is key. After scrubbing away, allow the adhesive remover to sit on the surface for a few minutes. This gives it time to break down the adhesive further, making it even easier to remove.
Scrape It Off:
Now comes the fun part – gently scrape away the loosened adhesive using a plastic scraper or putty knife. Be careful not to apply too much pressure, as this can damage the material underneath. If there are any stubborn or hard-to-reach areas, a soft-bristled brush or toothbrush can come in handy for some extra scrubbing power.
Rinse and Repeat:
After scraping away the adhesive, rinse the area with warm water and wipe it clean with a cloth or sponge to remove any remaining adhesive residue and cleaning solution. If there are still traces of adhesive left on the surface, don’t worry. Simply repeat the process until all of it is removed. Remember, it may take multiple attempts depending on the strength and thickness of the adhesive.
Common Mistakes to Avoid When Removing Adhesives
Removing adhesives can be a challenging task, but with the right approach, you can bid farewell to that stubborn residue in no time. However, it’s crucial to avoid common mistakes that could damage surfaces or complicate the removal process. In this article, we will explore the top mistakes to avoid when removing adhesives and provide expert tips for a smooth and successful removal process.
Avoid Forceful Techniques:
One of the most common mistakes people make is using excessive force or aggressive techniques when removing adhesives. Remember, patience is key. Instead of forcefully scraping or pulling at the adhesive, use a gentle touch and let the adhesive remover work its magic.
Give It Time:
Another mistake is not allowing enough time for the adhesive remover to work effectively. Different adhesives require varying amounts of time for the remover to penetrate and dissolve them completely. Rushing the process may leave behind sticky residue or result in incomplete removal. So, be patient and give the remover enough time to work its wonders.
Use the Right Product:
Using incorrect or incompatible adhesive removers can lead to ineffective removal or surface damage. Ensure that you choose an adhesive remover specifically designed for the type of adhesive you are dealing with. This way, you can confidently dissolve the adhesive without harming your surfaces.
Ventilation Matters:
While removing adhesives, it’s important to work in a well-ventilated area or wear a mask to protect yourself from harmful fumes emitted by some adhesive removers. Proper ventilation ensures a safe and comfortable removal process.
Follow Instructions:
Always read and follow the manufacturer’s instructions carefully before using an adhesive remover. Each product may have specific application and removal instructions that must be followed for optimal results. Ignoring these instructions could result in ineffective removal or even damage to your surfaces.
Test, Test, Test:
Before applying an adhesive remover to a larger area, it’s crucial to test it on a small, inconspicuous spot first. This step helps you determine if the remover will cause any adverse effects such as discoloration or damage. It also gives you an idea of how effective the remover will be in removing the adhesive.
CVfrYva1iFo” >
Conclusion
Removing 3M Hi-strength 90 spray adhesive can be a challenging task, but with the right technique and tools, it’s definitely doable. Here are some effective methods to get rid of this stubborn adhesive.
Remember, always follow the manufacturer’s instructions and exercise caution when using any chemicals or solvents. If you’re unsure about a particular surface or material, it’s best to consult a professional for guidance.

