Looking to add a personal touch or professional finish to your foam projects? Applying vinyl to foam is the way to go. Whether you’re crafting custom foam signage, decorations, or even costumes, this technique opens up a world of creative possibilities. In this blog post, we’ll walk you through the step-by-step process of putting vinyl on foam.
To get started, gather your essential materials. You’ll need high-quality adhesive vinyl sheets in your desired color or design. Don’t forget the trusty transfer tape or application tape. And of course, you’ll need your foam surface, craft knife or scissors, and a squeegee or credit card.
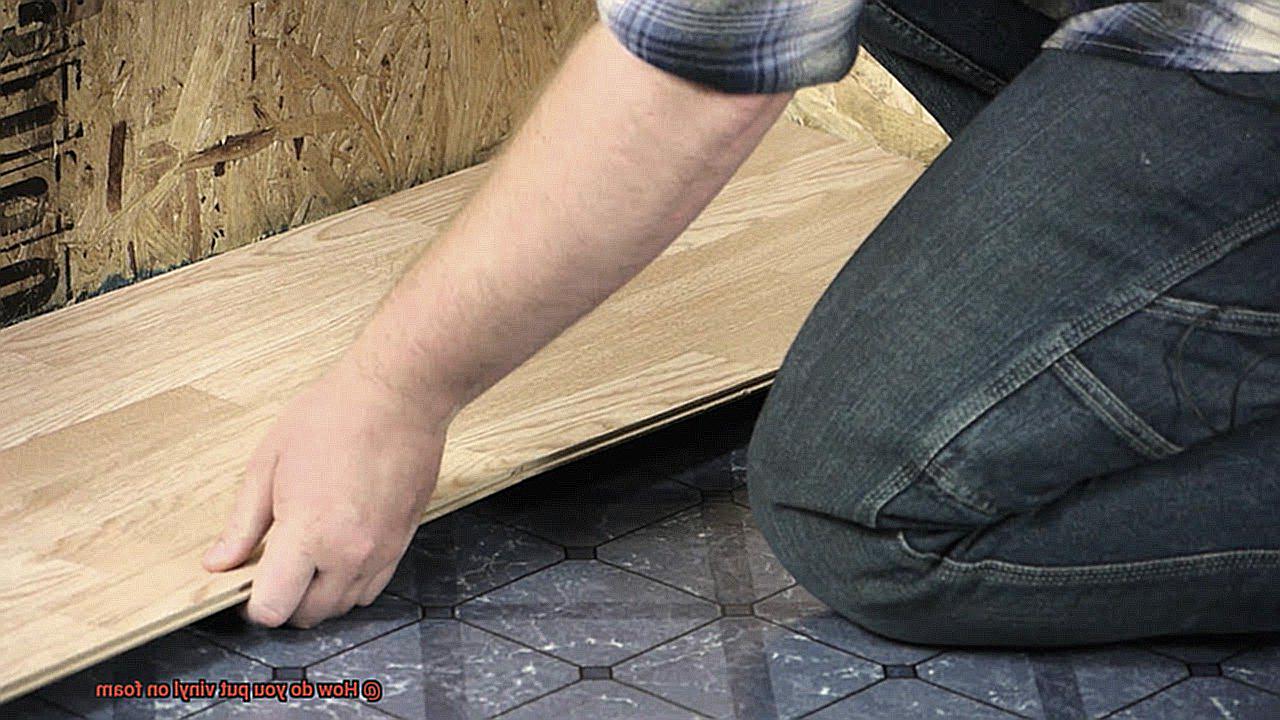
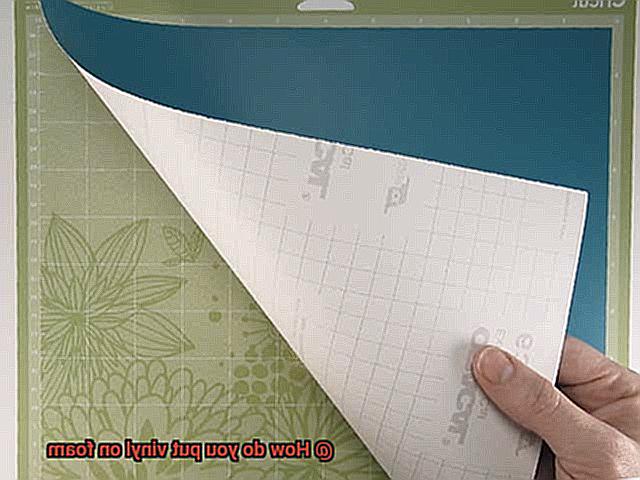
- First things first – prep that foam surface. Give it a good clean and make sure it’s dry so that the vinyl sticks like glue. Once it’s ready, measure and cut your vinyl sheet to fit the area on the foam you want to cover. Peel off the backing to reveal the sticky side of the vinyl. Carefully align it with your foam surface, making sure it’s straight and centered.
- Now comes the important part – applying pressure. Grab that squeegee or credit card and smooth out any air bubbles for a secure bond between the vinyl and foam. Apply even pressure across the entire surface to avoid wrinkles or wonky designs. Take your time here because it really affects how your finished project will look.
Once the vinyl is firmly stuck to the foam, it’s time for some tape removal action. Peel off that transfer tape slowly at a 180-degree angle while keeping an eye on the vinyl staying in place. If there’s any resistance, press down on the tape again and apply more pressure with your trusty squeegee or credit card.
As you gain experience with this technique, you’ll discover some neat tips and tricks that make everything smoother than butter. For example, using a weeding tool or craft knife before applying vinyl can give you cleaner edges. And if you’re working on a curved or rounded foam surface, make small incisions along the vinyl’s backing to allow for more flexibility during application.
In a nutshell, putting vinyl on foam is a simple yet rewarding process that lets you add your personal touch and take your foam creations to the next level. With the right materials, attention to detail, and a little practice, you’ll achieve professional-looking results in no time. So why not give it a shot and unlock endless possibilities for your foam projects?
Gather the Necessary Materials
Contents
- 1 Gather the Necessary Materials
- 2 Prepare the Foam Surface
- 3 Cut the Vinyl Fabric
- 4 Choose an Adhesive
- 5 Let the Adhesive Dry
- 6 Position and Attach the Vinyl
- 6.1 Step 1: Prepare the Surface – Clean and Smooth
- 6.2 Step 2: Measure and Cut – Accurate and Adequate
- 6.3 Step 3: Get Sticky – Unveil the Adhesive Side
- 6.4 Step 4: Smooth It Out – Banishing Wrinkles and Bubbles
- 6.5 Step 5: Repeat and Perfect – Section by Section
- 6.6 Step 6: Check for Security – A Tightly Bonded Union
- 6.7 Step 7: Allow Proper Bonding Time – Patience is Key
- 6.8 Step 8: Optional Protective Coating – Shield and Strengthen
- 7 Trim Excess Material
- 8 Finishing Touches
Embarking on a vinyl-to-foam project is an exciting endeavor, but before you dive in, it’s essential to gather the necessary materials. By arming yourself with the right tools and supplies, you can ensure a smooth and professional application. In this comprehensive guide, we’ll walk you through the essential materials you need, step-by-step instructions, and valuable tips for a successful vinyl-to-foam transformation.
Materials Needed:
- Foam: Select the perfect foam for your project, such as polyurethane foam, memory foam, or upholstery foam. Consider thickness and density based on your desired outcome.
- Vinyl: Choose vinyl fabric that not only matches your design aesthetic but also meets the requirements for upholstery or crafting purposes. Explore an array of colors, patterns, and textures to find the perfect match.
- Adhesive: Invest in a strong adhesive specifically formulated for bonding vinyl materials. Options include spray adhesives for wide coverage, contact adhesives for a strong bond, or adhesive tapes for easier application.
- Cutting Tools: Ensure clean and precise cuts with sharp scissors or a utility knife. These tools are vital for accurately sizing the vinyl to fit your foam surface.
- Measuring Tools: Achieve perfection by using a measuring tape or ruler to obtain precise measurements and markings. Accuracy is key in achieving a professional finish.
- Heat Gun or Hair Dryer: For curved surfaces or corners, a heat gun or hair dryer can be invaluable in molding the vinyl smoothly. Use caution and maintain a safe distance to avoid damaging the material.
- Squeegee or Roller: Eliminate air bubbles and guarantee proper adhesion between the vinyl and foam with a squeegee or roller. Opt for a size suitable for your project to ensure even pressure distribution.
- Protective Gear: Prioritize safety by donning gloves and safety glasses. This protective gear will shield you from potential injuries and chemical exposure while working with adhesives and cutting tools.
Step-by-Step Instructions:
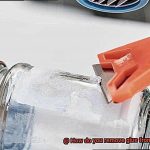
- Prepare the Foam: Begin by thoroughly cleaning the foam surface with mild detergent and water or specialized foam cleaner. Allow it to dry completely before proceeding.
- Measure and Cut: Using your measuring tools, measure the dimensions of the foam surface you want to cover. Cut the vinyl fabric accordingly, leaving some extra material for trimming later.
- Apply Adhesive: Evenly apply adhesive to both the foam surface and the backside of the vinyl fabric using a brush or roller. Follow the manufacturer’s instructions regarding drying time.
- Position and Smooth: Carefully position the vinyl fabric over the foam surface, starting from one edge and gradually pressing down while smoothing out wrinkles or bubbles.
- Trim Excess Material: Achieve clean edges by trimming any excess material using sharp scissors or a utility knife.
Prepare the Foam Surface
Preparing the foam surface is an essential step in the process of applying vinyl. Whether you’re a seasoned DIY enthusiast or a first-time adventurer, following these steps will ensure a successful transformation.
Step 1: Cleanliness is Key
Before starting anything, make sure the foam surface is squeaky clean. Using a damp cloth or sponge, gently wipe away any dust or debris that may have accumulated. This will create a smooth canvas for the vinyl.

Step 2: Roughen Up the Surface
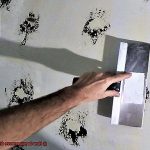
To enhance the adhesive’s grip, give the foam surface some texture. Use sandpaper or a sanding block to gently sand the foam in circular motions. Remember, a slightly rough surface is what we’re aiming for, so apply just enough pressure.
Step 3: Clear Away the Mess
After sanding, remove any loose particles or dust. A soft brush or cloth works wonders in sweeping away debris from the foam surface.
Step 4: Primer Power
To ensure a strong bond between the vinyl and foam, apply a primer. Choose one compatible with both materials and use a brush or roller to evenly apply it. Follow the manufacturer’s instructions for drying time.
Step 5: Measure, Cut, and Apply
Now comes the exciting part – applying the vinyl. But before diving in, measure and cut the vinyl to fit your foam surface. Leave extra material around the edges for trimming later.
Apply a thin layer of adhesive to both the foam surface and the back of the vinyl. Spread it evenly, avoiding excess glue that could cause bubbling or wrinkling in the vinyl.
Step 6: Smooth Operator
Carefully place the vinyl onto the foam surface, starting from one edge and working your way across. Use a squeegee or your hands to smooth out any air bubbles or wrinkles, working from the center outward. This will ensure a seamless finish.
Step 7: Trim to Perfection
With the vinyl securely in place, trim off any excess material using a sharp utility knife or scissors. Make precise cuts for a clean and professional look.
Step 8: Patience is Key
Allow the adhesive to fully dry and cure according to the manufacturer’s instructions. This will ensure a strong and lasting bond between the vinyl and the foam surface.
Cut the Vinyl Fabric
Cutting vinyl fabric is an essential skill for anyone looking to transform foam into a work of art. Whether you’re upholstering furniture, crafting headboards, or creating custom cushions, precise cutting ensures a snug fit and impeccable appearance. So, let’s explore the world of precision cutting and learn how to cut vinyl fabric like a pro.
First and foremost, gather your arsenal of cutting tools. You’ll need a sturdy cutting mat, a trusty rotary cutter, and a ruler to guide your hand. These tools will be your secret weapons in achieving clean and precise cuts that would make any professional craftsman proud.
Once you have your tools ready, lay the vinyl fabric flat and smooth on the cutting mat. Smooth out any wrinkles or creases to create an even canvas for your masterpiece. Next, take your ruler and mark the dimensions you need for your foam project using a pen or chalk. Take your time with this step, ensuring accuracy by double-checking your measurements. Remember, precision is key.
Now it’s time to unleash the power of the rotary cutter. With a steady hand and even pressure, start cutting along the marked lines. Make smooth, continuous cuts to avoid jagged edges or uneven lines. If you’re dealing with curved or intricate shapes, consider using small scissors or a craft knife for more precision. Handle the vinyl fabric with care as it tends to stretch or distort when being cut.
When cutting vinyl fabric, it’s always wise to cut slightly larger than the foam dimensions. This allows for easy wrapping and securing of the vinyl around the foam later on. Plus, it gives you some wiggle room in case you need to make any adjustments during the upholstery process.
Once you’ve finished cutting, discard any excess material and give yourself a pat on the back for a job well done. But don’t forget to clean up your work area too. A tidy and organized workspace will not only make you feel like a pro, but it will also set the stage for a flawless upholstery project.
Remember to always follow safety precautions when using cutting tools. Keep your fingers away from the blade and use proper technique to avoid any accidents. With a little practice, you’ll soon become a vinyl-cutting virtuoso.
Cutting vinyl fabric is just one step in the process of putting it on foam. Once you’ve mastered this art of precision, you can move on to preparing the foam surface and applying glue to attach the vinyl. But that’s a story for another time.
Choose an Adhesive
The answer to this question can make all the difference when it comes to applying vinyl to foam, so let’s delve into the details.
Let’s begin with adhesion. We all want that vinyl to stay in place, right? Well, the key lies in selecting an adhesive specifically designed for bonding vinyl to foam. These adhesives are formulated to create a robust and enduring bond while maintaining flexibility to accommodate the stretching and movement of the vinyl material. Say farewell to peeling and embrace long-lasting adhesion.
Durability is another vital consideration. None of us want our hard work to go down the drain after a short period, do we? By choosing the correct adhesive, you ensure that your vinyl masterpiece remains intact for the long haul. Opt for an adhesive that can withstand any wear and tear your project might encounter, be it exposure to sunlight, moisture, or regular cleaning.
Now, let’s talk cost. We all desire value for our money, and adhesive selection is no different. While various adhesives flood the market, it is crucial to find one that meets your project’s specific needs without emptying your pockets. Remember, investing in a high-quality adhesive may save you money in the long run by avoiding costly reapplications or repairs.
When it comes to application methods, you have options aplenty. Spray adhesives offer effortless and uniform coverage, making them a popular choice. On the flip side, liquid or gel adhesives allow for more precise application, perfect for intricate foam projects. Consider your personal preference and project requirements when selecting your application method.
Last but not least, follow the manufacturer’s instructions regarding drying time. Patience is paramount. Allow ample time for the adhesive to dry and set correctly for a sturdy bond between your vinyl and foam. Rushing this step could lead to a less durable and secure outcome.
Let the Adhesive Dry
Today, we’re delving into the crucial step of letting the adhesive dry when applying vinyl on foam. While it may seem like a small detail, it holds the key to creating a bond that can withstand the test of time.
The Power of Proper Drying Time:
When it comes to vinyl-on-foam applications, using adhesive is essential for achieving a strong and long-lasting bond. However, here’s the catch – you must let the adhesive dry properly before moving forward. Let’s break down why this step is so important.
Follow the Manufacturer’s Instructions:
Different adhesives have different drying times, making it crucial to heed the manufacturer’s instructions. They know their product best and can guide you on how long you should wait before proceeding with the next steps of your project.
Patience is a Virtue:
As a general rule of thumb, it’s recommended to let the adhesive dry for at least 24 hours before continuing with the vinyl application. This waiting period allows the adhesive to set and ensures a bond that can withstand the test of time.
Handle with Care:
During this critical drying time, it’s crucial to avoid any contact or disturbance to the foam surface. Even a small touch or accidental bump can compromise the bond between the vinyl and foam, leading to peeling or lifting later on.
Creating the Right Environment:
To aid in faster drying, consider placing your foam in a well-ventilated area during this process. Proper air circulation helps speed up drying and ensures that your adhesive dries evenly.
Be Gentle with Heat:
In some cases, using a fan or applying gentle heat can help expedite the drying process. However, exercise caution not to overheat or apply excessive force that may damage the foam or compromise the adhesive’s integrity.
The Tacky Test:
After the recommended drying time has passed, it’s essential to check if the adhesive has completely dried before proceeding. Lightly touch the adhesive or use a small test patch of vinyl. If it feels tacky or sticky, it’s not fully dry yet – give it a little more time.
The Final Touch:
Once the adhesive has completely dried, it’s time for the exciting part – applying the vinyl. Carefully align and press the vinyl onto the foam surface, ensuring there are no wrinkles or bubbles during the process.
Position and Attach the Vinyl
In this comprehensive guide, we’ll take you through the step-by-step process, ensuring that your vinyl stays securely in place for years to come.
Step 1: Prepare the Surface – Clean and Smooth
To lay the foundation for a successful vinyl application, start by ensuring that your foam surface is pristine. Rid it of any dirt or debris that could interfere with the vinyl’s adhesion. A clean surface is essential for establishing a strong bond between the vinyl and the foam.
Step 2: Measure and Cut – Accurate and Adequate
Measure the dimensions of your foam and cut the vinyl accordingly. Leave some extra material on each side to allow for adjustments and ensure a perfect fit. Precision in measurement and cutting guarantees a seamless final product.
Step 3: Get Sticky – Unveil the Adhesive Side
Peel off a small section of the backing from the vinyl, revealing its adhesive side. With utmost care, align this exposed section with one edge of the foam, starting at one end.
Step 4: Smooth It Out – Banishing Wrinkles and Bubbles
As you attach the vinyl, work from one end to the other, applying pressure and smoothing out any pesky wrinkles or bubbles along the way. Utilize a squeegee or a similar tool to forge a firm bond between the vinyl and foam. Press from the center towards the edges, eradicating any air bubbles that may threaten perfection.
Step 5: Repeat and Perfect – Section by Section
Continue peeling off the backing and applying adhesive sections at a time until every inch of the foam is enveloped in vinyl. Should any air bubbles or wrinkles appear during the process, employ a pin or needle to carefully puncture them and then smooth out the vinyl.
Step 6: Check for Security – A Tightly Bonded Union
Once all sections of vinyl are securely attached and smoothed out, go over the entire surface again with unwavering pressure. This final step guarantees that no loose or unsecured areas remain, ensuring a flawless finish.
Step 7: Allow Proper Bonding Time – Patience is Key
For optimal adhesion and durability, allow the vinyl to set and bond with the foam for at least 24 hours before handling or using the finished product. This period of patience ensures a maximum bond that will stand the test of time.
Step 8: Optional Protective Coating – Shield and Strengthen
To fortify your vinyl against wear and tear, consider applying a clear protective coating. This additional layer safeguards the vinyl’s appearance and prolongs its lifespan, enhancing its resilience.
Trim Excess Material
Step 1: Assemble Your Tools
Before embarking on your trimming adventure, arm yourself with the right tools. Choose between a sharp utility knife or a pair of scissors, ensuring they are clean and in tip-top shape. This guarantees smooth cuts without any unwanted tears or jagged edges.
Step 2: Plan and Mark with Precision
Trimming excess material demands a well-thought-out game plan. Decide how much material you wish to remove and mark those areas accordingly. This strategic approach maintains consistency throughout the project, delivering results that surpass expectations.
Step 3: Cutting with Finesse
Whether wielding a utility knife or scissors, remember that steady and deliberate strokes win the race. Apply gentle pressure and employ multiple light strokes instead of attempting to slice through the vinyl in one swift motion. This technique minimizes the risk of slips or uneven cuts. Scissor enthusiasts should opt for small, precise cuts rather than broad sweeping motions.
Step 4: Nimble Maneuvering
As you trim, be mindful of the foam beneath. Exercise a steady hand, especially around corners or intricate designs. To maintain control, consider using your non-dominant hand to firmly hold down the vinyl while cutting with your dominant hand. This ensures seamless and even trims.
Step 5: Taming Tenacious Excess Material
Encountering stubborn excess material? Do not despair. A gentle application of heat from a heat gun or hairdryer on a low setting can come to your rescue. The warmth softens the vinyl, making it more pliable and easier to cut through.
Step 6: Inspect and Perfect
Once you have completed the trimming process, take a moment to inspect your masterpiece. Scan for any uneven edges or rough cuts that may require additional attention. If necessary, make any final trims or touch-ups to achieve an immaculate finish.
Finishing Touches
You’ve mastered the intricate art of applying vinyl to foam. Your project is taking shape, but before you declare it complete, there’s one crucial step left – the finishing touches.
These final steps are what separate the amateurs from the experts, elevating your creation from good to great and giving it that polished and professional appearance.
In this in-depth guide, we’ll delve into the importance of these finishing touches and walk you through a step-by-step process to achieve a flawless finish that will leave a lasting impression.
Trimming Excess Vinyl:
The first order of business is tackling those pesky excess vinyl materials. Say goodbye to overhanging edges. Equip yourself with a sharp utility knife or scissors, and with surgical precision, carefully trim away any excess material. Follow the contours of the foam, allowing for clean, even cuts that create a seamless look exuding precision and attention to detail.
Smoothing Out Wrinkles and Bubbles:
Now, let’s address any wrinkles or bubbles that may have popped up during the application process. These unsightly imperfections need to be banished.
Arm yourself with a trusty squeegee or a similar tool, applying gentle pressure as you navigate its smooth surface across the vinyl. Work deliberately and methodically, coaxing out trapped air and ensuring a flawlessly smooth finish.
Securing the Edges:
To prevent any future mishaps such as peeling or lifting, securing the edges of your vinyl is paramount. No shortcuts here. Select an adhesive or glue specifically designed for vinyl-to-foam applications.
Apply a thin layer along the edges and then press them firmly onto the foam. This meticulous step creates an unbreakable bond, guaranteeing your vinyl stays firmly in place for years to come.
Cleaning Up Excess Adhesive:
Lastly, let’s give your masterpiece a final touch-up by banishing any lingering adhesive or residue. We want to ensure your creation is pristine, after all. Utilize a mild solvent or cleaning solution that is safe for both the vinyl and foam surfaces.
Follow the manufacturer’s instructions diligently, taking extra care to test the solution in an inconspicuous area first to safeguard against any unwanted damage or discoloration.
gkAhbWQ2LlE” >