Ever wondered about the enchanting art of merging two pieces of silicone? It’s like discovering the secret recipe for a flawless connection between these versatile materials. From DIY enthusiasts to industrial wizards, silicone bonding has revolutionized countless industries, spawning durable products and ingenious solutions.
In this captivating blog post, we will unravel the enigma behind putting two pieces of silicone together. So buckle up and get ready to plunge into the mesmerizing world of silicone fusion.
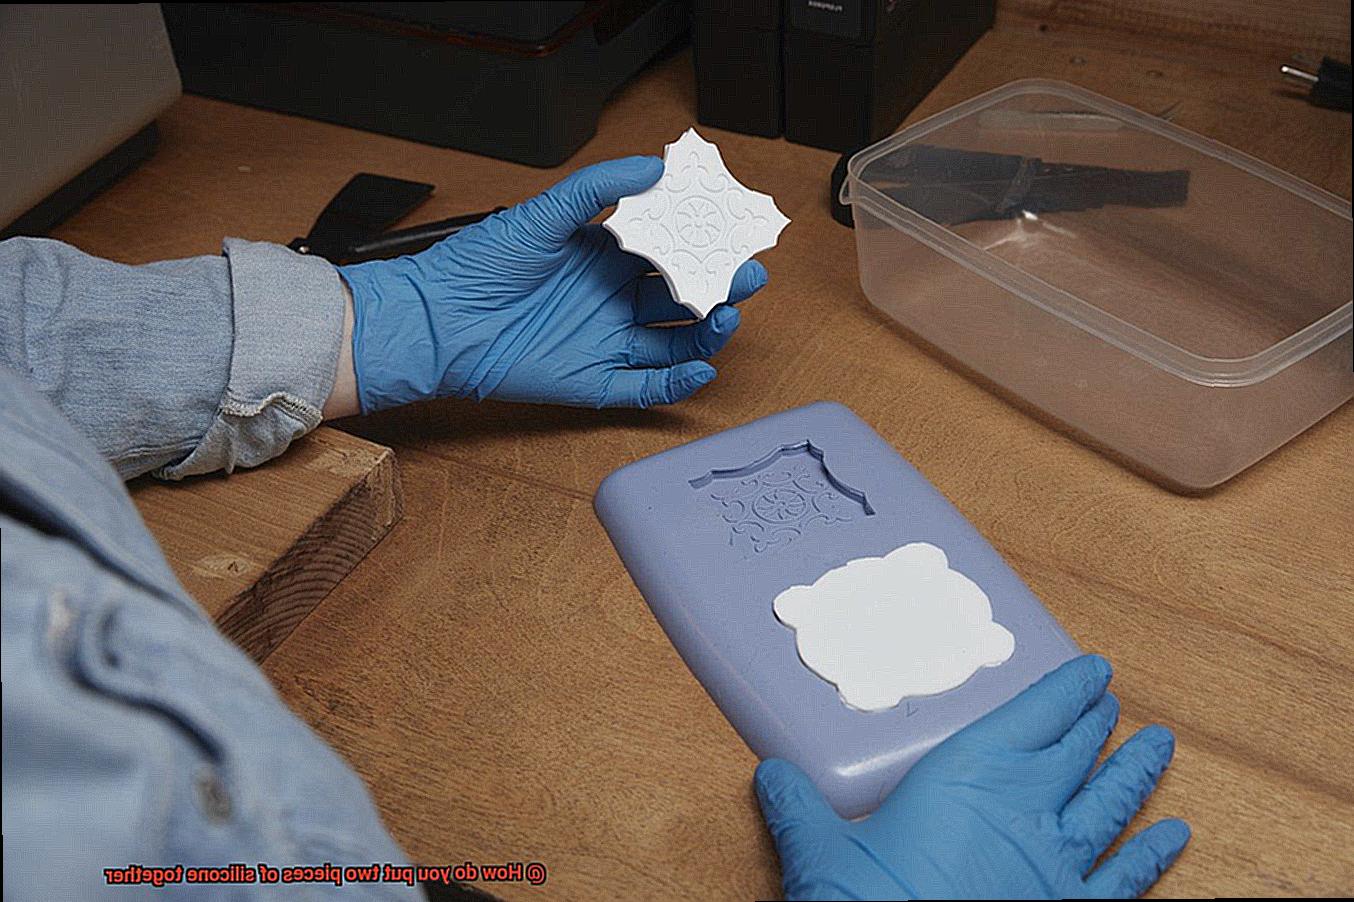
How do you put two pieces of silicone together?
Contents
- 1 How do you put two pieces of silicone together?
- 2 What is Silicone and Its Properties?
- 3 What Type of Adhesive is Best for Bonding Silicone?
- 4 Preparing the Surfaces Before Applying Adhesive
- 5 Applying the Two-Part Silicone Adhesive
- 6 Aligning and Pressing the Pieces Together
- 7 Removing Excess Adhesive
- 8 Curing the Bonded Pieces
- 8.1 Curing Methods: Air, Heat, UV, and Moisture
- 8.2 Air Curing: Witness the Chemical Dance Party.
- 8.3 Heat Curing: Turning Up the Heat for Faster Results
- 8.4 UV Curing: Let There Be Light for Instant Transformation
- 8.5 Moisture Curing: Atmospheric Chemistry at Its Finest
- 8.6 The Importance of Following Manufacturer’s Instructions
- 9 Factors That Affect Bond Strength
- 10 Conclusion
The Mighty Silicone:
Silicone is a material with superpowers. With its ability to brave scorching temperatures, resist chemicals, repel water, and maintain exceptional flexibility, it’s no wonder it’s a go-to choice for various applications. Before attempting to unite two pieces of silicone, it’s crucial to understand its unique characteristics.
The Magic of Silicone Adhesives:
One of the most popular methods for merging silicone involves harnessing the power of silicone adhesives. These specially formulated wonders possess incredible bonding properties that create strong and long-lasting joints. Whether you’re crafting with silicone or tackling industrial projects, silicone adhesives offer trustworthy adhesion.
Prepping for Perfection:
Achieving a triumphant bond between two pieces of silicone requires meticulous surface preparation. Banishing contaminants like dirt, grease, or oils from the surfaces is paramount. Additionally, employing a primer designed specifically for silicone bonding can significantly boost adhesive performance.
Techniques That Triumph:
There are several techniques to bring two pieces of silicone together in perfect harmony:
- Overlapping: Overlapping the edges of the silicone pieces and applying adhesive along the seam creates an unbreakable bond.
- Clamping: Employing clamps or weighty objects to hold the silicone pieces tightly while the adhesive cures ensures even pressure and an unwavering connection.
- Tape Method: Applying adhesive tape along the edge of the silicone and pressing the two pieces together allows for precise, controlled bonding.
As you can see, merging two pieces of silicone is like unlocking a treasure trove of possibilities.
Understanding the incredible properties of silicone, meticulously prepping surfaces, and employing effective bonding techniques are the keys to achieving an impeccable bond.
So whether you’re a hobbyist working on thrilling DIY projects or a professional tackling intricate industrial needs, now you possess the knowledge to create the perfect union between two pieces of silicone.
Stay tuned for our in-depth exploration of advanced silicone bonding methods in upcoming
What is Silicone and Its Properties?
Silicone, a synthetic material composed of silicon, oxygen, carbon, and hydrogen atoms, possesses an array of remarkable properties that have earned it a prominent place in various industries. With its versatility, silicone offers unparalleled advantages in applications that demand resilience, heat resistance, chemical stability, and more. This article delves into the captivating properties of silicone and explores how these characteristics contribute to its diverse range of applications.
Unyielding Thermal Stability:
Silicone boasts an exceptional ability to withstand extreme temperatures without flinching. Its physical and chemical properties remain unchanged even when exposed to scorching heat or bone-chilling cold. This makes silicone the go-to material for automotive gaskets and seals that need to maintain their integrity under the blistering engine temperatures.
Invincible Against Chemicals:
Silicone’s resistance to chemicals sets it apart from its counterparts. It stands impervious and inert against the corrosive forces of acids, bases, solvents, and other destructive substances. This resistance makes silicone the ultimate choice for laboratory equipment and medical devices that constantly come into contact with a diverse range of chemicals.
Electrical Insulation Champion:
Silicone dons the crown when it comes to electrical insulation properties. With its high dielectric strength and low electrical conductivity, silicone effortlessly repels electric current and provides impeccable insulation. It is the material of choice for electrical connectors, cables, and insulators where reliable insulation is non-negotiable.
Hydrophobic Wonders:
Silicone showcases a mesmerizing hydrophobic nature that grants it unmatched water repellency. Its surface tension dips significantly below that of water, causing water droplets to form beads and effortlessly slide off. This hydrophobic property renders silicone indispensable for waterproofing coatings or sealants in dire need of superior water resistance.
Flexibility and Elasticity Extraordinaire:
Silicone’s flexibility and elasticity know no bounds. It stretches and bends without losing its shape or succumbing to breakage. This extraordinary quality makes silicone the material of choice for rubber-like gaskets, O-rings, or prosthetic devices that demand exceptional resilience and enduring durability.
What Type of Adhesive is Best for Bonding Silicone?
Silicone, the versatile material renowned for its flexibility, durability, and resistance to heat, poses a unique challenge when it comes to bonding. Its low surface energy and non-porous nature demand a special adhesive for achieving a strong and long-lasting bond. In this comprehensive guide, we will unveil the best adhesive options for bonding silicone, along with expert tips and tricks to ensure success. Brace yourself for an enlightening journey into the realm of silicone bonding.
The Two-Part Silicone Adhesive: A Dynamic Duo:
Leading the pack is the mighty two-part silicone adhesive. This formidable adhesive combines a base and a curing agent, creating a synergistic bond that boasts both strength and flexibility. Like a superhero sidekick, it can withstand any bending or stretching without relinquishing its grip. With this adhesive, your silicone bonds will conquer any challenge that comes their way.
Silicone-Based Adhesives: A Match Made in Heaven:
In the realm of silicone bonding, there exists a divine union – the silicone-based adhesive. Formulated specifically for bonding silicone, these adhesives unleash their magical adhesion properties for a reliable bond that never falters. Whether you opt for the one-part or two-part formulation, rest assured that you have found your perfect partner in achieving seamless silicone bonds.
Other Options: Super Glue, Epoxy, and Polyurethane (Handle with Care):
While the two-part silicone adhesive and silicone-based adhesives reign supreme, there are other contenders worth mentioning. Cyanoacrylate, better known as super glue, epoxy, and polyurethane adhesives can also be used for bonding silicone. However, it is important to note that these alternatives may not provide the same robustness as their silicone-specific counterparts. Treat them as loyal sidekicks – reliable but not as invincible as the main hero.
Preparation, the Key to Success:
Before embarking on your bonding journey, proper surface preparation is paramount. Begin by diligently cleaning silicone surfaces with a solvent such as isopropyl alcohol to banish any dirt or grease that may hinder adhesion. For an added advantage, gently sanding or utilizing an abrasive pad to roughen the surface will boost the bond strength by maximizing contact area.
Preparing the Surfaces Before Applying Adhesive
Prepare to embark on a captivating journey into the realm of adhesive mastery. Today, we unveil the hidden secrets to unlocking the full potential of your silicone bonds – the art of preparing surfaces before applying adhesive. This often-neglected step is the key to achieving not just strong, but virtually indestructible bonds. So, don your lab coat and magnifying glass as we delve into the intricate world of surface preparation and unleash the true power of adhesive success.
The Path to Bond-iness: Cleanliness Matters:
Picture this: two pieces of silicone struggling to cling together amidst a layer of grime or oil. It’s a recipe for disaster, isn’t it? That’s why our first commandment is cleanliness. Thoroughly cleanse those surfaces using a trusty sidekick – a mild detergent or solvent.
Banish any pesky contaminants such as dust, grease, or oil from the equation. Remember, rinse off all cleaning agents and let those surfaces bask in the glory of absolute dryness before proceeding.
Out with the Old, In with the New:
Do remnants of past adhesive still haunt your silicone surfaces? Fear not, dear adhesive aficionados. Armed with gentle precision and scraping tools or sandpaper, bid farewell to these relics without inflicting any harm upon your precious silicone.
Roughen Up for Unyielding Bonds:
Silicone’s smooth and non-porous nature can be quite the challenge for adhesives seeking something to grip onto. But fret not. Introducing roughening – a technique that adds texture to your surfaces for maximum grip. Simply wield sandpaper or an abrasive pad and gently create a terrain that entices adhesives to hold on tight. It’s like giving your bond an invigorating boost of strength.
Primers: The Magical Elixir of Adhesion:
In the realm of bonding with other materials like metal or plastic, even our trusty silicone needs a little assistance. Enter primers, the enchanting elixirs that enhance adhesion and bridge the gap between silicone and its sometimes fickle counterparts. But beware, dear adhesive alchemists. Follow the manufacturer’s instructions diligently, allowing the primer to dry thoroughly before unveiling its adhesive-enhancing powers.
Applying the Two-Part Silicone Adhesive
Prepare to embark on a journey that will transform your silicone connections into unbreakable alliances. So, gather your tools and let us delve into the secrets of adhesive mastery.
Step 1: The Path to Purity
Before we can weave our adhesive sorcery, we must ensure absolute cleanliness. Like a knight preparing for battle, we need to eliminate any impurities that might hinder our bonding triumph. Armed with a mild detergent or trusty rubbing alcohol, cleanse the surfaces of your silicone pieces. Banish dirt, dust, and oils to create the ideal foundation for our adhesive’s effectiveness.
Step 2: Unleash the Alchemy
Now that our surfaces gleam with purity, it is time for the alchemical process known as mixing. Remember, the two-part silicone adhesive comprises a base and a curing agent. Follow the manufacturer’s instructions meticulously, for each adhesive possesses its own unique mixing ratios and curing times. Through thorough mixing, we unlock the full potential of our adhesive, guaranteeing a bond of unwavering strength.
Step 3: Painting with Precision
With our adhesive concoction ready, we embark on an artistic endeavor. Like a master painter wielding their brush, we apply a thin and even layer of adhesive onto one of the silicone surfaces. Every stroke is deliberate and purposeful, ensuring complete coverage on all areas that will intertwine with its counterpart. This is where our adhesive love story begins, creating a connection that transcends time and space.
Step 4: Aligning Destinies
Now comes the moment of truth – bringing together two silicone pieces destined to be united. But remember, time waits for no one. As the adhesive starts its transformation, it becomes less malleable. Swiftly align the pieces, applying firm pressure to forge a bond as unyielding as a titan’s grip. In this union, air bubbles are vanquished, leaving behind a seamless connection that defies all odds.
Aligning and Pressing the Pieces Together
In this captivating journey, we will uncover the secrets of achieving seamless bonds that defy all odds. Prepare your tools, steady your hands, and let us embark on this alchemical quest together.
Getting Aligned:
Before we unlock the true potential of our silicone adhesive, aligning our pieces is paramount. Picture it as finding that perfect puzzle piece in a magnificent tapestry. Let’s explore some techniques to master the art of alignment:
- Alignment Marks: These minuscule notches or lines on the silicone pieces become our guiding constellations. By matching these marks, we navigate the cosmos of alignment, ensuring a robust and seamless bond.
- Jigs and Templates: Imagine jigs as loyal companions that cradle your silicone pieces while you work your magic. They can be as humble as two wooden pieces with strategically placed holes. Templates, on the other hand, resemble blueprints guiding you to place the silicone pieces precisely. These indispensable tools unlock the gateway to precision alignment.
The Perfect Press:
Once our celestial pieces align like stars in the night sky, it is time to apply pressure and forge an unbreakable bond. Let us unveil the secrets of pressing like true masters:
- Even Pressure: Embrace your inner Michelangelo; delicately but firmly apply pressure across the entire surface of the silicone pieces. This symphony of touch ensures a harmonious distribution of adhesive, resulting in a flawless bond.
- Beware the Squeeze: While strength may be tempting, excessive pressure is not our ally. It risks deforming or squeezing out precious silicone between the pieces. Begin with gentle force, gradually increasing it until you achieve an unyielding seal.
- Clamps and Vices: For larger or intricate pieces, trusty clamps and vices come to the rescue. They cradle your creations, granting you the freedom to focus on alignment and controlled pressure.
Following the Adhesive’s Call:
The adhesive, the crucial orchestrator of our bond. Remember, each adhesive has its own set of rituals and rules. Let us heed their call:
Removing Excess Adhesive
In the realm of silicone bonding, achieving seamless connections is an alchemical quest that requires finesse and precision. But what about when the puzzle pieces don’t fit perfectly, leaving behind unsightly excess adhesive?
I am here to guide you through the magical process of removing this stubborn residue. In this article, we’ll explore the steps needed to achieve a clean and polished finish, ensuring your silicone surfaces remain unblemished.
So gather your tools and let’s embark on this adhesive-removal adventure.
Step 1: Exercise Patience and Allow Curing Time
Before we dive into removing excess adhesive, it’s crucial to let it cure fully. Most silicone adhesives require at least 24 hours to set completely. Remember to follow the manufacturer’s instructions for the optimal curing time. Patience is key in achieving the desired outcome.
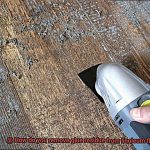
Step 2: Gentle Scraping for Delicate Surfaces
Once the adhesive has cured, it’s time to take out your plastic scraper or putty knife. Start at one edge and work your way towards the center, applying light pressure while adjusting the angle of the scraper as needed. Slowly but surely, scrape away the excess adhesive without causing any harm to the delicate silicone surface.
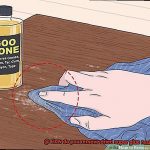
Step 3: Conquer Stubbornness with Silicone Solvents
For those particularly stubborn adhesive residues, specialized silicone solvents come to the rescue. These solvents can be easily obtained from hardware stores or online retailers. However, be sure to read and follow the instructions provided by the brand as they may vary.
Step 4: Test, Then Apply Solvent
Before applying any solvent, perform a compatibility test on a small, inconspicuous area of the silicone surface. Once confirmed safe, apply the solvent directly onto the excess adhesive. Give it a few minutes to work its magic, loosening and softening the adhesive for easier removal. Then, wipe away the residue using a clean cloth or sponge.
Step 5: The Heat is On
In some cases, heating the excess adhesive can aid in its removal. Use a heat gun or set your hairdryer on low heat. Gently warm the adhesive, making it softer and more pliable. This allows for easy scraping with a plastic tool or wiping away with a clean cloth. Be cautious not to overheat or burn the silicone surface.
Curing the Bonded Pieces
In our previous segment, we delved into the exciting world of achieving flawless silicone connections. Today, we’re going to explore the crucial step of curing bonded pieces. So grab your lab coat and safety goggles, because we’re about to dive deep into the different methods of curing and why it’s essential to follow those manufacturer’s instructions.
Curing Methods: Air, Heat, UV, and Moisture
When it comes to curing bonded silicone pieces, there’s more than one path to success. Let’s take a closer look at the four main methods:
Air Curing: Witness the Chemical Dance Party.
With air curing, the adhesive is left exposed to air for a specific period. During this time, a magical chemical reaction occurs within the adhesive, transforming it into a powerful bond. It’s like watching your creation come to life before your eyes.
Heat Curing: Turning Up the Heat for Faster Results
Time to crank up the temperature. Heat curing involves using an oven or heat gun to accelerate the curing process. This method is ideal for adhesives that require higher temperatures for optimal bonding. It’s like giving your bond a turbo boost.
UV Curing: Let There Be Light for Instant Transformation
Harnessing the power of light. UV curing relies on ultraviolet light to cure the adhesive. Adhesives containing photoinitiators react when exposed to UV light, triggering a rapid chemical reaction that hardens the adhesive in an instant. It’s like performing a magical spell with sunlight as your wand.
Moisture Curing: Atmospheric Chemistry at Its Finest
Prepare for a mystical reaction. Moisture-curing adhesives rely on ambient moisture in the air for curing. When these adhesives come into contact with water vapor in the environment, moisture-reactive chemicals initiate a bonding process like no other. It’s like witnessing a secret connection between your adhesive and the elements.
The Importance of Following Manufacturer’s Instructions
Now that we’ve explored the different curing methods, let’s talk about something crucial: following those manufacturer’s instructions. Here’s why it’s essential:
Factors That Affect Bond Strength
In our previous section, we explored the key elements behind flawless connections and the importance of following instructions. Now, let’s dive deeper into the factors that directly impact bond strength when working with silicone materials. Get ready to don your lab coats as we unveil the secrets to achieving an unbreakable and long-lasting bond.
Surface Preparation: Laying the Rock-Solid Foundation
Imagine constructing a house on a shaky foundation – it’s destined for collapse. The same principle applies to bonding silicone materials. Surface preparation is the first and most critical factor that influences bond strength. Thoroughly cleaning and preparing the surfaces to be bonded is absolutely essential. By removing dirt, grease, or contaminants, you create a pristine canvas for the adhesive to work its magic. So grab your solvent or sandpaper and lay down a rock-solid foundation for an unbreakable bond.
Adhesive Selection: Choosing Your Bonding Superhero
Not all adhesives are created equal, my friends. The type of adhesive you choose can make or break your bond strength. In the vast adhesive kingdom, there are various options available for bonding silicone materials, each boasting unique properties and strengths. From silicone-based adhesives to cyanoacrylates, epoxies, and polyurethane adhesives, they all have their place. However, it’s crucial to select an adhesive specifically designed for bonding silicone materials to ensure optimal bond strength.
Curing Time: Patience Rewarded with Strength
In this fast-paced world, patience is often overlooked. When it comes to achieving exceptional bond strength, proper curing time is of utmost importance. Curing time refers to the duration required for the adhesive to fully dry and reach its maximum strength. Following the manufacturer’s instructions diligently is the key to avoiding weak bonds caused by insufficient curing time or brittle bonds due to overcuring. Remember, patience is rewarded with unbreakable strength.
3eH19nQotNA” >
Conclusion
In order to successfully join two pieces of silicone together, there are a few key steps to follow. Firstly, ensure that both surfaces are clean and free from any debris or contaminants.
Next, apply a high-quality silicone adhesive or sealant to one surface, spreading it evenly with a tool or your finger. Then, firmly press the two pieces together, making sure they align perfectly.
Allow sufficient time for the adhesive to cure and bond the silicone pieces together securely. Finally, check for any excess adhesive and remove it carefully if necessary.
By following these steps with precision and care, you can achieve a strong and durable bond between two pieces of silicone.