Ready to take your home decor or gift-giving game to the next level?
Look no further than the art of transferring printed pictures onto wood. It’s a surefire way to add a personal touch and create eye-catching masterpieces.
Whether you want to immortalize a precious family moment, capture the beauty of nature, or showcase your furry friend’s adorable face, this technique will make your favorite memories pop like never before. In this blog post, we’ll walk you through the step-by-step process of putting a printed picture on wood, giving you all the insider tips and tricks for professional-looking results.
Get ready to turn ordinary wooden surfaces into extraordinary works of art that will leave everyone in awe.
What is the Transfer Medium Method?
Contents
- 1 What is the Transfer Medium Method?
- 2 What is the Adhesive Spray/Glue Method?
- 3 Choosing the Right Adhesive Product for Bonding Paper to Wood
- 4 Other Methods of Putting a Printed Picture on Wood
- 5 The Benefits of Using Transfer Mediums
- 6 The Benefits of Using Adhesive Sprays or Glue
- 7 Selecting the Appropriate Type of Wood for This Project
- 8 Tips for Achieving Successful Results
- 9 Conclusion
If you’re seeking a creative and personalized way to decorate wooden items or craft unique gifts, the Transfer Medium Method is the answer. In this blog post, we will delve into this popular technique, which guarantees professional-looking results.
Whether you’re looking to spruce up wooden furniture, create personalized signs, or make custom wooden gifts, the Transfer Medium Method offers a fun and imaginative way to incorporate printed images onto wood.
Step-by-Step Guide:
Gather your materials:
- A printed image on regular printer paper (use a laser printer for optimal results)
- Transfer medium (choose between gel medium or image transfer liquid)
- A wooden surface
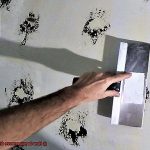
Apply the transfer medium:
- Brush a thin and uniform layer of transfer medium onto the specific area of the wood surface where you want the image to appear.
- Ensure complete coverage of the desired area.
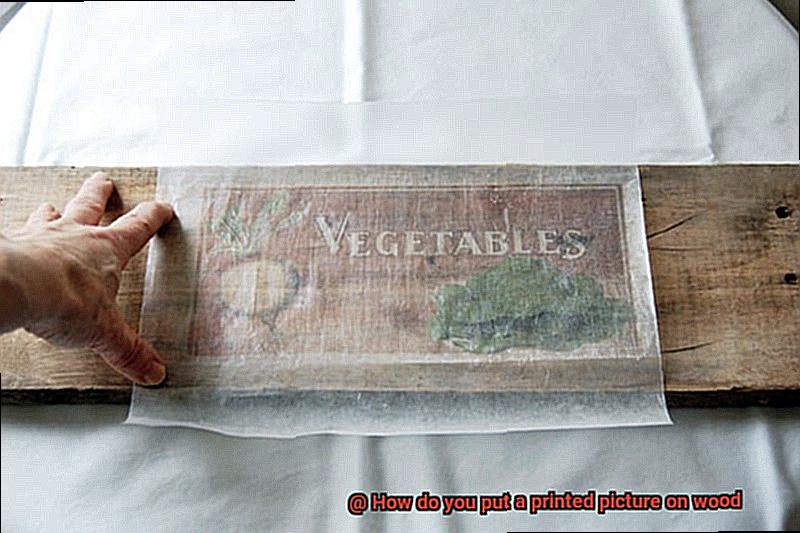
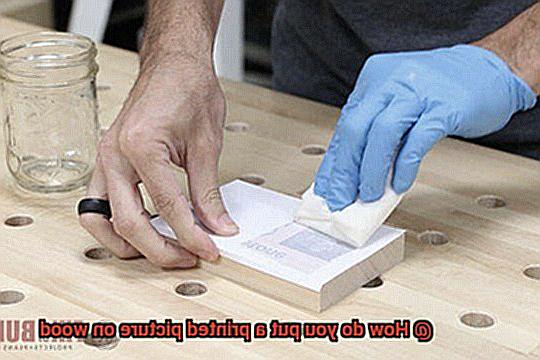
Place the printed image:
- While the transfer medium is still wet, carefully place the printed image face down onto the wood surface.
- Apply firm pressure and eliminate any air bubbles or wrinkles using a roller or credit card.
Allow it to dry:
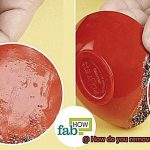
Remove the paper:
- Moisten the paper with water and gently rub it off.
- Witness the transferred image revealed on the wood surface.
Tips and Considerations:
- Opt for a laser printer when printing the image, as inkjet prints may yield less satisfactory results.
- Choose a transfer medium specially designed for transferring images onto wood.
- Ensure that your wooden surface is clean and smooth for better adhesion.
- Experiment with different wood types to achieve diverse effects and textures.
- Practice on small wooden samples before embarking on larger projects.
What is the Adhesive Spray/Glue Method?
If you’re seeking a creative and personalized way to bring printed images to life on wood, look no further than the adhesive spray/glue method. This popular technique allows you to transfer images onto wood surfaces, turning ordinary pieces of wood into stunning works of art with professional-looking results.
So, how does it work? Let me break it down for you. The adhesive spray/glue method involves using a spray adhesive or glue specifically designed for this purpose. With just a thin, even layer of adhesive applied to the back of the printed picture, you ensure full coverage. Once the adhesive dries and becomes tacky, gently press the picture onto the wood surface, making sure it aligns perfectly.
One major advantage of this method is its ease of use. No fancy equipment or complicated techniques required – simply grab a can of adhesive spray or a bottle of specialized glue, and you’re ready to go. Plus, the process is quick and efficient, allowing you to create beautiful artwork in no time.
But that’s not all. The adhesive spray/glue method also offers a strong bond between the printed picture and the wood. Your artwork will stay intact and durable, even in high-traffic areas or outdoor environments. Say goodbye to worries about peeling or lifting pictures.
Versatility is another great feature of this method. It works well with various types of wood and surface textures. So whether you’re working with smooth or rough surfaces, the adhesive will adhere effectively. This opens up a world of possibilities for your woodworking projects – from wall art and photo frames to furniture embellishments and more.
However, it’s crucial to choose the right adhesive for this method. Not all glues are suitable for attaching paper or photos to wood surfaces. Be sure to select an adhesive specifically formulated for this purpose to ensure a strong bond without compromising the integrity of your printed picture.
Choosing the Right Adhesive Product for Bonding Paper to Wood
Achieving a strong and long-lasting bond when bonding paper to wood requires choosing the right adhesive product. This crucial decision involves considering several factors that will ensure your artwork stays firmly in place, even under the harshest conditions.
First and foremost, consider the type of paper you are working with. Is it glossy or matte? Coated or uncoated? Different adhesives have varying compatibility with different paper types. Take a moment to analyze the properties of your paper and choose an adhesive accordingly. Don’t let the wrong adhesive ruin your artistic vision.
Next, take a close look at the wood surface. Is it as smooth as silk or rough as sandpaper? The texture and porosity of the wood play a significant role in determining which adhesive will create a solid bond. You don’t want your masterpiece falling apart because the adhesive couldn’t stick properly to the wood surface. Choose an adhesive that is compatible with the specific characteristics of your wood.
Consider the environmental conditions your artwork will be exposed to. Will it be subject to moisture or extreme temperatures? If so, choose an adhesive that can handle these challenges without breaking a sweat. Water-resistant or temperature-resistant adhesives are your best friends in these situations, ensuring your artwork remains intact and vibrant.
Don’t forget about the application method and drying time. Some adhesives require clamping or pressure during the curing process, while others simply need time to dry. Consider your project timeline and application process carefully to select an adhesive that fits seamlessly into your workflow.
Lastly, safety should always be a priority. Some adhesives may contain toxic chemicals or emit strong fumes during application and curing. Don’t compromise your health or safety for a bond. Choose an adhesive that is safe to use and follow all instructions carefully to ensure a worry-free experience.
Other Methods of Putting a Printed Picture on Wood
Are you ready to take your printed pictures to the next level and transfer them onto wood? While using glue is a common method, there are other exciting ways to achieve this stunning effect. Let’s dive into some alternative methods that will help you create a unique and eye-catching piece of art.
One popular technique is the transfer paper method. This involves printing your picture onto transfer paper using an inkjet printer. With the aid of a household iron, you can apply heat and pressure to transfer the image onto the wood surface. The result? Detailed and vibrant images that preserve every little detail.
Another method that crafters swear by is the Mod Podge method. Mod Podge, a versatile craft adhesive, can be used to transfer printed images onto wood. Applying a layer of Mod Podge to the wood surface, you then place the printed picture face down and smooth out any air bubbles. Once dry, moisten the paper and gently rub it away, revealing a smooth and even transfer.
If you’re aiming for a transparent and smooth finish, consider the gel medium method. Gel medium is an art supply that works wonders for transferring printed images onto wood. By applying a layer of gel medium to both the printed picture and the wood surface, placing the picture face down on the gel medium layer, and pressing firmly, you ensure good contact. After drying and gently rubbing away the paper, you’ll unveil a transferred image with a flawless finish.
For those seeking a glossy and durable outcome, the resin coating method is worth exploring. With this method, you print your picture on resin-coated paper and then transfer it onto the wood by applying a layer of resin over it. The resin acts as both an adhesive and a protective coating. Pour it evenly over the printed picture, let it cure according to instructions, and enjoy a stunning and long-lasting finish.
Lastly, if you desire a smooth and professional-looking result, image transfer mediums like Liquitex or Golden can be your best friends. These specially formulated products allow for easy image transfer onto various surfaces, including wood. By applying a layer of the transfer medium onto the wood, letting it dry, placing the printed picture face down on the dried transfer medium, and gently rubbing away the paper after a few minutes, you’ll achieve a flawless transferred image on the wood.
The Benefits of Using Transfer Mediums
Transfer mediums are specially designed products that allow you to transfer your printed images onto various surfaces, including wood. This innovative technique offers a multitude of benefits that will transform your ordinary pictures into stunning works of art.
One of the main advantages of using transfer mediums is the ease and simplicity they offer. No need for complicated techniques or expensive equipment. With just a few simple steps, you can effortlessly transfer your pictures onto wood, opening up a whole new world of creative possibilities.
Another significant benefit is the precision and accuracy that transfer mediums provide. You can ensure that your printed picture appears exactly as intended on the wood surface, with no distortion or loss of quality. This level of precision allows you to create professional-looking pieces that will impress everyone who sees them.
Versatility is another key advantage of using transfer mediums. Whether you have an inkjet or laser printer, glossy or matte paper, transfer mediums can handle it all. They work seamlessly with different types of printers and paper materials, allowing you to choose the best combination for your project.
Additionally, transfer mediums are typically transparent or semi-transparent, allowing the natural texture and grain of the wood to shine through the transferred image. This unique effect adds depth and character to your artwork, creating a visually appealing result.
Using transfer mediums also eliminates the need for cutting or trimming your printed images. You can transfer them onto the wood surface in their entirety, saving both time and effort. This convenience makes the process even more accessible to artists of all skill levels.
Durability is another significant benefit of using transfer mediums. These products are often water-resistant and provide a protective layer over the transferred image, ensuring its longevity. Your creations will withstand the test of time, allowing you to cherish them for years to come.
Furthermore, transfer mediums offer endless possibilities for customization and personalization. You can add a unique and personalized touch to any wooden item, whether it’s a photo frame, a wooden plaque, or even a furniture piece. Let your creativity soar as you transform everyday objects into one-of-a-kind treasures.
Last but not least, using transfer mediums is a cost-effective option compared to other methods of transferring images onto wood. Say goodbye to expensive professional printing services or specialized equipment. With transfer mediums, you can achieve professional-quality results without breaking the bank.
The Benefits of Using Adhesive Sprays or Glue
These versatile tools offer a multitude of benefits that make them the perfect choice for attaching printed pictures onto wood surfaces.
First and foremost, adhesive sprays or glue are incredibly easy to use. With their user-friendly containers and simple instructions, anyone can apply them onto a wood surface with ease. Whether you’re a professional artist or just someone who loves to DIY, adhesive sprays or glue make the process a breeze.
But it’s not just about ease of use – adhesive sprays or glue are also incredibly versatile. They can be used on various types of wood surfaces, from plywood to hardwood, and even rough-textured woods. This opens up a world of creative possibilities when it comes to displaying your printed pictures on wood.
One of the standout advantages of adhesive sprays or glue is their ability to create a strong bond between the printed picture and the wood surface. This ensures that your picture will stay securely attached, even when faced with moisture or changes in temperature. Some adhesive sprays or glue even offer UV protection, preventing your printed picture from fading over time.
But what if you’re not satisfied with the placement of your picture? No problem. Adhesive sprays or glue allow for easy repositioning. Simply peel off the picture and reapply it without causing any damage to either the picture or the wood surface. This feature is particularly helpful when working on intricate designs or striving for perfection in picture placement.
In addition to their practical benefits, adhesive sprays or glue also contribute to the overall aesthetic appeal of your artwork. When applied correctly, they create a seamless bond between the printed picture and the wood surface, enhancing the visual impact of your artwork. Some adhesive sprays or glue even dry clear, leaving behind no visible residue.
Last but not least, adhesive sprays or glue provide durability to your attached printed picture. They help protect the picture from wear and tear, ensuring it remains intact for an extended period. This is especially important if your artwork will be displayed in high-traffic areas or regularly handled.
Selecting the Appropriate Type of Wood for This Project
When it comes to putting a printed picture on wood, selecting the right type of wood is crucial. Different types of wood have distinct characteristics that can significantly impact the final outcome of your project. So, what factors should you consider when choosing the appropriate type of wood? Let’s dive deeper into this fascinating and comprehensive topic.
Firstly, let’s discuss the hardness of the wood. Hardwoods, such as oak or maple, are renowned for their durability and resistance to damage. They can effortlessly withstand the pressure and heat involved in the transfer process without sustaining any harm. On the other hand, softwoods like pine or cedar are more susceptible to dents and scratches, which can ultimately affect the quality and longevity of your transferred image. If you desire a project that stands the test of time, it is advisable to opt for a hardwood.
Next, consider the grain pattern of the wood. Some woods possess a tight and smooth grain, while others boast a more pronounced and open grain pattern. The tighter the grain, the smoother and more detailed your transferred image will appear. Woods with an open grain pattern, such as ash or mahogany, may result in a more textured and rustic aesthetic. Therefore, depending on the atmosphere and style you wish to convey, choose a wood with an appropriate grain pattern that complements your artistic vision.
The color of the wood is yet another crucial factor to take into account. Lighter-colored woods like birch or maple tend to provide a brighter and more vibrant background for your transferred image. These woods can enhance the overall impact and make your picture pop with vividness. Conversely, darker woods like walnut or cherry can add depth, richness, and an elegant touch to the final result. Consider what mood or ambiance you want your project to evoke and select a wood color accordingly.
Additionally, think about the size and thickness of the wood. Thicker pieces of wood offer enhanced stability and durability for your project. They are less prone to warping or bending over time, ensuring that your masterpiece remains intact for years to come. On the other hand, smaller pieces of wood can be more manageable and easier to work with, especially if you are new to this technique. Choose a size and thickness that best suits your specific project requirements.
Lastly, take into consideration the availability and cost of the wood. Some types of wood may be harder to find or more expensive than others. It is essential to choose a type of wood that fits within your budget and is readily available in your area. Conduct thorough research and explore local suppliers to ensure you can obtain the desired wood without exceeding your financial constraints.
Tips for Achieving Successful Results
Transferring a printed picture onto wood is a fantastic way to showcase your favorite photos. In this step-by-step guide, we will explore the key steps necessary for achieving successful results. From choosing the right wood to applying the transfer medium, these tips will help you unleash your creativity and bring your photos to life on wood.
Selecting the Perfect Wood Canvas:
To ensure a smooth and even transfer, it’s crucial to choose the right type of wood. Opt for hardwoods like birch plywood or maple, which have a naturally smooth texture. Avoid woods with prominent grains or knots that can interfere with the transfer process. Remember, a picture-perfect canvas starts with the right wood.
Prepping the Wood Surface:
Before diving into image transfers, prepare your wood surface like a pro. Start by sanding away any rough edges or imperfections, creating a clean and smooth canvas. Wipe off any dust or debris with a clean cloth, ensuring better adhesion of the image. This will provide a solid foundation for your masterpiece.
Choosing the Ideal Image:
Selecting the perfect image is crucial for a stunning transfer. Opt for high-resolution photos with vibrant colors and sharp details. Images with strong contrast and simple lines work best for this technique. Avoid complex patterns or excessive fine detail, as they may not transfer well onto wood. Choose an image that speaks to you and captures your imagination.
Exploring Transfer Mediums:
Now it’s time to choose your weapon of choice: gel medium, Mod Podge, or iron-on transfers. Each method has its own unique charm and characteristics, so do some research and find the one that suits your style and needs best. These magical mediums will help bond your printed picture to the wood surface, ensuring a successful transfer.
Printing in Reverse:
Printing in reverse may sound counterintuitive, but trust us, it’s essential. Flip or mirror your image before printing to ensure it appears correctly once transferred onto the wood. This simple trick will save you from any unexpected surprises and ensure a seamless transfer.
Applying with Care:
With your printed picture in hand, apply a generous layer of transfer medium onto the wood surface. Smooth it out like spreading creamy peanut butter on toast, ensuring even coverage. Be sure to cover the entire area where you want your image to shine. Take your time and apply with care, as this step determines the quality of the transfer.
Perfect Placement:
Now comes the exciting part. Carefully place your printed image face-down onto the transfer medium-covered wood surface. Align it with precision, like a puzzle piece finding its perfect spot. Use a credit card or similar tool to smooth out any pesky bubbles or wrinkles. A flawless placement ensures a successful transfer.
xHOWUR8vTvo” >
Conclusion
Putting a printed picture on wood is a creative and unique way to display your favorite images. It adds a rustic and natural touch to your decor, making it stand out from traditional framed prints. So, how exactly can you achieve this? Well, let me guide you through the process step by step.
Firstly, you’ll need to gather your materials. You’ll need a piece of wood that’s smooth and sanded, ensuring a clean surface for the image transfer. Make sure the wood is the appropriate size for your picture.
Next, you’ll need a printed copy of the picture you want to transfer onto the wood. You can use an inkjet printer for best results. Remember to reverse or mirror the image before printing so that it appears correctly on the wood.
Once you have everything ready, it’s time to apply the image onto the wood. Start by applying a generous amount of gel medium or Mod Podge directly onto the wood surface. Spread it evenly using a foam brush or roller.
Now carefully place your printed picture face down onto the gel medium or Mod Podge. Smooth out any wrinkles or air bubbles using a brayer or credit card, ensuring good contact between the paper and wood.
After that, let it dry completely. This usually takes around 24 hours but may vary depending on humidity levels and temperature.
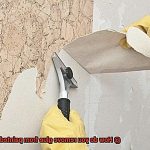
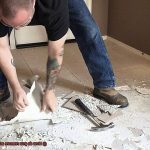
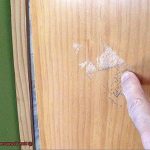
Once dry, it’s time for the exciting part – removing the paper. Moisten a sponge or cloth with water and gently rub over the paper in circular motions. The water will help loosen and remove the paper fibers while leaving behind only the ink transferred onto the wood.
Be patient during this step as rubbing too hard may damage or remove some of the transferred image. Continue moistening and rubbing until all traces of paper are gone, revealing your beautiful image on wood.
Lastly, protect your masterpiece by applying a clear sealer or varnish over it. This will not only enhance its appearance but also provide durability and protection against moisture and UV rays.
And there you have it – a printed picture successfully transferred onto wood. Display it proudly in your home or give it as a personalized gift to someone special. The possibilities are endless, so let your creativity run wild.
In conclusion, putting a printed picture on wood is a fun and rewarding DIY project that allows you to showcase your favorite images in a unique way. With just a few materials and some patience, you can create stunning wooden photo prints that will surely impress.