Ever wondered how ordinary wood becomes a force to be reckoned with when combined with the strength of fiberglass? It’s all in the meticulous preparation, expert craftsmanship, and a touch of finesse. Whether you’re a woodworking enthusiast or aspiring boat builder, mastering the art of preparing wood for fiberglass is an essential skill.
Imagine this: an aging piece of wood, weathered by time and nature’s elements, about to undergo a remarkable transformation. It will emerge as a water-resistant structure capable of conquering rough waves or standing tall amidst fierce storms. But how does this magical metamorphosis occur?
In this blog post, we’ll dive into the secrets of preparing wood for fiberglass. We’ll explore the foundational steps that ensure longevity, durability, and beauty in the final product. Get ready to uncover essential aspects that cannot be overlooked.
- Wood Selection: Discover the hidden knowledge behind choosing the perfect type of wood with ideal characteristics for successful fiberglass application.
- Surface Preparation: Learn techniques to create a smooth, clean, and stable surface that seamlessly bonds with fiberglass.
- Sanding and Filling: Uncover the key to achieving flawlessness using sandpaper, epoxy fillers, and other tools to address imperfections.
- Priming and Sealing: Master priming and sealing techniques to protect wood from moisture while enhancing its bonding properties – maximizing fiberglass strength.
By the end of this journey, you’ll possess the knowledge needed to prepare wood for fiberglass applications – unlocking endless creative possibilities. Whether you dream of restoring classic wooden sailboats or building custom masterpieces, get ready as we unveil captivating secrets within this extraordinary process. Let’s embark on an unforgettable voyage where skilled craftsmanship meets the mesmerizing synergy of wood and fiberglass.
What is Fiberglass?
Contents
Fiberglass, an extraordinary composite material composed of fine glass fibers, possesses a remarkable blend of strength and versatility. Its unique properties have made it a go-to choice across a multitude of industries. In this article, we will delve into the intricate production process of fiberglass, explore its myriad advantages, and uncover its wide-ranging applications.
The Production Process:
Crafting fiberglass involves a meticulous process that begins with the melting of glass at high temperatures, creating thin strands known as glass fibers. To ensure cohesion and prevent unraveling, these fibers are coated with a binding agent. They can either be woven into fabric or used as loose fill. To fashion fiberglass products, the fibers are combined with a resin matrix—a plastic compound that solidifies upon curing. The resin is skillfully mixed with a catalyst or hardener, initiating the curing process.
Advantages of Fiberglass:
- Lightweight yet Strong: One of fiberglass’s most notable attributes is its exceptional strength-to-weight ratio. Despite being remarkably lightweight, it maintains an impressive structural integrity, making it ideal for applications where weight reduction is paramount.
- Durability and Resistance: Fiberglass exhibits unparalleled resistance to chemicals, moisture, UV radiation, and temperature fluctuations. It bravely endures harsh environmental conditions, rendering it suitable for outdoor use or in demanding environments.
- Electrical Insulation Properties: With its impeccable electrical insulation properties, fiberglass finds itself perfectly suited for applications in the electrical and electronics industries. It acts as a protective barrier against electrical currents, enhancing safety and performance.
- Sound and Thermal Insulation: Fiberglass serves as an outstanding sound and thermal insulator, effectively reducing noise levels and providing exceptional thermal insulation properties. This invaluable trait finds great use in the construction and automotive industries.
Applications of Fiberglass:
- Construction Industry: The construction industry heavily relies on fiberglass for various purposes such as insulation, roofing, windows, doors, and structural components. Its exceptional strength and resistance to environmental factors make it a trusted choice for reliable building materials.
- Automotive Industry: In the automotive sector, fiberglass plays a pivotal role in manufacturing lightweight body panels, bumpers, spoilers, and interior components. Its robustness and durability contribute to fuel efficiency and overall improved performance.
Preparing the Wood Surface
If you’re thinking about incorporating fiberglass into your projects, you’ll need to know how to properly prepare the wood surface for application. Let’s dive into the steps to ensure your fiberglass project turns out smooth and strong.
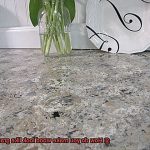
First, we need to clean the wood surface. Get rid of any dirt, dust, or debris that could ruin the bond between the wood and fiberglass. Use a brush or a trusty vacuum cleaner to give that wood a thorough cleaning. No room for imperfections here.
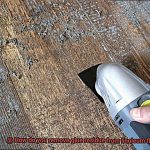
Next up is sanding. Yes, it can be tedious, but trust me, it’s worth it. Sanding helps remove rough spots, splinters, and old finishes that won’t play nicely with fiberglass. Start with coarse-grit sandpaper and work your way up to finer grits for a silky smooth finish. Your fingertips will thank you for this TLC.
Now, let’s address any knots or imperfections in the wood. Fill them in with wood filler or putty to create a level playing field. Just make sure to let it dry completely before moving forward. Patience is key; we want that surface to be flawless.
Once the wood is smooth and level, it’s time for primer. Think of primer as the superhero sidekick that seals the wood and creates a solid foundation for fiberglass. Choose a primer specifically designed for fiberglass materials and follow the manufacturer’s instructions for application.
But hold on. Before we jump into fiberglass, let’s give that wood some extra love with epoxy resin. This magical potion further seals and strengthens the wood, ensuring optimal adhesion for the fiberglass. Read the instructions on the epoxy resin packaging carefully and apply it like a pro.
Now that our wood surface is prepped and primed, it’s time for the main event: fiberglass. Cut your fiberglass cloth or matting to fit your project’s dimensions and lay it over the prepared wood. Saturate and bond the fiberglass onto the wood using fiberglass resin or adhesive. Smooth out any air bubbles or wrinkles, working from one end to another.
Now comes the hard part – waiting. Allow the fiberglass to cure completely before moving forward. The curing time may vary depending on the product, so check the manufacturer’s instructions for guidance.
Applying Epoxy Resin Primer
Get ready, because we’re about to dive into the fascinating world of fiberglass. But before we can do that, we need to ensure that your wood surface is prepared properly by applying epoxy resin primer. This step is absolutely crucial in creating a solid foundation and enhancing the adhesion between the wood and fiberglass. So, let’s roll up our sleeves and get started on this exciting journey.
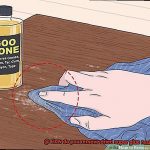
The first sub-topic we need to address is cleaning the wood surface. Imagine a whistle, that’s how clean we want it to be. Grab a mild detergent and water, and give that wood surface a scrub like it’s never been scrubbed before. We need to eliminate any dirt, grease, or loose particles that might interfere with the adhesion process. Once you’ve thoroughly cleaned the surface, rinse it off completely and allow it to dry completely before moving on.
Now, let’s talk about sanding. This step is all about creating a rough texture on the wood surface that will allow the epoxy resin primer to grip on like a champion. Start with a coarse grit sandpaper and gradually work your way up to finer grits until you achieve a smooth and even finish. And don’t forget, before you proceed any further, make sure to remove any sanding dust from the surface. You can use a tack cloth or a vacuum cleaner to get rid of any residue.
Safety is always a top priority. So, before we jump into applying the epoxy resin primer, make sure you’re wearing your gloves and goggles. This stuff can be harmful if it comes into contact with your skin or eyes, so let’s protect ourselves and stay safe.
Now it’s time to mix up that epoxy resin primer. Follow the manufacturer’s instructions carefully and combine the resin and hardener in specific ratios. Give it a good stir to ensure thorough blending of the components. Once your mixture is ready, grab either a brush or a roller and start applying the epoxy resin primer onto the wood surface. Remember, work in small sections to ensure even coverage, and pay close attention to those corners and edges that might require a little extra attention.
Laying Fiberglass Cloth
Laying fiberglass cloth on wood is an art form that requires precision and attention to detail. It’s a process that transforms a simple piece of wood into a robust and durable masterpiece. So, are you ready to embark on this thrilling journey? Let’s dive in.
First and foremost, cleanliness is key. Before laying the fiberglass cloth, you must ensure that the wood surface is pristine. Any dirt, dust, or rough spots can jeopardize the adhesion of the cloth and compromise the quality of your final product. Imagine your wooden canvas as a blank slate waiting to be perfected.
To achieve this, start by giving the wood surface a thorough cleaning. Armed with a mild detergent and water, scrub away any grease, oil, or contaminants that may be present. Be gentle yet thorough, using a soft brush or sponge to ensure every nook and cranny is free from impurities.
Once the wood surface is sparkling clean, it’s time to create a smooth finish. Grab your fine-grit sandpaper and let it glide across the wood grain. This will eliminate any rough spots, splinters, or imperfections that could mar your masterpiece. Smoothness is the name of the game here.
After sanding, take a moment to appreciate your handiwork before wiping down the surface with a tack cloth or lint-free cloth. This step is crucial in removing any lingering dust or debris left behind by sanding. Think of it as preparing the perfect canvas for an artist’s brushstrokes.
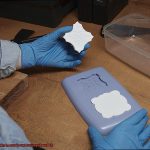
Now that your wood surface is immaculate, it’s time to turn your attention to the fiberglass cloth itself. Measure and cut the cloth to fit your desired area, leaving some excess for overlapping and trimming later. Picture it as a tailor expertly crafting a bespoke suit.
Prepare yourself for the next step – mixing epoxy resin. Following the manufacturer’s instructions precisely, combine the resin and hardener with utmost care and accuracy. Stir it like you’re conducting a symphony, ensuring that every element is harmoniously blended.
With your resin mixture ready, it’s time to apply a thin layer onto the wood surface. This layer acts as a bonding agent between the wood and the fiberglass cloth, ensuring a strong and lasting connection. Imagine yourself as a skilled craftsman delicately laying the foundation for your creation.
Saturating with Epoxy Resin
Wood, a timeless material cherished for its natural beauty and versatility, can be transformed into extraordinary creations with the right techniques. When it comes to reinforcing wood with fiberglass, there is one crucial step that serves as the foundation for a durable masterpiece – saturating the wood with epoxy resin. In this article, we will explore the captivating process of saturating wood with epoxy resin, uncovering the sub-topics and steps involved in this transformative journey.
Preparing the Wood Surface
Before unleashing the magic of epoxy resin, meticulous preparation of the wood surface is paramount. Begin by purging any impurities that may hinder adhesion – rid the surface of dirt, dust, and debris. Furthermore, bid farewell to the remnants of past finishes or coatings, allowing the epoxy resin to establish an intimate bond with the wood fibers. Lastly, embrace the power of sanding, transforming roughness into a velvety smooth canvas eagerly awaiting its resin infusion.
Applying Epoxy Resin
With your prepared wooden canvas at the ready, it’s time to embark on the exhilarating journey of saturating it with epoxy resin. Equip yourself with a brush or roller, and with confident strokes, apply the resin evenly onto the wood surface. Remember to work in small sections to ensure comprehensive coverage. Embrace generosity as you lavish the resin upon the wood, allowing it to permeate deep within the fibers, fortifying their structure like a resilient shield.
Penetration and Curing
The enchantment of epoxy resin lies in its low viscosity, enabling it to penetrate deep into the heart of the wood. This penetration bestows upon the wood newfound strength and stability, rendering it impervious to moisture and decay. Embrace the notion that porous or highly absorbent woods may require multiple coats, each layer adding to the tapestry of protection. As you admire your resin-soaked creation, grant it the gift of time – a serene period of curing. Remember, this delicate process is influenced by temperature and humidity, so vigilantly heed the manufacturer’s instructions.
Trimming Excess Cloth
Today, we embark on a crucial step in the wood preparation process for fiberglass – trimming excess cloth. Though seemingly mundane, its significance cannot be overstated. This is the secret to achieving that smooth, seamless finish that will truly elevate your fiberglass masterpiece. So, equip yourself with a trusty sharp utility knife or scissors, and let us trim away with precision and finesse.
Why Trimming Excess Cloth Matters:
When fiberglass cloth is applied to wood surfaces, excess material often remains. Neglecting to trim this excess cloth can result in unsightly bulges or unevenness in the final fiberglass layer – far from the desired outcome for your masterpiece. By skillfully trimming it off, you ensure a professional finish that will leave everyone in awe.
The Tools of the Trade:
To tackle this trimming task, you require a steadfast companion – a sharp utility knife or a pair of scissors. Ensure their cutting prowess is at its peak before proceeding. After all, dull blades won’t cut it (pun intended.) when striving for clean cuts and avoiding accidental damage.
Trimming Techniques:
- Lift and Separate: Begin by gently lifting the edge of the excess cloth away from the wood surface. This grants better visibility and access to the cloth beneath.
- Follow the Contours: Carefully cut along the edge of the wood, tracing its natural curves and contours. This creates a seamless transition between the wood and fiberglass layer.
- Patience is Key: Take your time and execute small, controlled cuts. Hastiness during this step may result in inadvertent damage to the wood or underlying fiberglass layer. We demand nothing short of perfection.
- Smooth and Even Edges: Strive to maintain a smooth and even edge while trimming. This contributes to a polished, professional appearance that allows your craftsmanship to radiate.
Neat and Tidy:
Once the excess cloth has been trimmed, it is time for the finishing touches. Gently press down on the remaining cloth to securely affix it to the wood surface. Any loose or frayed edges? Trim them as well, ensuring a consistently neat and tidy aesthetic.
Sanding Down Imperfections
In our previous section, we delved into the art of trimming excess cloth for fiberglass, leaving you ready to conquer any project with finesse. Now, let’s shift our focus to another crucial step in achieving impeccable craftsmanship – sanding down imperfections when preparing wood for fiberglass. Get ready to unlock the secrets that will elevate your work to new heights.
Importance of Sanding Down Imperfections:
Creating a Solid Foundation: Before you can achieve a flawless finish with fiberglass, you need to lay the groundwork. Sanding down imperfections is absolutely essential in ensuring that the fiberglass material adheres smoothly and evenly to the wood surface, resulting in a flawless finish that will leave jaws dropping.
Sanding Process:
- Cleanliness is Key: The first step in this transformative process is to ensure that your wood surface is clean and free from any unwanted particles. Say goodbye to dust, dirt, and loose particles by using a cloth or brush. This meticulous cleaning sets the stage for optimal adhesion and a smooth final result.
- Coarse Grit for Rough Spots: As you embark on your journey to perfection, reach for coarse-grit sandpaper (around 80 or 100 grit) as your trusty companion. This powerful tool will help you conquer rough spots, bumps, and uneven areas on the wood. Remember, always sand in the direction of the wood grain for superior results that will make your work stand out.
- Tackling Imperfections with Care: In the realm of woodworking artistry, imperfections are simply opportunities waiting to be transformed. When you encounter cracks, holes, or dents, channel your inner craftsman and apply even pressure using a sanding block or the skillful touch of your hand. Watch as these imperfections level out, giving birth to a beautifully smooth and flat surface that’s ready to be elevated.
- Finer Grit for a Heavenly Texture: Once you’ve triumphed over the major imperfections, it’s time to take your wood surface to new heights of smoothness. Embrace the finer-grit sandpaper (around 120 or 150 grit) as your ally in this quest for perfection. With each stroke, this heavenly tool will smoothen the surface further, preparing it flawlessly for the transformative power of fiberglass.
Applying a Topcoat for Protection
In our previous section, we delved into the art of sanding down imperfections in wood to prepare it for fiberglass. We shared our transformative secrets on achieving flawless results, creating a solid foundation that sets the stage for greatness. Now, let’s take it a step further and explore the crucial process of applying a topcoat for protection. Get ready to learn how to safeguard your wood masterpiece with an extra layer of durability and charm.
The Power of Protection:
Imagine your stunning wood creation serving as a canvas for fiberglass magnificence. But wait. Before we embark on that journey, let’s understand why applying a topcoat is absolutely essential. This protective layer adds an extra level of defense, preserving the integrity of your wood masterpiece by shielding it from moisture and contaminants.
Preparing for Perfection:
Just like any masterpiece, proper preparation is key. Before applying the topcoat, ensure your wood surface is spotless – no dirt, no dust, no debris. Grab your trusty sandpaper and erase any imperfections left behind by previous finishes or paint. Smooth out every rough edge to create an ideal foundation for your topcoat adventure.
Selecting the Perfect Armor:
Enter the realm of topcoats – a world brimming with possibilities. Polyurethane, epoxy, marine varnish – each offers unique advantages and suitability for various applications. Take a moment to explore the options and select the perfect armor that aligns with your vision.
Priming for Endurance:
Before diving into the topcoat application, let’s add another layer of protection and durability through priming or sealing. This additional step enhances adhesion while providing a smooth and even surface for your topcoat to showcase its brilliance. Trust us, this extra effort will pay off in the long run.
Unleashing Your Inner Artist:
It’s time to bring out your inner artist. Follow the manufacturer’s instructions diligently, using the recommended tools and techniques for application. Whether it’s brushes or rollers, embrace the process and ensure proper ventilation. Remember, patience is key as multiple coats may be required to achieve the desired level of protection and finish.
zzfWNOtV01o” >
Conclusion
Preparing wood for fiberglass requires careful attention to detail and a systematic approach. Before starting the process, it is essential to ensure that the wood surface is clean and free of any dirt, dust, or debris. This can be achieved by thoroughly sanding the wood with coarse-grit sandpaper, followed by finer-grit sandpaper for a smooth finish.
Once the wood is sanded, it is crucial to apply a primer or sealer to create a barrier between the wood and the fiberglass. This will help prevent any moisture from penetrating the wood and causing damage over time. The primer should be applied evenly and allowed to dry completely before proceeding.
Next comes the application of fiberglass resin. This step requires precision and care as it involves mixing the resin with a catalyst to initiate the curing process. The mixture should be stirred thoroughly until it reaches a smooth consistency.
With the resin ready, it’s time to apply fiberglass cloth or matting onto the prepared wood surface. The cloth should be cut into manageable pieces and laid flat on top of the resin-coated area. Gently press down on the cloth with a brush or roller to remove any air bubbles and ensure proper adhesion.
Once all areas are covered with fiberglass cloth, another layer of resin should be applied on top. This will help saturate and bond the cloth further, creating a strong and durable composite structure.
After allowing sufficient time for curing, typically 24-48 hours depending on temperature and humidity conditions, it’s time for finishing touches. Excess fiberglass material can be trimmed off using a sharp knife or scissors, followed by sanding to achieve a smooth surface.
In conclusion, preparing wood for fiberglass involves thorough cleaning, priming, applying resin and fiberglass cloth, curing, trimming excess material, and sanding for a flawless finish.