We all know that glass can be a bit of a tricky customer when it comes to sticking things together. Whether you’re jazzing up a DIY glass project or rescuing a cherished glass item from the brink of doom, one thing’s for sure: preparing that glass surface for glue is absolutely essential. Without the right prep work, your bond might not last long or could even end up in shambles. But fret not, my friends. In this blog post, we’re going to take you on a journey through the mystical art of prepping glass for glue. We’ll dish out some killer tips, handy tricks, and safety precautions along the way. So buckle up and get ready to master the art of achieving a bond that’s so strong it could withstand an earthquake (well, maybe not quite). Are you ready? Let’s dive right in.
Cleaning the Glass Surface
Contents
Cleaning the glass surface is a crucial step in preparing it for glue, ensuring a strong and long-lasting bond. To effectively clean the glass, gather the necessary materials, such as a microfiber cloth, lint-free wipes or paper towels, rubbing alcohol or glass cleaner, and a gentle detergent.
Begin by removing any loose debris or particles from the glass surface. Use a soft brush or a canister of compressed air to gently blow away dust and dirt, minimizing the risk of scratching the glass during the cleaning process.
Next, prepare a cleaning solution suited to the level of dirt or grime on the glass. You can use a mild detergent mixed with warm water or a commercially available glass cleaner, making certain it does not contain harsh chemicals or abrasives that may damage the glass.
Moisten a lint-free wipe, paper towel, or microfiber cloth with the cleaning solution, taking care not to saturate it excessively. Excess moisture can seep into the edges of the glass and cause damage.
Gently wipe the glass surface using smooth and even strokes. Start from one corner and work your way across the entire surface, paying extra attention to areas that may have accumulated more dirt or smudges.
For stubborn stains or residues on the glass, apply a bit more pressure when wiping, or consider using a non-abrasive scrubbing pad specifically designed for glass surfaces. Be cautious to avoid scratching the glass while doing so.
After cleaning the glass surface, rinse it thoroughly with clean water to remove any leftover cleaning solution or detergent residue. Ensure that all cleaning solution is completely washed away. Finally, dry the glass with a clean, lint-free cloth to prevent water spots or streaks.
Remember that different types of glass may require specific cleaning methods or products. Always refer to the manufacturer’s guidelines or consult a professional if unsure about the appropriate cleaning procedure for a particular type of glass.
Scuffing the Glass
Scuffing the glass is a vital step in preparing it for glue application. This process involves creating a rough texture on the glass surface, which provides the perfect foundation for a strong bond. By scuffing the glass, you enhance the adhesion between the glass and adhesive, resulting in a secure and durable connection.
One of the main reasons why scuffing is important is because it increases the bonding strength between the glass and adhesive. The smooth surface of glass can make it challenging for glue to form a strong bond. However, by scuffing the glass, you create microscopically roughened areas that provide more surface area for the adhesive to grab onto, resulting in a more secure and durable connection.
Scuffing also helps to eliminate any contaminants or residues that may be present on the glass surface. These impurities can hinder the adhesive’s ability to bond effectively, leading to weak or unreliable adhesion. By scuffing the glass, you remove these contaminants and create a clean and ideal surface for the adhesive to adhere to.
To achieve successful scuffing, it is important to use proper techniques and appropriate materials. Using sandpaper or an abrasive pad with the right grit is crucial. The grit level depends on the type of glass and adhesive being used, so it’s essential to choose the appropriate one for your specific project.
When scuffing, it is important to apply light pressure and maintain a consistent and even motion. Excessive pressure or vigorous scrubbing can cause scratches or cracks in the glass, which may compromise its integrity.
After scuffing, be sure to rinse the glass thoroughly with water to remove any residue from the scuffing process. This ensures that all traces of grit and debris are eliminated before applying the glue or adhesive.
Applying a Primer
Applying a primer is an essential step in preparing glass for glue. It plays a crucial role in creating a strong and long-lasting bond between the glass and the adhesive. Think of it as laying the foundation for a secure and reliable connection. The purpose of a primer is to promote adhesion by creating a rough surface on the glass that the glue can grip onto, ensuring a durable bond that will stand the test of time.
Before applying the primer, it is important to thoroughly clean the glass surface. Any dirt, dust, or oils can interfere with the primer’s ability to bond with the glass. To achieve a pristine surface, use a mild detergent or glass cleaner to remove any impurities. Carefully wipe the glass clean with a lint-free cloth, being mindful to avoid harsh chemicals or abrasive materials that could scratch the surface.
Once the glass is clean, you’re ready to apply the primer. There are different types of primers available for use on glass, such as acid-based primers and non-acid-based primers. Acid-based primers are commonly used for etching the glass surface, creating microscopic pits that enhance adhesion. However, they require careful handling and safety precautions due to their corrosive nature. On the other hand, non-acid-based primers are safer and easier to use. They chemically bond with the glass surface, providing a strong base for the glue to adhere to.
When applying the primer, it is crucial to follow the manufacturer’s instructions. Depending on the type of primer you’re using, you may need to use a brush or spray applicator. Ensure that you apply the primer evenly and avoid excessive application. A thin, uniform coat is usually sufficient to create an adequate bond.
After applying the primer, allow it to dry completely before proceeding with gluing. The drying time can vary depending on the type of primer used, so refer to the product instructions for guidance. Once the primer is dry, you can proceed with applying your chosen adhesive or glue. The primer will provide a strong foundation for the glue to adhere to, ensuring a secure bond between the glass and other materials.
Choosing an Adhesive
Choosing the right adhesive is of utmost importance when it comes to bonding glass surfaces. The adhesive you select can determine the strength, durability, and overall success of your project. Whether you are working on a small DIY project or a large-scale industrial application, considering the following factors is crucial:
- Type of adhesive: There are various types of adhesives available in the market, each with its own set of properties and applications. Epoxy adhesives are known for their strong bonding capabilities and high resistance to heat and chemicals, making them ideal for glass-to-metal or glass-to-glass bonding. Silicone adhesives, on the other hand, provide flexibility and a watertight seal, making them suitable for applications where water or moisture may be present. UV-curing adhesives are perfect when fast curing time is required.
- Properties of the adhesive: Temperature resistance, flexibility, transparency, and curing time are among the properties that need to be considered. Depending on your project requirements, you may need an adhesive that can withstand extreme temperatures or one that remains flexible after curing.
- Compatibility with glass type: Not all adhesives work well with every type of glass. It is important to ensure that the adhesive you choose is compatible with the specific glass type you are working with. Tempered or laminated glass may require special adhesives designed for their unique properties.
- Surface preparation: Properly preparing the glass surface is essential for achieving a strong bond. Clean the surface thoroughly using a mild detergent or glass cleaner and a lint-free cloth or paper towel. Avoid abrasive cleaners or materials that may scratch the glass.
- Primer or surface activator: Using a suitable primer or surface activator can enhance the adhesive’s bonding strength. Follow the manufacturer’s instructions for application to ensure optimal results.
- Application technique: Apply the adhesive evenly according to the manufacturer’s instructions. Avoid excessive application, as this may weaken the bond or leave behind visible residue.
- Curing time: Allow the adhesive sufficient time to cure before subjecting the bond to any stress or load. Curing time varies depending on the adhesive type, so it is important to follow the manufacturer’s recommendations for best results.
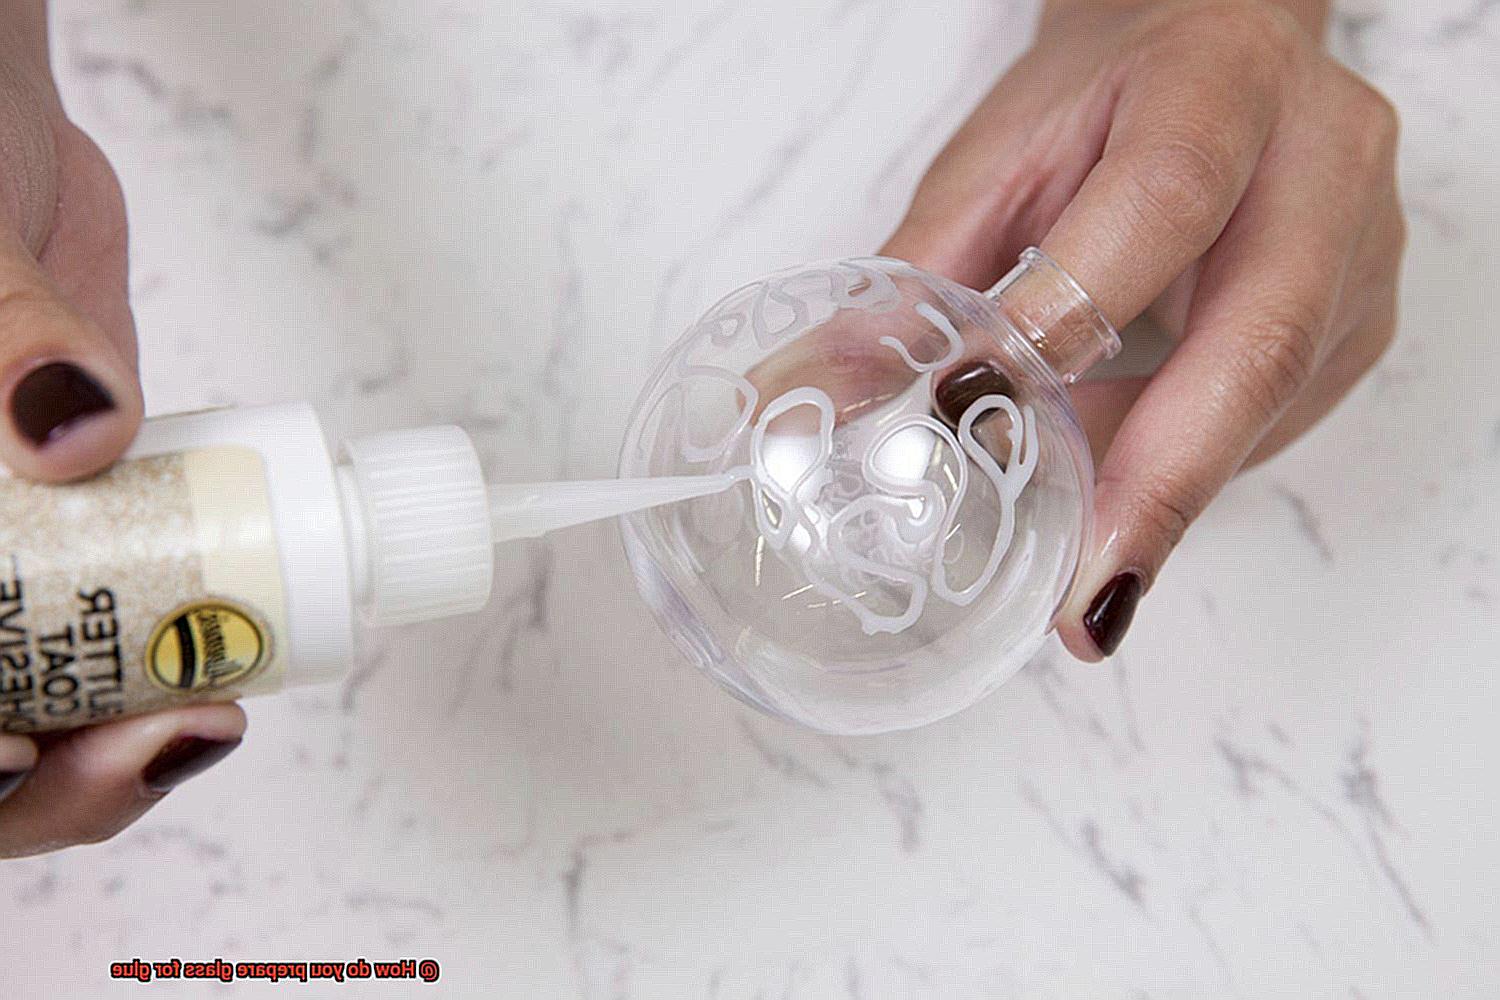
Applying the Glue
Applying the glue to glass is a delicate process that requires attention to detail and proper technique to ensure a strong and durable bond. By following these steps, you can achieve a successful glue application on glass surfaces.
First and foremost, preparation is key. Before applying the glue, it is crucial to clean the glass surface thoroughly. Use a mild detergent or glass cleaner to remove any dirt, dust, or oils that may be present. This step ensures that the glue adheres properly and creates a strong bond.
Once the surface is clean, make sure to dry the glass completely. Moisture can interfere with the bonding process of the glue, so take the time to ensure that there is no moisture left on the glass. A dry surface provides the ideal conditions for a secure bond.
Depending on the type of glue being used, it may be necessary to roughen or etch the glass surface slightly. This can be done using fine-grit sandpaper or a glass etching solution. Roughening the surface creates more texture and increases the bond strength between the glass and the glue.
Now it’s time to apply the glue. It is essential to use an adhesive that is specifically designed for glass bonding to ensure a strong and durable bond. Follow the manufacturer’s instructions for application techniques and guidelines.
When applying the glue, it is important to use a thin and even layer. Avoid applying too much glue as it may result in excess oozing or a messy appearance. A thin layer will also help prevent air bubbles from forming under the adhesive.
To spread the glue evenly, use a brush or a small applicator tool. Make sure all areas are covered and there are no gaps or missed spots. This step ensures that the entire surface is bonded securely.
If required, use clamps or tape to hold the glued objects together until the adhesive sets. This will prevent any movement or shifting during the curing process, ensuring a strong and stable bond.
Allow sufficient time for the glue to dry and cure completely. The drying time can vary depending on the type of glue used, so refer to the product instructions for specific details. Rushing this step can compromise the strength of the bond.
Once the glue has dried, it’s time to test the bond. Gently test the bonded objects to ensure that they hold firmly and do not separate or move easily. If the bond is strong and secure, then the gluing process was successful.
Bonding the Glass Pieces Together
Bonding glass pieces together requires precision and attention to detail to achieve a strong and reliable bond. There are several steps to follow in order to ensure a successful outcome.
Firstly, it is crucial to choose the right adhesive for your specific project. Consider factors such as the required strength of the bond and the visibility of the adhesive. Epoxy, cyanoacrylate (super glue), and silicone adhesive are commonly used options for bonding glass.
Next, thoroughly clean the glass surfaces before applying any adhesive. Use a glass cleaner or isopropyl alcohol to remove any dirt, grease, or residue that could hinder proper adhesion. It is important to ensure that the surfaces are completely dry before proceeding.
To enhance the bond strength, lightly sand the edges or surfaces that will be bonded. Use fine-grit sandpaper and apply gentle pressure to create a slightly rough texture. Be careful not to scratch or damage the glass in the process.
Consider using a primer or bonding agent specifically designed for glass. These products create a chemical bond between the adhesive and the glass surface, increasing the strength of the bond.
When applying the adhesive, be sure to follow the instructions provided by the manufacturer. Apply the adhesive evenly and in the right amount for a strong bond. Using too little adhesive may result in a weak bond, while using too much can create a messy appearance.
Carefully align the glass pieces before pressing them firmly together. Excess glue can be wiped away gently with a damp cloth or removed with a razor blade once it has dried.
Allow sufficient curing time for the adhesive to fully set. Different adhesives have varying curing times, so refer to the manufacturer’s instructions for guidance. During this curing period, it is important to avoid subjecting the bonded glass to any stress or movement.
Handle the bonded glass with care once the adhesive has fully cured. However, it is advisable to avoid subjecting it to excessive stress or sudden temperature changes, as the strength of the bond may continue to increase over time.
If there are any visible traces of adhesive, they can be removed using a suitable solvent or adhesive remover. Follow the instructions provided with the solvent and take necessary precautions to protect yourself and the surrounding materials.
Curing the Glue
Curing the glue is the final and crucial step in the intricate process of bonding glass. It is the key to ensuring that all your efforts in preparing the glass surface do not go to waste. When it comes to curing the glue, there are several reasons why it is so important.
Firstly, curing allows the adhesive to reach its maximum bond strength. As the glue dries and hardens, it forms a robust connection between the glass surfaces. This ensures that your bonded glass pieces will stay securely together, even under stress or strain.
Secondly, a properly cured adhesive creates a durable bond. It can withstand temperature changes, moisture, and other environmental factors without weakening or deteriorating. This is particularly important for glass applications that are exposed to harsh conditions or need to last for an extended period.
Moreover, curing ensures that the adhesive performs optimally. It allows the glue to fully penetrate and interact with the glass surface, creating a seamless connection. This maximizes the adhesive’s properties, such as resistance to chemicals or UV light, which may be crucial for specific applications.
When it comes to curing times, they can vary depending on the adhesive used and environmental conditions. It is essential to follow the manufacturer’s instructions regarding the recommended curing time. Rushing the process or not allowing enough time for the adhesive to cure can compromise the bond strength and overall performance.
Once the glue has fully cured, you can handle the bonded glass pieces with confidence. However, it is still important to handle them with care to avoid any unnecessary stress or strain on the bond. Always follow any additional handling instructions provided by the manufacturer.
Inspecting and Reinforcing Bonded Areas
Inspecting and reinforcing bonded areas is a crucial step in ensuring the strength and durability of glass-to-glass or glass-to-object bonds. Before applying any adhesive, it is essential to carefully inspect the glass surface for any imperfections, defects, or damage that could compromise the bond.
Begin the inspection process by thoroughly examining the entire glass surface for scratches, chips, or cracks. Repair or replace any damaged areas before proceeding with the gluing process. Small chips can often be filled with a clear epoxy or resin, while larger cracks may require professional repair or replacement.
In addition to visible damage, it is also important to check for invisible contaminants on the glass surface. Fingerprints, oils, dust, or other substances can interfere with the adhesion of the glue. To remove these contaminants, clean the glass using a gentle glass cleaner or mild detergent. Avoid using harsh chemicals or abrasive materials that could scratch or damage the glass. Rinse the glass with water and dry it completely using a lint-free cloth or paper towel.
Once the glass has been inspected and cleaned, certain areas may need reinforcement before applying glue. This is particularly important for large or heavy objects that will be attached to the glass surface. Reinforcement helps distribute weight evenly and prevents stress points that could weaken the bond over time.
One common method of reinforcement is using strips of clear adhesive tape along the edges of the glass. This provides additional support and stability to the bond. Apply the tape carefully, ensuring it does not overlap onto the area where the glue will be applied.
Another option for reinforcement is metal or plastic brackets or clips. These can be attached to both the glass and the object being glued, providing extra strength and stability. Select brackets based on their compatibility with the adhesive and their ability to withstand weight and stress.
In some cases, roughening the glass surface may be necessary for a stronger bond. Use fine sandpaper or a glass etching solution following the manufacturer’s instructions carefully. Avoid excessive roughening, as it can weaken the glass and compromise its integrity.
5xRNNXQpkOU” >
Conclusion
Preparing glass for glue requires careful attention to detail in order to ensure a strong and durable bond. Before applying any adhesive, it is crucial to clean the glass surface thoroughly. Use a mild detergent or glass cleaner to remove any dirt, grease, or fingerprints that may interfere with the bonding process.
Next, lightly sand the area where you plan to apply the glue. This step helps create a rough surface for better adhesion. Be sure to use fine-grit sandpaper and apply gentle pressure to avoid scratching or damaging the glass.
After sanding, wipe away any dust or debris using a lint-free cloth or paper towel. It is essential to have a clean and dry surface before moving on to the next step.
Now it’s time to choose the right adhesive for your project. There are various glues available specifically designed for bonding glass. Make sure to read the instructions carefully and select a glue that is suitable for your particular needs.
Apply a thin and even layer of glue onto one of the surfaces you want to bond. Avoid applying too much glue as it can lead to messy results and weaken the bond. If necessary, use a small brush or toothpick to spread the glue evenly.
Once you have applied the adhesive, carefully press the two surfaces together. Apply gentle pressure for a few minutes to allow the glue to set properly. Depending on the type of adhesive used, you may need additional curing time before handling or moving the bonded glass.
Remember, proper preparation is key when it comes to achieving successful results with gluing glass. By following these steps and taking your time, you can ensure a strong and reliable bond that will stand the test of time.