Are you a Lego fanatic or a parent determined to preserve your child’s masterpiece? If so, you’ve come to the right place. Finding the perfect method to permanently glue Legos can be a game-changer. Sometimes, those traditional Lego constructions just need a little extra oomph to withstand the test of time, rough handling, and epic adventures.
In this blog post, we’ll dive into some tried-and-true techniques that will leave your Lego creations permanently bonded. These methods have gained popularity for their effectiveness and ability to maintain the structural integrity of Lego projects. Whether you’re creating display models or functional prototypes, these techniques have got you covered.
But before we get into the nitty-gritty of gluing Legos forever, it’s important to remember that permanent gluing means altering those beloved bricks in a way that might limit their reusability. So choose your project wisely before reaching for that glue bottle.
Now let’s explore some top-notch techniques for permanently gluing Legos and find out why they’ve become go-to methods in the Lego community.
Note: Always handle glue with care and follow the manufacturer’s instructions for safe usage.
Different Types of Adhesives for Legos
Contents
Building with Legos is a magical experience that lets your imagination soar. But what if you want to create a masterpiece that lasts forever? That’s where the power of adhesives comes in. In this blog post, we will explore the different types of adhesives for Legos, each with its own unique strengths and considerations.
Epoxy Resin – The Unyielding Protector:
Epoxy resin is like the knight in shining armor for Lego builders. This two-part adhesive creates an indestructible bond between Lego pieces. When mixed together, it becomes a force to be reckoned with. Epoxy resin is perfect for those who want their Lego creations to stand up to heavy play and handling. It takes a bit longer to cure, but the wait is worth it for its durability. Once cured, it forms a strong and permanent bond, ensuring that your Lego masterpiece will endure the test of time.
Cyanoacrylate Glue – The Quick and Mighty:
Cyanoacrylate glue, also known as super glue, is like a superhero for Lego builders. This adhesive dries quickly and forms an unbreakable bond between Lego pieces. Just a tiny drop of this powerful glue can bring your Lego creation to life forever. But remember, a little goes a long way. It’s important to use this glue sparingly, as excess glue can seep out and create a messy appearance. Opt for a gel or thick super glue for better control and precision.
Construction Adhesive – The Heavy-Duty Warrior:
For those looking for an industrial-strength solution, construction adhesive or liquid nails are the answer. These adhesives are typically used for heavy-duty construction projects and provide a strong bond. However, they may not be as suitable for smaller or intricate Lego designs due to their thicker consistency and messier application. If you’re working on a large-scale Lego creation or need a super-strong bond, construction adhesive can be a reliable choice.
Silicone-Based Adhesives – The Flexibility Masters:
Silicone-based adhesives offer a unique advantage for Lego builders who desire some degree of movement in their creations. These adhesives provide a strong bond while still allowing for flexibility. They are perfect for larger displays or dioramas where a little give is essential. Plus, they can withstand temperature changes, ensuring your Lego masterpiece stays intact. Silicone sealant or aquarium sealant are common options in this category.
Choosing Wisely – The Key to Success:
Not all adhesives are created equal when it comes to Legos. Avoid using hot glue or regular craft glue, as they may not provide a strong enough bond or could damage your precious Lego pieces. Always opt for adhesives specifically formulated for plastic materials like Legos to ensure a secure and lasting connection.
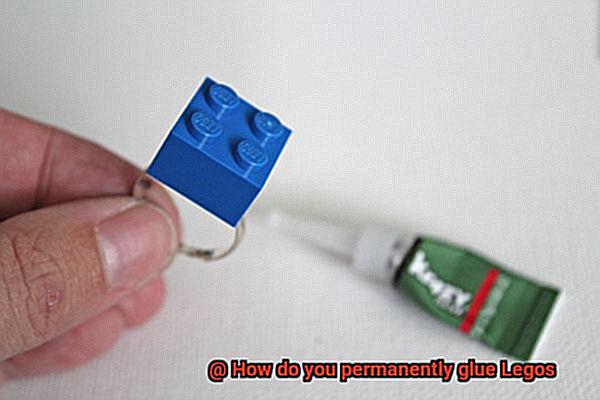
Using Super Glue on Legos
Legos are a beloved toy that sparks creativity and imagination in both children and adults. However, sometimes you may want to create a more permanent structure or prevent your masterpiece from falling apart during playtime.
That’s where super glue comes in handy. With its strong adhesive properties, super glue can securely bond Legos together, ensuring that your creation stays intact. But before you embark on this sticky journey, it’s important to understand the process and potential risks associated with using super glue on Legos.
Step-by-Step Guide for Using Super Glue on Legos:
- Clean the surfaces: Before applying super glue, make sure to clean the surfaces that will be glued together. Any dust, dirt, or oil can interfere with the bonding process. A quick wipe with a damp cloth should do the trick.
- Use a small amount of glue: To avoid excess glue seeping out and ruining the appearance of your Lego structure, it is recommended to use a small amount of super glue for each Lego connection. Less is definitely more in this case.
- Be precise and careful: Applying super glue requires precision and care to avoid gluing unintended parts together. Using a toothpick or a small applicator can help you apply the glue in small amounts, ensuring accuracy.
- Allow time to dry: Once the Legos are glued together, give them enough time to dry and set. The drying time can vary depending on the type of super glue used, so it’s best to follow the instructions provided by the manufacturer. This could take anywhere from a few minutes to a few hours.
Potential Risks of Using Super Glue on Legos:
- Permanence: Super glue creates a strong bond between Legos, making them difficult to separate. This permanence should be considered before gluing Legos together, as it may limit future modifications or disassembling of the structure. Think twice before using super glue on Legos that you still want to have the ability to take apart.
- Difficulty in separation: In case a mistake is made or if there is a need to separate the glued Legos, it can be challenging. Applying heat, such as using a hairdryer, can sometimes help soften the glue and make it easier to separate the pieces. However, this method may not always work and could potentially damage the Legos.
- Warranty concerns: It’s worth noting that using super glue on Legos may void any warranty or guarantee provided by the Lego company. Therefore, it is advisable to use this method only when necessary and after considering all factors.
Using Epoxy Resin on Legos
In this comprehensive guide, we will delve into the captivating world of epoxy resin and how it can revolutionize your Lego building experience. Prepare to be amazed as we explore the wonders of this adhesive superhero and discover how it can transform your fragile Legos into unbreakable masterpieces that will withstand the test of time.
Before we embark on this epic journey, let’s cover some essential groundwork. Epoxy resin is an extraordinary two-part adhesive that comprises a resin and a hardener. When these two components unite, they undergo a chemical metamorphosis, forging an unyielding bond that defies all odds. But hold your horses. Before you embark on your gluing adventure, pay homage to cleanliness by swiftly wiping down the Lego surfaces that will join forces. This simple act ensures an unbreakable connection between the bricks.
Now that we’ve prepped our Lego surfaces for greatness, let’s dive into the nitty-gritty. Follow the sacred instructions bestowed upon you by the resin gods and mix the epoxy resin and hardener in their divine ratio.
This step is crucial for achieving a legendary bond, so heed those measurements with unwavering precision. Once your adhesive concoction is ready, delicately apply a small amount to one of the Lego surfaces yearning to be united. Utilize the mighty toothpick or wield a small brush to spread the adhesive evenly, like an artist’s brushstroke on a masterpiece.
The moment of truth has arrived – it’s time to press those Lego pieces together with unwavering determination. Firmly hold them in place for a few captivating minutes, allowing the epoxy resin to weave its magic and forge an unbreakable alliance.
To amplify this bond even further, consider employing clamps or tape to hold the pieces in place while the adhesive cures. Ah, the art of patience comes into play now.
Depending on the brand and type of epoxy resin you’ve chosen, it is generally advised to let it cure for a minimum of 24 hours before indulging in the sheer pleasure of handling or playing with your newly fortified Lego creation.
Your Legos have now become one with the indomitable power of epoxy resin – a match made in the heavens of brick-building brilliance.
These glued Lego pieces will now stand tall against the relentless forces of play and handling, defying all attempts to dismantle their unyielding bond. However, heed this cautionary tale: once Legos are fused together with the mighty epoxy resin, they shall never be easily disassembled.
Thus, it is prudent to reserve this extraordinary adhesive for Legos that you wish to preserve as a singular and awe-inspiring masterpiece.
Using Silicone Adhesive on Legos
Well, worry no more. In this blog post, we will unveil the power of silicone adhesive and show you how to create unbreakable Lego masterpieces that will withstand the test of time. So, grab your Legos and let’s get started.
Understanding Silicone Adhesive:
Silicone adhesive is a popular choice for permanently gluing Legos due to its strong bonding properties and flexibility. It is made from silicone polymers that provide excellent durability and resistance to temperature changes. This makes it ideal for creating long-lasting Lego builds.
Cleaning and Preparing the Surfaces:
Before using silicone adhesive on Legos, it is crucial to clean the surfaces that will be bonded. Dust, dirt, or oil can prevent the adhesive from properly adhering to the plastic. Use a mild detergent or soapy water to clean the surfaces, then ensure they are thoroughly dried before applying the adhesive.
Applying Silicone Adhesive Properly:
When applying silicone adhesive, remember that less is more. Apply a small amount of adhesive to the Lego pieces you want to bond. To achieve precision and control, use a toothpick or small brush. This will help you avoid excessive glue application and ensure a seamless finish.
Pressing and Aligning for a Perfect Bond:
Once the adhesive is applied, it’s time to bring those Lego pieces together. Before pressing them firmly, make sure they are aligned properly. Silicone adhesive forms a strong bond quickly, so positioning is crucial. Take your time to ensure everything is in place before making that final connection.
The Power of Patience: Curing Time:
Now comes the hardest part – waiting. Allow your glued Lego creation to cure for at least 24 hours before handling or playing with it. Remember, different brands and types of silicone adhesive may have varying curing times, so follow the manufacturer’s instructions for optimal results. Trust us, patience pays off.
Flexibility: The Ultimate Superpower:
One of the best things about silicone adhesive is its flexibility. Your glued Lego creations can still be disassembled if necessary, although it may require some effort. So, don’t worry about your Lego pieces being permanently stuck together – silicone adhesive provides a strong bond without sacrificing flexibility.
Know Your Limits: Functionality and Compatibility:
While silicone adhesive is a superhero when it comes to permanently gluing Lego pieces, it’s important to consider its limitations. If you’re planning to build structures with moving parts or hinges, using silicone adhesive may hinder their functionality. In such cases, consider alternative building techniques to preserve the movable magic of Legos.
Specialty Lego Glues
Specialty Lego glues are specially formulated adhesives designed to permanently bond Lego bricks together, ensuring that your carefully constructed creations stay intact for years to come. One popular option is the “LEGO Adhesive,” a water-based glue that acts like super glue for Legos, but without the mess. This adhesive provides a strong and durable bond, allowing your structures to withstand rough play sessions. It dries clear and flexible, ensuring that no unsightly residue ruins your designs.
While the infamous Kragle from the LEGO Movie may be a fictional substance, there are still plenty of real options available. If you’re feeling adventurous, you can try DIY approaches such as epoxy or super glue. However, it’s important to apply these sparingly to avoid any gloopy messes and test them on a small inconspicuous area before committing to the entire structure.
It’s worth noting that some adhesives may become brittle over time or when exposed to extreme temperatures, so it’s essential to handle glued Lego structures with care. By choosing an adhesive that dries clear and flexible and being gentle with your creations, you can ensure their lasting durability.
Considerations for Aesthetics
When it comes to the aesthetics of permanently gluing Legos together, there are several important considerations to keep in mind. Let’s dive into the world of aesthetics and explore the key factors that will help you achieve a visually appealing result.
First and foremost, the type of glue you choose is crucial. There are numerous options available, each with its own unique characteristics. Some glues dry clear, while others may leave behind a visible residue. To ensure your Legos look their best, opt for a glue that won’t detract from their visual appeal. Nobody wants unsightly globs of glue ruining their masterpiece.
Next up is the application method. Precision is key here. You want to apply the glue in a controlled manner to avoid any mess or excess adhesive. This will help maintain a neat and clean appearance, giving your Lego structure that polished finish.
Color is another important consideration. If you’re working with Legos of different colors, it’s essential to choose a glue that matches or blends well with them. This will create a cohesive look that’s pleasing to the eye. After all, aesthetics are all about harmony and balance.
Longevity is also a factor to consider. Some glues may yellow or become brittle over time, which can affect both the appearance and durability of your creation. Investing in a high-quality adhesive that can withstand the test of time and maintain its integrity is crucial.
Lastly, before permanently gluing your Legos together, take a moment to plan out the design and arrangement. Experiment with different arrangements and consider adding additional elements to enhance the overall visual appeal. A little extra thought and creativity can go a long way.
Disassembling and Reusing Legos
Disassembling and reusing Legos is a fundamental aspect of the building process. Legos are designed to be versatile, allowing for endless possibilities and encouraging creativity. However, there may be instances where you want to permanently glue Legos together for added stability or to create long-lasting structures.
Before delving into the process of permanently gluing Legos together, it’s important to understand the core principles of Lego play. Lego sets are specifically designed to be built, taken apart, and rebuilt into different forms. The ability to modify structures is a key element of the Lego experience. Therefore, permanently gluing Legos goes against these principles and should be approached with caution.
If you still wish to proceed with permanent bonding, it’s crucial to consider alternative methods of strengthening or stabilizing your Lego creation before reaching for the glue bottle. However, if you have a specific reason for permanently gluing Legos together, here are some options:
- Epoxy glue: Epoxy is known for its strength and durability. It provides a strong bond between Lego pieces and can make your creations more stable. However, it can be messy to work with, so precision and careful application are necessary to avoid excess glue seeping out.
- Specialized Lego adhesives: There are adhesive products specifically designed for use with Legos. These adhesives claim to provide a strong bond while still allowing for disassembly if needed. It’s important to follow the manufacturer’s instructions when using these products and test them on a small area before applying them more extensively.
When permanently gluing Legos together, proper alignment and stability are crucial during the bonding process. Using clamps or rubber bands to hold the pieces firmly in place while the adhesive dries can help achieve this. Be sure to allow sufficient drying time as per the adhesive manufacturer’s instructions before handling or putting any stress on the glued pieces.
It’s important to remember that permanently gluing Legos together limits the potential for creative modifications and reuse. Once Legos are glued, they become a fixed structure and cannot be easily modified or incorporated into other designs. Therefore, it is recommended to reserve permanent bonding for specific situations where it is absolutely necessary.
Tips for Applying Adhesive
Building with Legos is an exciting and creative activity that allows you to construct amazing structures. Sometimes, you may want to glue your Lego creations together to make them more sturdy and permanent. In this article, we will explore some essential tips for applying adhesive when permanently gluing Legos.
Choose the Right Adhesive:
Before you start gluing, it’s crucial to choose the right adhesive for the job. There are different types of adhesives available, such as epoxy, super glue, and construction adhesive. Each adhesive has its own strengths and weaknesses, so consider factors like drying time, strength, and flexibility when making your choice.
To ensure a strong bond, clean the surfaces of the Lego pieces that will be glued together. Wipe them with a damp cloth or use a mild detergent to remove any dirt, dust, or oils that could interfere with the bonding process. Clean surfaces will result in a better adhesive connection.
Apply Sparingly:
When applying adhesive, less is more. Use a small drop or thin bead of adhesive along the edges or contact points of the Legos. Applying too much adhesive can create messy glue lines and make it difficult to align the pieces properly.
Apply Pressure:
After bonding the Lego pieces together, apply pressure for a period of time to ensure a strong bond. You can use clamps or simply press down firmly with your hands for several minutes. This helps the adhesive to fully cure and creates a sturdy connection between the Legos.
Consider Appearance:
If appearance matters to you, choose an adhesive that dries clear or matches the color of the Legos being glued. Some adhesives may leave a visible residue on the Legos, so it’s important to pick one that won’t affect the overall look of your creation.
YJHH-mgruqQ” >
Conclusion
When it comes to permanently gluing Legos together, there are a few methods you can try.
One option is using a strong adhesive like epoxy or super glue. These adhesives create a bond that is difficult to break, ensuring your Legos stay firmly attached.
Another technique involves melting the Lego pieces together using heat. You can do this by using a soldering iron or even an oven set at a low temperature.
Whichever method you choose, it’s important to remember that once Legos are glued together, they cannot be easily taken apart without damaging the bricks.